Create and manage JSON Forms

JSON Forms is a two-component application in Itential Platform Studio that enables form management: a collection view and a form builder. Forms can be used throughout Itential Platform. At a high level, the JSON Forms builder provides the functionality to generate a JSON Schema representation of a form via a drag-and-drop interface.

Access JSON Forms

Navigate to Studio > JSON Forms. JSON Forms is listed in the left navbar as its own subcategory in Studio.

Collection view

To open the Collection view of JSON Forms, click the Find A Workflow link under Quick Start on the main welcome page of Studio.

The Collection page displays in a card-based layout with tabs across the top. To access a specific JSON Form, workflow, or other automation, select the corresponding tab to see the card view of all available items.

JSON Forms collection view

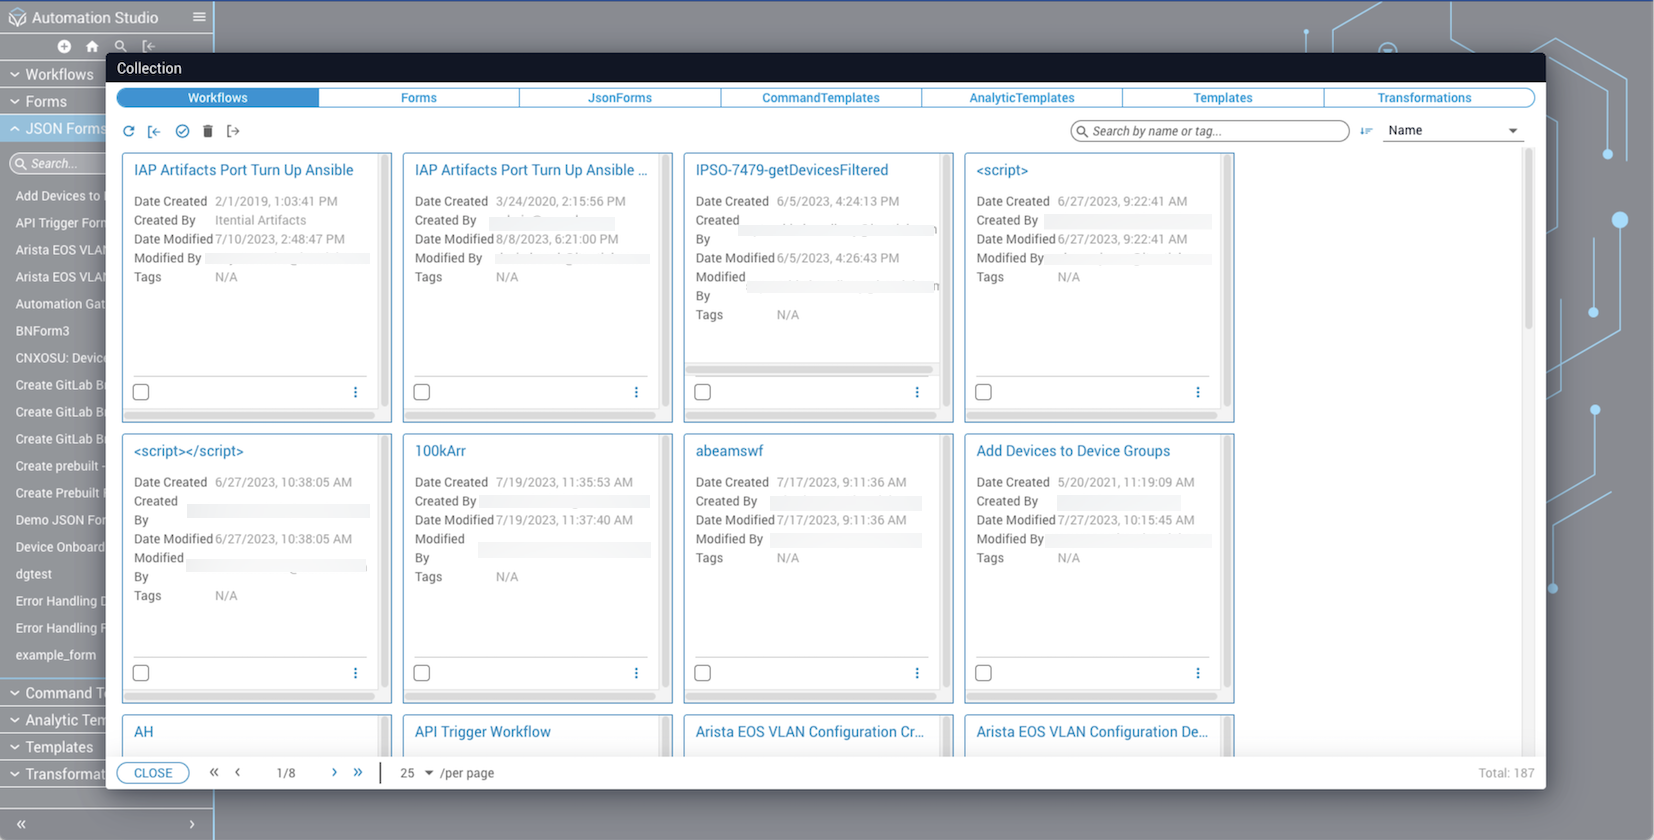
The following actions can be taken from the Collection page:

ActionDescription
RefreshRefreshes the page.
ImportImports a workflow.
Select AllSelects all workflows on the active tab and page.
DeletePermanently removes a selected workflow.
ExportExports a selected workflow.
SortSort by name, date created, last modified, or by tags.
SearchSearch for a workflow by name or other criteria.

Create a new JSON Form

1

Open Studio

Navigate to the main Studio application page.

2

Open the Create dialog

Click the + Create a Workflow link to open the Create dialog.

3

Select JSON Form

Select JSON Form from the dropdown list.

4

Name and create

Enter a JSON Form name (required) and brief description (optional). Click Create to save. The JSON Form is added to the Collection page.

Delete a JSON Form

You can delete an existing JSON Form using the card menu or by selecting a specific JSON Form and clicking Delete.

Using the card menu

Click the stacked dots icon inside the JSON Form card to display the menu options, then click Delete.

Select and delete multiple JSON Forms

1

Select forms

Select the checkbox to mark the JSON Form as selected.

2

Delete selected forms

Click the trashcan icon to delete all selected forms.

3

Deselect if needed

Click the deselect button icon to unselect all selected forms.

Export forms to JSON files (2023.2 and earlier)

You can export a JSON file representation of a form using Forms in the left sidenav menu or from the Collections view.

Using the Forms menu

1

Open a form

Go to the main page of Studio. In the left navbar, click the dropdown arrow to open the Forms menu. Click any form in the list to navigate to the Form Builder for that form.

2

Open the card menu

Click the stacked dots icon in the top toolbar of the Form to display more options. From the menu, you can view the current form’s JSON schema, edit the form’s details, clone the form, revert changes, export to a JSON file, or delete the form.

3

Export

Click Export form to open the export modal.

4

Save the file

Select Save File to download a JSON file representation of the form. Remember the location where the file is saved.

Using the Collection view

1

Open the Collection view

Open the Collection view.

2

Select forms

Select the checkbox to select multiple forms for bulk export.

3

Export

Click the stacked dots icon to display the Export menu options, then click the Export icon to export all selected forms to JSON files.

Import JSON files

1

Open the Import dialog

Click the Import icon from the top toolbar on the Studio homepage. Alternatively, go to the Collection view of JSON Forms and select the Import icon. One or more JSON files (forms) can be imported at a time.

Clone a JSON Form

1

Open the card menu

Click the stacked dots menu icon inside the card.

2

Clone

Select the Clone menu option to create a copy of the JSON Form. The Clone Form dialog displays.

3

Name and save

Enter a different name in the Save Form as text field, then click Clone to save.

Preview a JSON Form

1

Open the card menu

Click the stacked dots menu icon.

2

Preview

Select Preview to show a preview of the JSON Form. Click Preview Form to display it.

3

View JSON schema

Click Show Form Data to display the JSON schema. Click Close to return to the preview modal.

Sort JSON Forms

1

Set sort order

Click the sort icon (on the left) to modify the sort order (ascending or descending).

2

Set sort property

Use the dropdown menu icon (on the right) to change the property the sort is performed on: name, date created, last modified, or tags.

View and update JSON Form details

Click the stacked dots menu in the top toolbar and select Edit details to open JSON Form details.

View information about who created the form and when, and who last updated the form and when. You can change the Name and Description.