Configure Azure AD
The Azure adapter allows SSO (single sign-on) in Azure over the OpenID Connect (OIDC) protocol. Use this guide to configure the Azure AD server and set up adapter-azure_aaa for Itential Platform.
The information provided was developed in a lab environment. Input for various settings and fields should be populated with details specific to your production environment.
This page outlines the process and permissions required for the Azure AAA adapter to communicate with the Azure AD system.
Admin privileges in the Azure AD system are required to perform the initial setup.
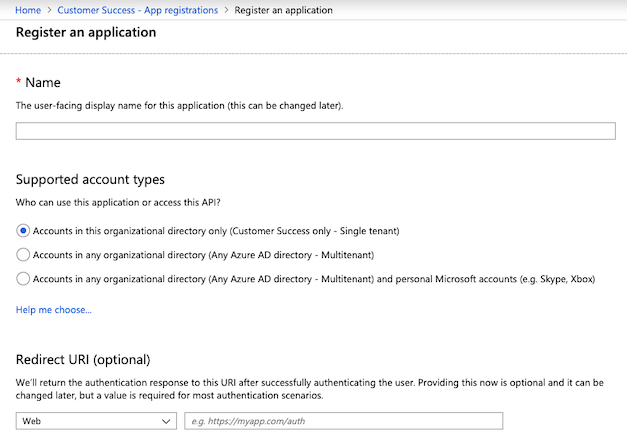
Create a new application
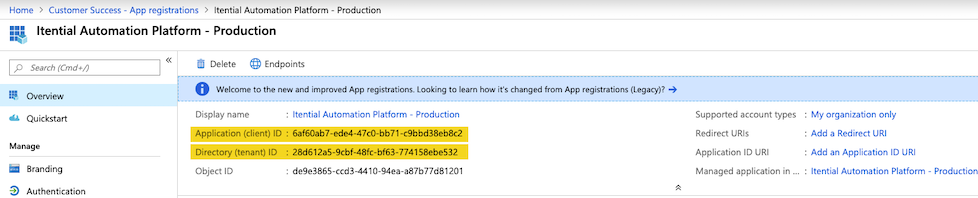
Open App Registration
Log in to the Azure AD system and access the Azure AD page. Select the App Registration section and click New registration.
Create a separate application for each environment so that passwords and configurations are unique to each environment.
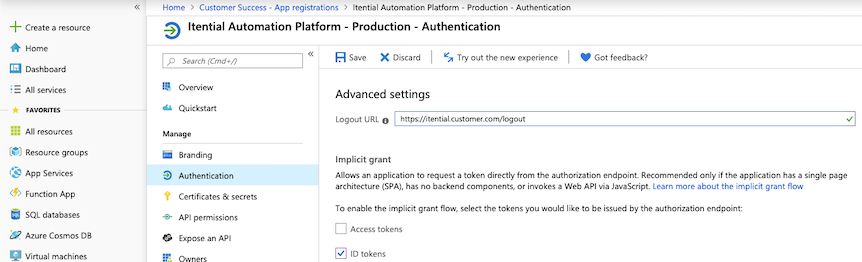
Configure authentication settings
Set redirect URIs
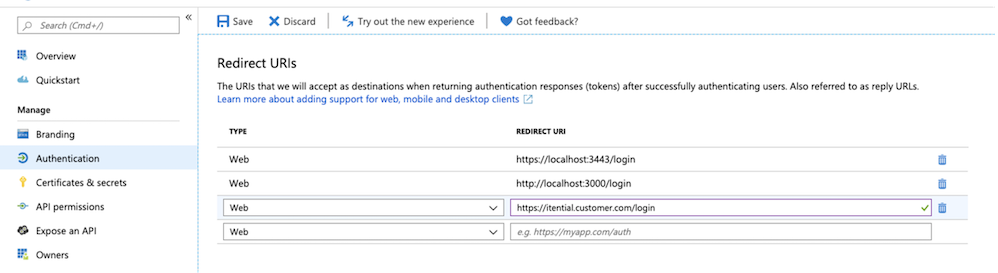
Go to the Authentication section. Verify the Redirect URIs. These are the acceptable return URIs after authentication. If a redirect is attempted to a URI that does not exist here, the redirect will fail. Pay close attention to ports — you must have a URI for each port.
Typically the URL is the same as the sign-on URL, or a sign-on URL with a specific SSO page. For example:
https://itential.customer.com/loginhttps://localhost:3443/login
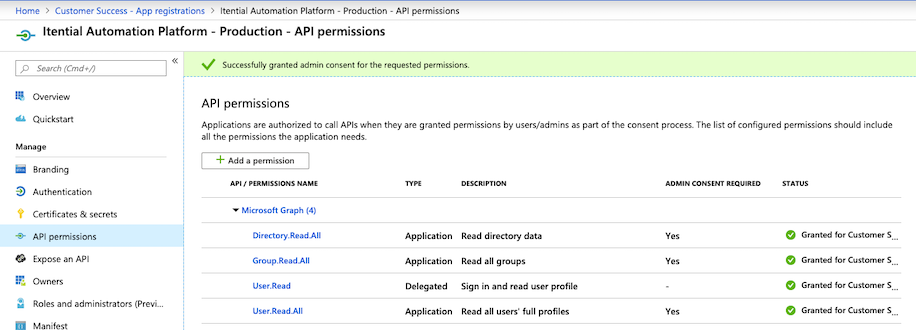
Set application permissions
Add API permissions
Go to the API Permissions section. Click + Add a permission. Find and select Microsoft Graph API from the list.
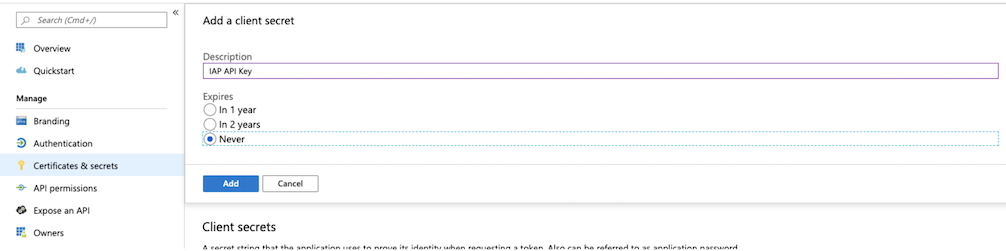
Set the API key

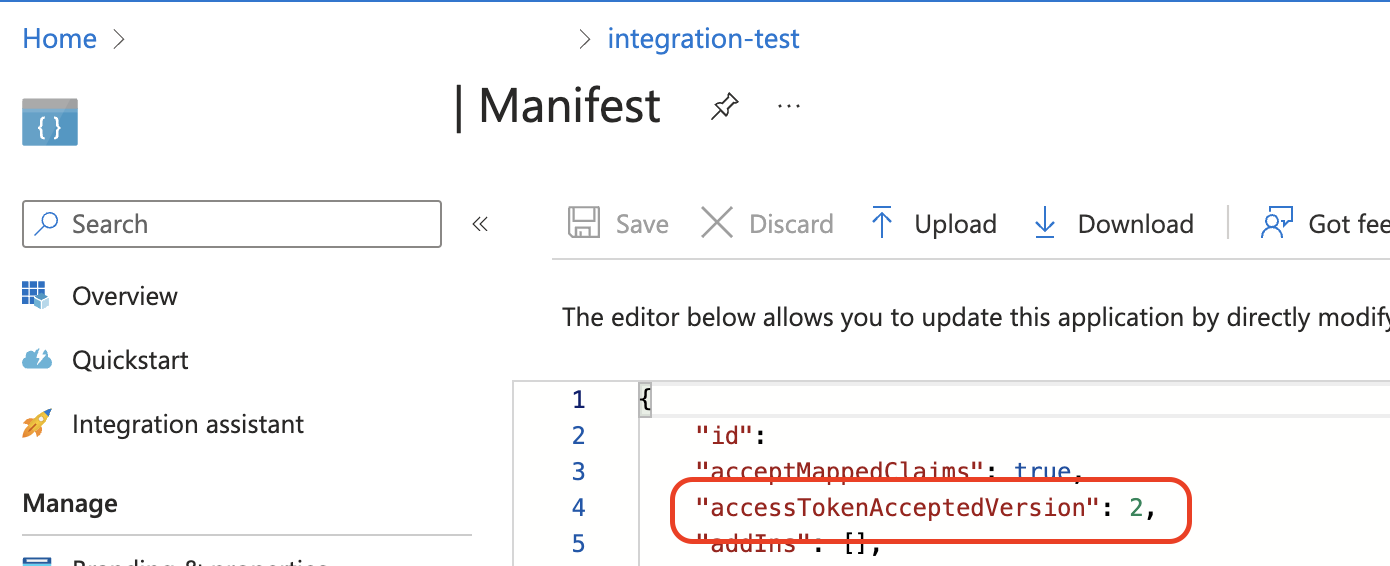
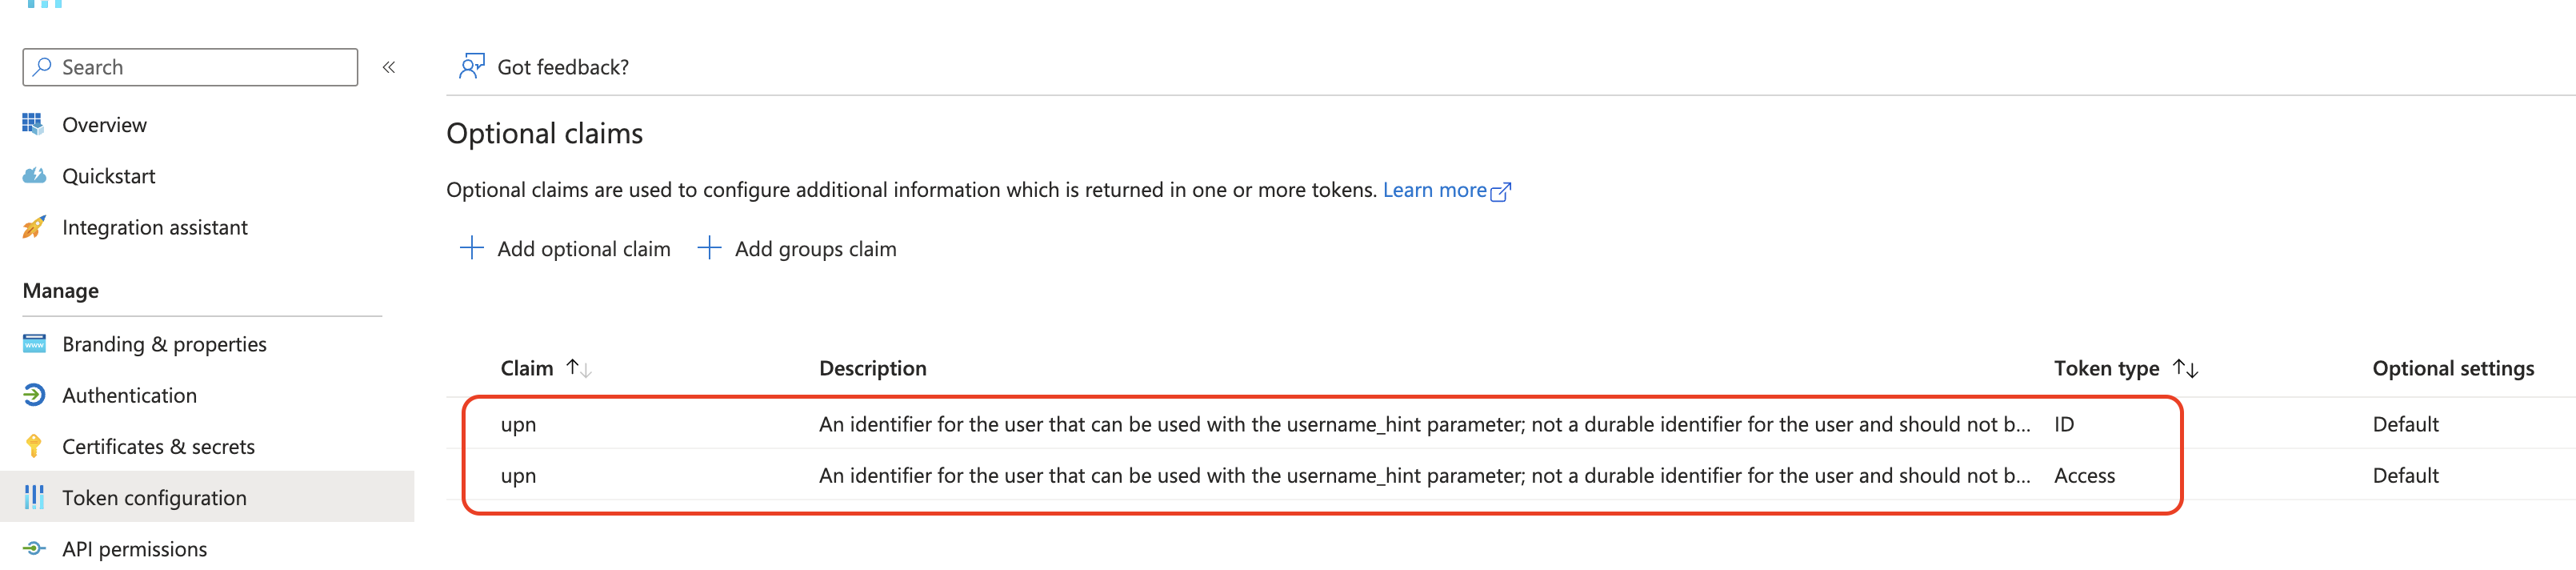
Add optional claims (Access Token v2.0)
If you have configured your registered application Manifest to use accessAcceptedTokenVersion: 2, you must create an optional claim for upn on your ID tokens and access tokens. The upn claim is used by the Azure adapter internally to handle account routing in Itential Platform and is required.