Connect a project to Git
From within Projects, you can connect to a remote repository such as GitHub or GitLab and use fetch, push, pull, and clone operations to sync a local copy of a project with the latest changes made by other collaborators.
A set of valid credentials is required to communicate with any remote repository.
See also Git Integration for Projects.
Set up access tokens
Before you use Git, add a GitHub or GitLab access token.
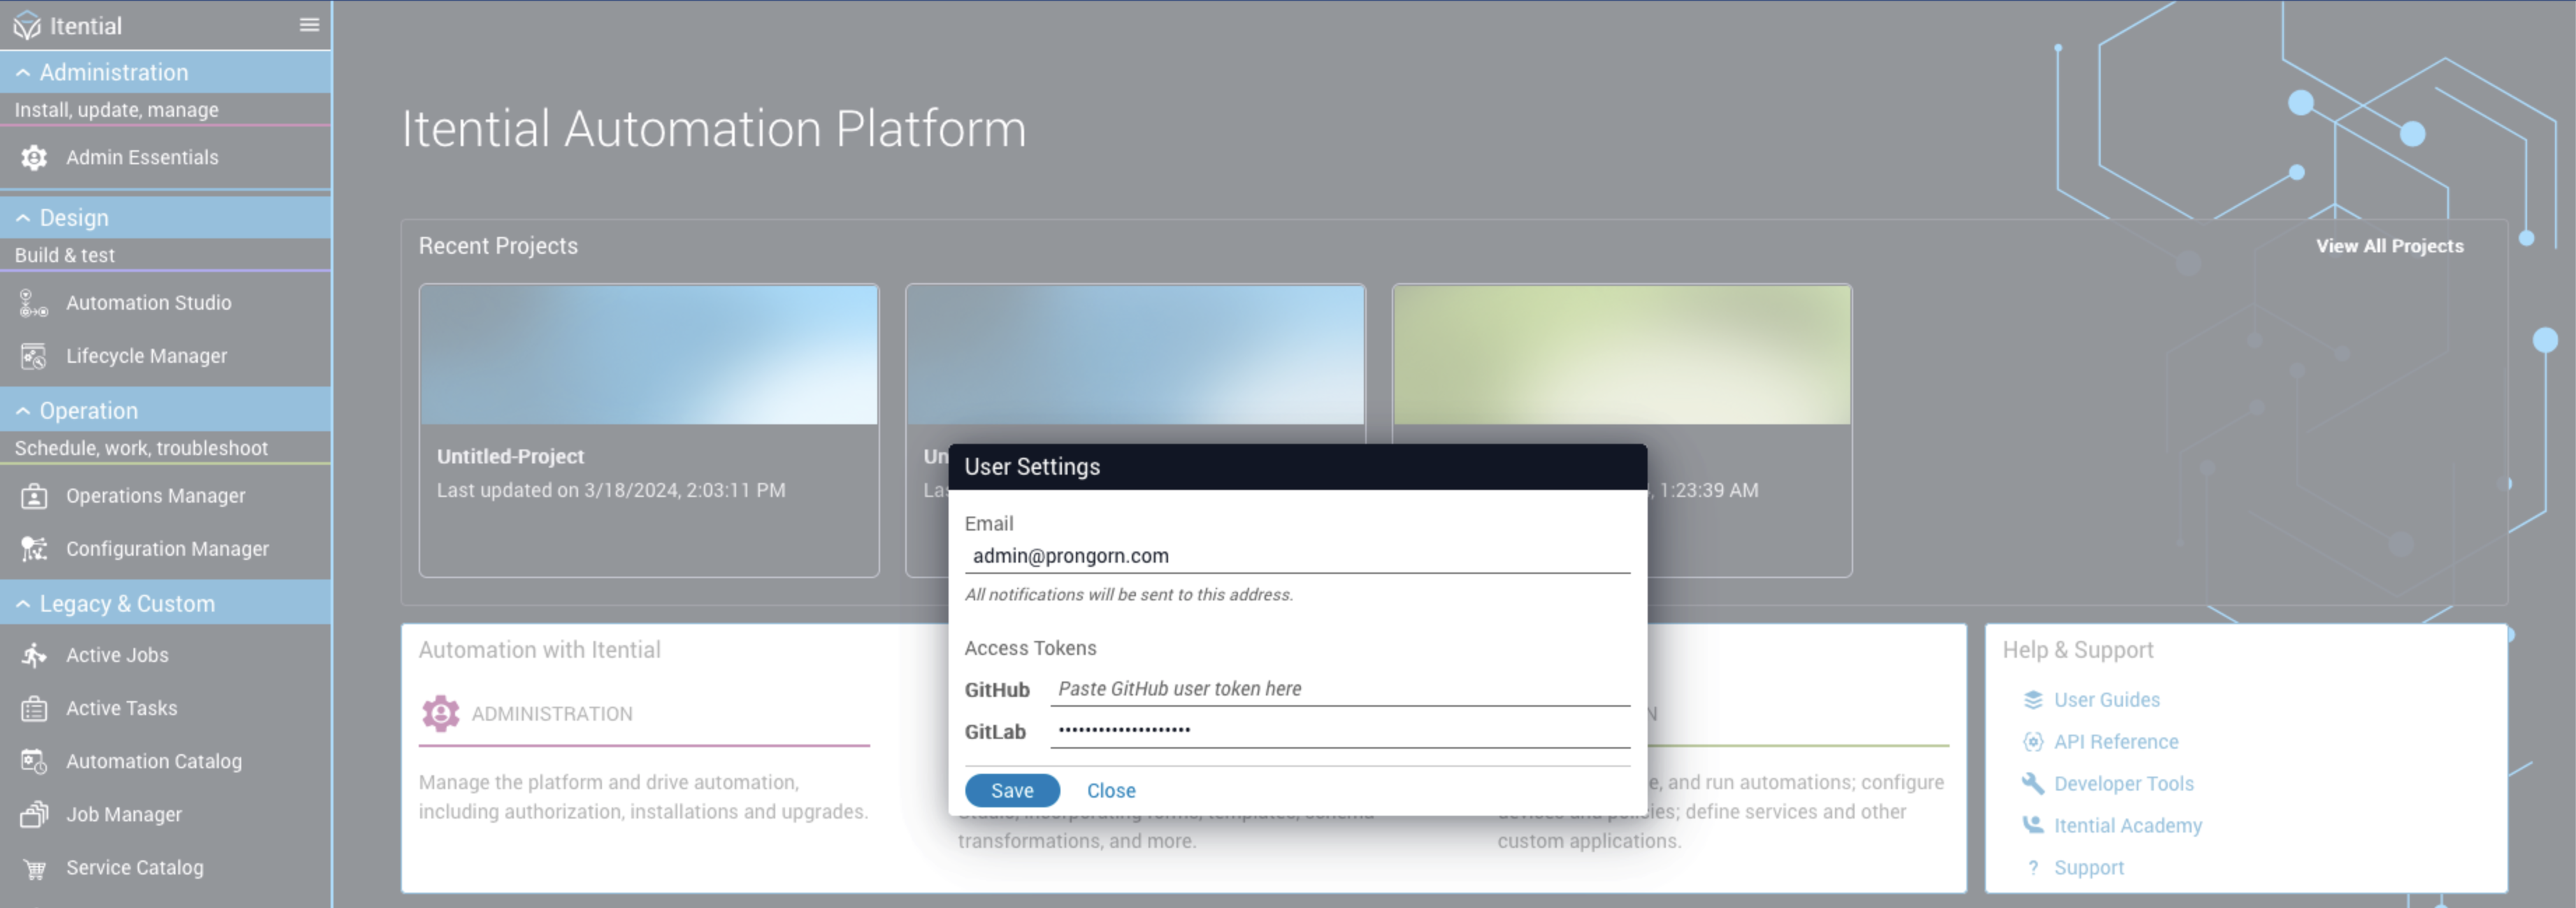
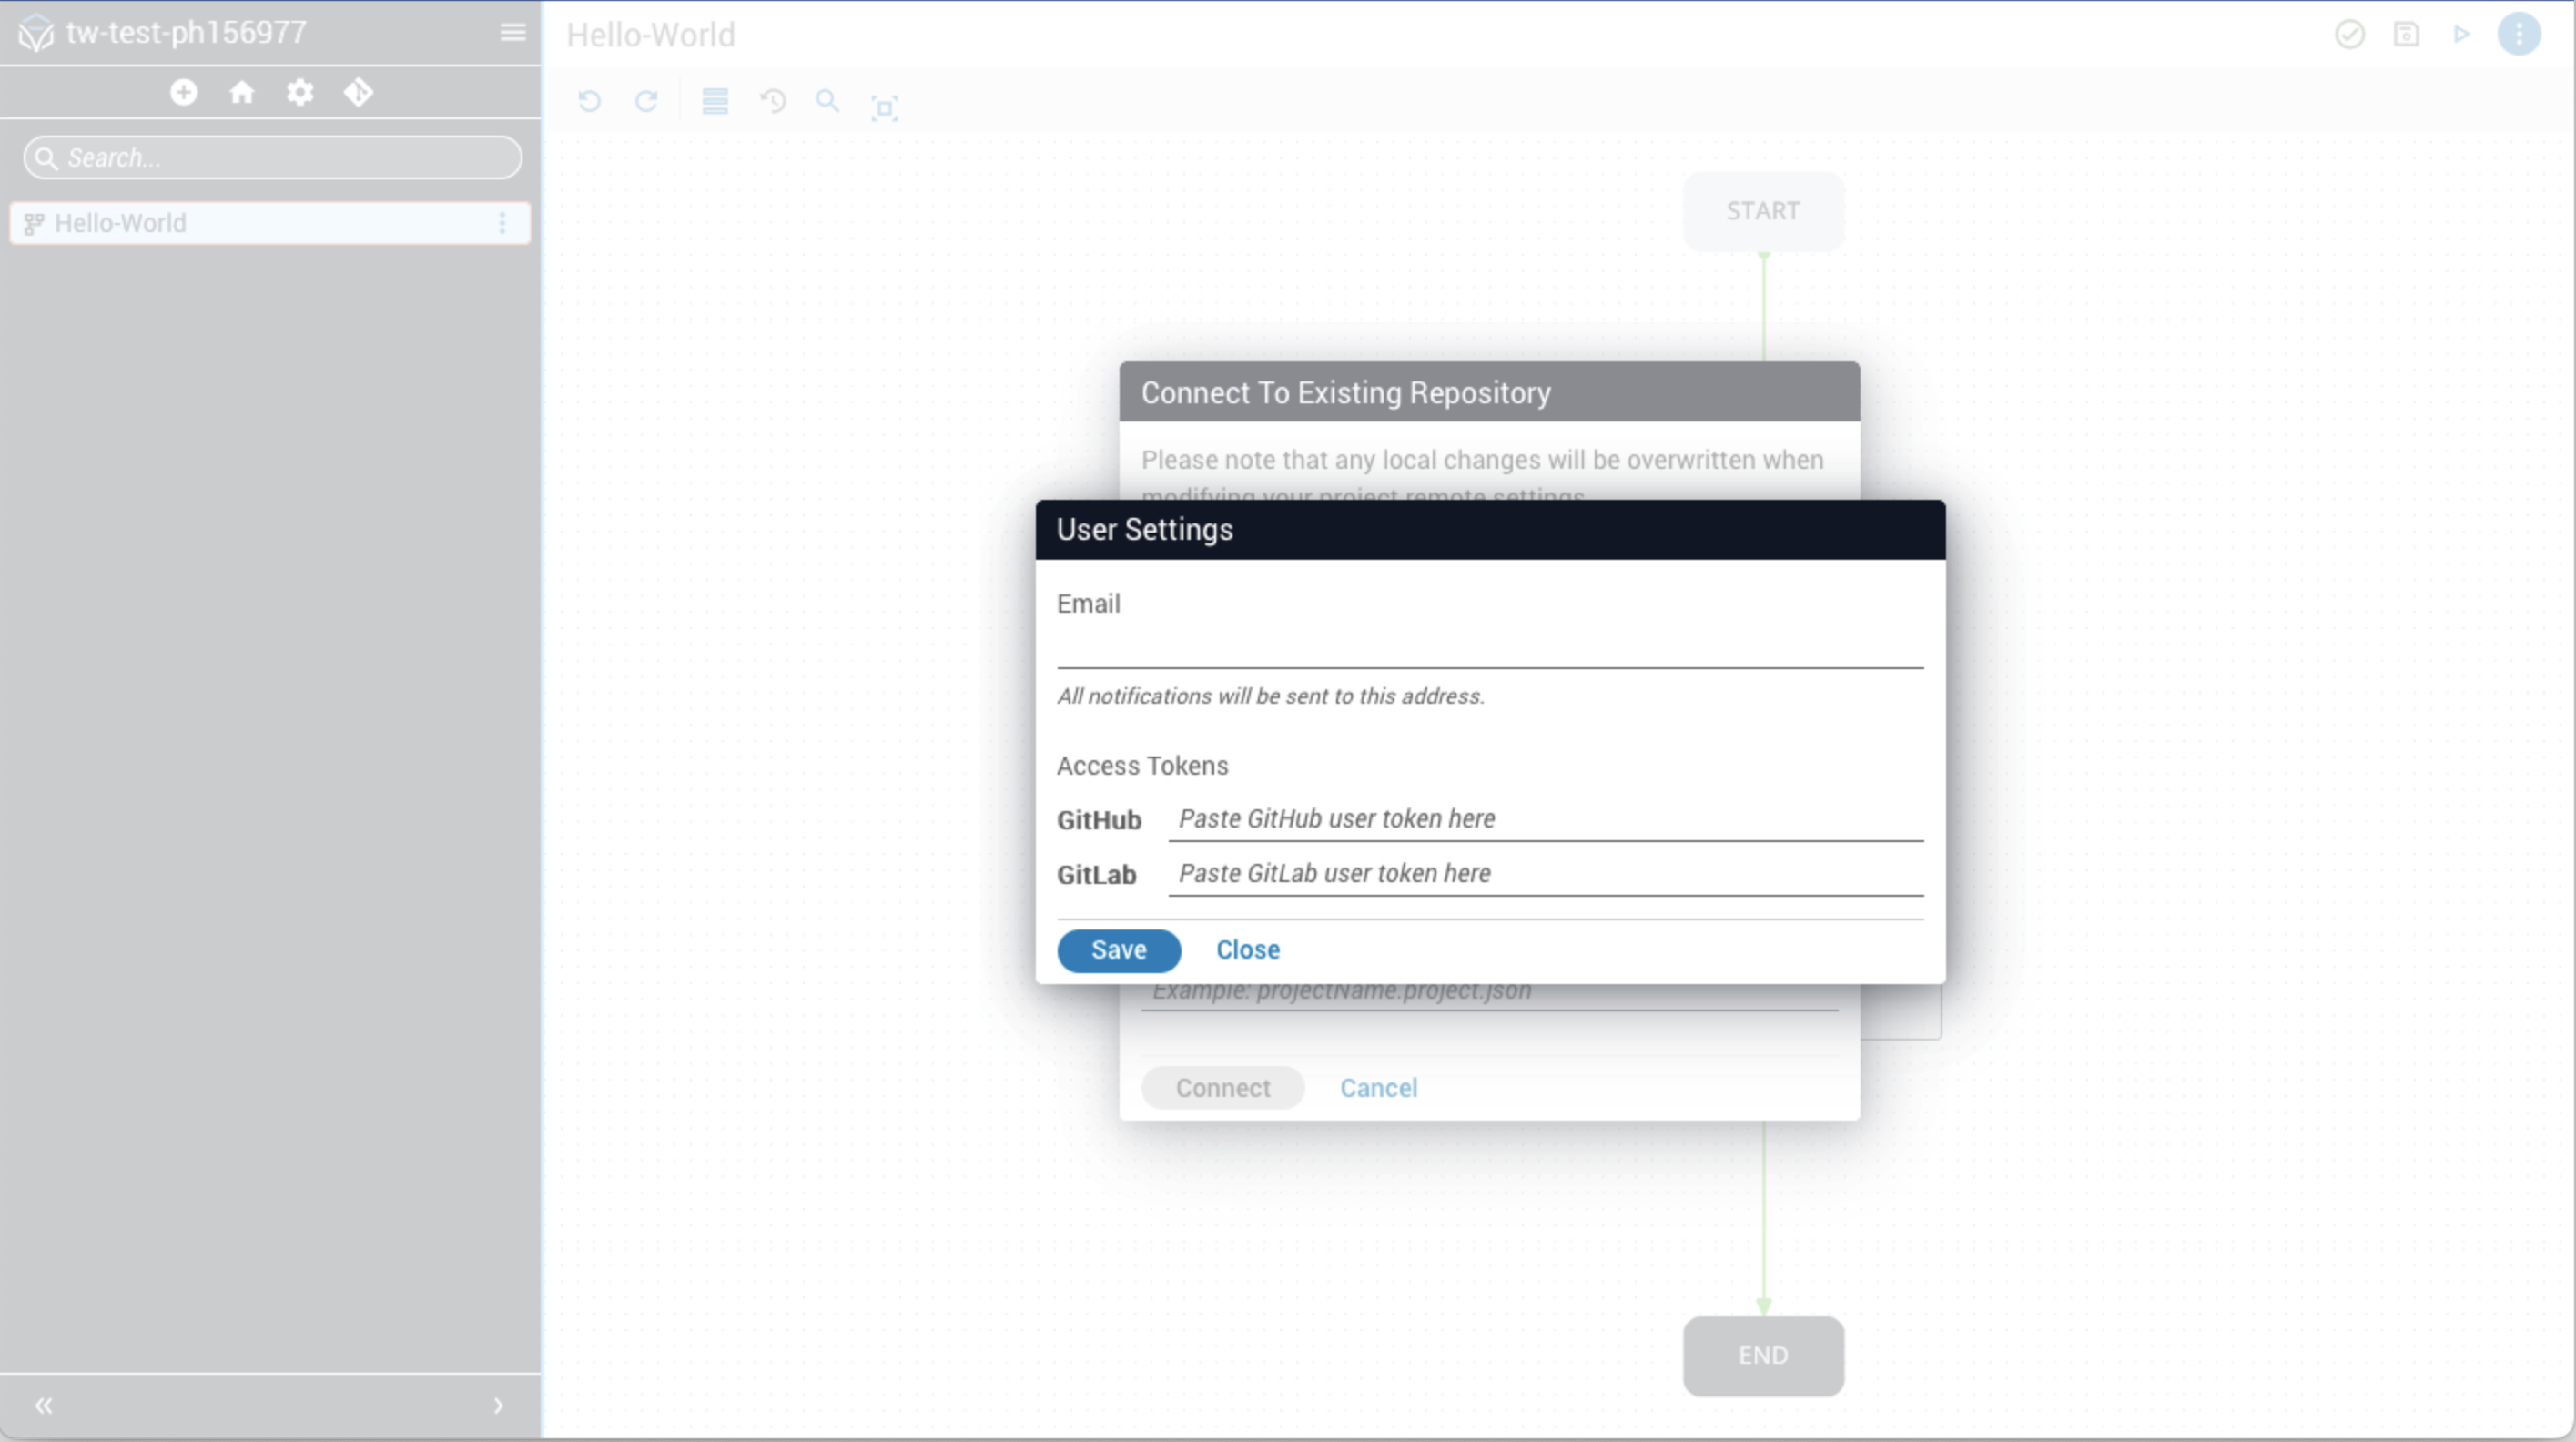
Open User Settings
Click the menu icon next to the Itential logo, then click your user name. The User Settings dialog opens.

Enter your email address
Enter your email address. Standard formats such as name@example.com and firstname.lastname@example.com are accepted.
Related reading:
Add credentials
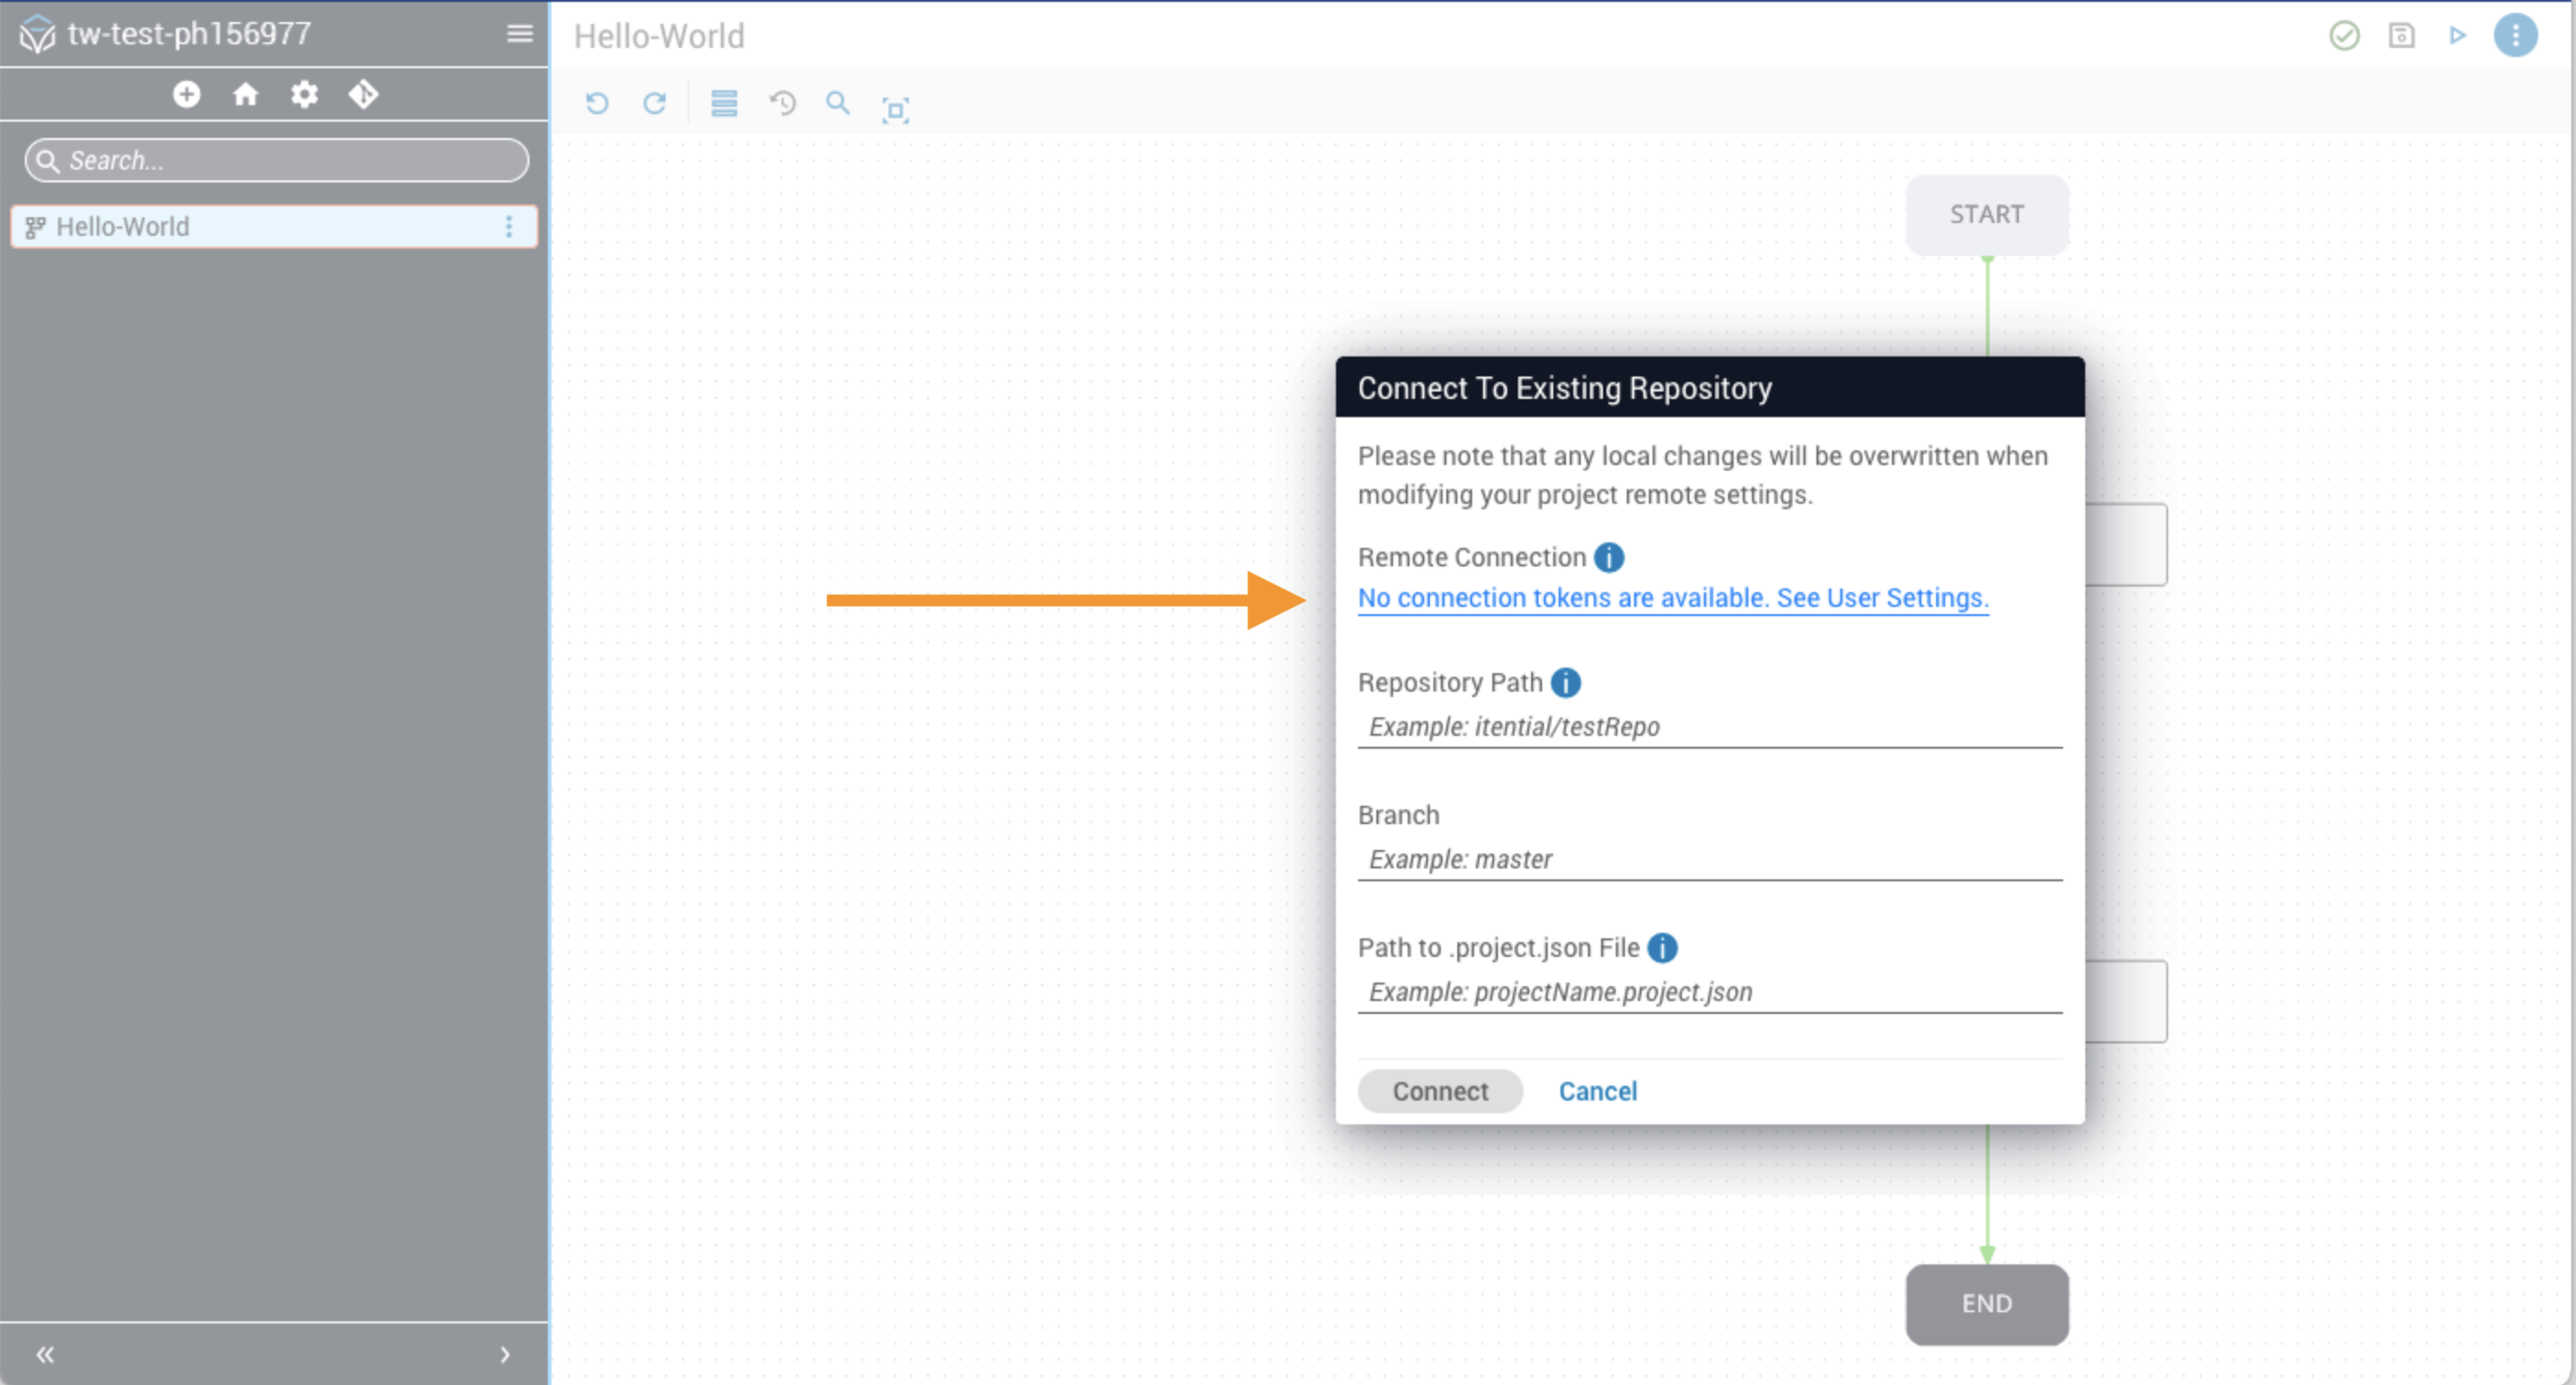
If you attempt to connect without tokens, the Remote Connection field shows an alert. Click See User Settings, add credentials, and save.
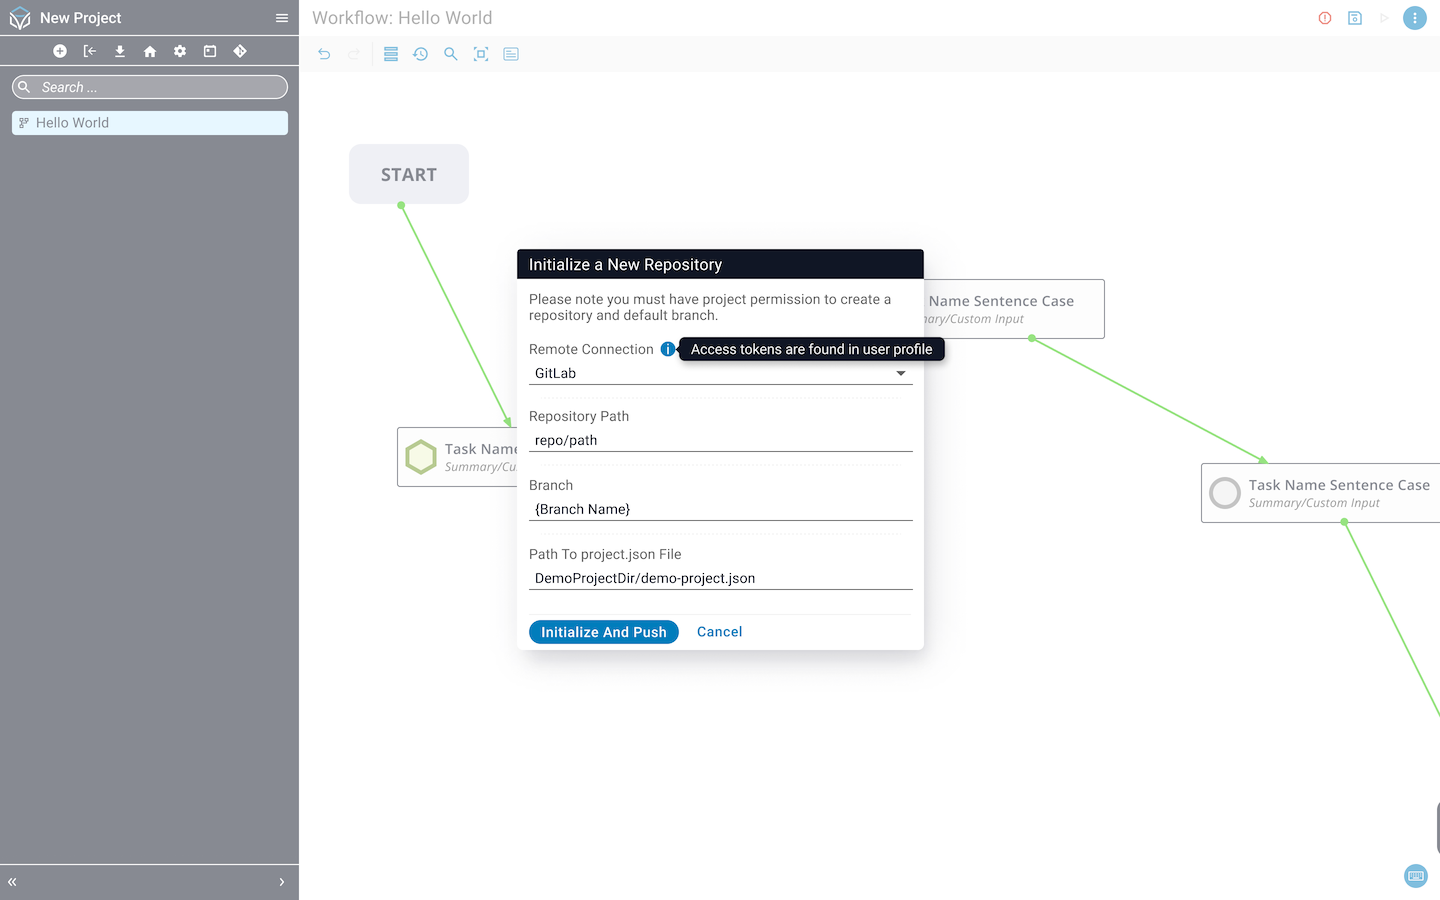
Initialize a new repository
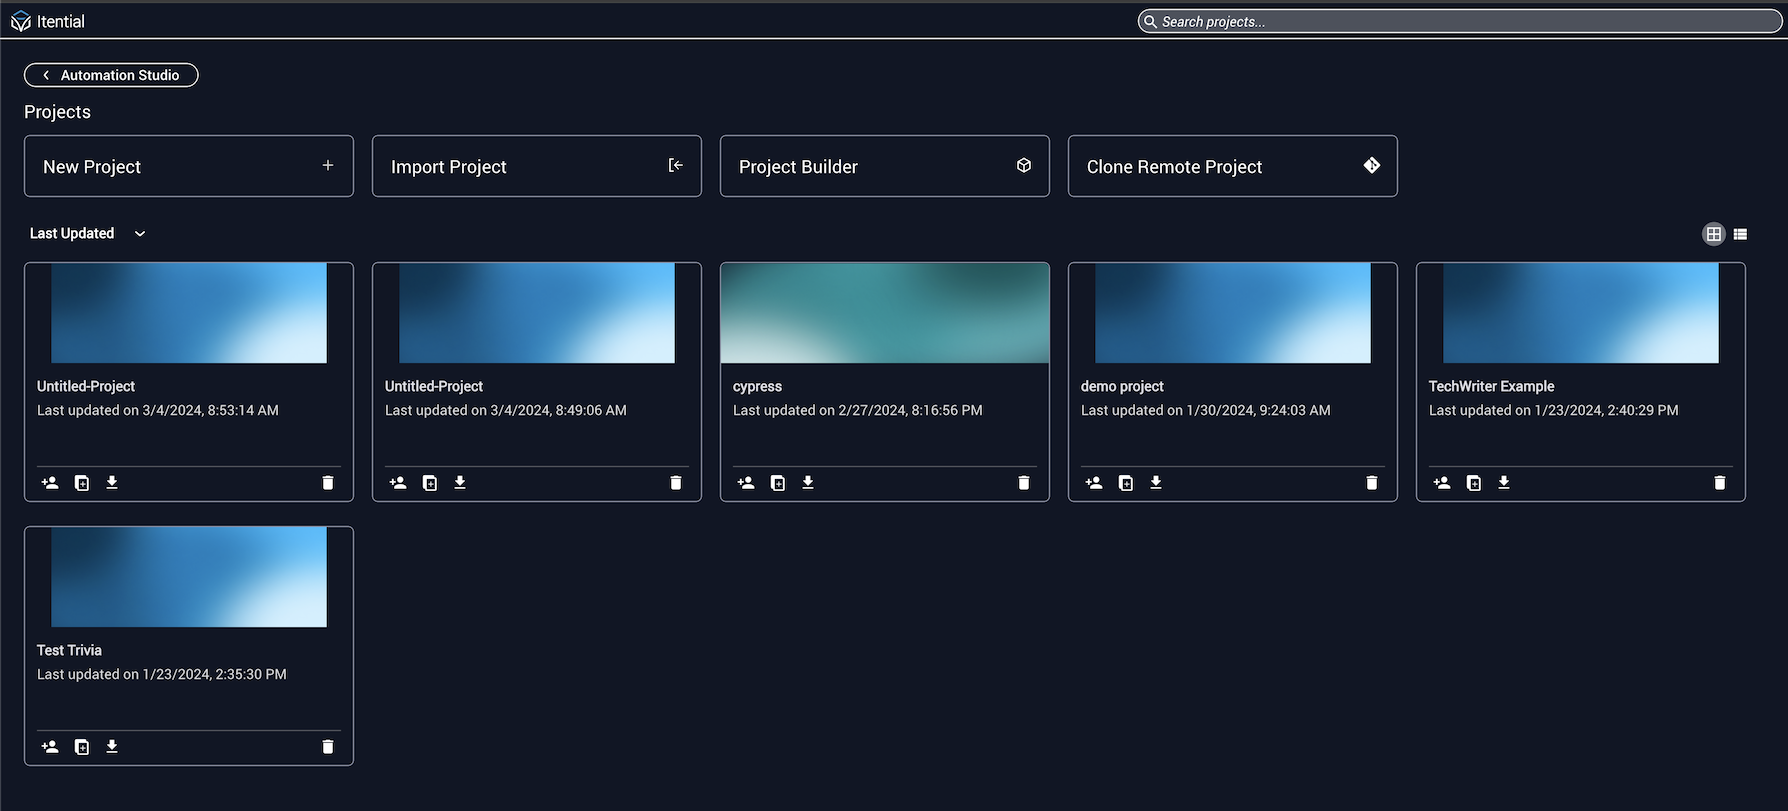
- Open the Projects homepage and click New Project +.
Hover over the Git icon in the toolbar and choose Initialize a New Repository.

In the dialog:
- Select a remote connection (tokens must be configured).
- Enter the repository path and branch name.
- Specify the path to a
project.jsonfile.
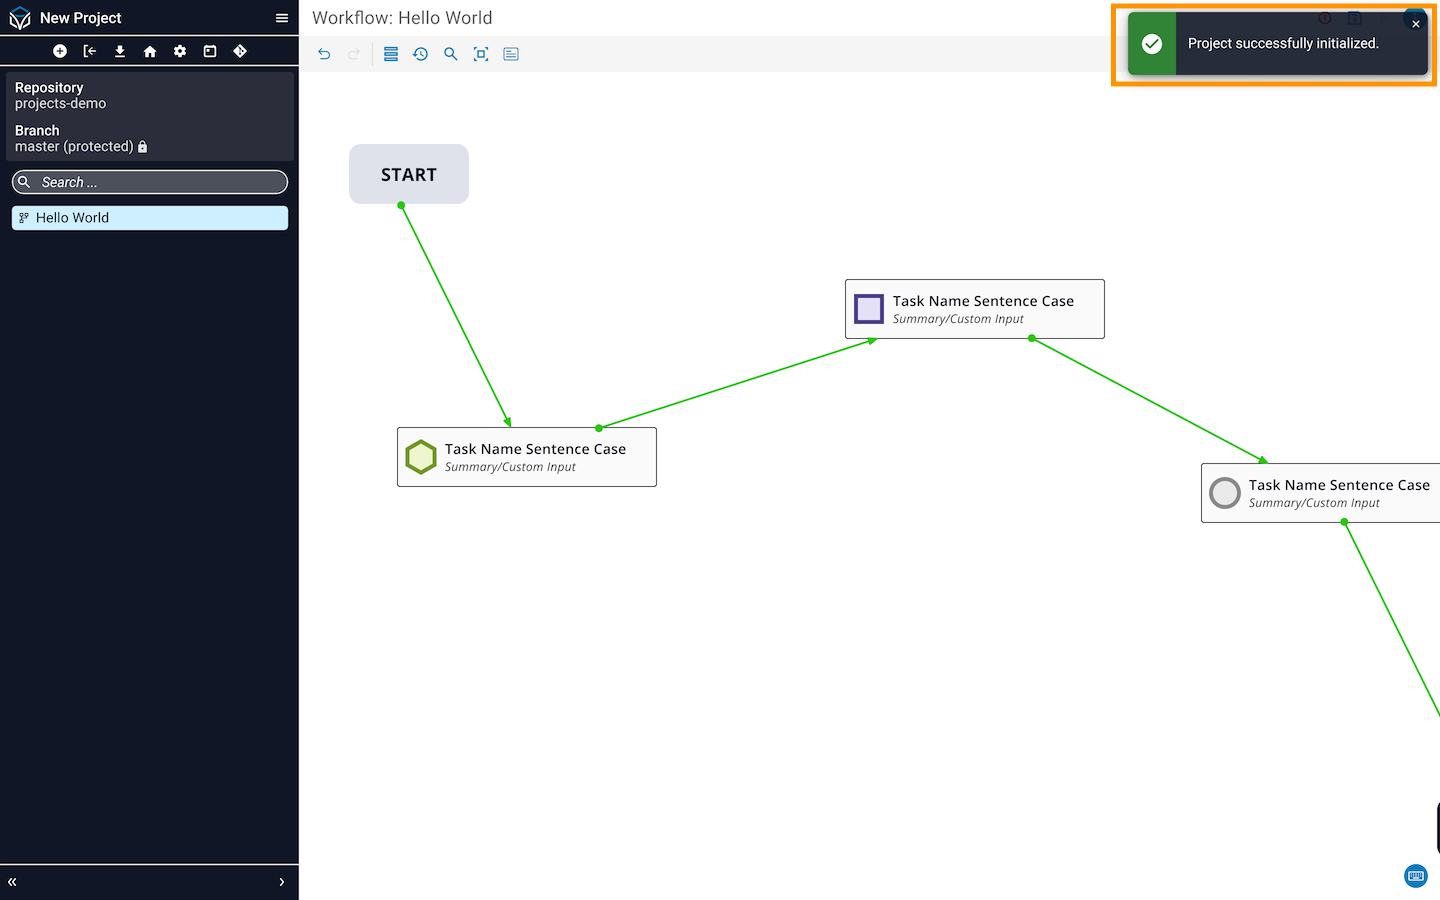
Click Initialize and Push.
A success banner appears when initialization finishes.
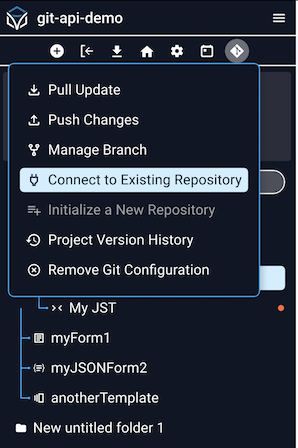
Connect an existing project
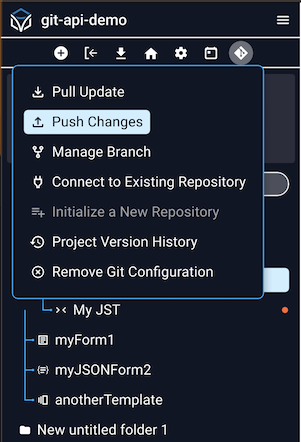
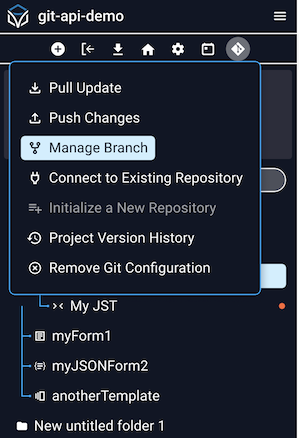
Open the project, hover over the Git icon in the toolbar, and choose Connect to Existing Repository.
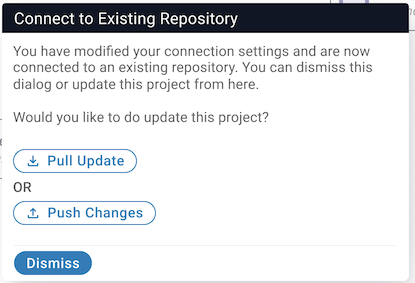
Select a saved Remote Connection or enter new settings, then click Connect.
A confirmation dialog offers Pull Update, Push Changes, or Dismiss.
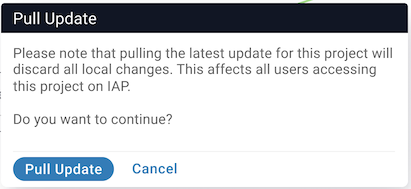
Pull updates
Open the project, hover over the Git icon, and click Pull Update.

A warning confirms that pulling will overwrite local changes. Click Pull Update to continue.
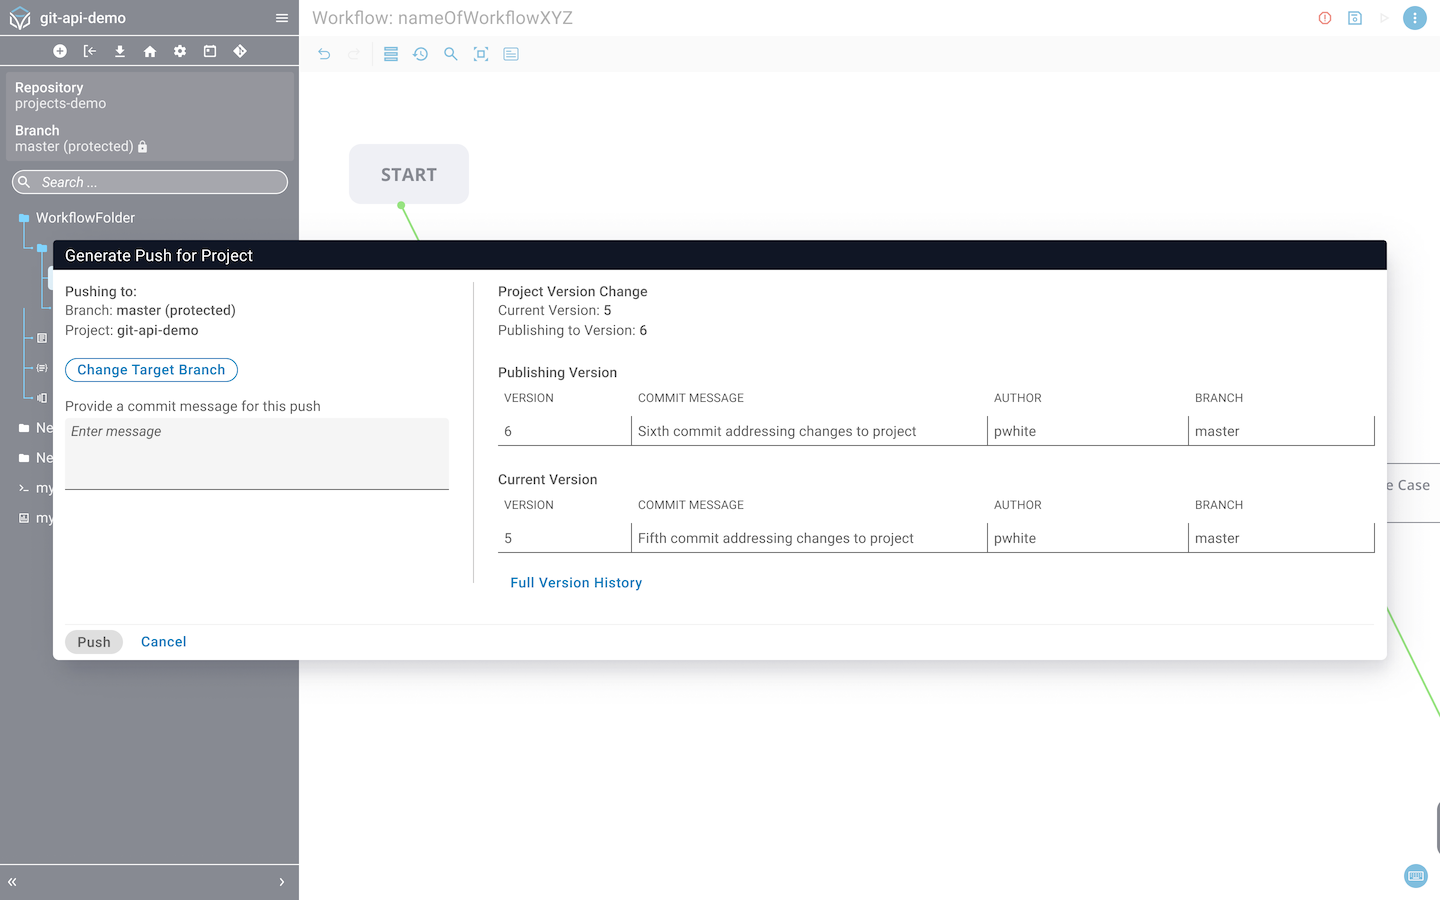
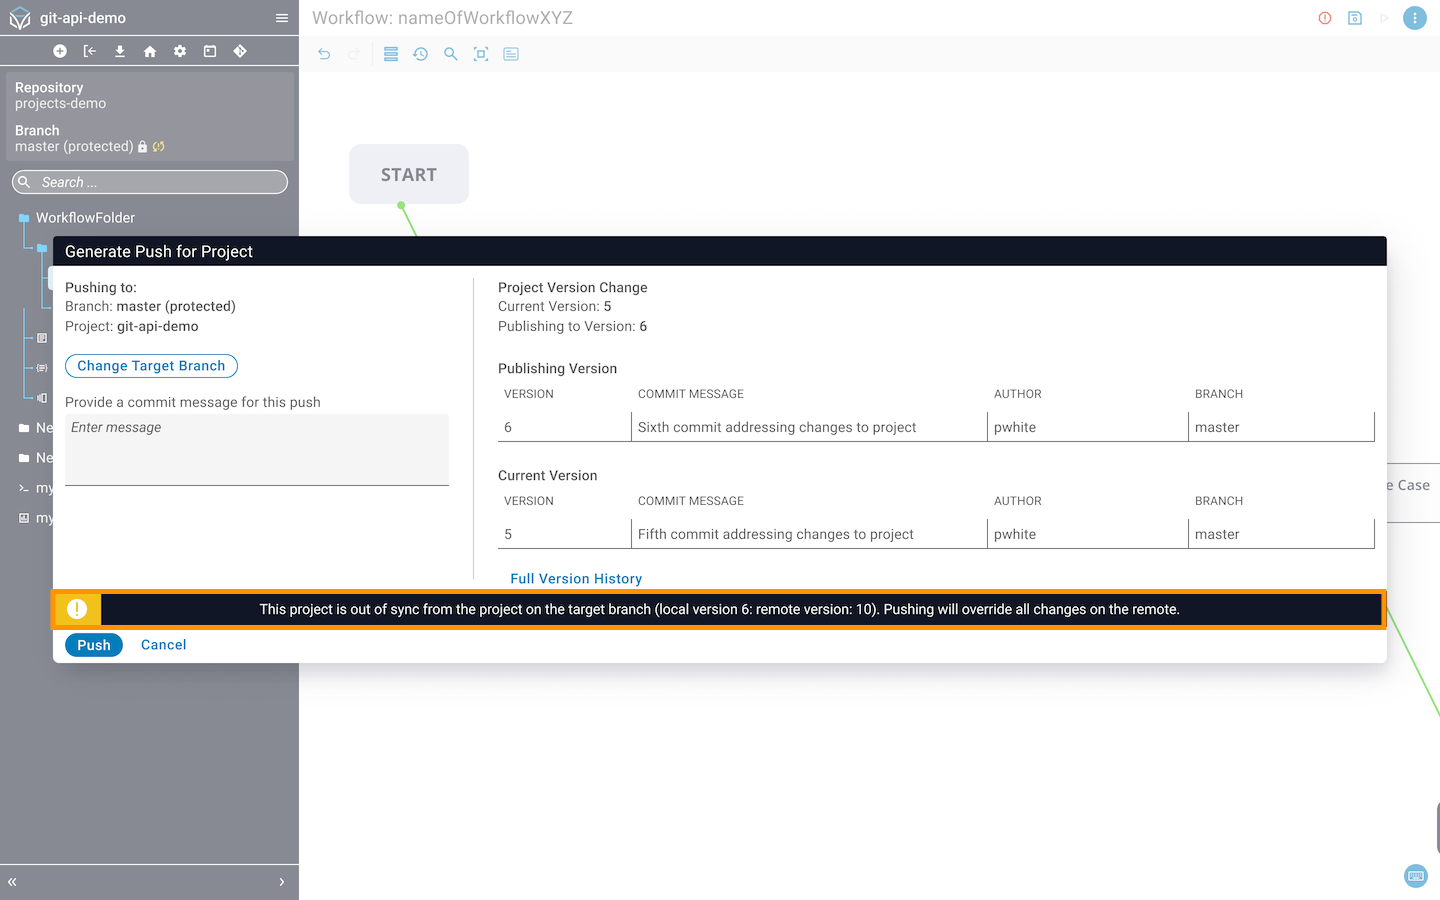
Push changes
Open the project, hover over the Git icon, and click Push Changes.
The Generate Push for Project dialog shows:
- Target branch and project (use Change Target Branch to switch).
- Commit Message field.
- Project Version Change section showing current and publish versions.
- Table of version history, commit messages, authors, and destination branches.
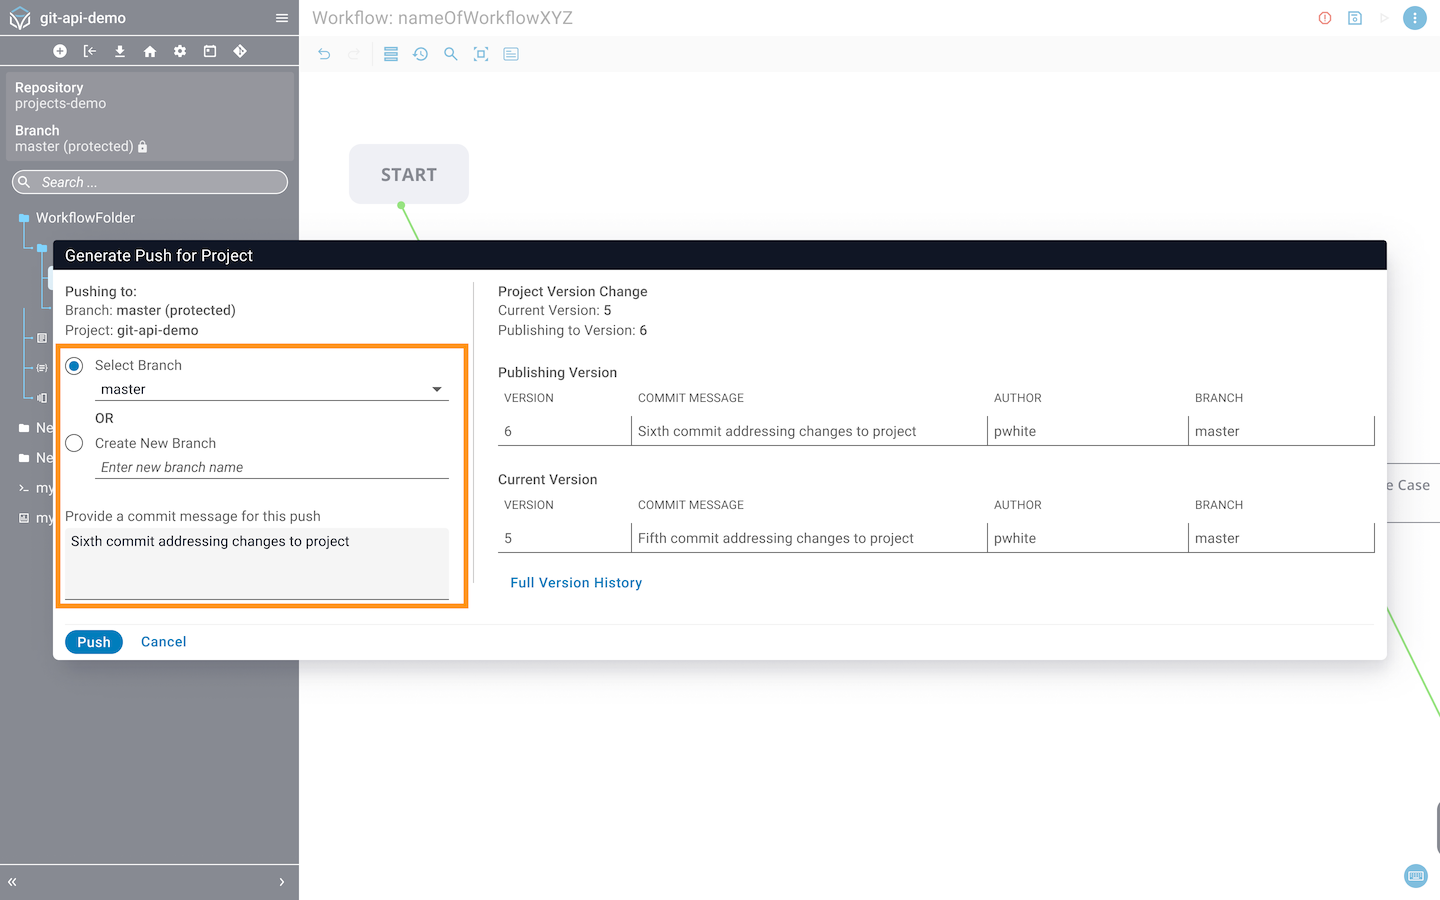
Change target branch
Click Change Target Branch to select a different branch or type a new path. Add a commit message and click Push.
Synchronize a branch
A sync icon appears next to the branch name in the side panel when your local project is out of sync with the repository. Hover over the icon to see version details.
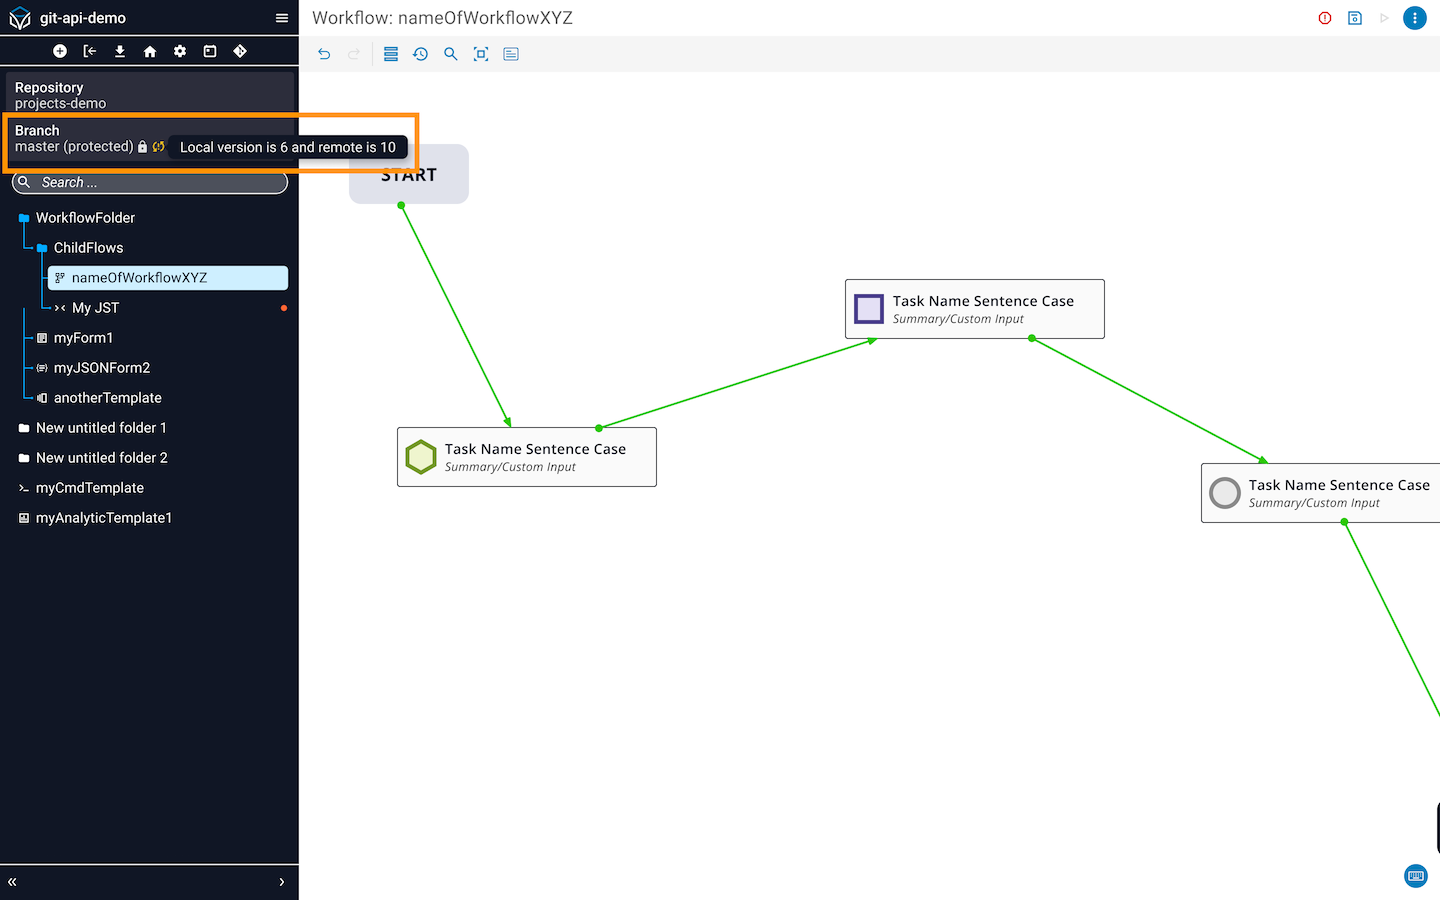
If you try to push an update and the target branch is out of sync, a warning displays. If you continue, the target branch will be overwritten with the pushed update.
Make sure you are in sync with the remote branch before you begin working. If another user updates the branch while you are working, your push will overwrite their changes. Pulling will overwrite your local project and Pushing will overwrite the remote project.
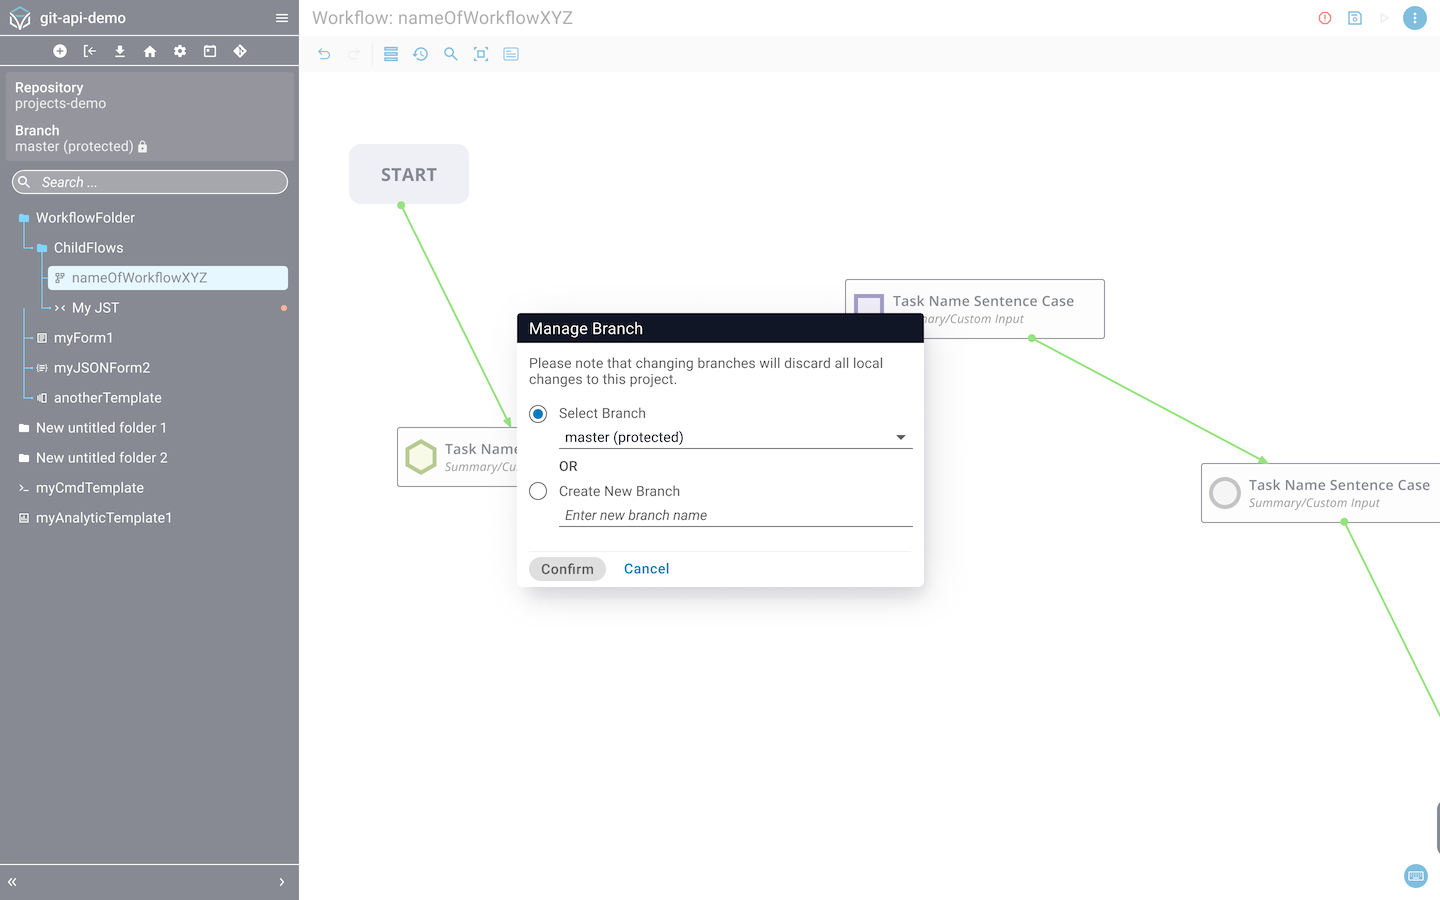
Manage a branch
Open the project, hover over the Git icon, and click Manage Branch.
In the dialog, pick a branch from the dropdown or enter a new name. Click Confirm.
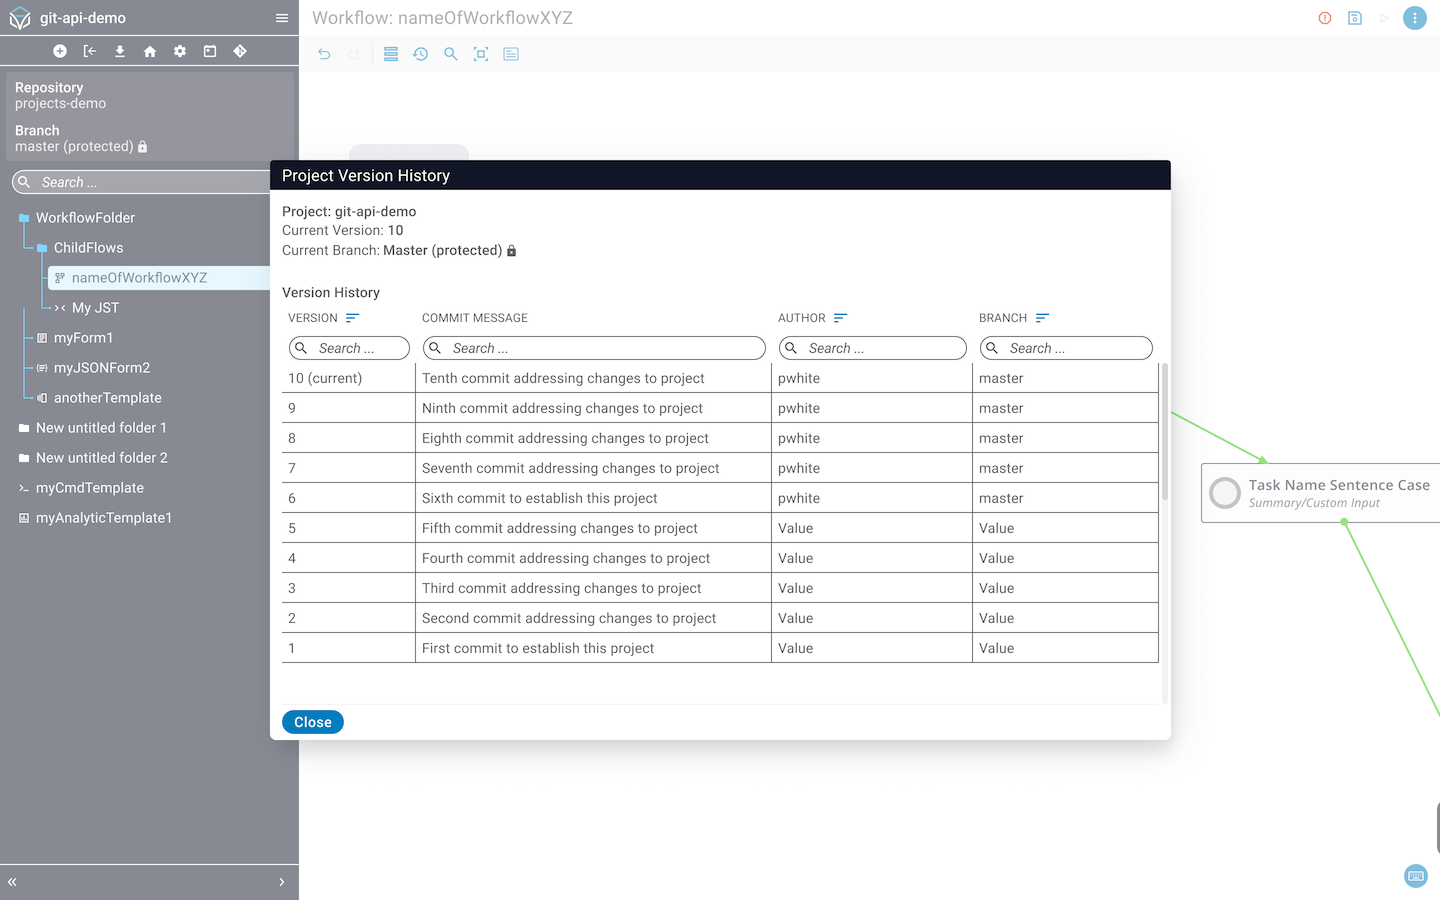
View version history
Open the project, hover over the Git icon, and click Project Version History.
A dialog shows the current branch and a table of version changes with commit messages.
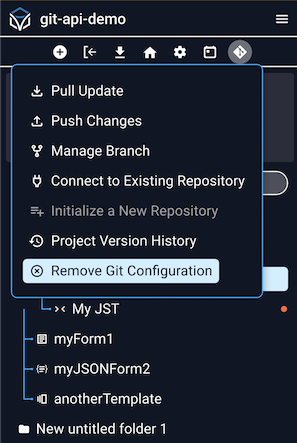
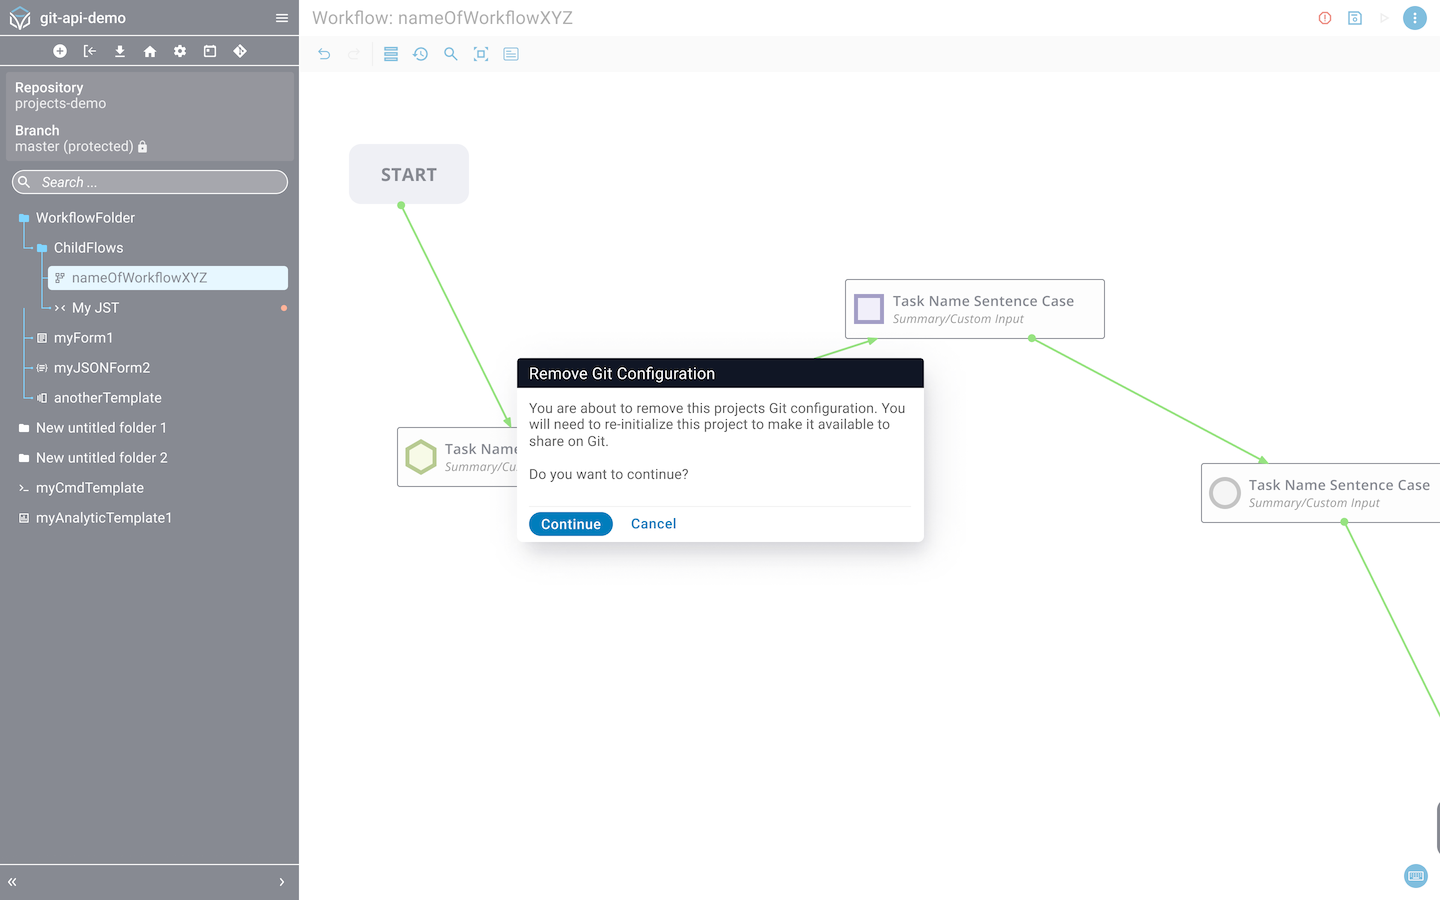
Remove Git configuration
Open the project, hover over the Git icon, and click Remove Git Configuration.
A warning dialog confirms removal of the project’s Git configuration. After removal, you must re-initialize the project to share it on Git. Click Continue to proceed.
Clone a remote project
Click Clone Remote Project from the Projects homepage. In the dialog, enter:
- Remote connection
- Repository path
- Branch name
- Path to a
project.jsonfile
Click Clone Project. A success banner appears in the upper-right corner and the cloned project appears in the Projects homepage list.
