Validate project references
In Studio you can build projects that include existing automation assets. Reference validation checks that project assets will work when you move the project between environments.
How reference validation works
Reference validation analyzes external references in the project (Golden Configurations, triggers, LCM resources, compliance reports, JSTs, templates, JSON forms, etc.) and alerts you if any referenced assets are missing or differ between environments. That way you can migrate with confidence.
Use cases
Use case 1: Import a project that references a global asset. Reference validation checks for the asset; if it’s missing, you see a warning and can continue or cancel.
Use case 2: Export a project from staging that references a Golden Config, then import it into production. If the production config differs, Projects warns you and lets you continue or cancel.
How to use reference validation
Reference validation is part of the Projects area in Studio and requires Platform 6. The feature works in a single environment, but to experiment you can use two environments: an “Old” (dev or staging) and a “New” (staging or production).
Reference validation applies in three scenarios:
- Importing a project from your Old environment that references global assets not bundled in the project file.
- Importing a project into your New environment when the referenced global assets differ from those in the Old environment.
- Pushing and pulling changes with Git, which is equivalent to import/export and triggers the same checks.
Importing a project with missing global assets
This scenario occurs when you import a project into the New environment and the referenced global assets are missing there.
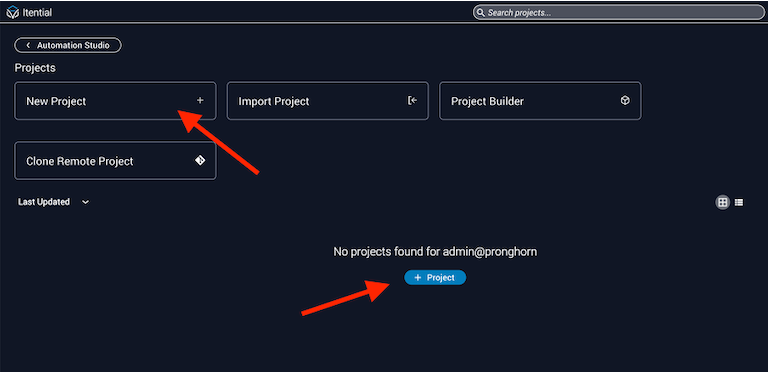
Step 1: Create a project in the Old environment
Create the project
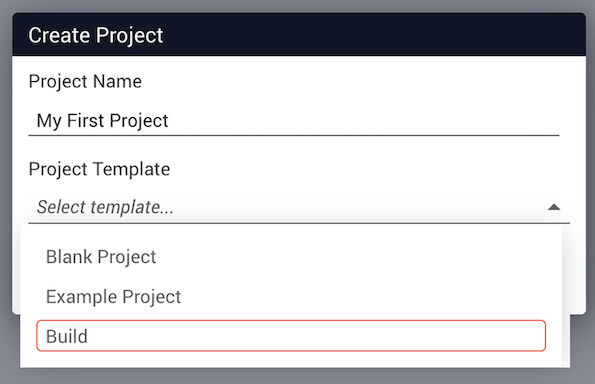
From the Projects main page, click New Project. Give the project a name and choose Build from the Project Template dropdown.
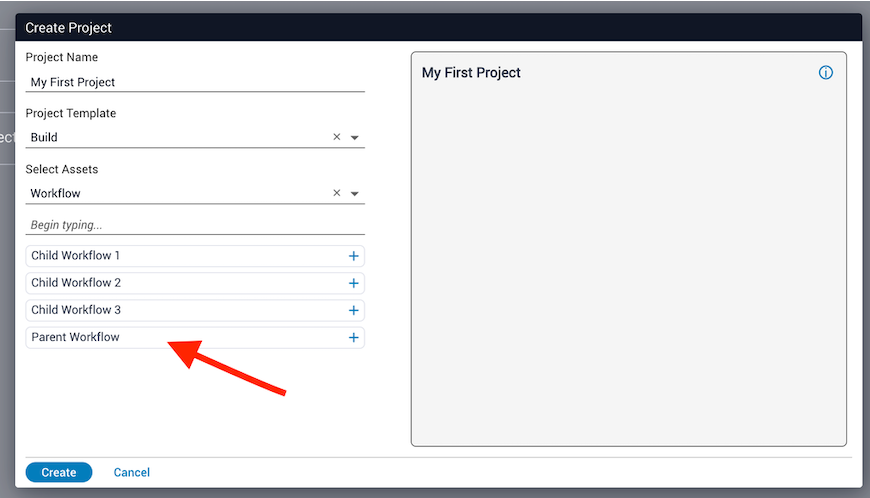
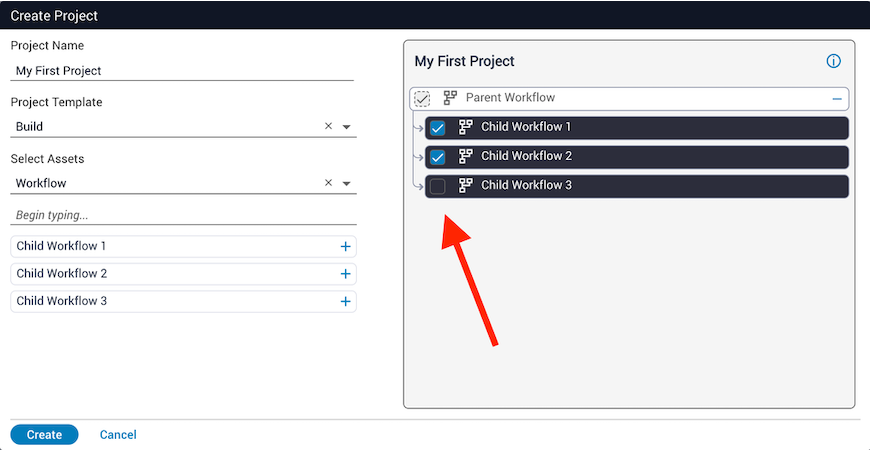
Select components, leaving at least one in global
Select components so that at least one remains in the global space. In the example below, “Child Workflow 3” will not be copied to the project and will instead be referenced from the global space.
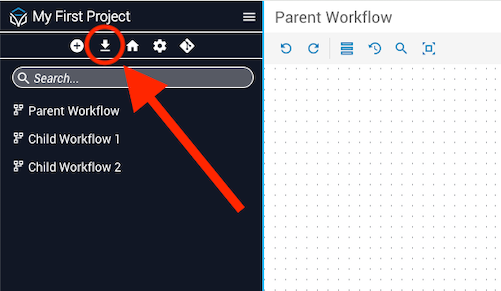
Step 2: Export and import the project
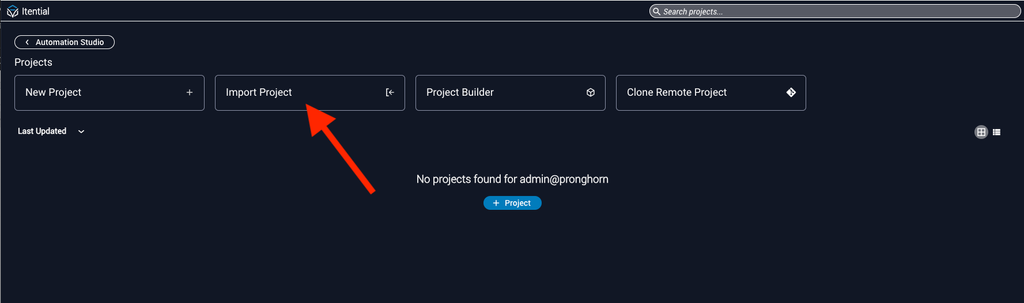
Import into the New environment
In the New environment, click Import Project, choose the file, and click Import. A warning appears about missing components.
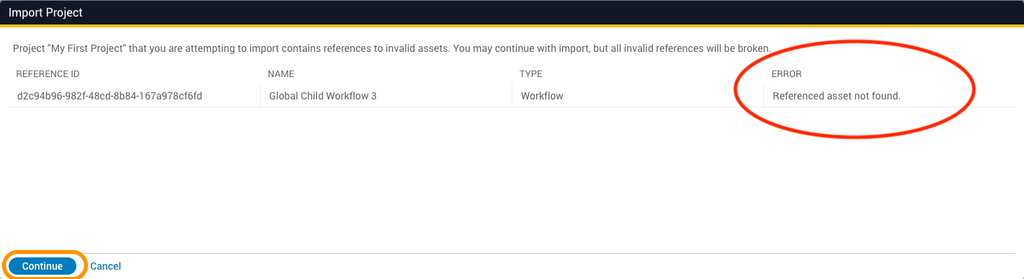
Continue or cancel
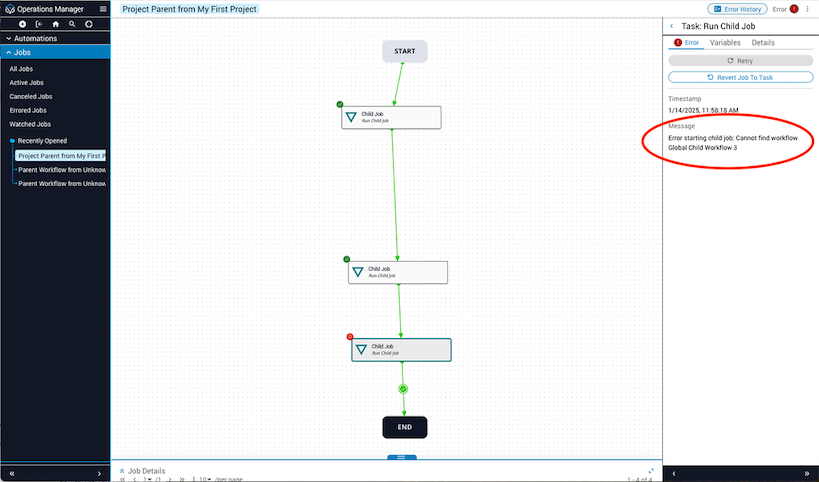
Click Continue to import despite missing components; workflows referencing them will error with {component_name} not found.
To avoid that, click Cancel, delete the project, return to the Old environment, export the missing global asset, import it into the New environment, and then retry importing the project.
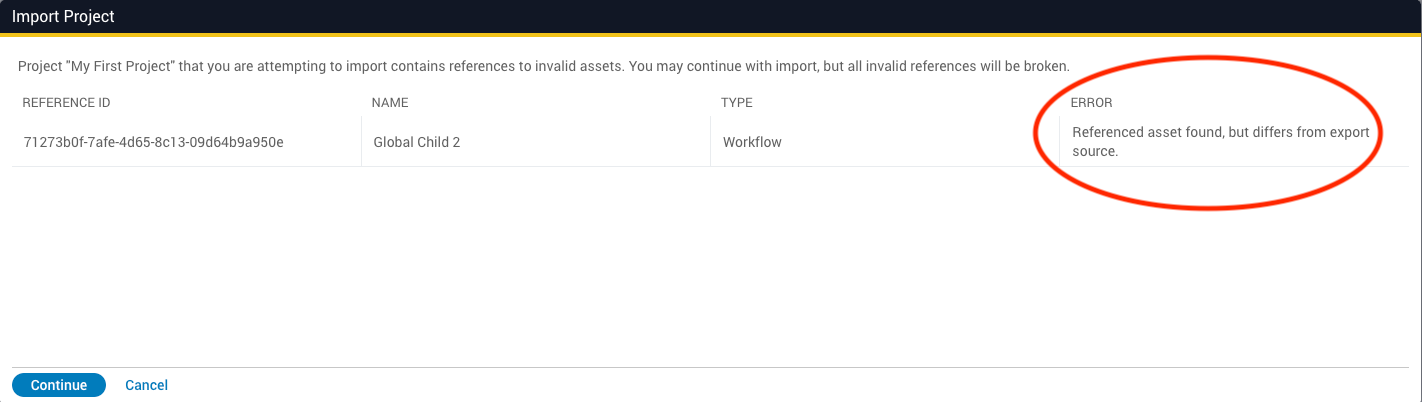
Importing a project with updated global assets
This scenario happens when the referenced global assets exist in the New environment but have been modified since export.
Create and export the project
In the Old environment, create a project that references a global asset (see Step 1). Export both the project and the referenced asset.