Configure PingID SAML SSO
PingID is a multi-factor authentication (MFA) solution that integrates with existing identity systems to provide secure authentication and can also be used as part of a SAML SSO implementation that allows users to access multiple applications with a single set of credentials.
Key benefits of using PingID with SAML SSO:
- Stronger security through MFA.
- Centralized authentication management.
- Audit trails of authentication events.
- Compliance with organizational security and regulatory requirements.
Before you begin
Beginning with the 2023.2 release, access management in Itential Platform was expanded to include SAML SSO Authentication. Itential assumes the reader has completed the process of setting up SAML SSO Authentication in Itential Platform via Admin Essentials and has mapped their Identity Provider (Admin Essentials > Authorization > Identity Providers).
Keep in mind that each organization may have their PingID system configured differently and this guide is not all-inclusive of every system environment.
Additional resources:
- Configuring a SAML Application — a basic guide to configuring PingID as a SAML Identity Provider on the Ping Identity site.
- A short demo of how to set up PingID and a test application for SAML SSO:
Add PingID attributes
Copy the Entity ID from PingID
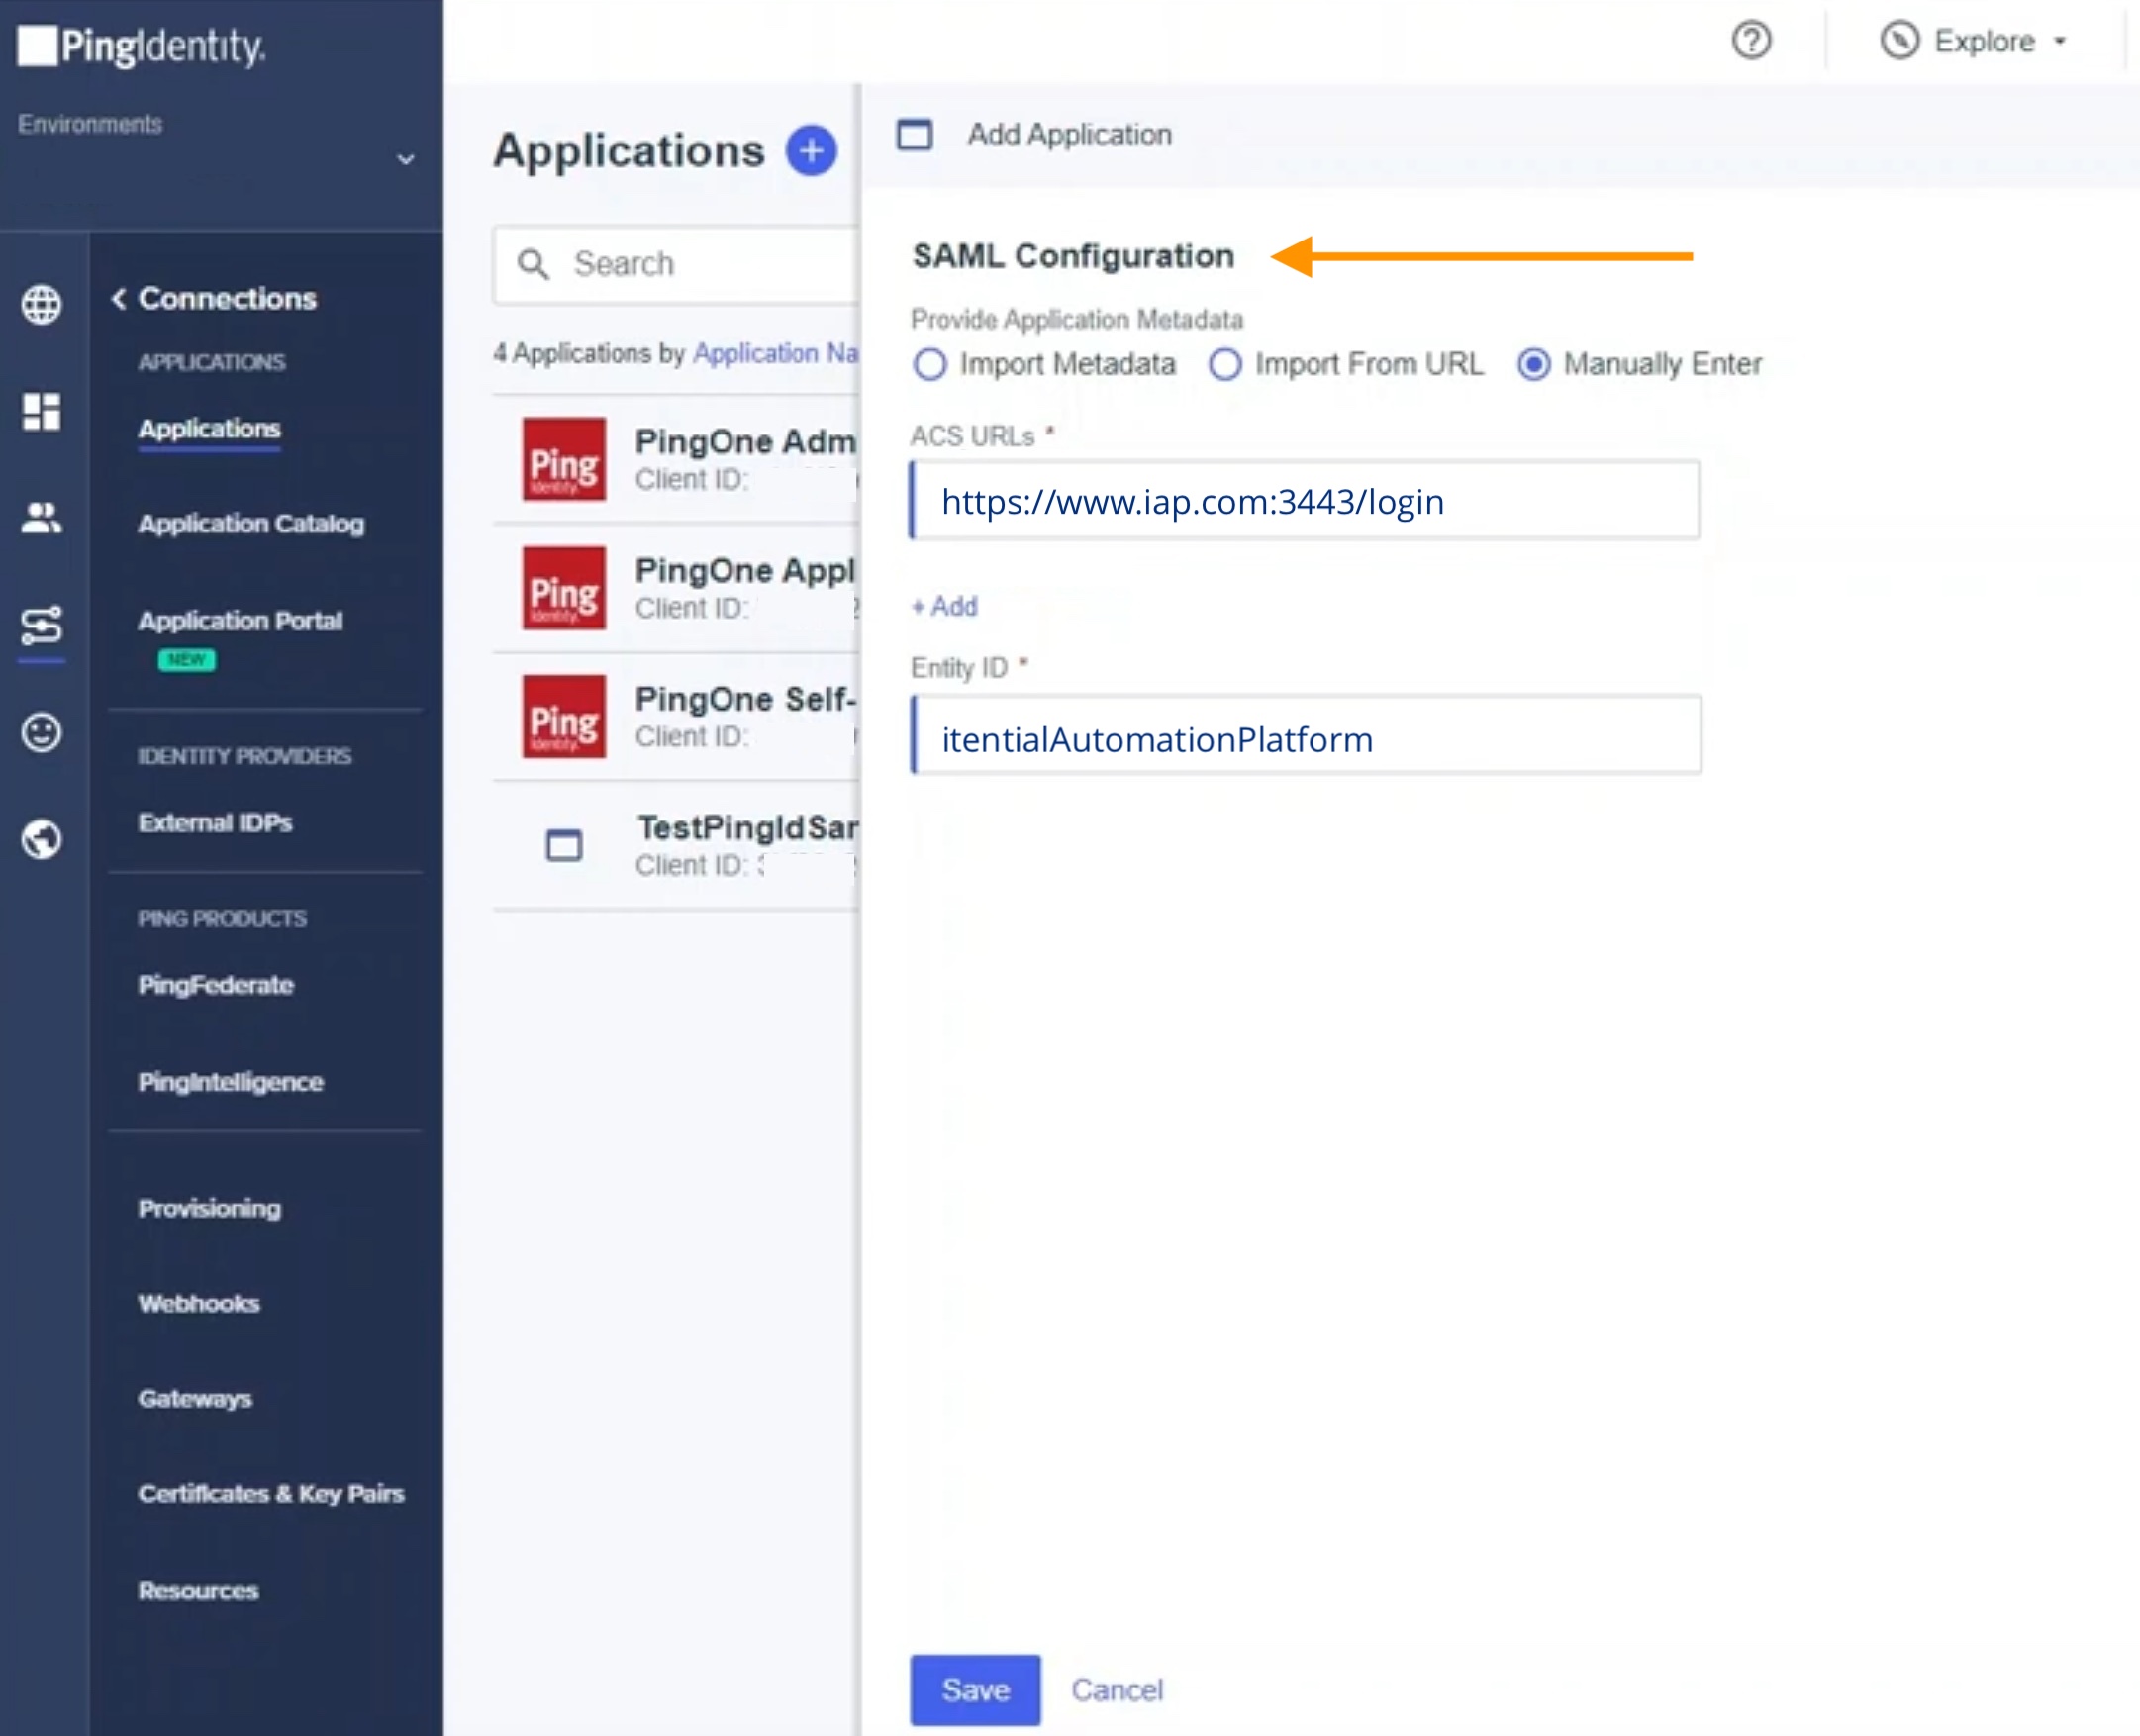
Sign in to PingID and go to the Itential Platform application that was set up under Applications. Under SAML Configuration, copy the Entity ID. This will be used to satisfy the Issuer parameter.
Paste the Entity ID into Itential Platform
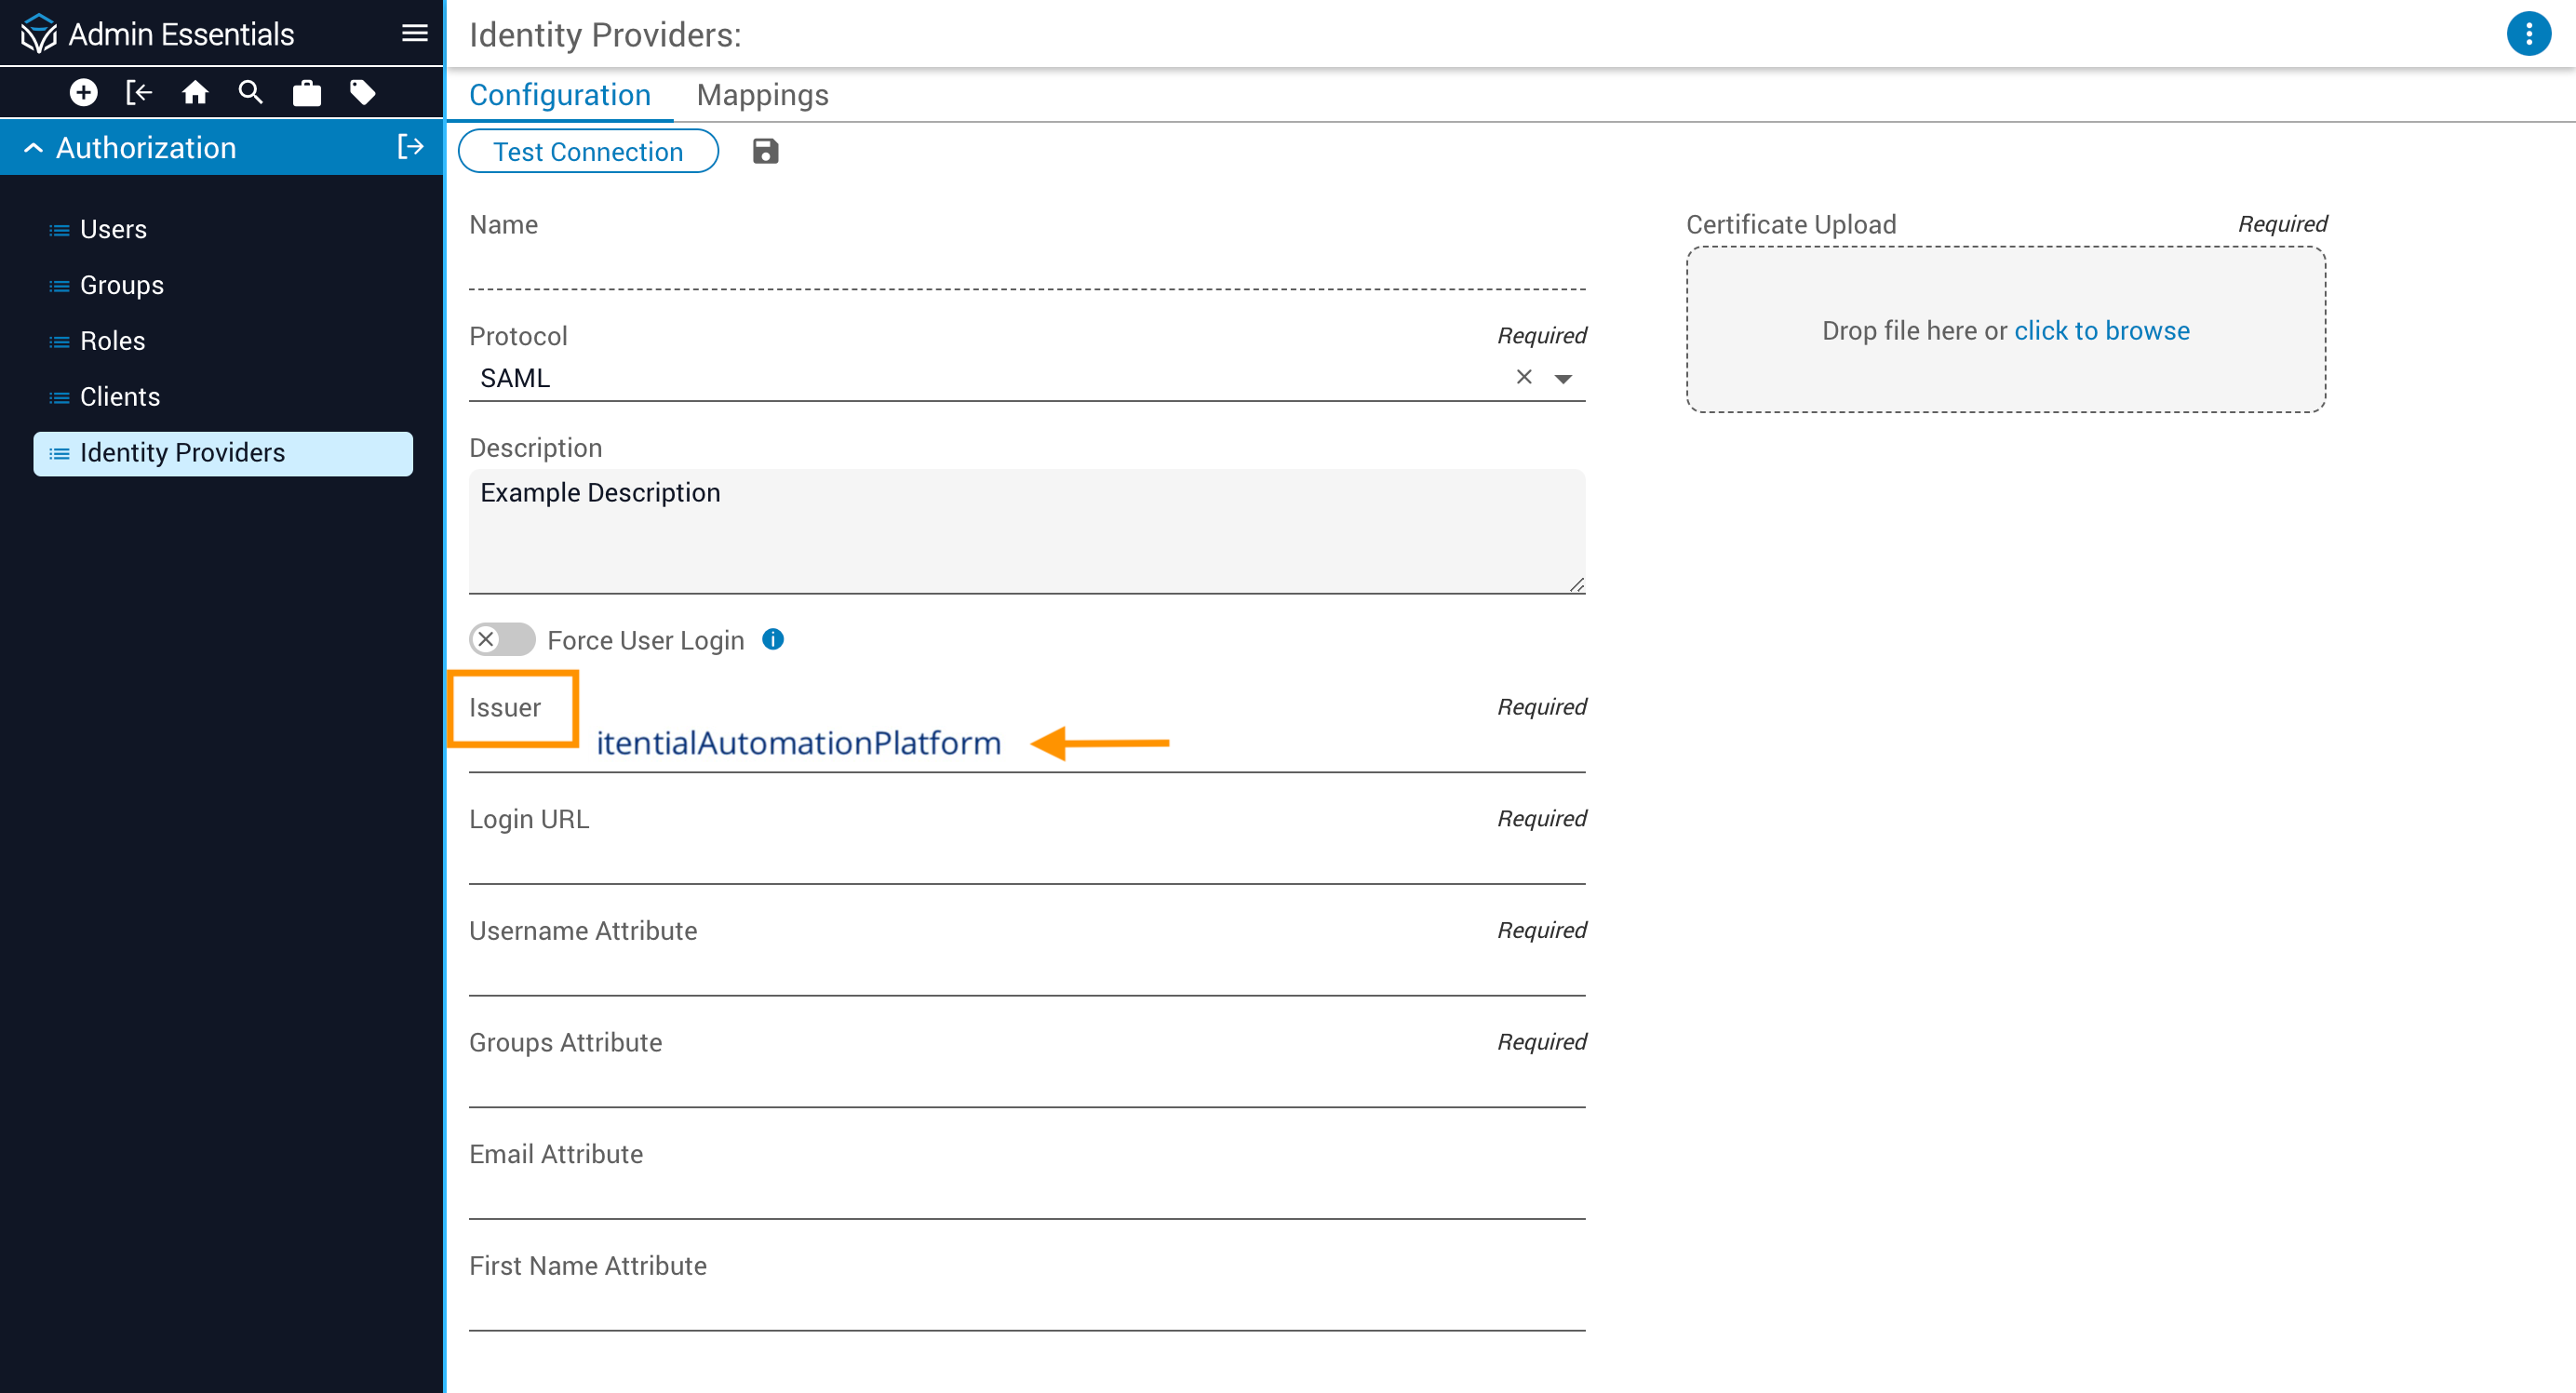
Sign in to Itential Platform and navigate to Admin Essentials > Authorization > Identity Providers > Configuration. Paste the Entity ID into the Issuer field.
Copy the Single Signon Service key from PingID
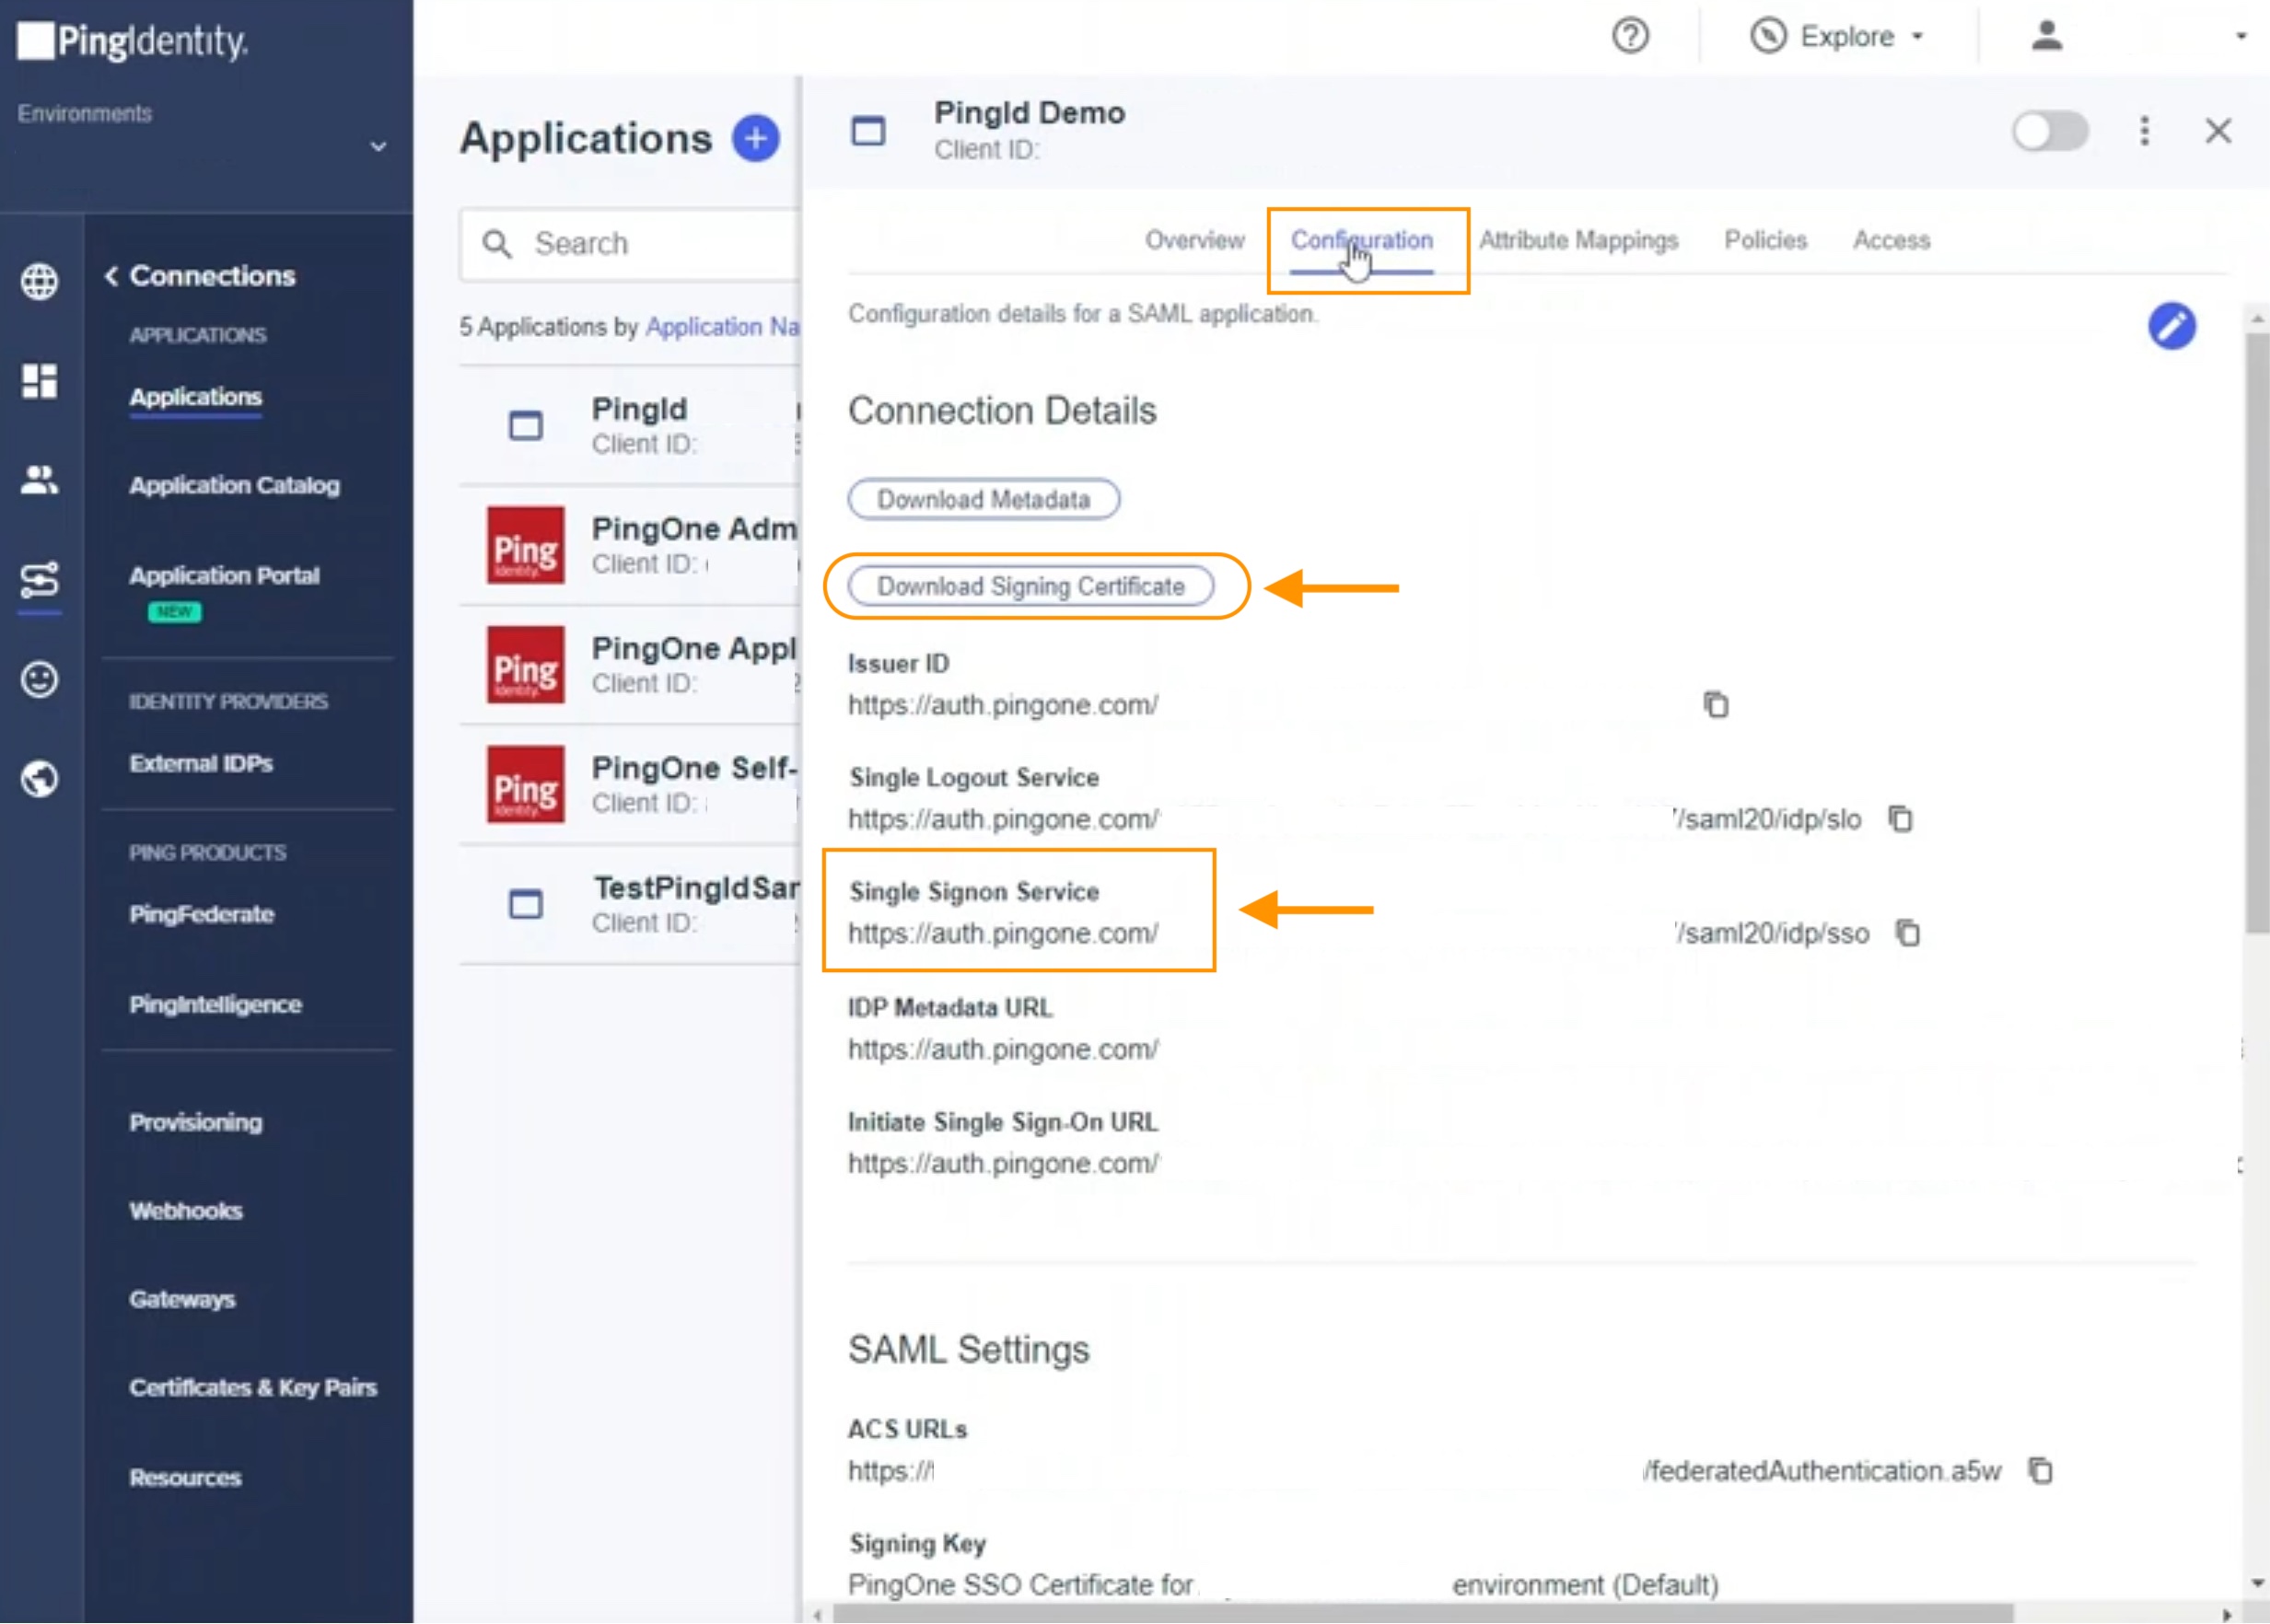
In the PingID administrative console, go to Applications > Configuration and copy the Single Signon Service key. This will be used to satisfy the Login URL parameter on the Itential Platform Identity Providers Configuration form.
Upload the signing certificate and enter the Login URL
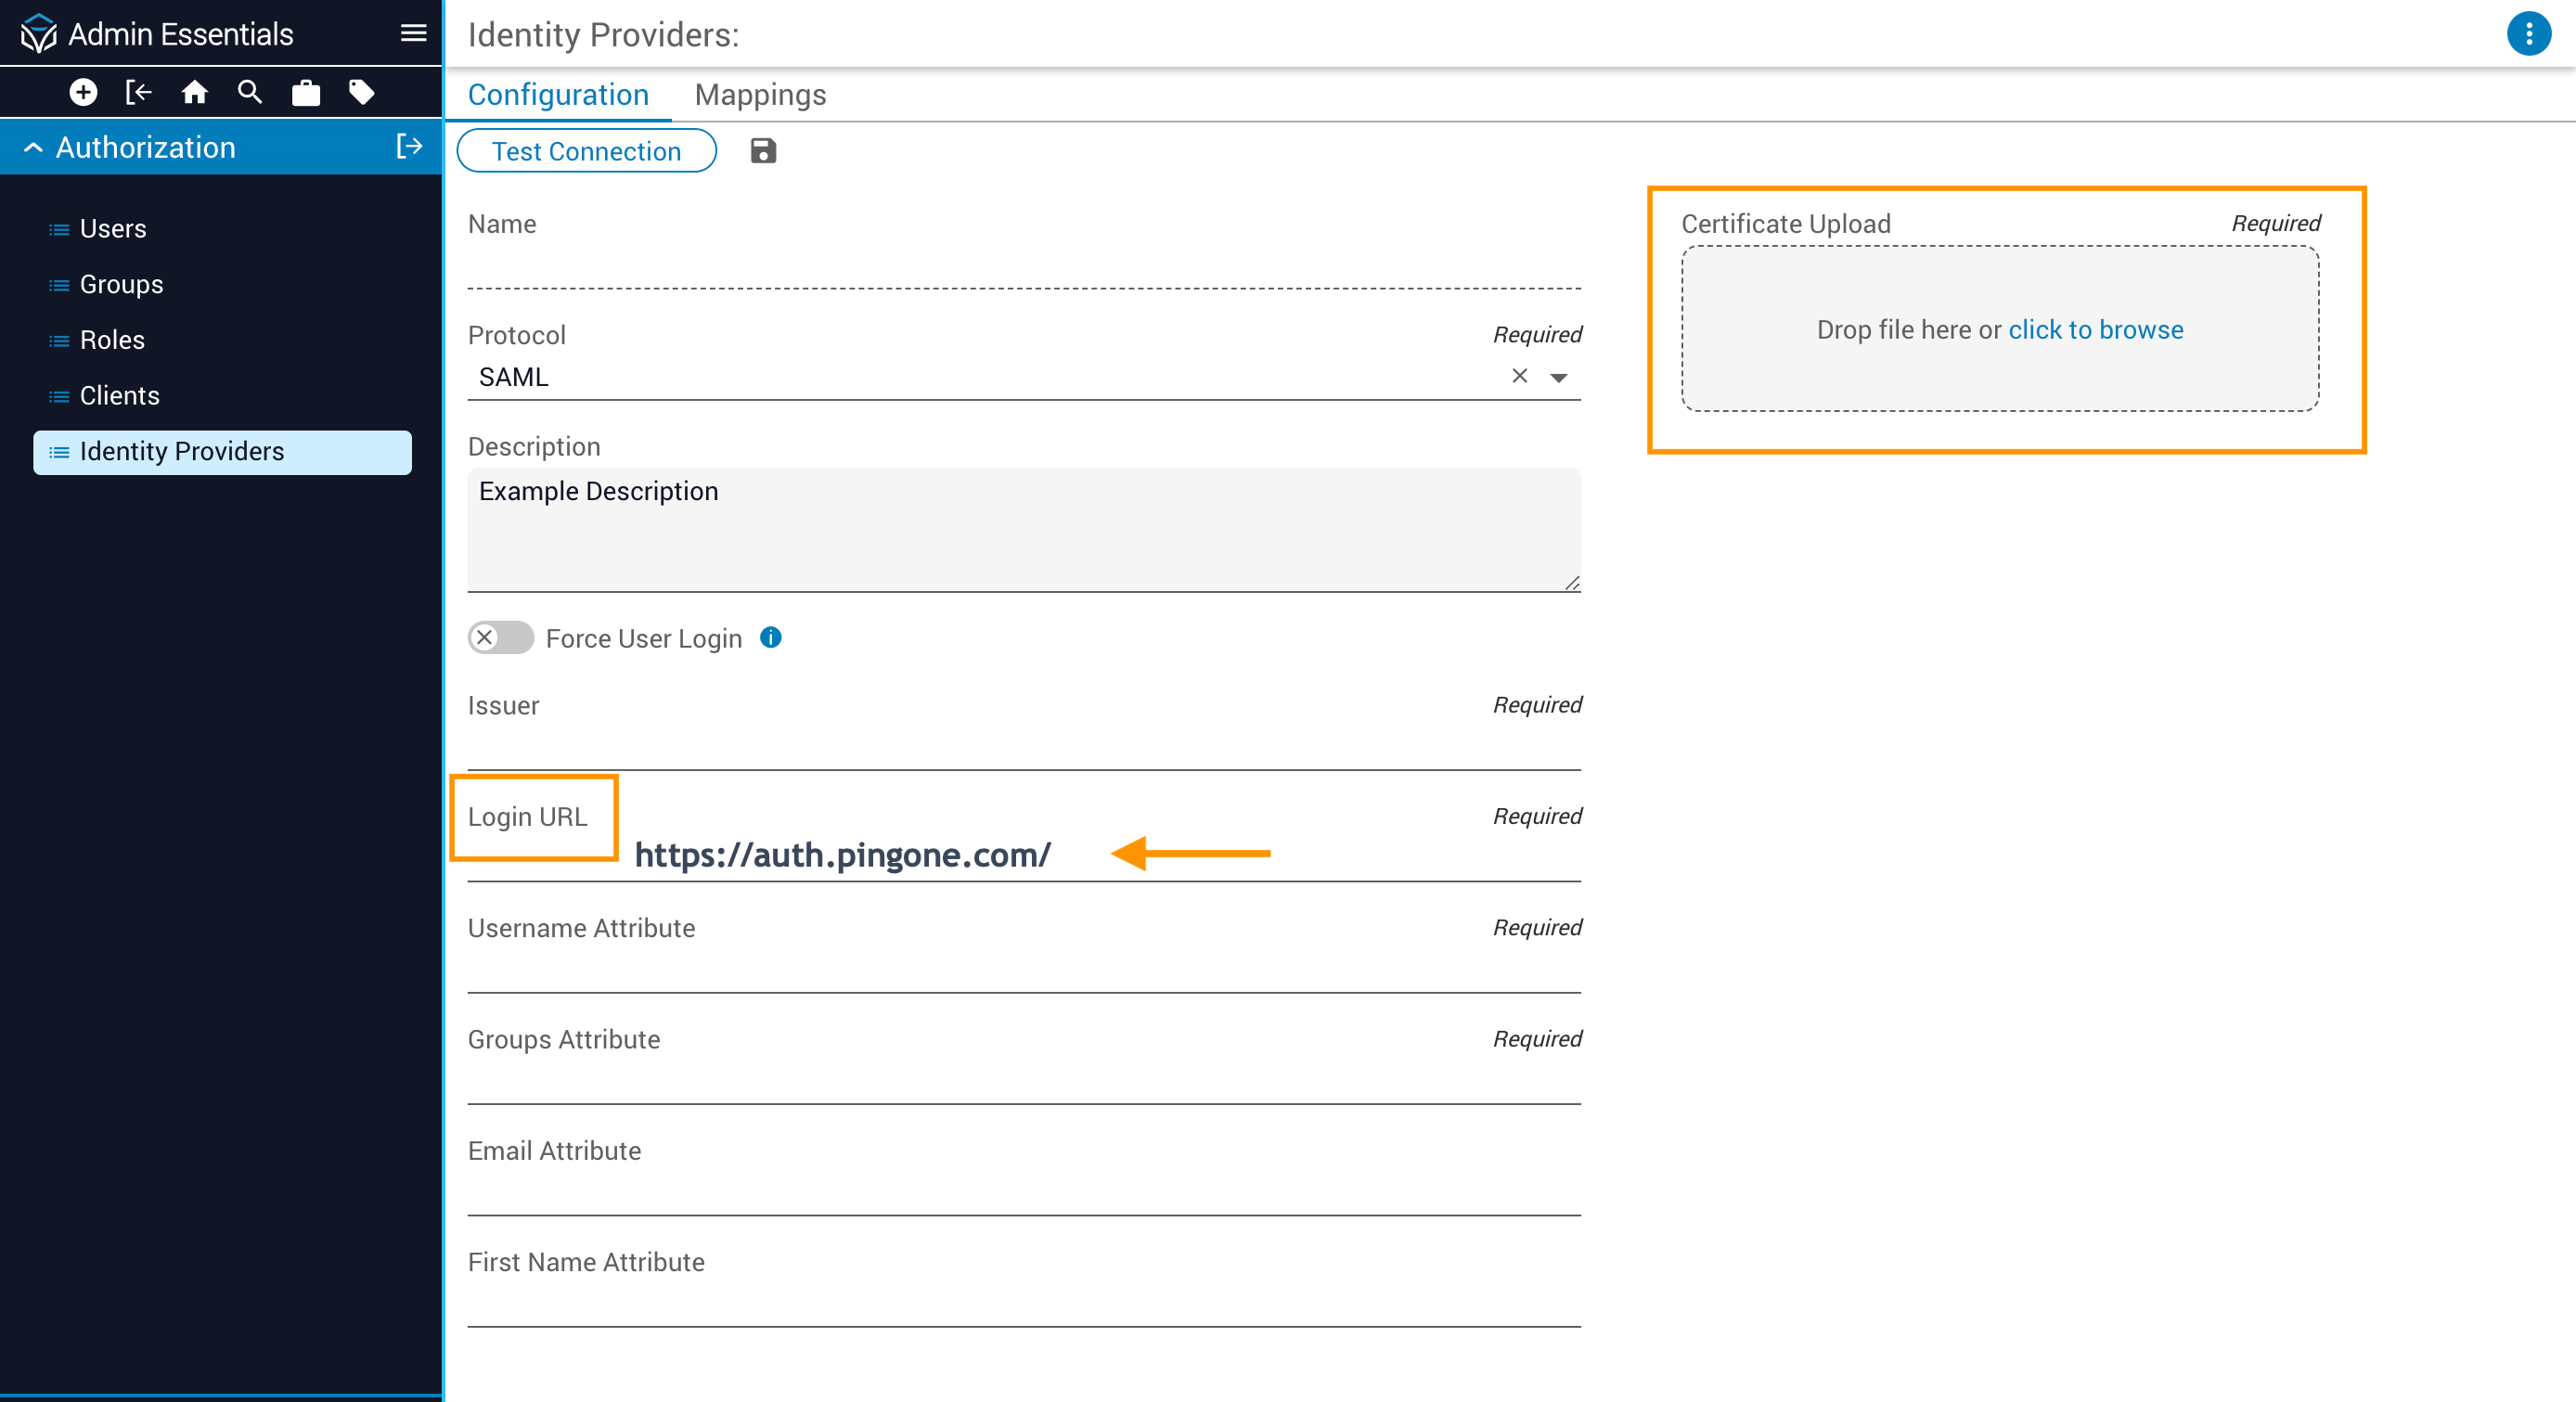
Download the Signing Certificate file from the PingID administrative console (Applications > Configuration). In Itential Platform, enter the Single Signon Service key in the Login URL field. Upload the certificate file to the Identity Providers Configuration form by drag-and-drop, or use the Click to Browse link to find and select the file.
Copy attribute mappings from PingID
In the PingID administrative console, go to Applications > Attribute Mappings and copy the Username, Group Names, and Email Addresses values from the PingOne column.

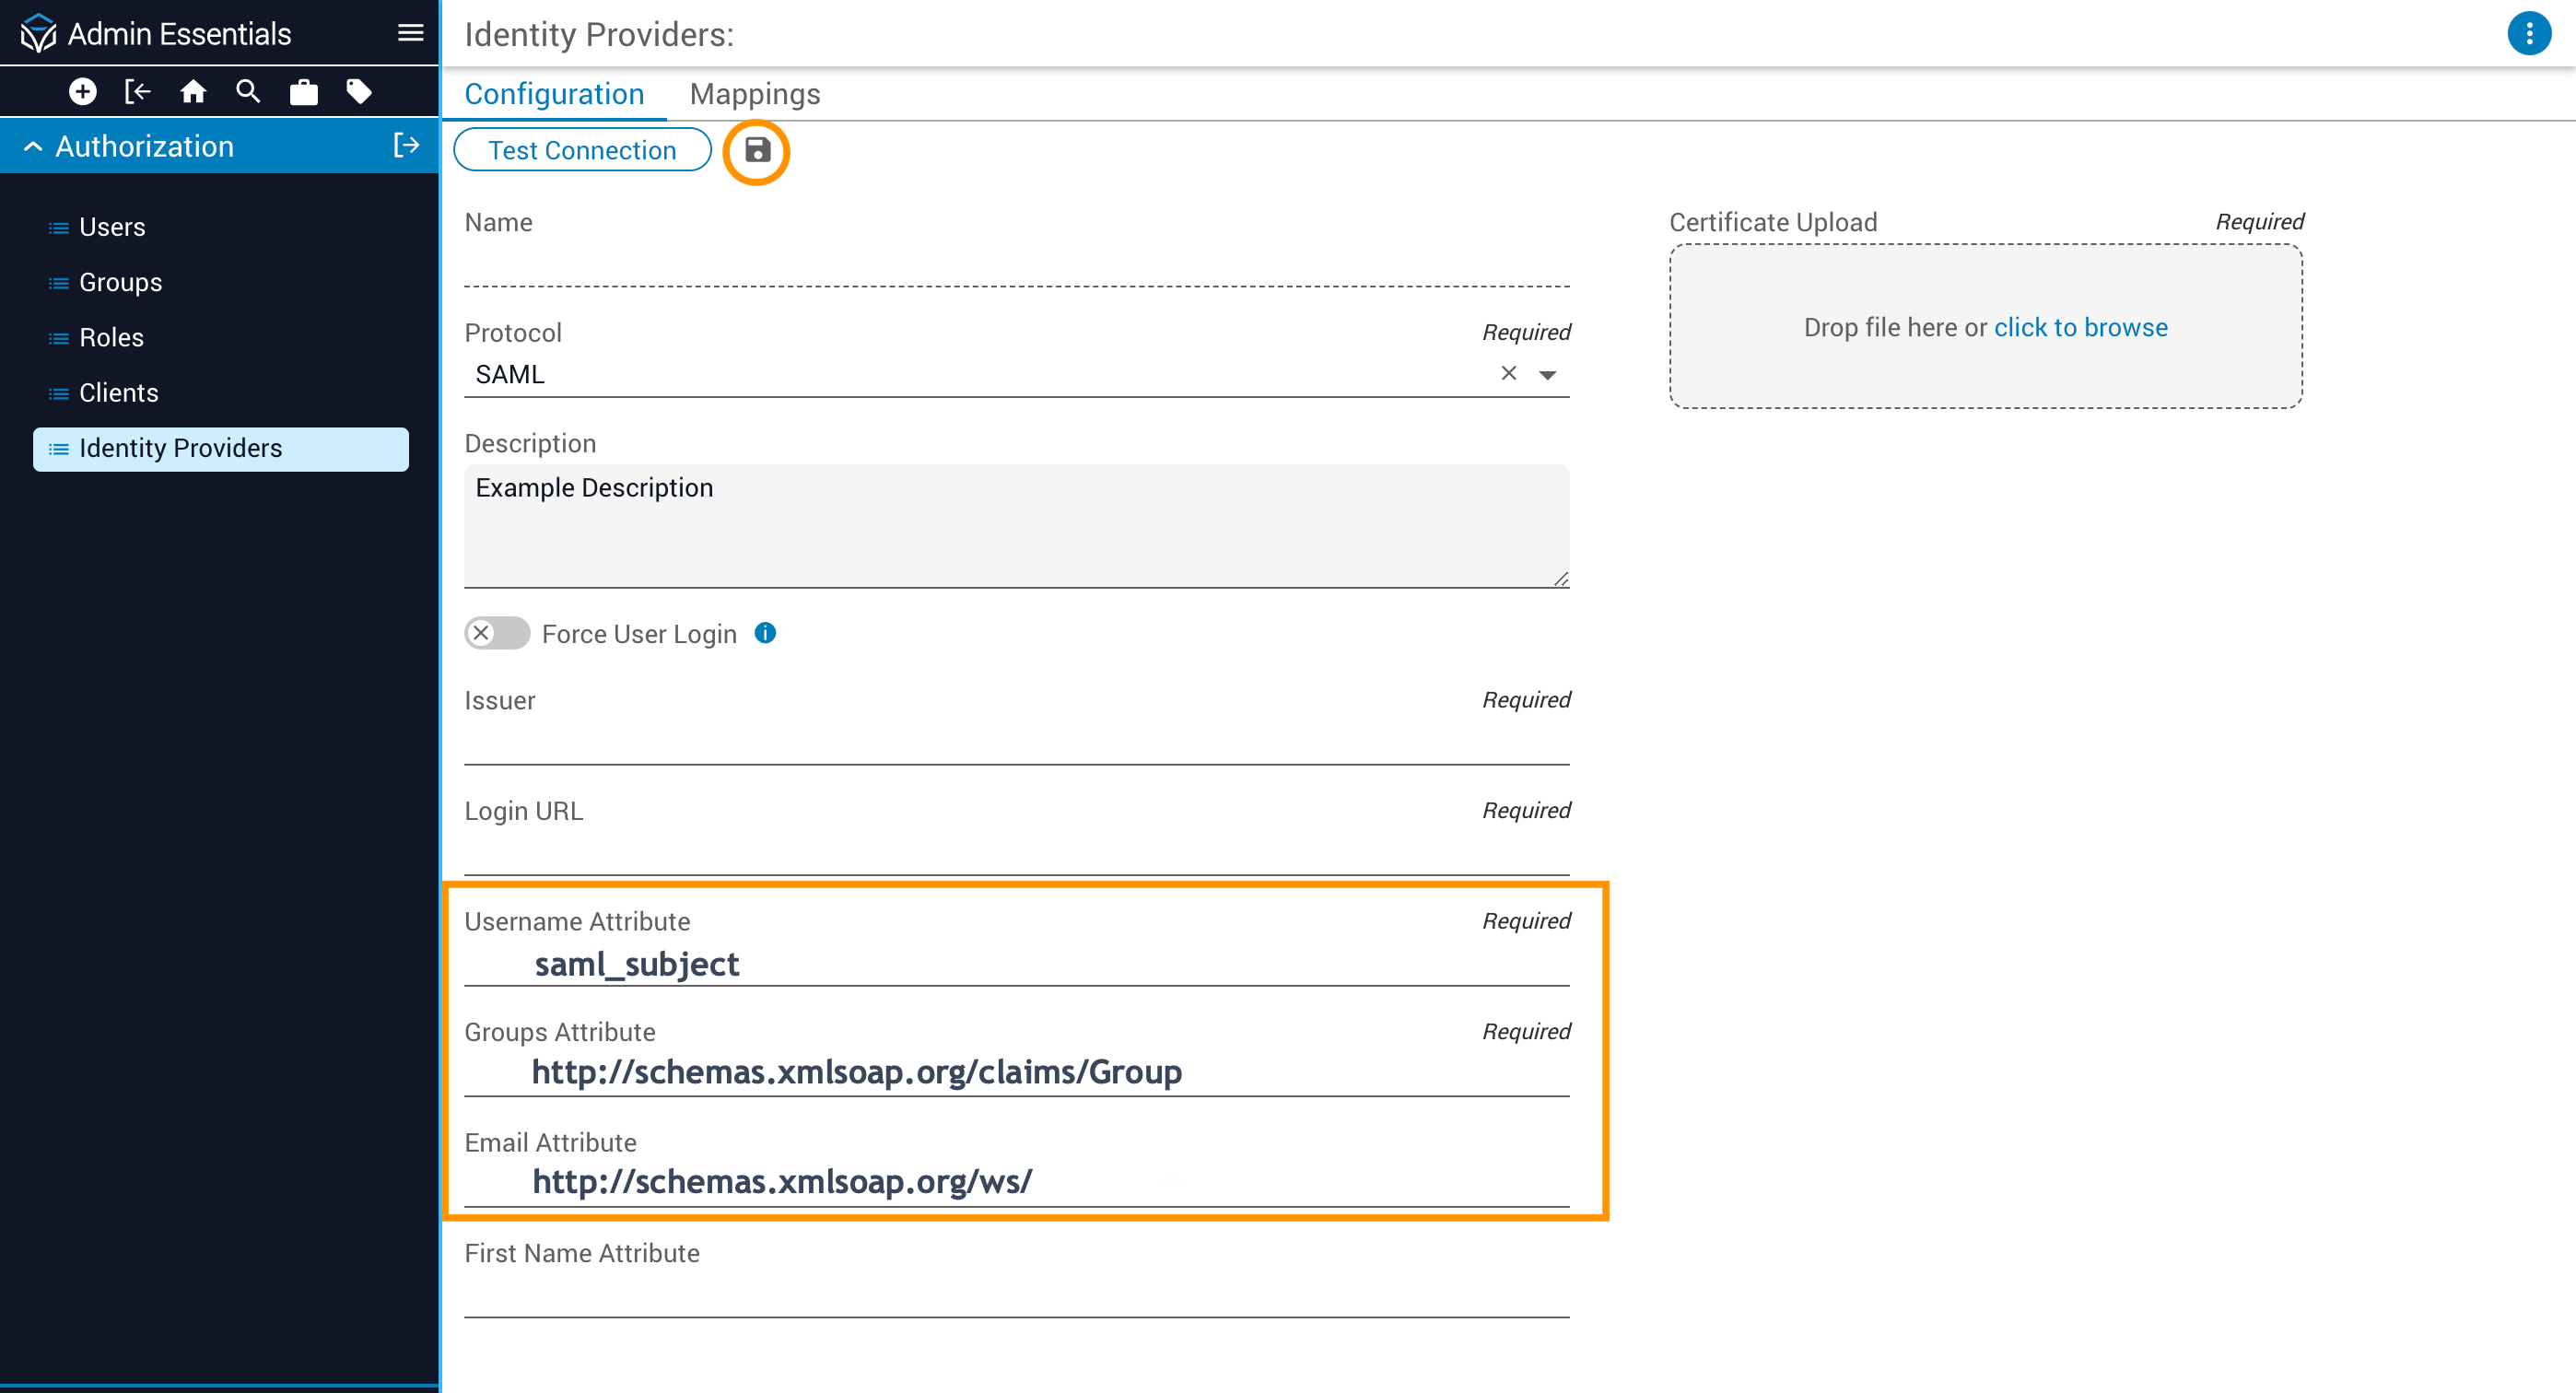
Paste attribute mappings into Itential Platform
In Itential Platform, on the Identity Providers > Configuration tab, paste the PingID values into the corresponding fields:
Username→ Username AttributeGroup Names→ Groups AttributeEmail Addresses→ Email Attribute
Test the PingID configuration
To enable PingID in Itential Platform, you must test the configuration first. Click the Test Connection button at the top of the Identity Providers page (under the Configuration tab). This initiates SSO SAML authentication with PingID in a new tab and displays a message indicating whether the test was successful.
If the test is successful, all parameters are set correctly and you can close the tab. After a successful test connection, Groups from the authentication server display and can be mapped to Itential Platform groups and roles. Map at least the pronghorn admin group to provide permissions within Itential Platform.

If the test is unsuccessful, there may be a problem with the parameters or certificate. Check your configured SAML settings to verify all attributes are mapped correctly.

Enable PingID SSO
Navigate to Admin Essentials > Authorization > Identity Providers. Locate the PingID IdP and slide the toggle switch to Enabled.
Once PingID is enabled, the Itential Platform authentication method immediately switches to SSO SAML.
