viewData
The viewData task displays a form to users containing job data and enables decision-making for the next workflow step.
Potential use cases
Use viewData for approval workflows where someone needs to review data and approve or reject, or for debugging and monitoring where operators need to see workflow state and decide whether to continue or retry steps.
Properties
How to configure
This example configures a viewData task that displays current time information and allows workflow re-execution. It uses a getTime task as a prerequisite. See the getTime task reference for more information.
Configure viewData inputs
Select the viewData task and configure the following:
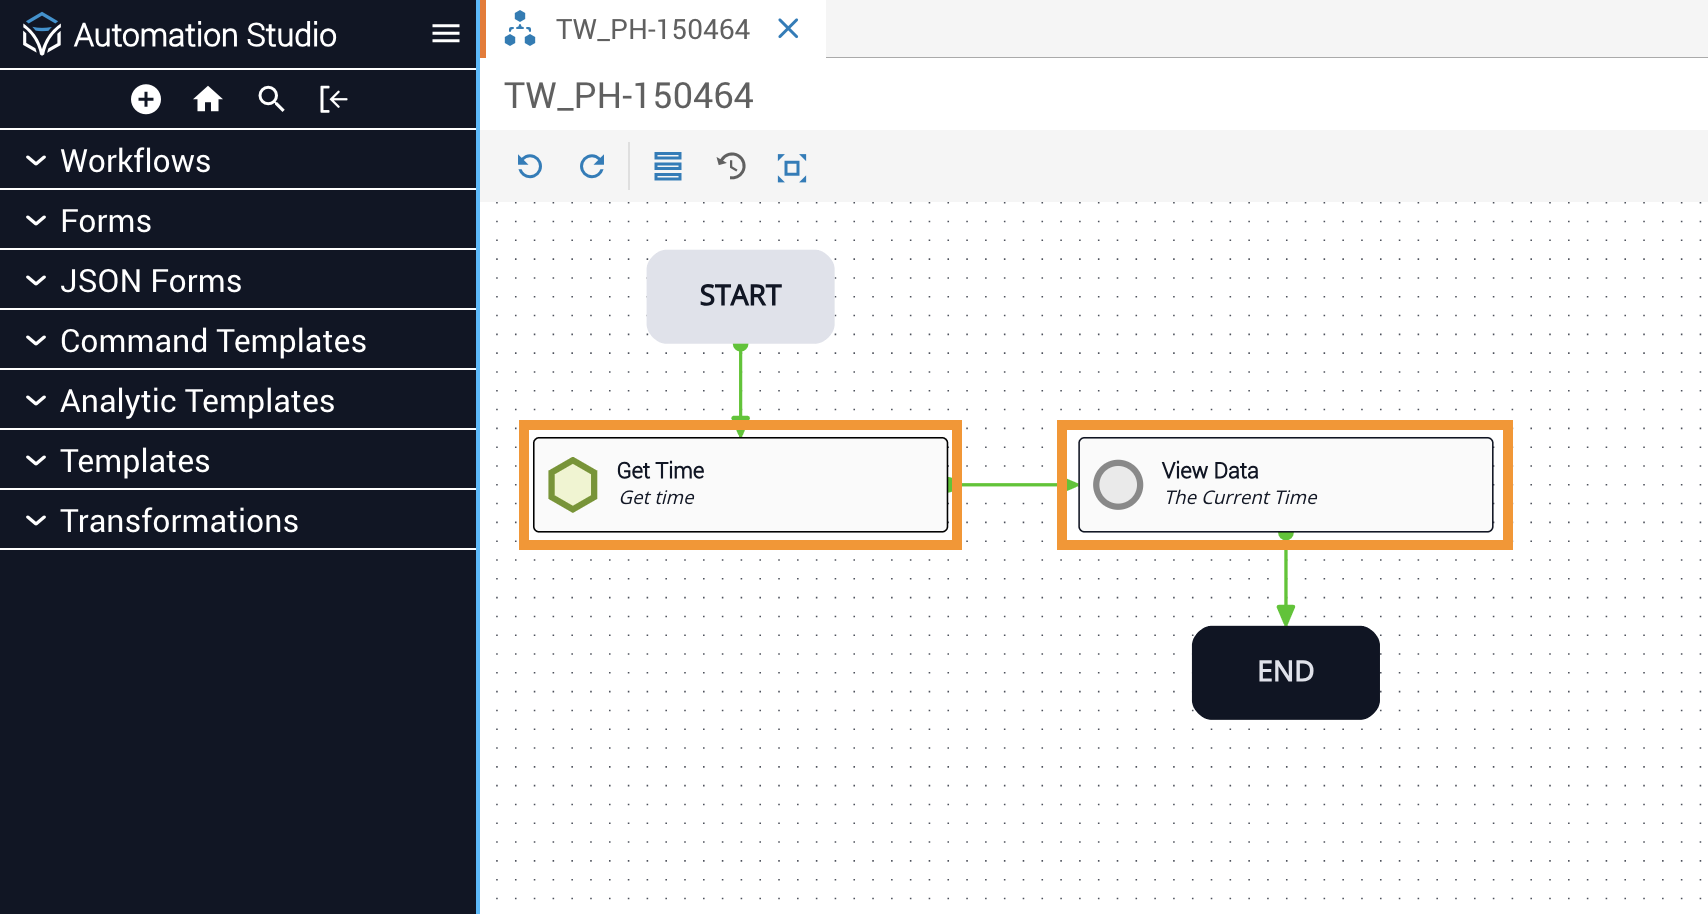
- header:
The Current Time is... - message:
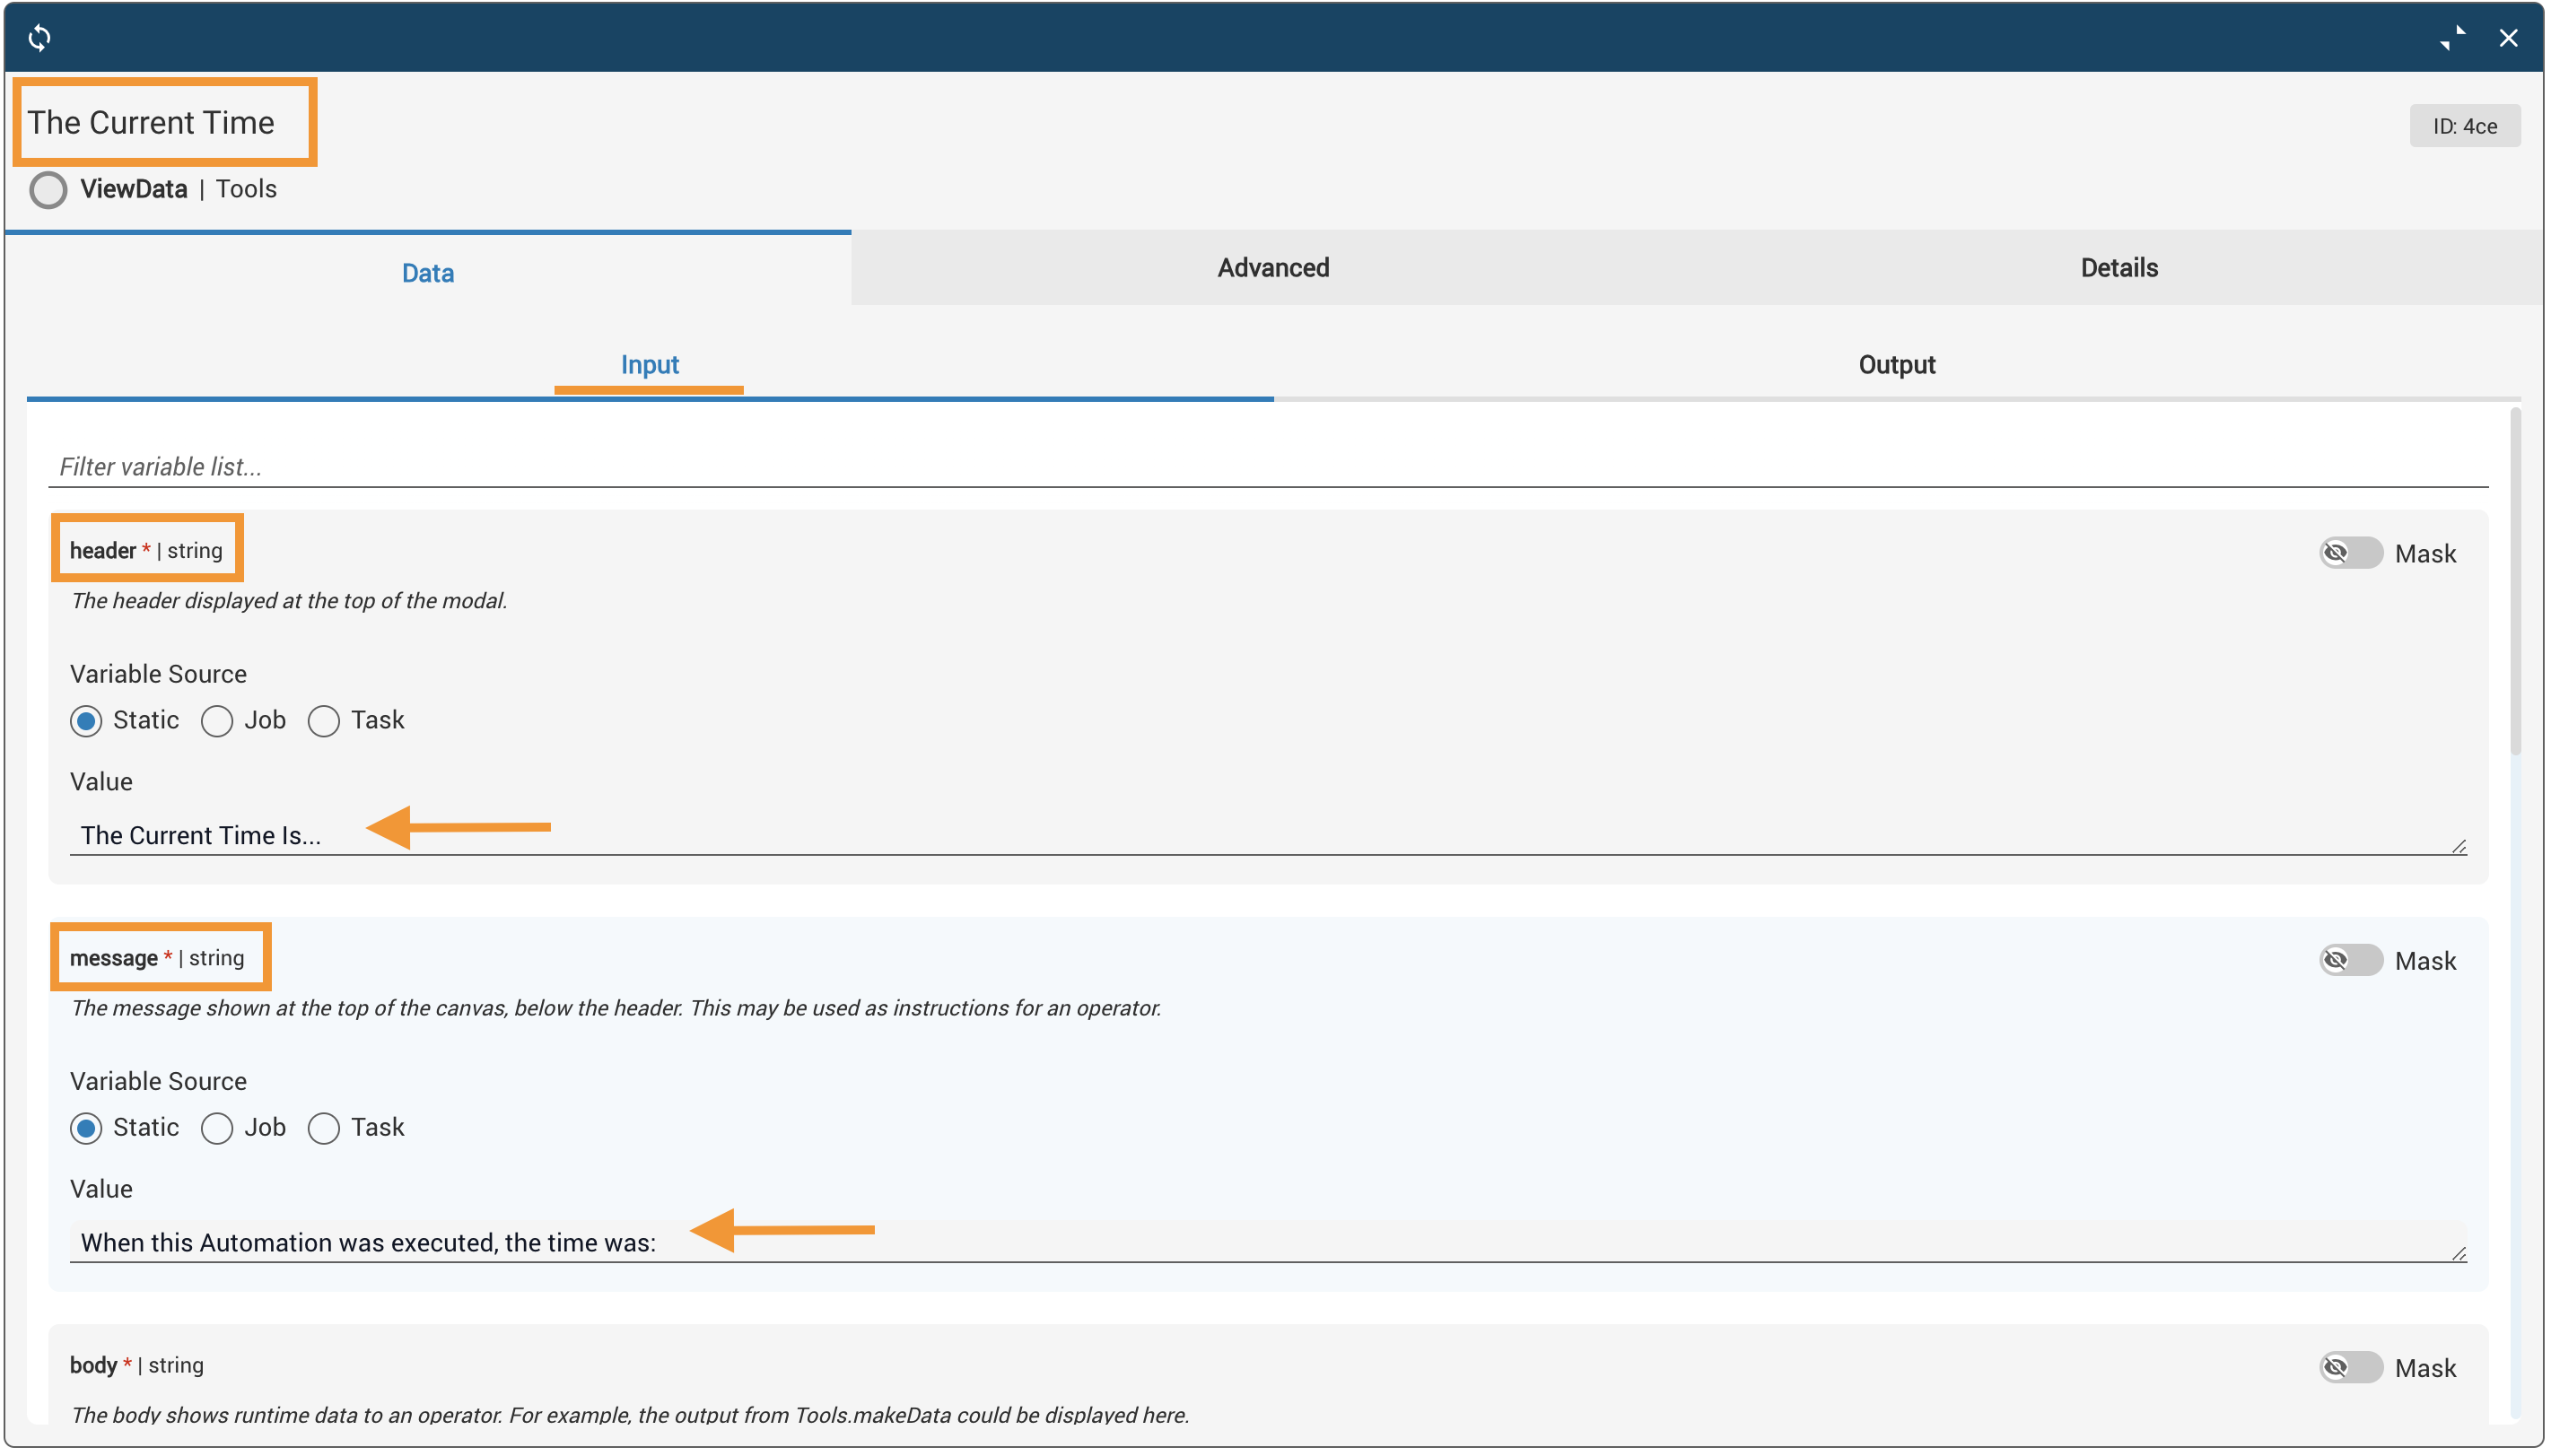
When this Automation was executed, the time was: - body: Set Reference task to
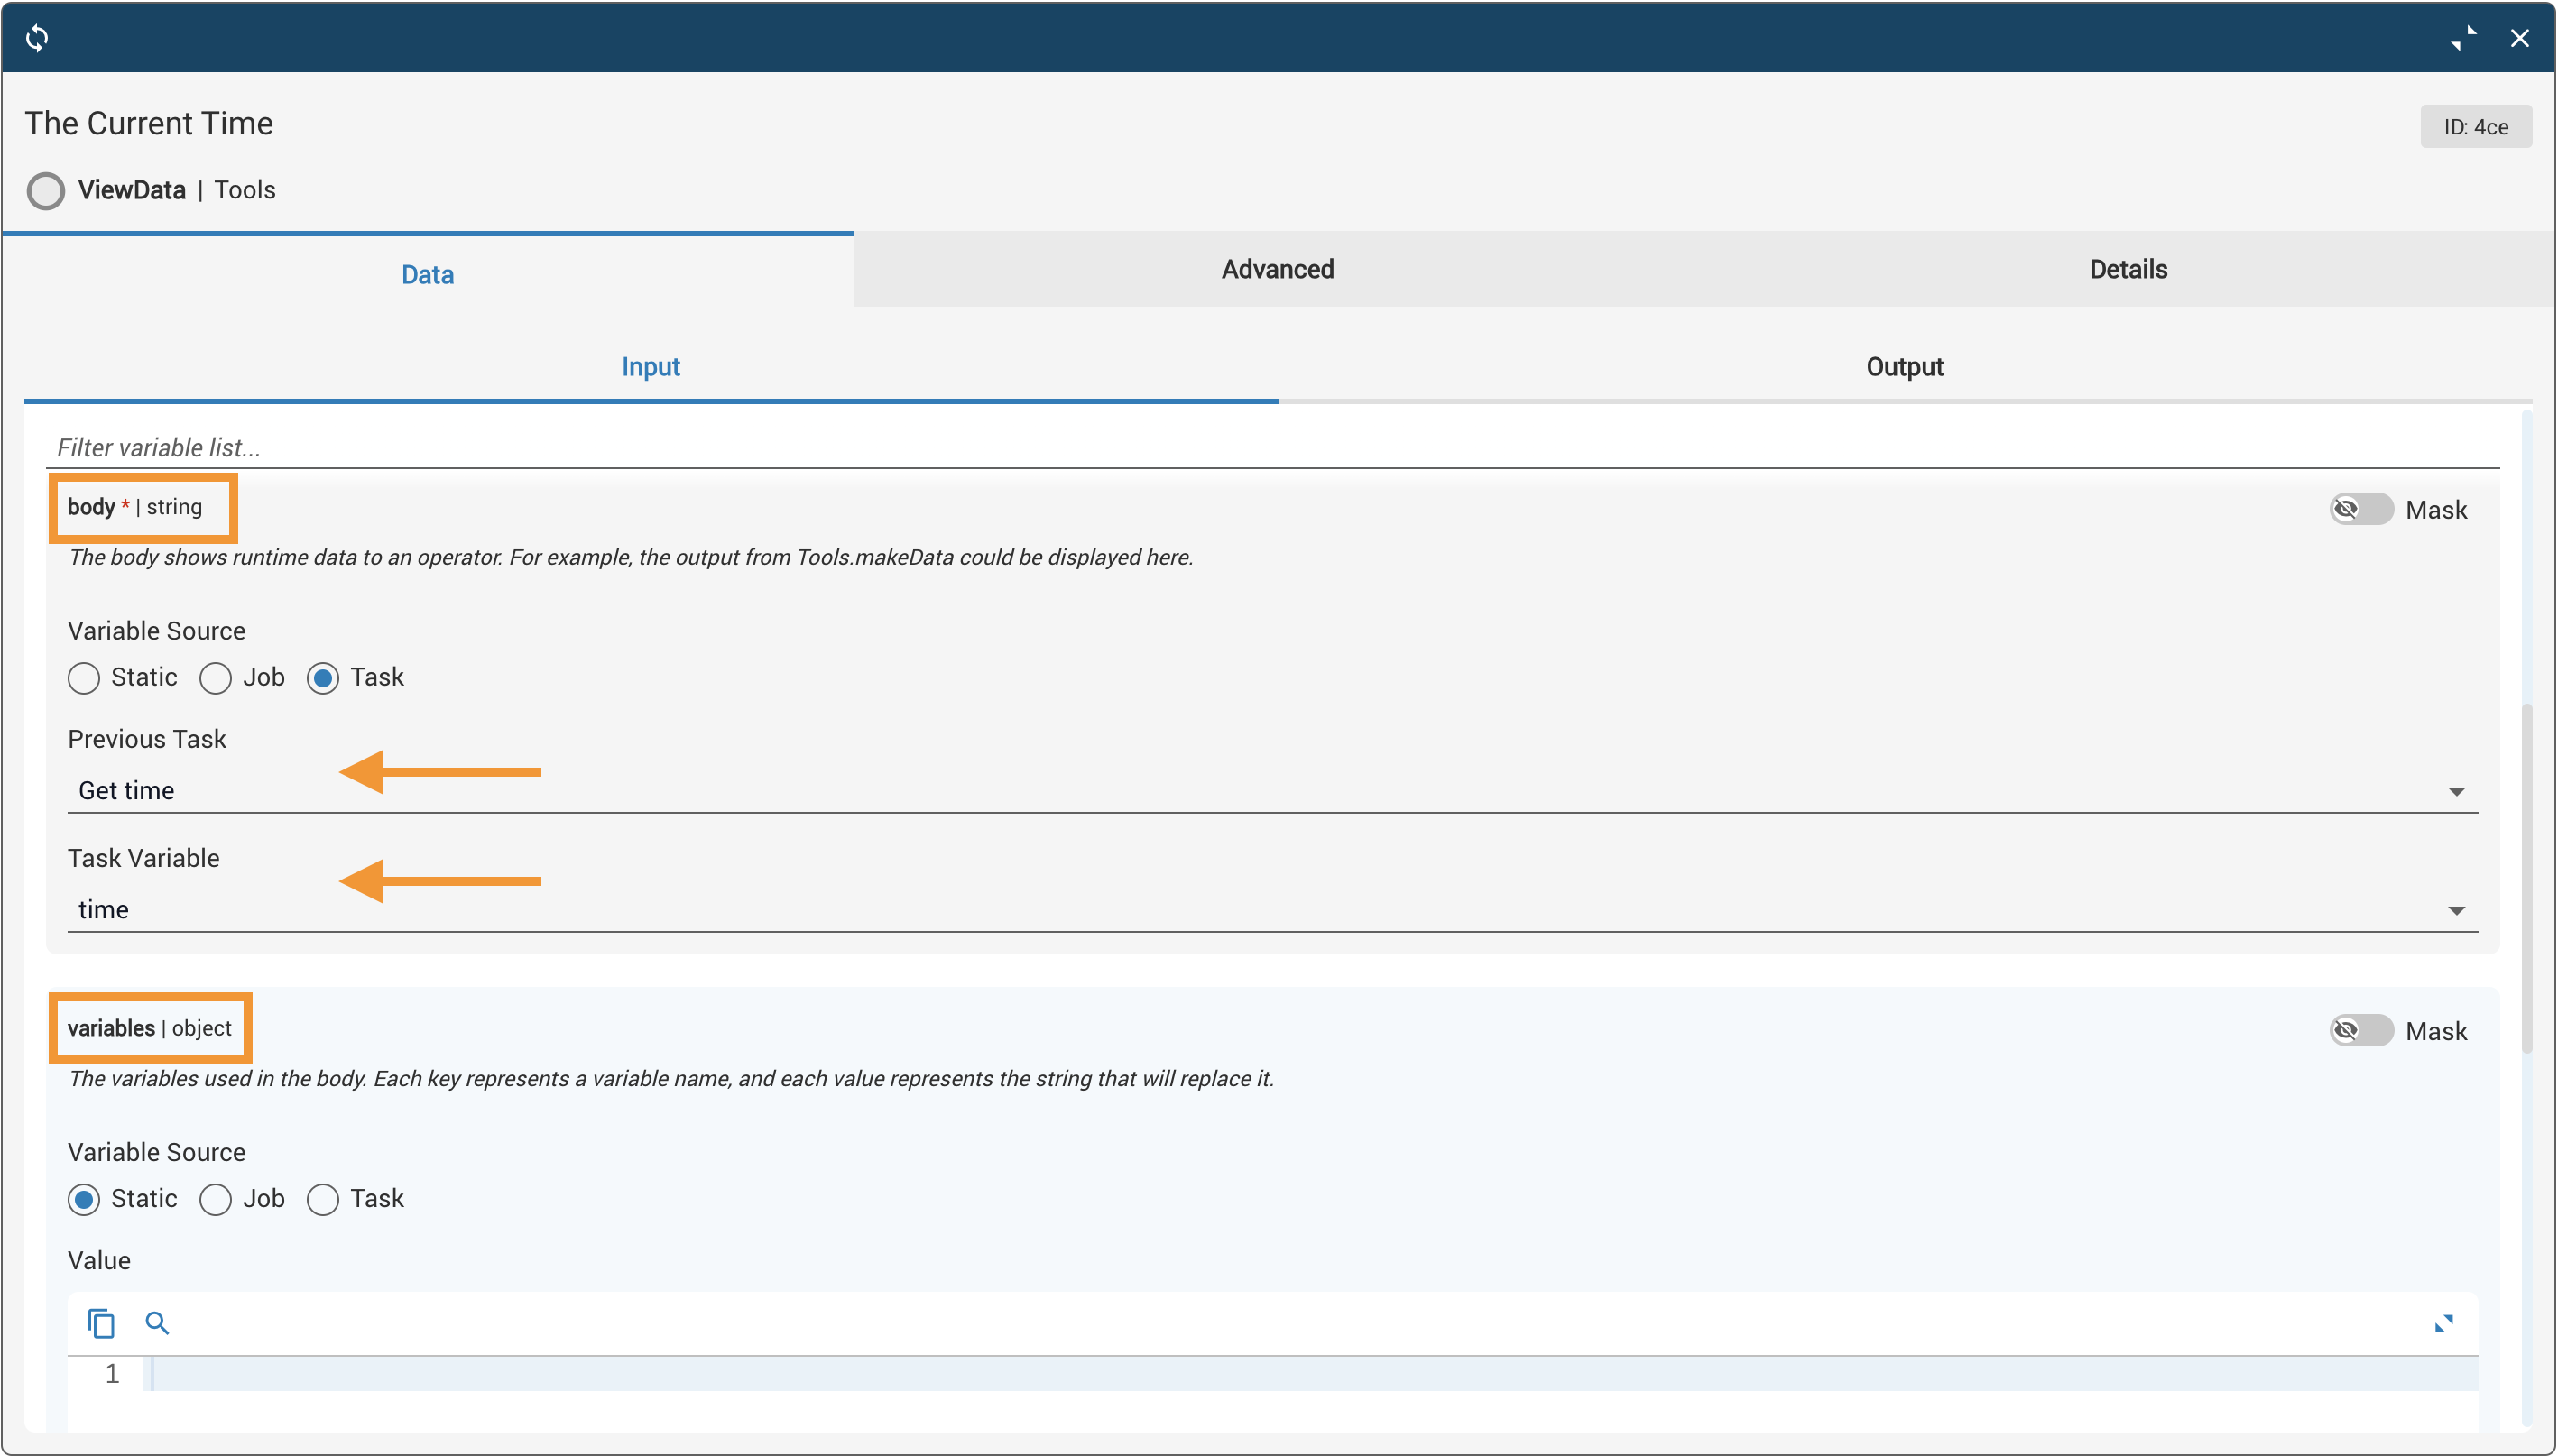
getTimeand Reference variable totime - btn_success:
I am done. - btn_failure:
Do it again.
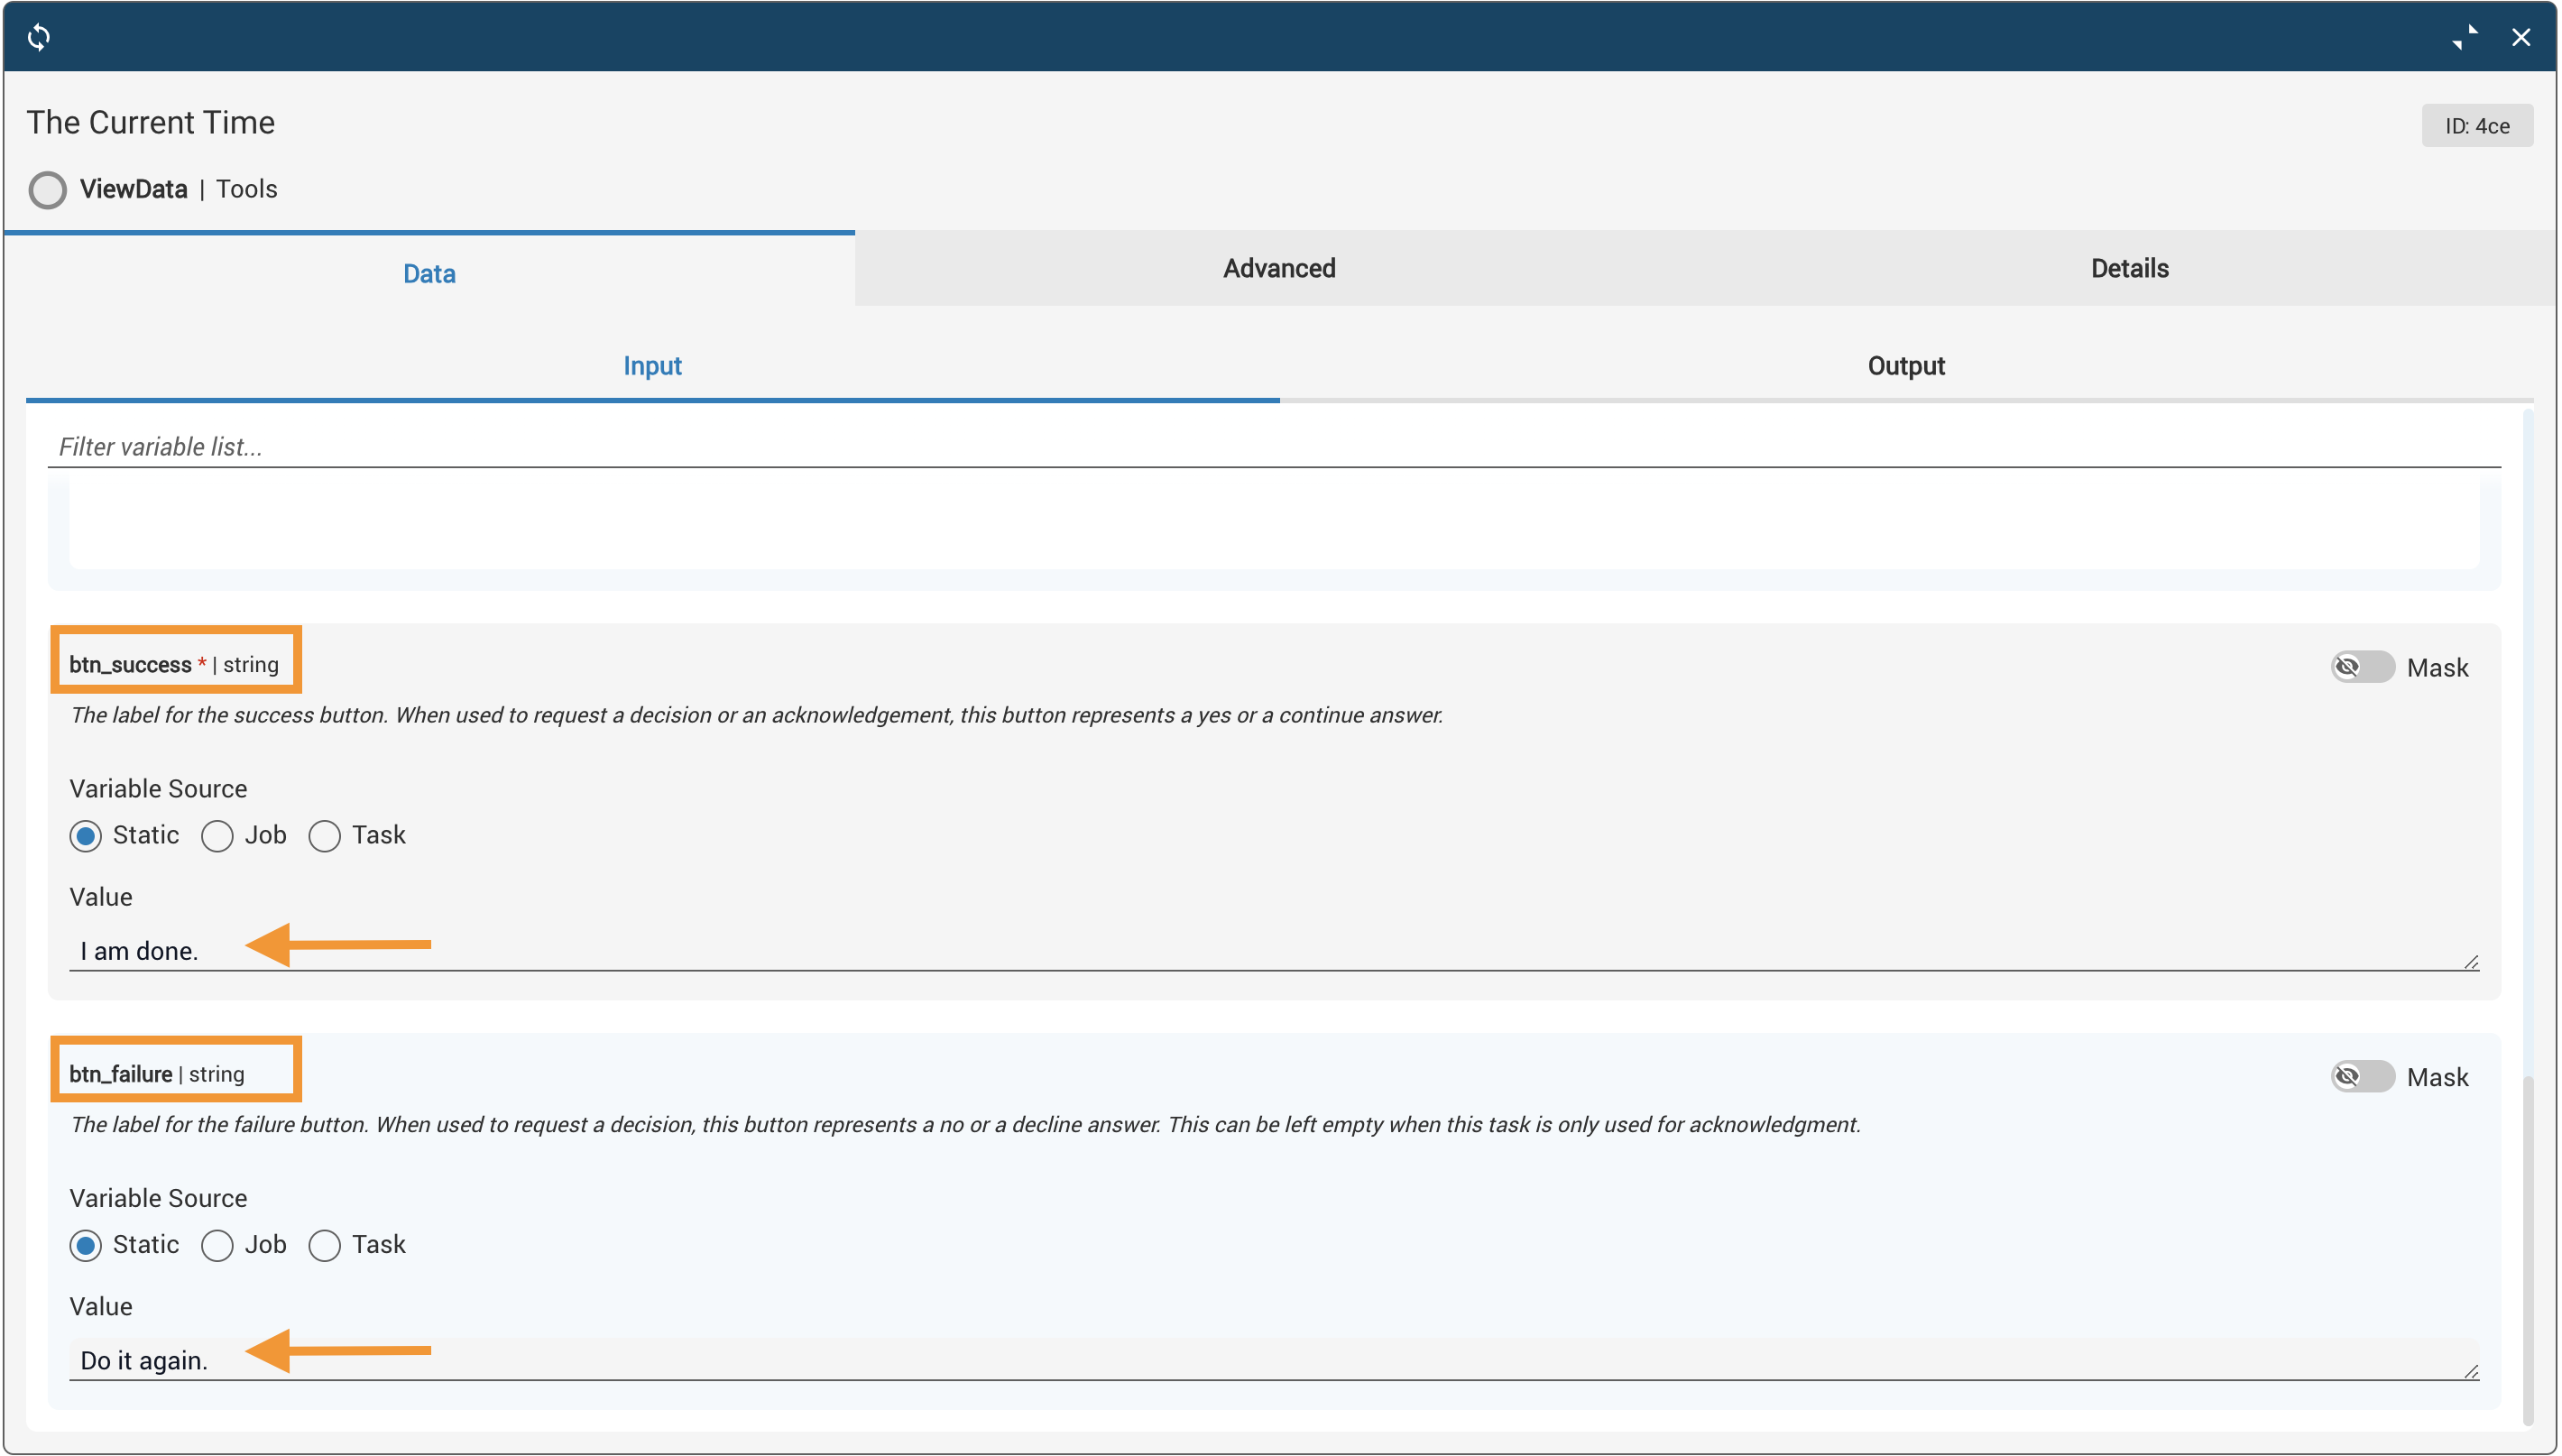
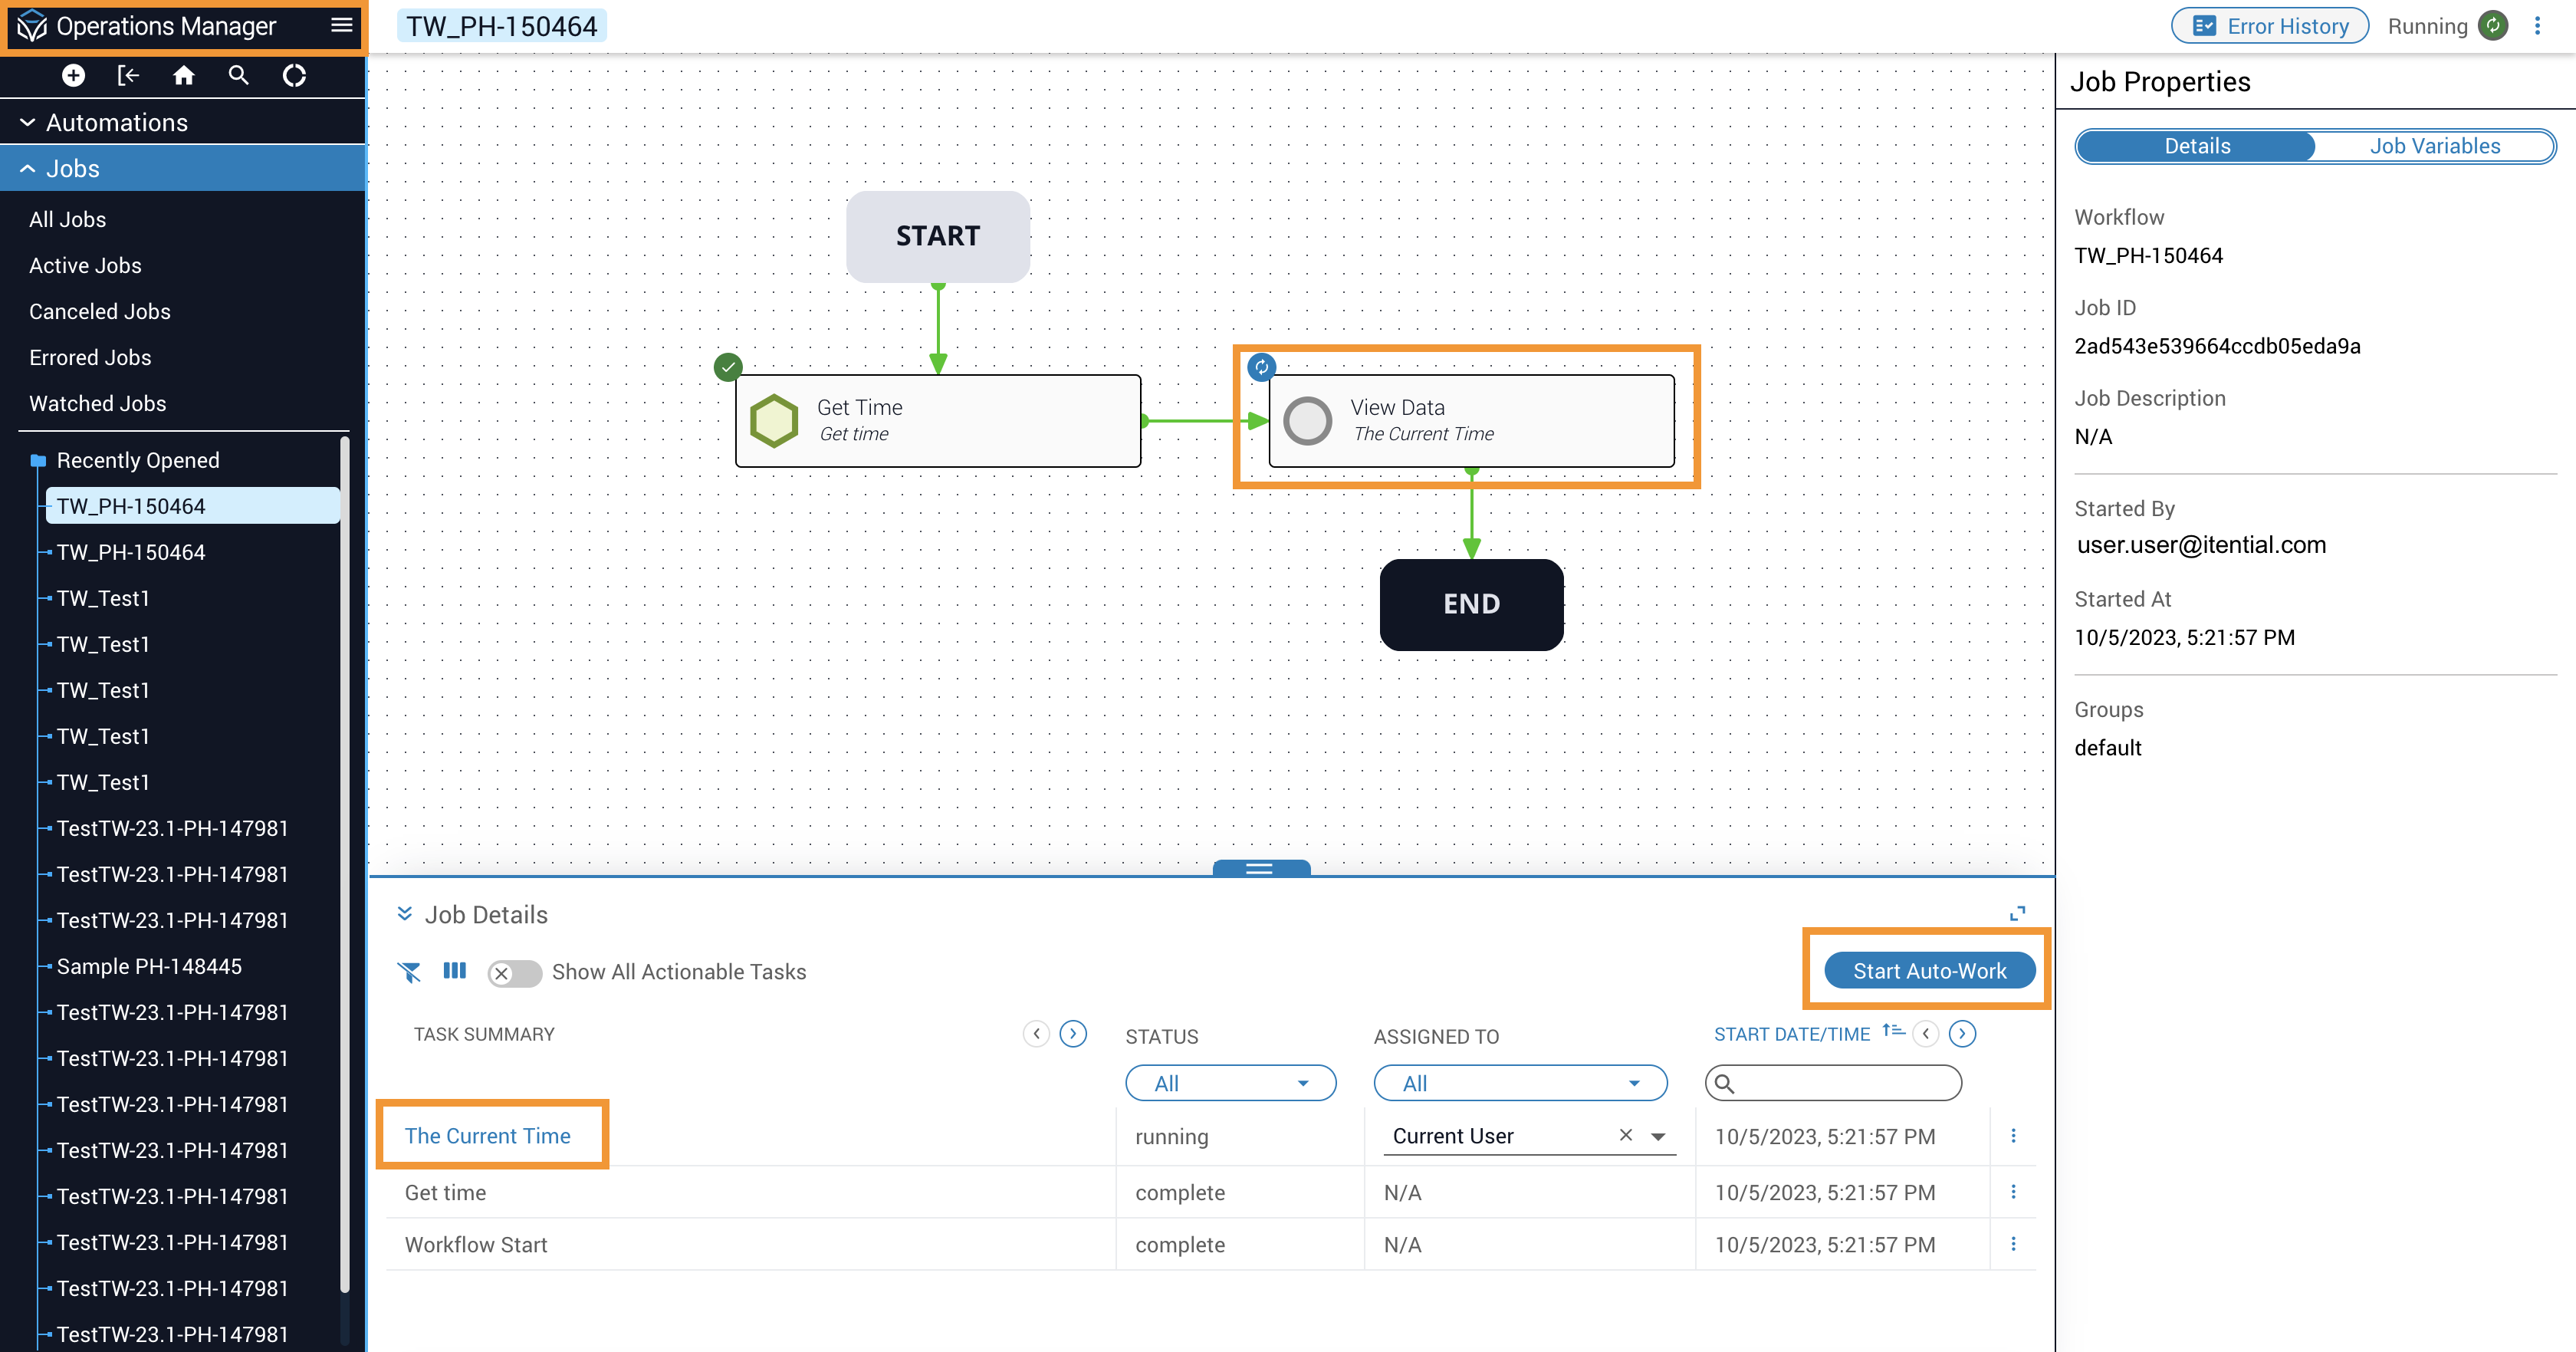
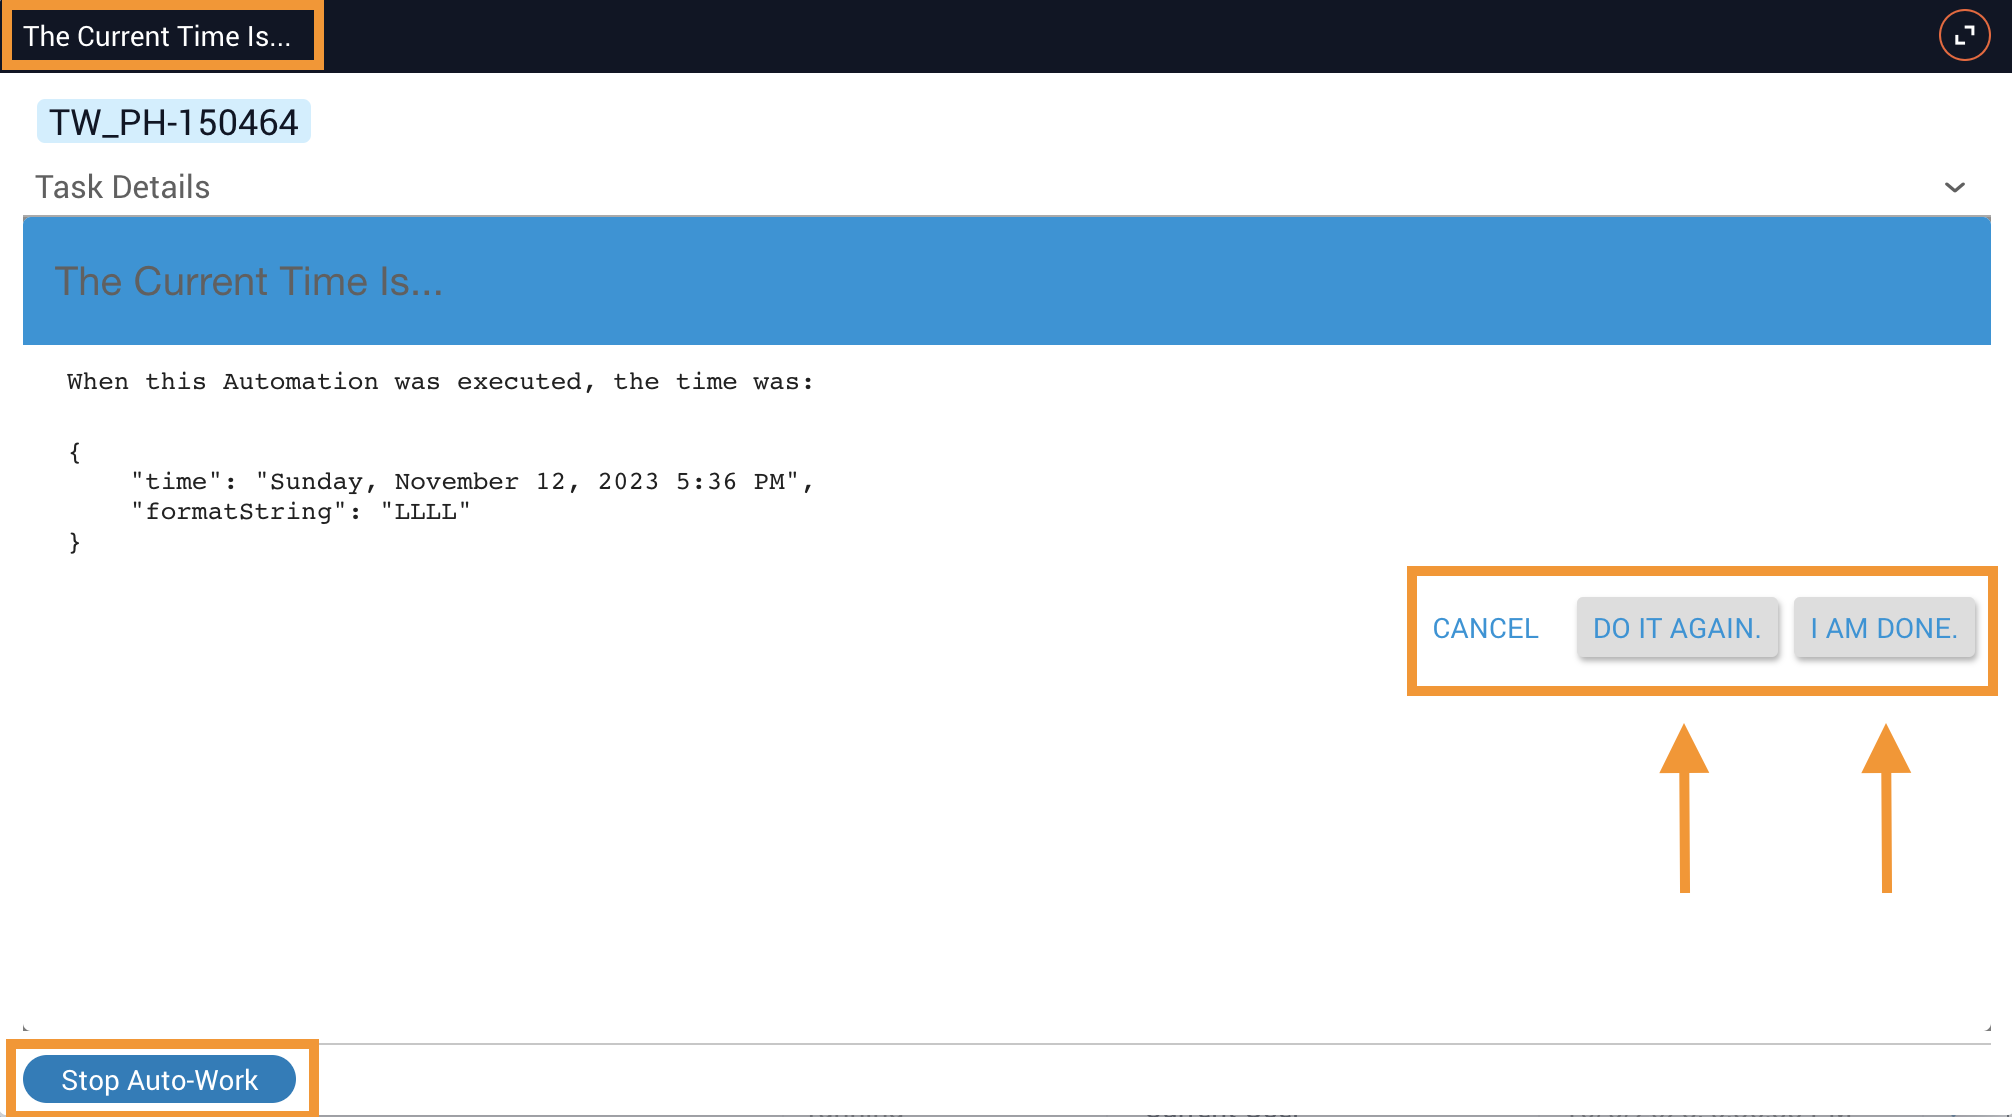
When the workflow reaches the viewData task, a Work Task link appears in Jobs (Operations Manager). Click the link to open the form and make a selection.
With this design, clicking I am done ends the job. Clicking Do it again follows the revert failure transition back to getTime, which re-runs and presents a new timestamp. This loop continues until the user clicks I am done or cancels the task. If the user clicks Cancel on the form, the modal closes but the job continues running until worked or cancelled.
Example — using the variables parameter
The variables field lets you pass JSON properties (strings) that can be referenced in the body of the viewData task usingItential Platform-specific syntax: <!parameterName!>.
In the configuration example above, instead of passing the getTime response directly as the body, you can use it as the input variables. Update the body to something like The current time is <!time!> and set variables to the getTime task. The <!time!> placeholder is replaced with the actual time value at runtime.
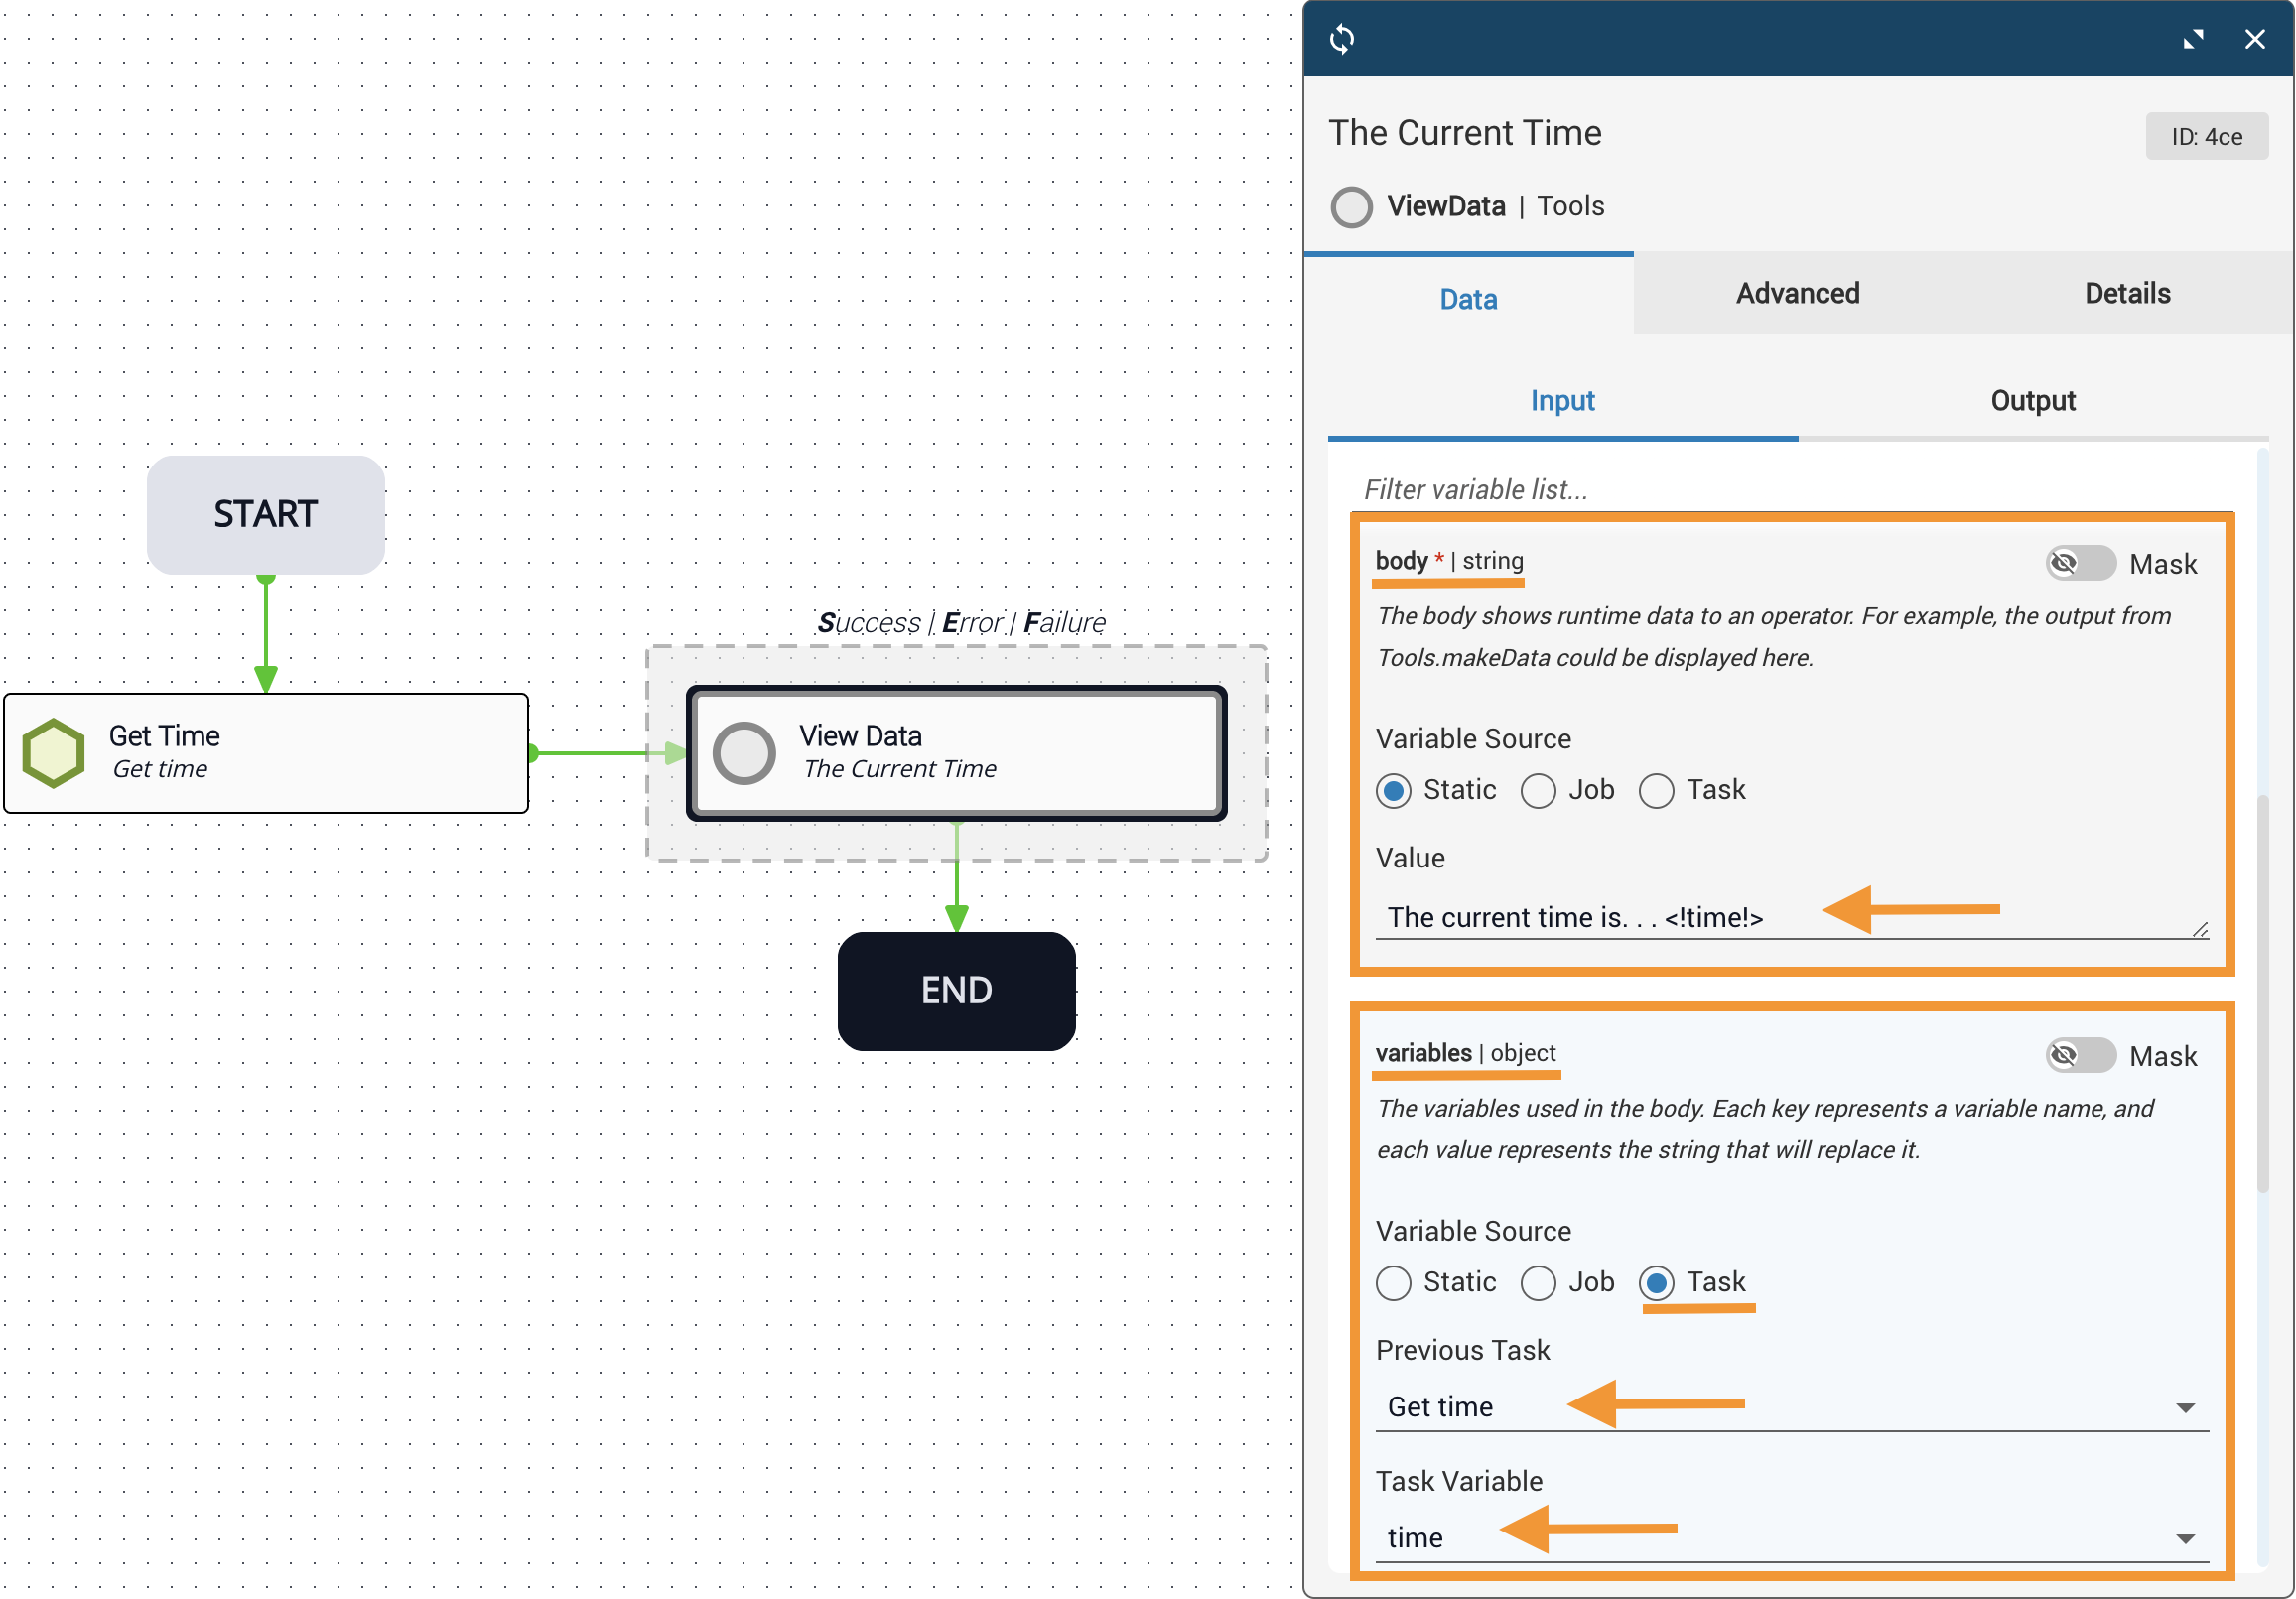
viewData task using getTime output as the variables input and syntax in the body
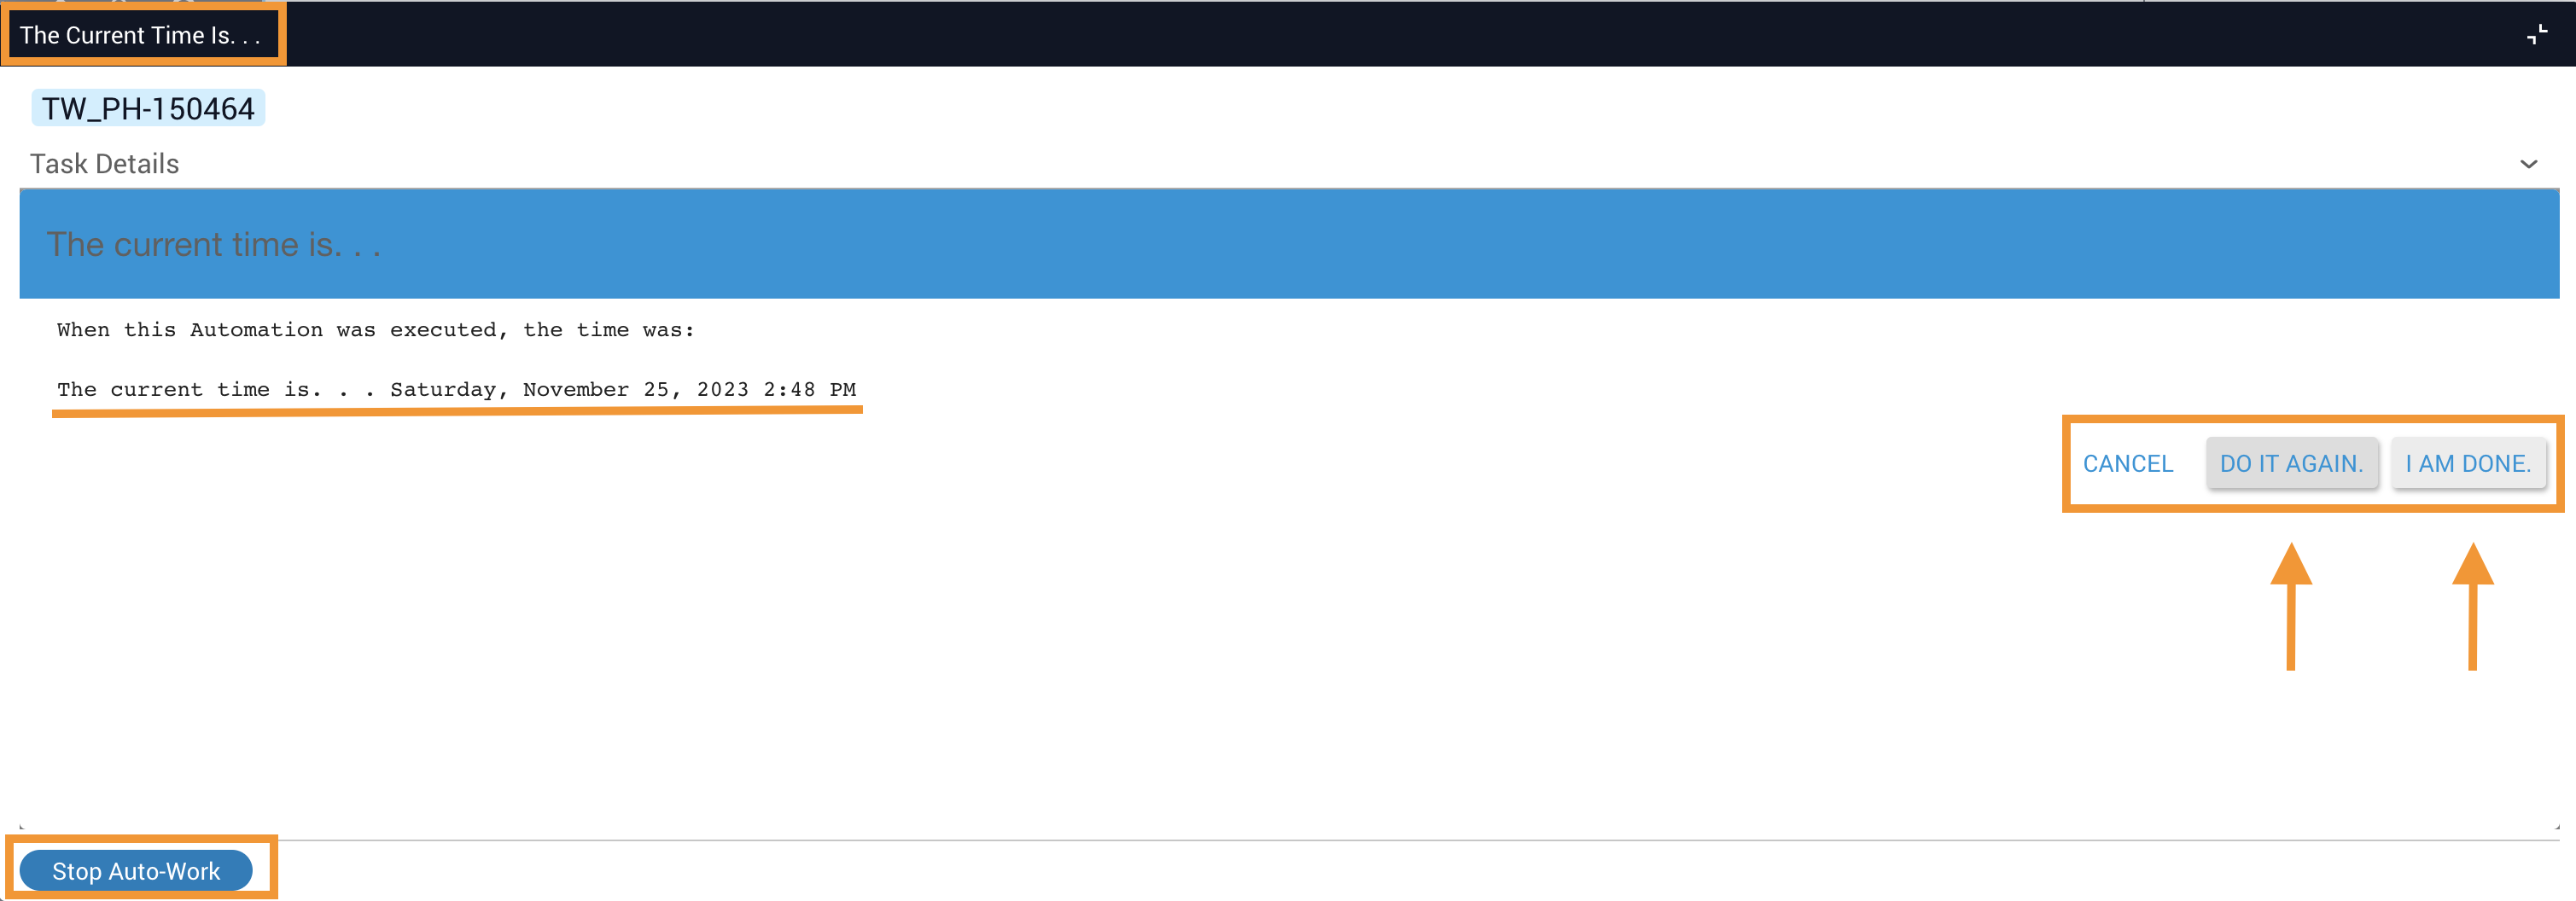
Once the automation completes, a Work Task link (Start Auto-Work) appears on the viewData task in Jobs (Operations Manager). Clicking the link opens the form prepared with the variable-substituted content.
Related reading
For related information, see the ViewData API reference.