Create and manage transformations
A JSON Schema Transformation (JST) uses a combination of JSON Schema and JavaScript methods to reformat JSON data. JSTs are created and managed in Itential Platform using the JST Designer application.
Create a new JST
Open an existing JST
Click the down arrow for the Transformations collection in the side navigation to expand the list of existing transformations, then click the desired transformation to open it in JST Designer.
If you know the name of the JST you’re looking for, search for it using the Search Bar at the top of the Transformations accordion, or via the Studio Collection View.
JST Designer canvas
After you create or open a JST, it opens in the JST Designer canvas — the main interface for constructing a JST, including adding incoming and outgoing schemas, methods, and functions.
Canvas UI

Incoming schemas
When a JST receives JSON data, it is first validated against one or more incoming schemas — JSON schemas that ensure the input data meets the required structures and constraints.
Incoming schemas can be added in two ways: by adding a standard incoming schema, or by adding a workflow task schema (an incoming schema tailored to a specific workflow task).
Add an incoming schema
To open the Add Incoming Schema modal, hover over the Add (+) button on the Incoming Schemas panel and select Incoming Schema from the context menu.
Create an incoming schema
Enter the schema
Enter an incoming schema into the Schema Editor using one of these methods: type or paste it directly; type or paste example JSON into the Example JSON Editor and click Infer Schema From Example JSON; or click Upload Schema (↑) to upload an existing schema file.
Add a workflow task schema
Open the modal
Hover over Add (+) on the Incoming Schemas panel and select Workflow Task Schema. The Add Workflow Task Schema modal opens.
Edit, copy, or delete an incoming schema
Hover over an incoming schema in the Incoming Schemas panel. A toolbar appears with Edit, Copy, and Delete actions.
Outgoing schemas
An outgoing schema defines the structure of the data leaving the JST. Data being operated on must be connected to an outgoing schema to appear in the JST’s output.
Connect to an outgoing schema
Outgoing schemas can also be created manually using the same steps as incoming schemas.
Methods
Incoming JST data can be transformed before connecting to an outgoing schema using methods — low-code, drag-and-drop representations of JavaScript methods on the canvas.
Use a method
Place the method
Locate the method in the Methods tab of the work bench and drag it to the canvas. Method input parameters are on the left; return parameters are on the right. Hover over the information icon (ℹ) in the method header for documentation.
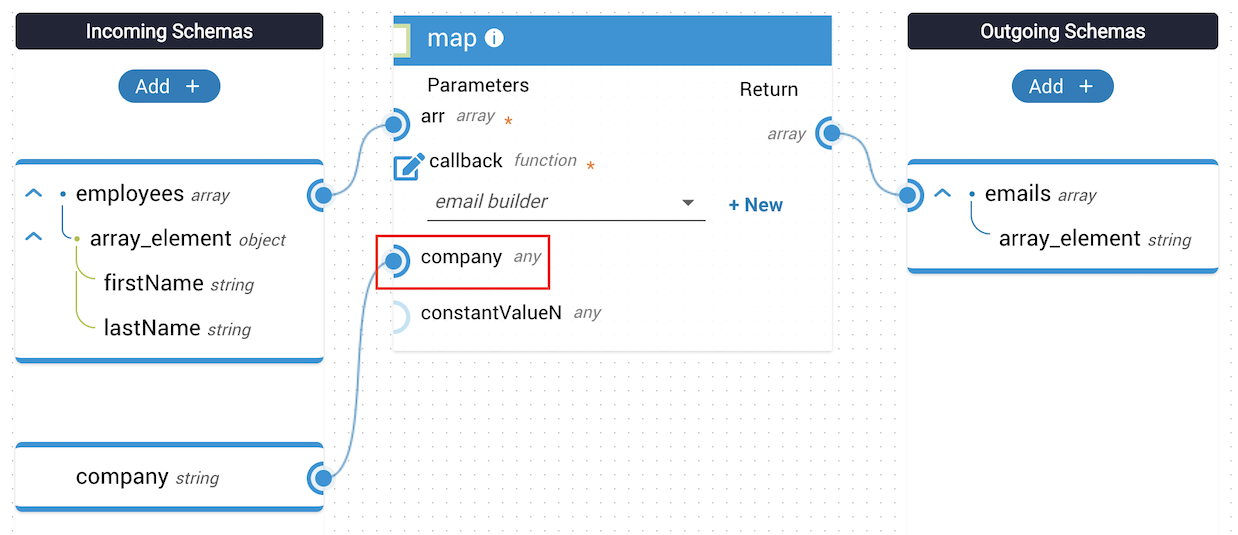
Constant values
Higher-order methods in JST Designer contain an optional parameter called constantValueN. These methods iterate through an array and accept a callback function invoked on each iteration. The constantValueN parameter lets you pass external data into that callback function.
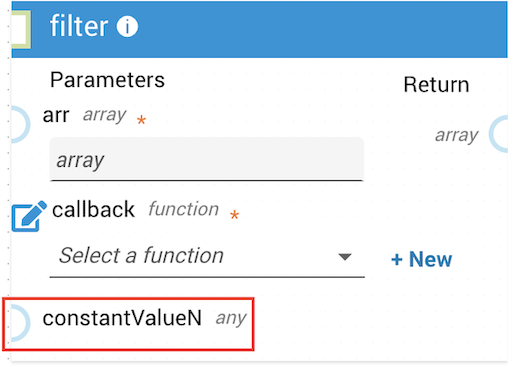
In early release versions (2022.1 and 2023.1), this parameter was called thisArg.
Example: use constant values
In this example, the employees array is passed to the map method. The JST takes this array and a provided company string and outputs an array of company emails. Because the company name is not available in the array parameter, it is passed in as a constant value to the callback function.
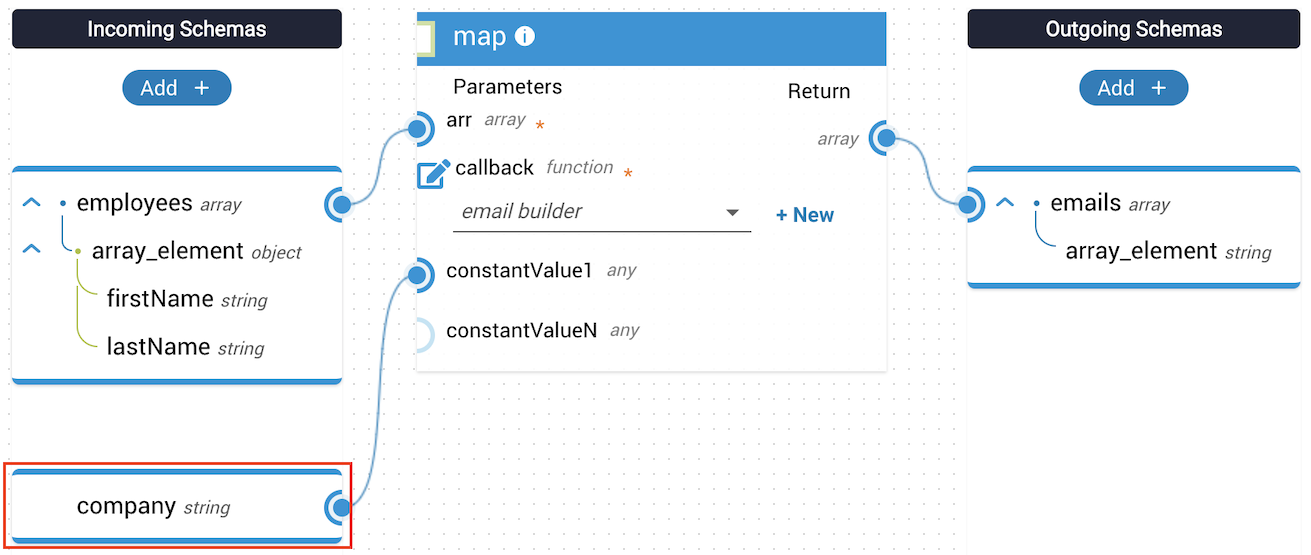
Within the callback function, the constant value appears in the Incoming Schemas panel as an additional incoming schema. Assignments can then be made from it within the function.
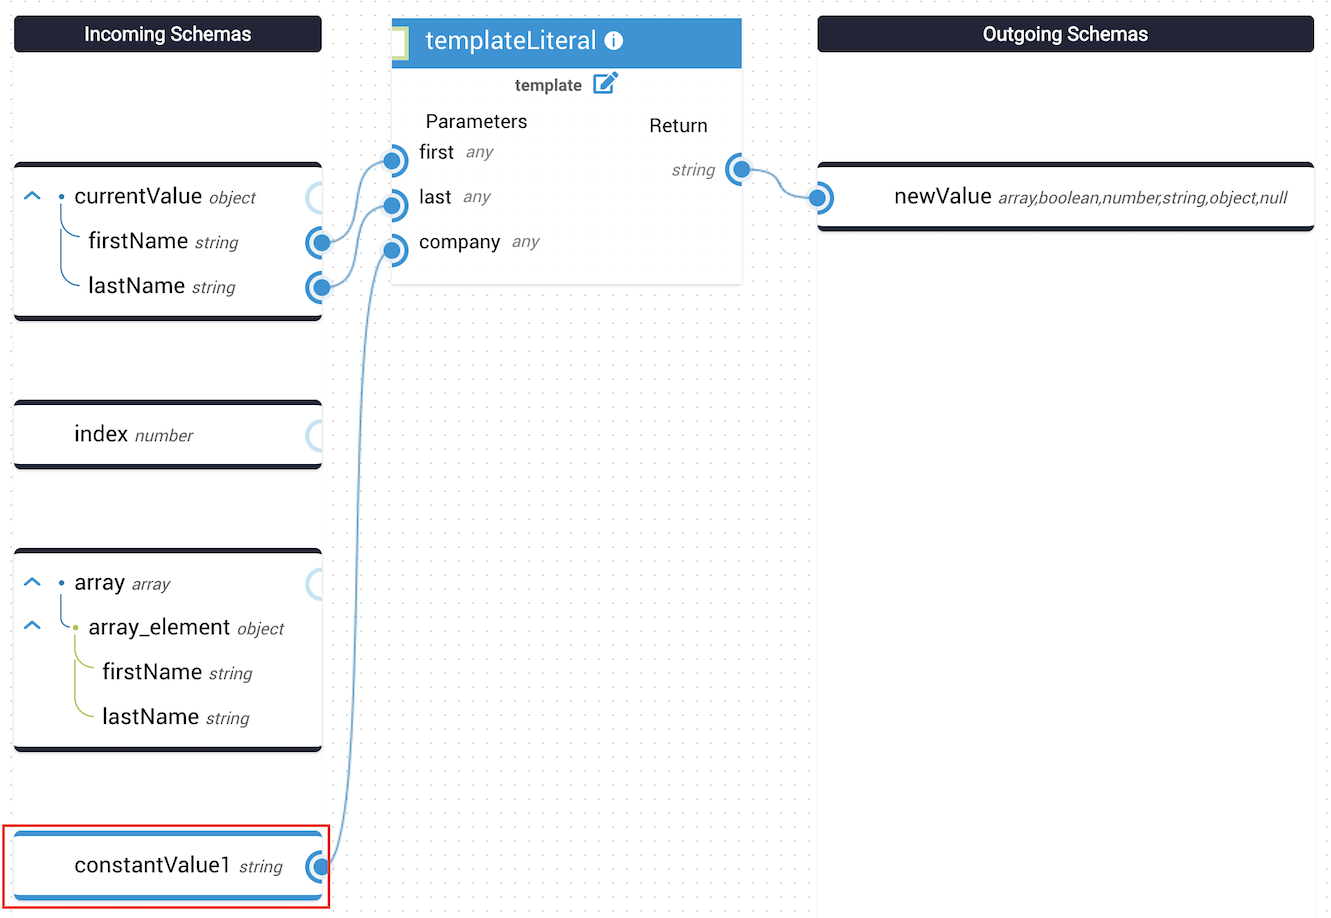
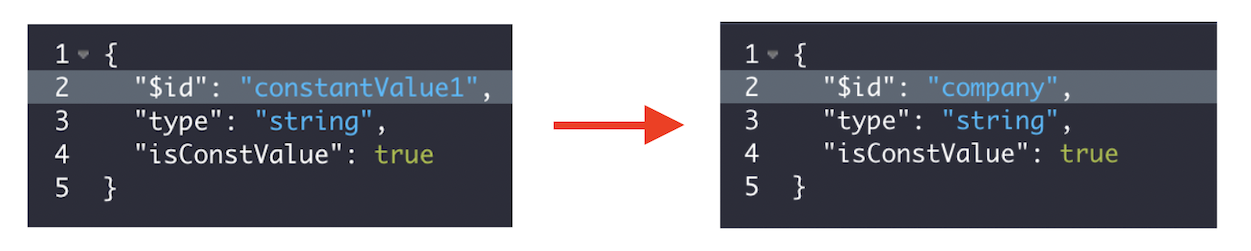
To edit a constant value, hover over it in the Incoming Schemas panel and use the same controls described in Edit, copy, or delete an incoming schema. Higher-order methods using the constant value are updated dynamically.
Functions
A JST can also transform data using functions — child JSTs placed on the canvas similarly to methods. Functions support a modular approach: if an identical series of methods is used by many JSTs, a function can encapsulate that logic in one reusable step.
Some methods require a function as an input parameter — these are called callback functions. Callback functions are embedded into the method itself rather than placed directly on the canvas. Hover over the information icon (ℹ) in the method header for details.
Create a function
Add the function
Click Add to open a blank JST Designer canvas in a new tab. Alternatively, click Upload to use a pre-existing exported JST as a function.
Edit, download, or delete a function
Hover over the function in the Functions tab of the work bench. Edit, download, and delete buttons appear. Click the relevant button.
Run a JST
Edit JST metadata
Clone, export, or delete a JST
Click the menu button at the upper right of the canvas, then select Clone transformation, Export transformation, or Delete transformation.
Further reading
Pre-built transformations are also available directly from the JST Designer canvas via the Pre-built JST dropdown menu.