Configure SAML SSO with Azure Entra ID
This page provides IT administrators the information needed to set up SAML SSO between Itential Platform and Azure Entra ID.
Beginning with version 2023.2 and higher, access management in Itential Platform was expanded to include SSO via SAML Authentication.
Itential assumes the reader has completed the process of setting up SAML SSO Authentication in Itential Platform via Admin Essentials, and has mapped their Identity Provider (Admin Essentials > Authorization > Identity Providers).
Keep in mind that each organization may have set up their Azure Entra ID system differently and this guide is not all-inclusive of every system environment.
Add the issuer ID
When configuring an Identity Provider (IdP) in Itential Platform, you will need to enter an Entity ID (called the “Issuer”) that identifies the identity provider.
Find the Application ID in Azure Entra ID
Sign in to Azure Entra ID and go to the Itential application that was set up.
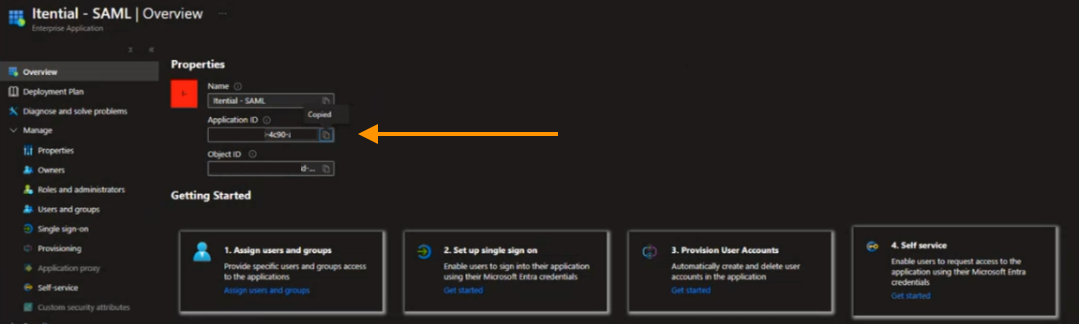
Under Properties, copy the Application ID. This will be used to satisfy the Issuer parameter.
Open the Identity Providers configuration in Itential Platform
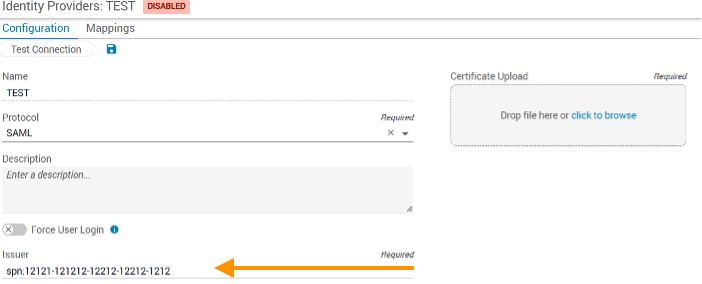
Sign in to Itential Platform and navigate to Admin Essentials > Authorization > Identity Providers > Configuration.
Paste the Application ID into the Issuer field
Paste the Application ID into the Issuer field.
Set up SSO in Azure Entra ID
These steps walk through setting up and obtaining the variables required to complete the configuration of SAML SSO in Itential Platform.
Open Single sign-on settings
Go back to the Itential application in Azure Entra ID and select Single sign on.
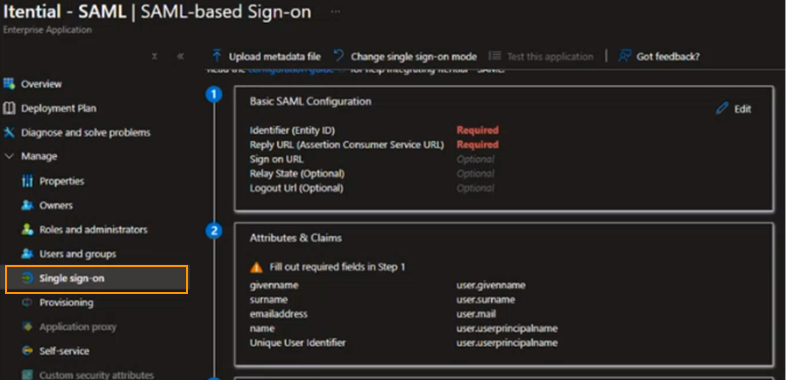
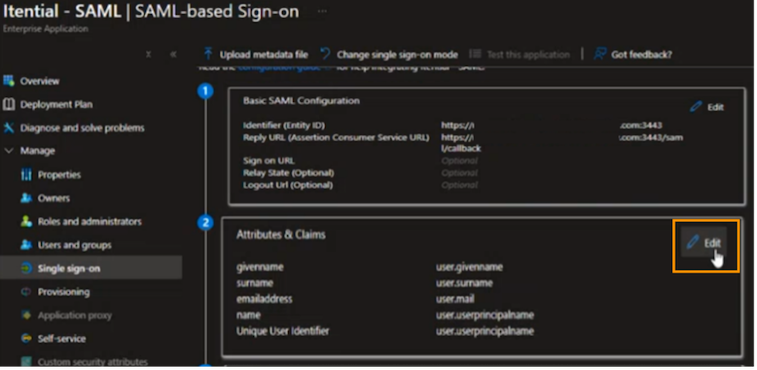
Configure Basic SAML Configuration
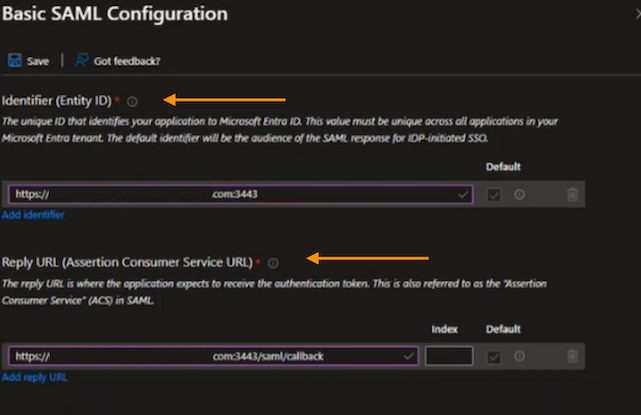
Click Edit under “Basic SAML Configuration” and enter the unique Identifier (Entity ID) that identifies Itential Platform and the Reply URL to receive the authentication token.
Append /saml/callback to the Reply URL so the format looks like this:
Click Save to finalize your Basic SAML Configuration changes.
Add a group claim
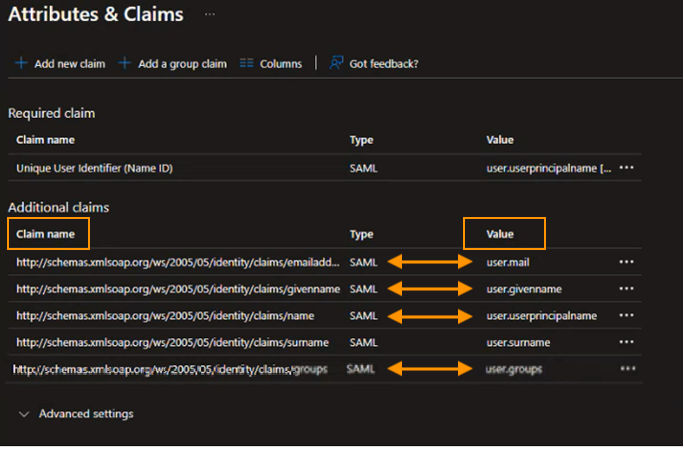
Go to Attributes & Claims, click Edit, and then click + Add a group claim.
Select the All groups button and then select Group ID from the dropdown under Source attribute.

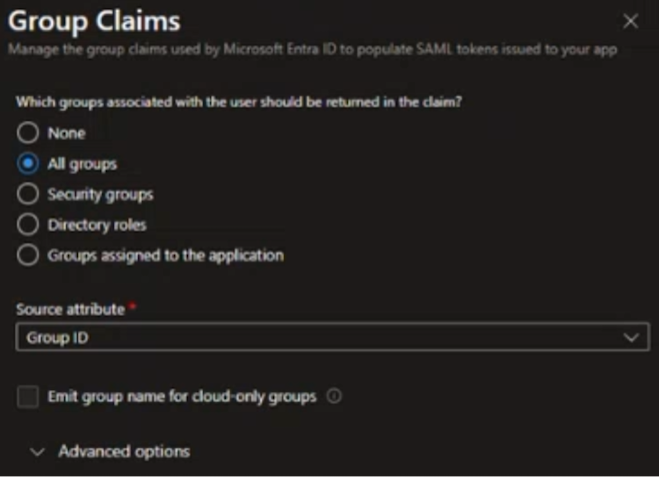
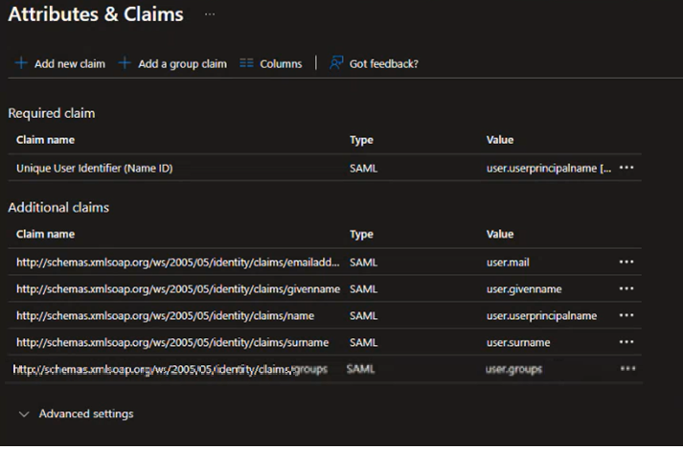
Click Save to finalize your changes. The user.groups claim name value displays under Additional Claims.
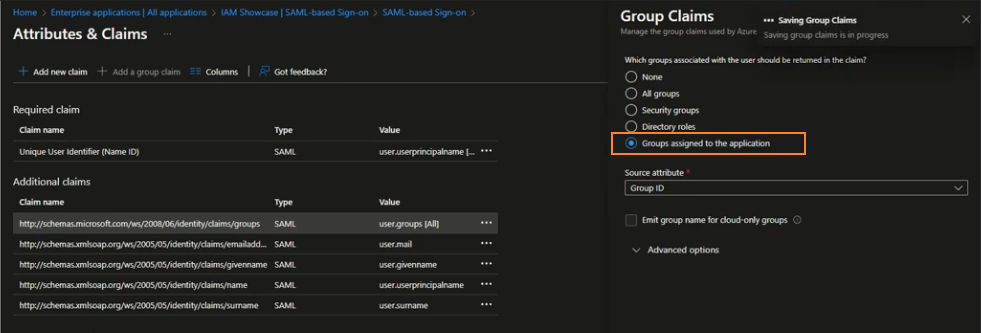
Entra ID limits the number of groups it will emit in a token to 150 for SAML assertions and 200 for OIDC authorization code flow. To avoid hitting the groups limit when users have large numbers of group memberships, restrict the groups emitted in claims to the relevant groups for the application by selecting the Groups assigned to the application option.
Further reading:
Configure Azure SAML SSO variables in Itential Platform
After setting up the variables in Azure Entra ID, finalize the identity provider configurations in Itential Platform.
Open the Identity Providers configuration
Navigate to Admin Essentials > Authorization > Identity Providers > Configuration.
Locate the claim names in Azure Entra ID
Locate the following attributes from Attributes & Claims in Azure Entra ID:
- name —
user.userprincipalname - groups —
user.groups - email address —
user.mail - given name —
user.givenname
Map claim names to Itential Platform fields
Copy the Azure Entra ID Claim name into the appropriate field in the Identity Providers Configuration. Use the following mapping:
Enter the Login URL
Locate the Login URL from the Set Up Itential - SAML area in Azure Entra ID and enter it into the Login URL field on the Identity Providers Configuration tab.

Upload the certificate
Download the Base64 certificate file under SAML Certificates in Azure Entra ID. Upload the certificate file to the Identity Providers Configuration page by drag-and-drop, or use the Click to Browse link to find and select the file.
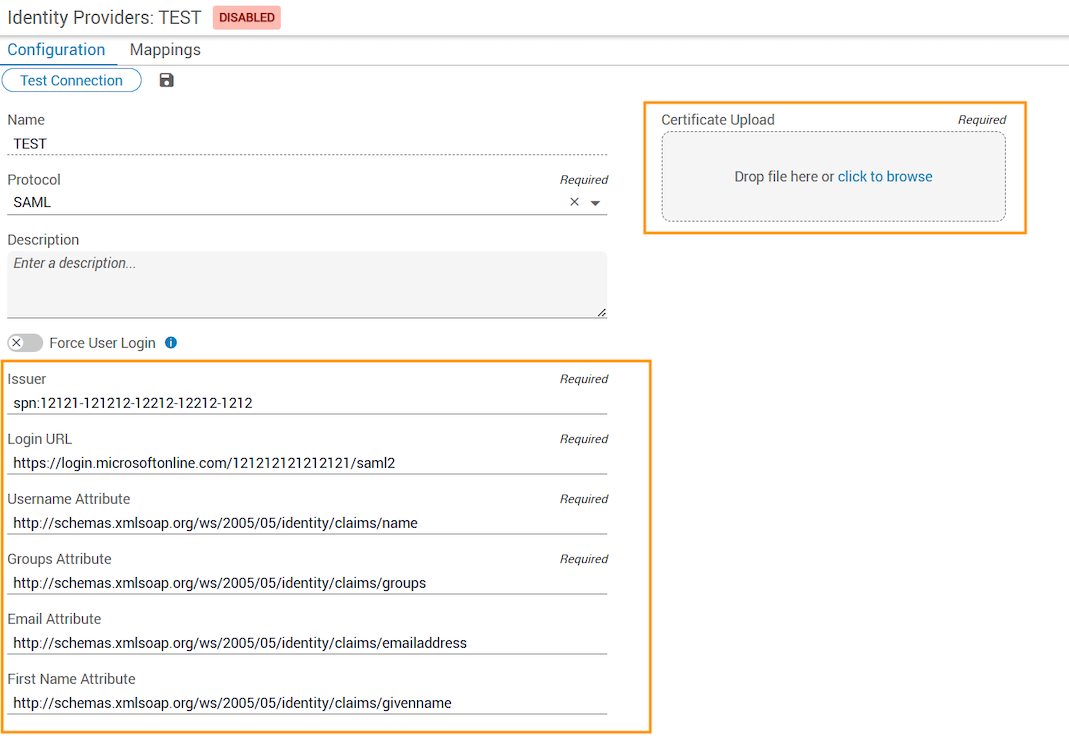
Test the Azure Entra ID configuration
To enable Azure Entra ID in Itential Platform, you must successfully test the configuration. Click the Test Connection button at the top of the Identity Providers page (under the Configuration tab). This initiates SSO SAML authentication with Azure Entra ID in a new tab.
This message indicates a problem with the parameters or certificate:

This message indicates a successful test and all parameters are set correctly:

The following is a sample testing certificate for Azure/Entra ID SSO configuration:
After a successful test connection, Groups from the authentication server display and can be mapped to internal Itential Platform groups and roles under the Mappings tab of the Identity Providers config. Map at least the pronghorn admin group to provide permissions within Itential Platform.
Enable Azure Entra ID SSO
Navigate to Admin Essentials > Authorization > Identity Providers. Locate the Azure Entra ID IdP and slide the toggle switch to Enabled.
Once Azure Entra ID is enabled, the Itential Platform authentication method immediately switches to SSO SAML.
