

Create and manage projects in Studio
Create projects
Create a project with either the New Project or Project Builder flows.
- New Project opens a blank project with a starter workflow and takes you to the editor.
- Project Builder lets you create or extend a project by adding assets during setup.
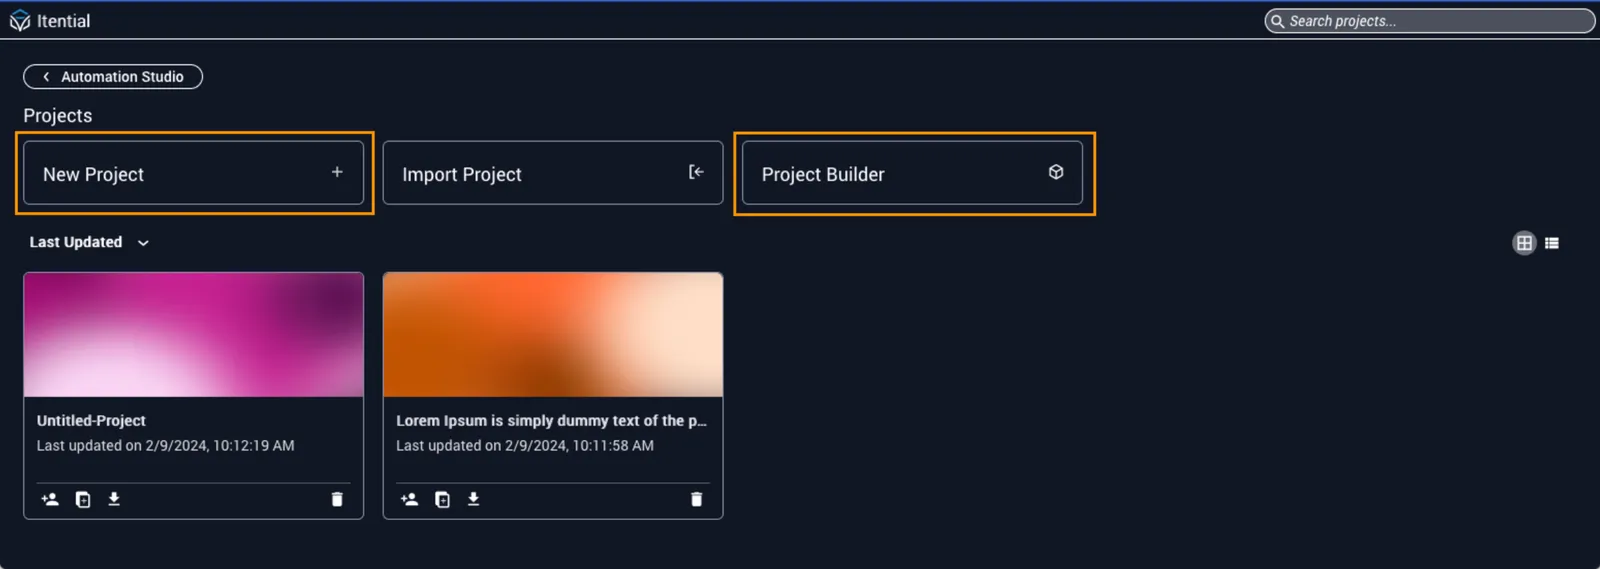
Create a new project
Click New Project to start an “Untitled Project” that includes a default workflow. The name shows in the left sidebar just like a regular Studio workflow.
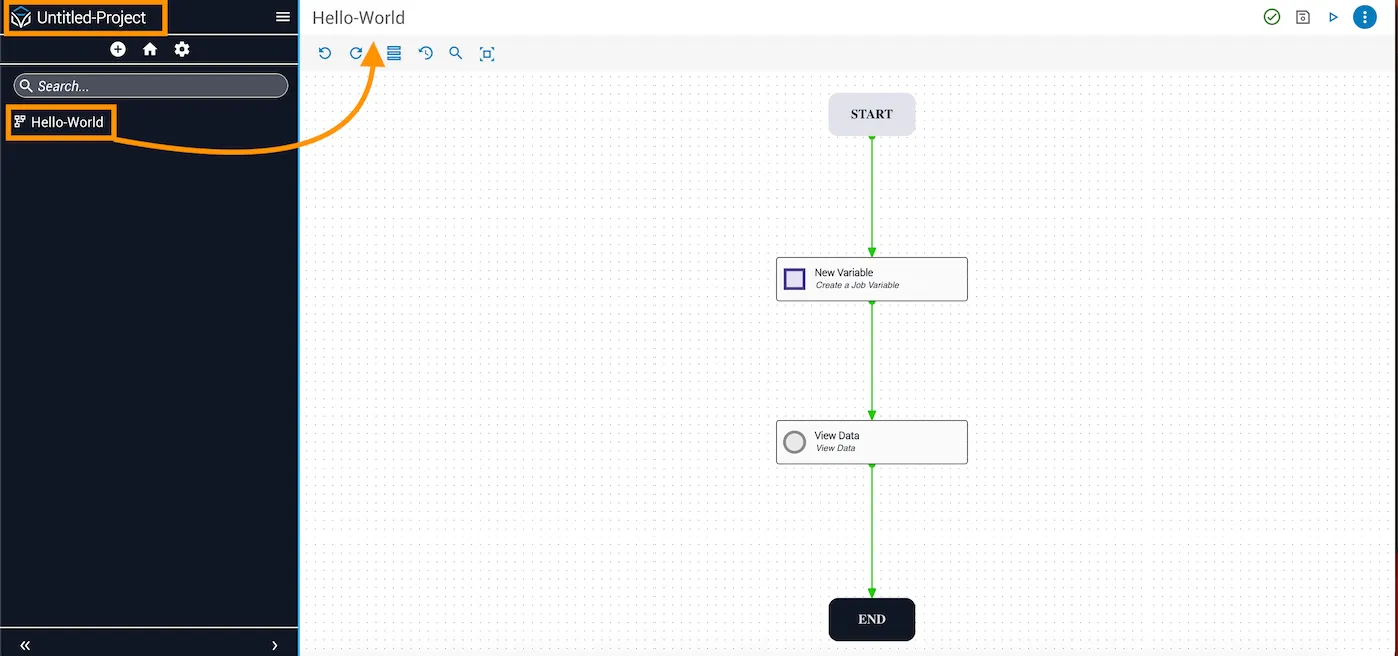
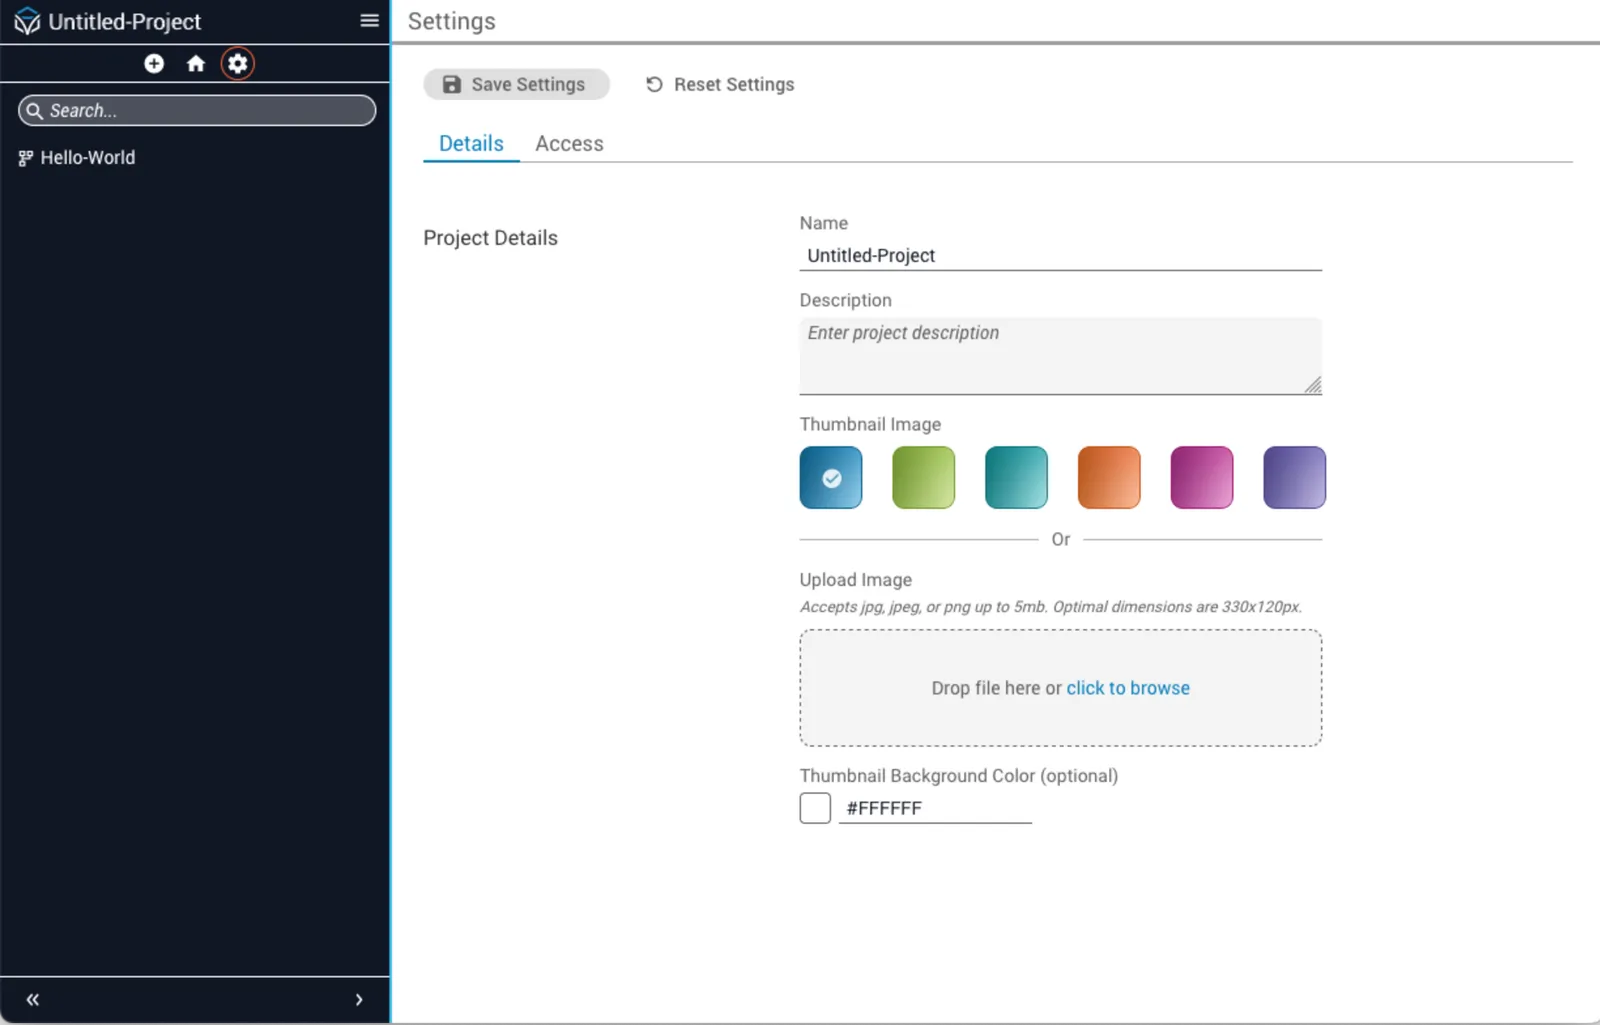
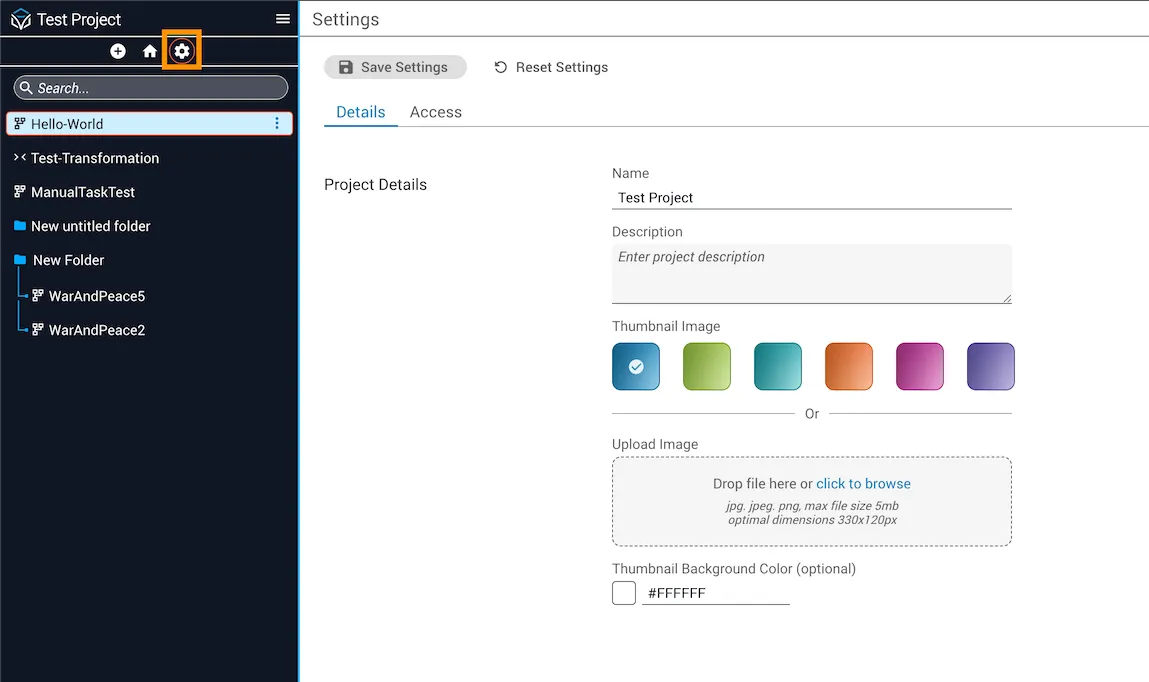
Open Settings by clicking the gear icon under the project name to rename it, add a description, or set a thumbnail.
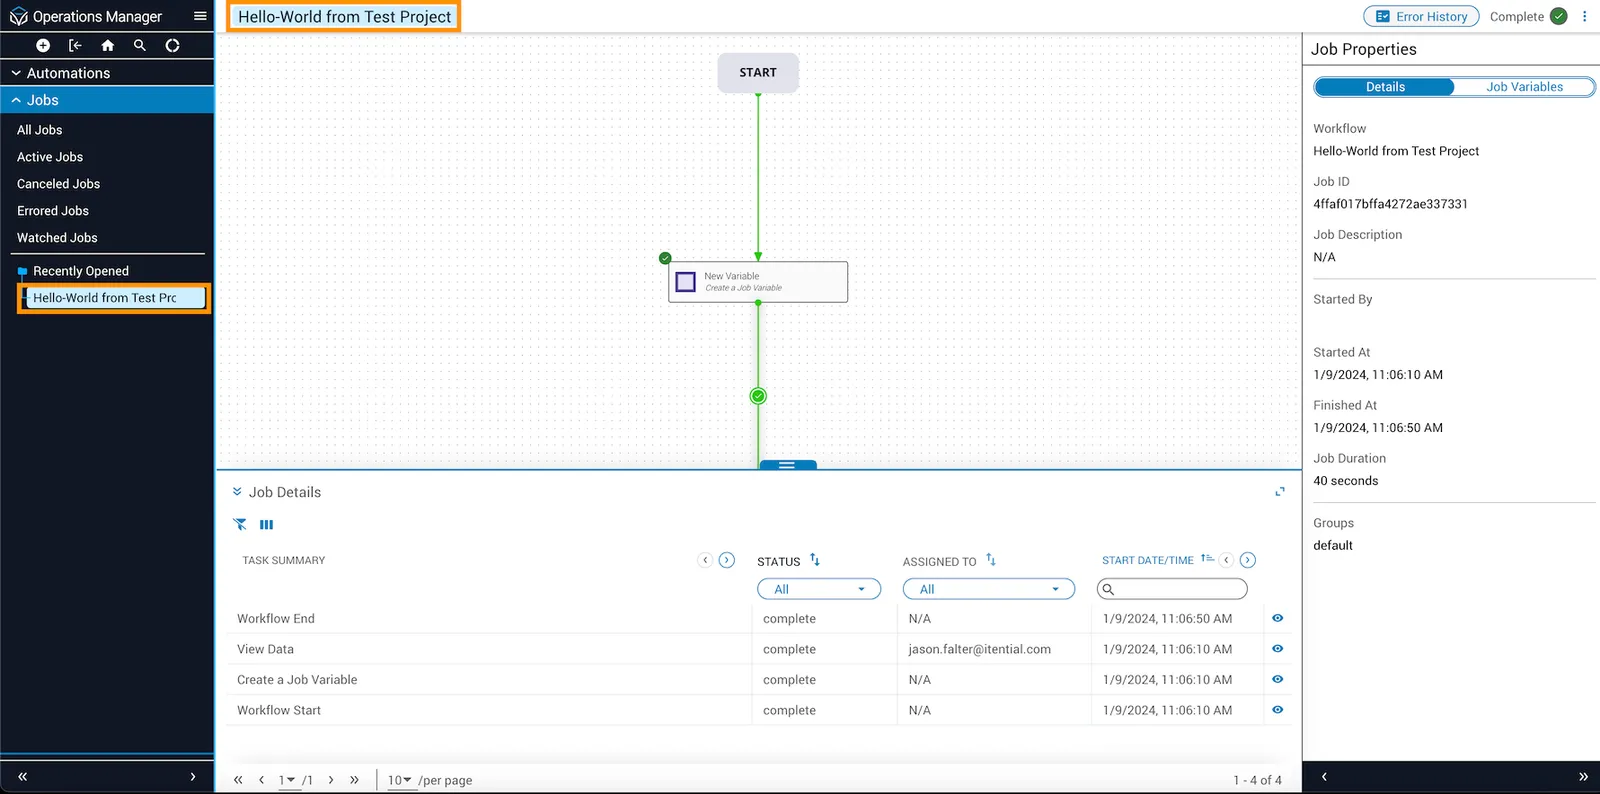
Jobs run from a project include the project name in their Operations Manager entry.
Create a project using Project Builder
Open Project Builder from the homepage. Pick an asset tab (workflows, JSON forms, command templates, analytic templates, templates, or transformations).
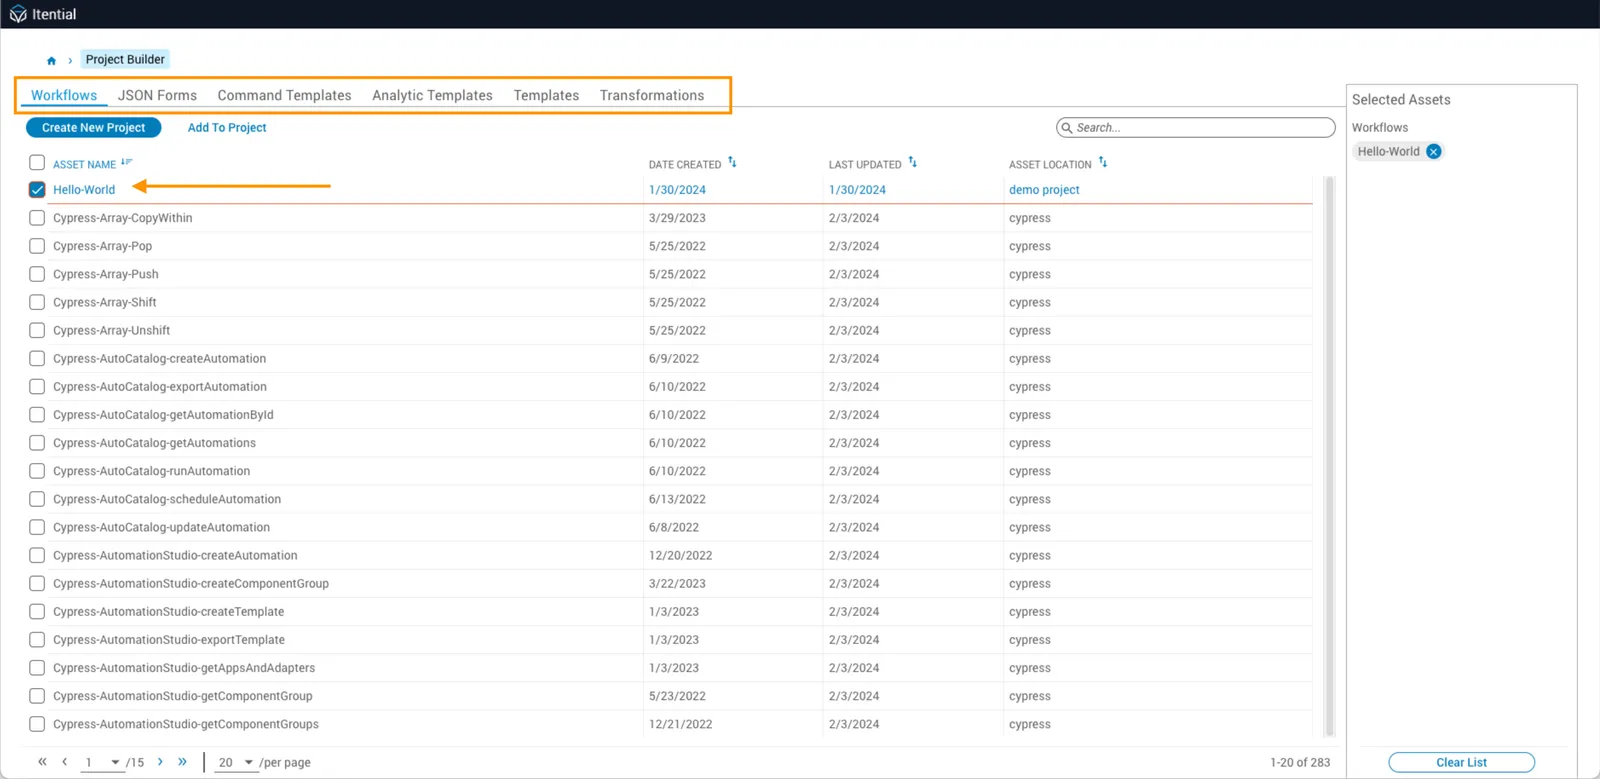
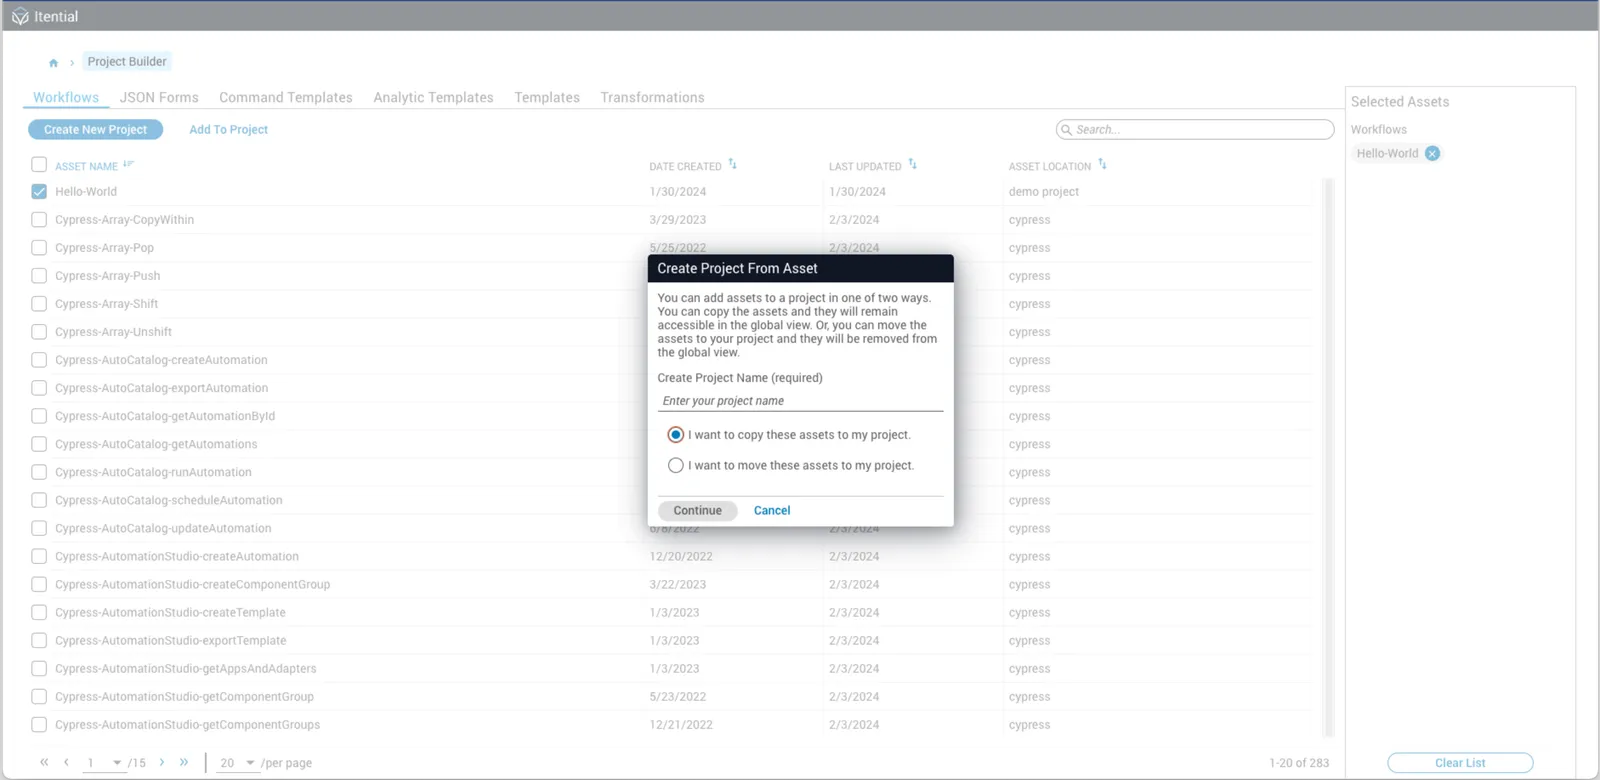
Check the boxes for the assets you want and click Create New Project. In the dialog, name the project and choose to copy or move the assets. Click Continue to open the new project with the first selected asset visible.
After adding assets to an existing project, a success notification appears with a link you can click to open the project.
Add assets to a project
To add assets to a project, hover over the (+) button in the Project Builder toolbar.
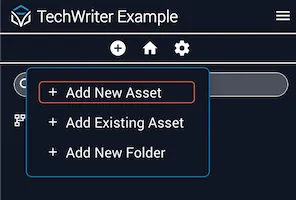
Add a new asset
Choose + Add New Asset to open a modal that lists available asset types. Select a card and fill out the details (name, description, type, etc.) in the create dialog.
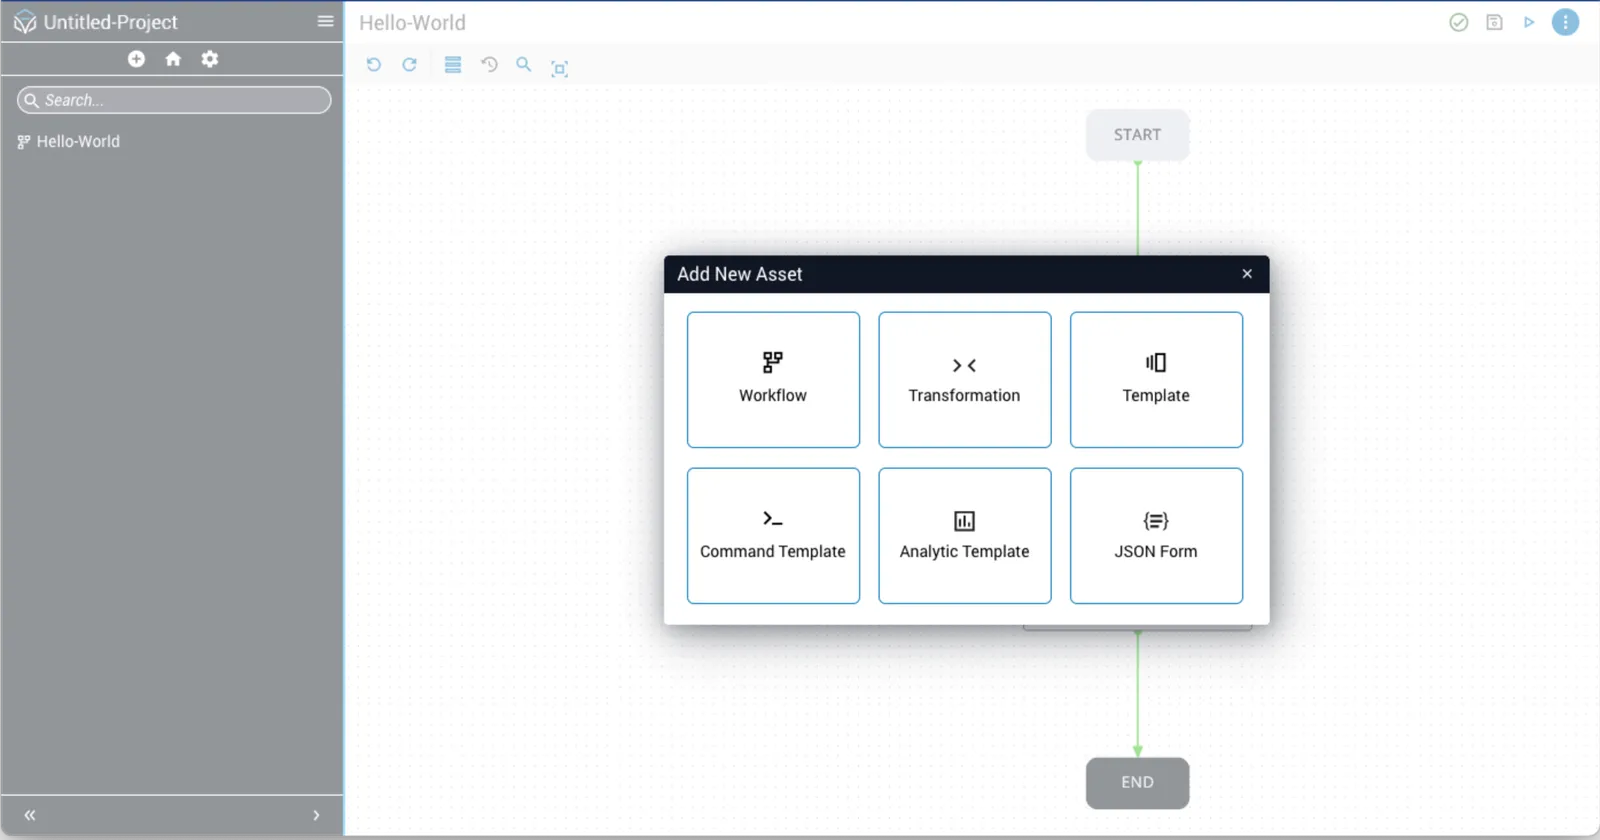
Asset names are unique within a project. The same name can exist in global space or in other projects but not twice in the same project.
Add an existing asset
Select + Add Existing Asset to open the view that lets you pick any asset not already in the project or any asset from another project.
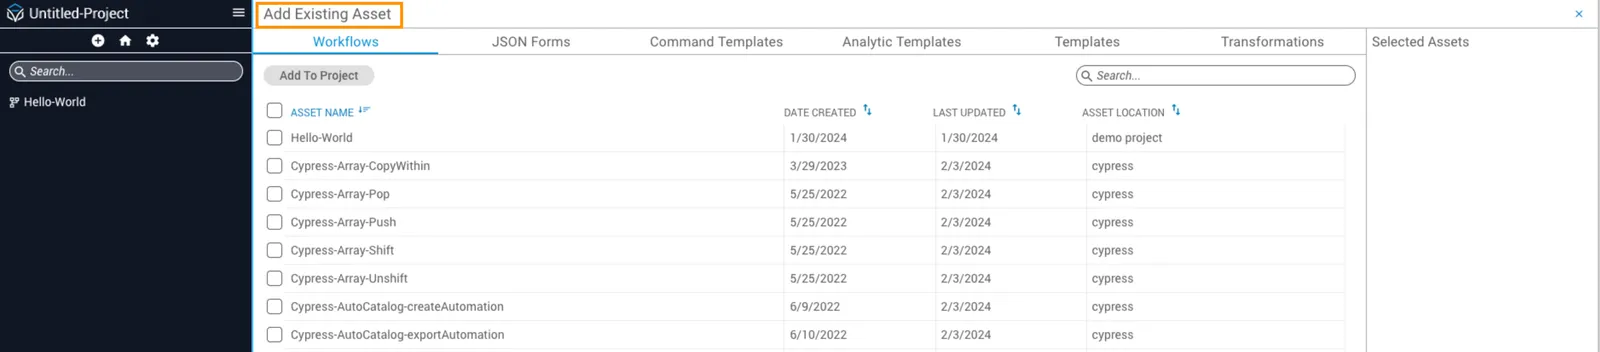
Select the checkbox next to each asset you want to add and click Add To Project. A dialog prompts you to copy or move the selected assets. All selected assets display under Selected Assets on the right.

Moving assets removes them from Studio and makes them inaccessible from the Global View.
Import and export projects
When importing or exporting, remember that projects only include Studio assets. Use the standalone bundle feature if you need to package non‑Studio items (for example, Operations Manager triggers or infrastructure definitions).
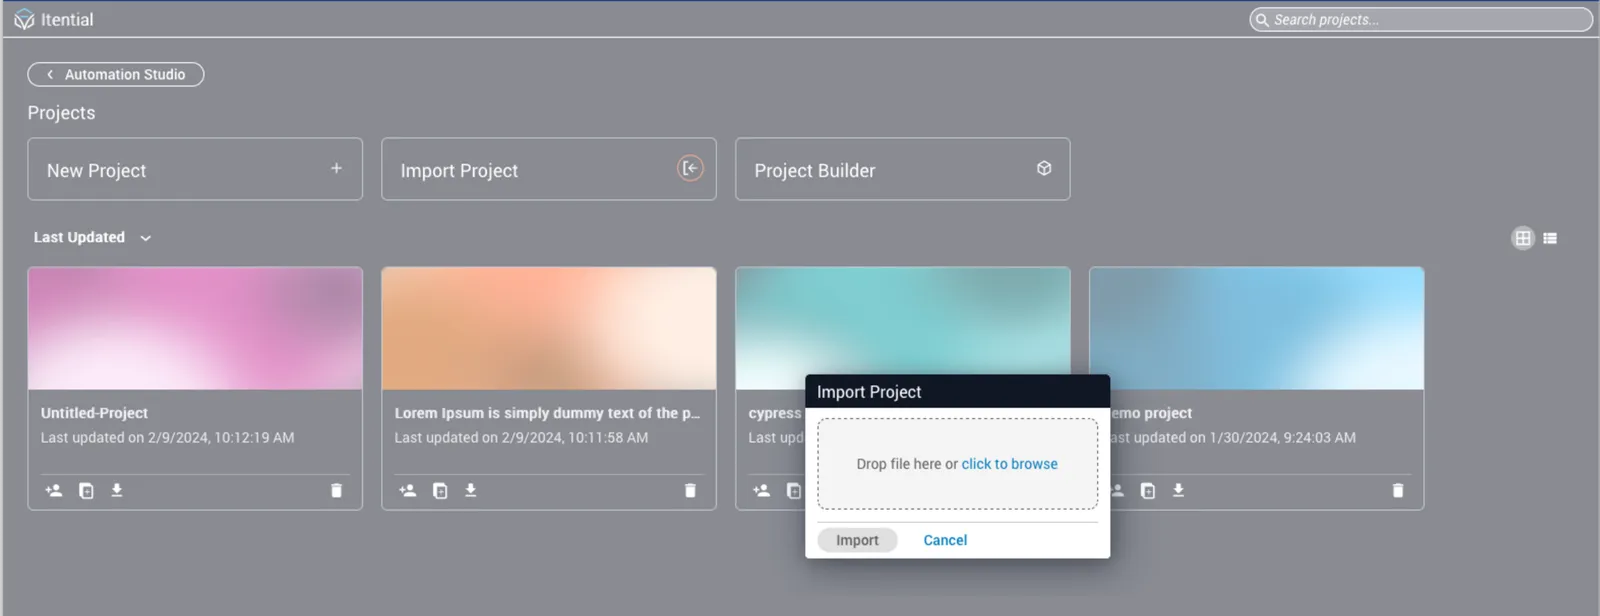
To import a project, navigate to the Projects homepage and click the import button. Upload the project by drag and drop, or browse the file system.
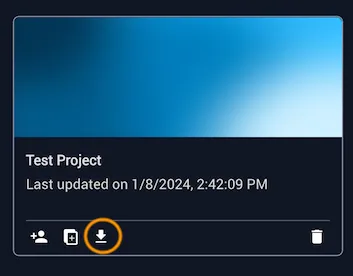
To export a project, click the export button at the bottom of each project card and save the project to a specified location.
Duplicate projects
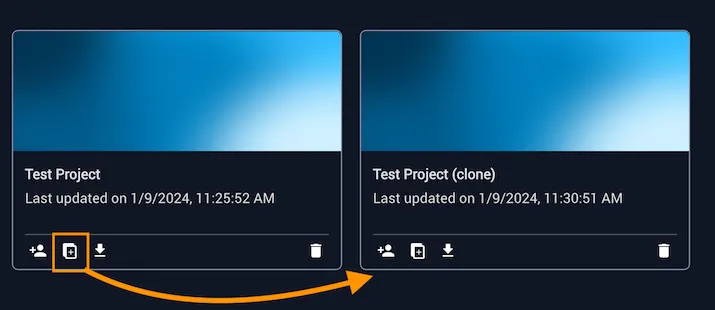
To duplicate a project, click the duplicate button at the bottom of a project card. The duplicate appears in the project list with (clone) appended to the project name.
Manage project assets
For any project, you can view asset details and rename assets using the left sidebar. You can also create folders to organize assets.
Edit details
Hover over any asset in the left sidebar to display the menu button (⋮). Select Edit details to open a dialog where you can update the project name and description.
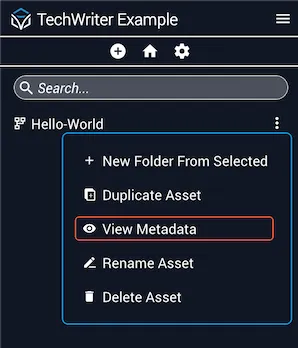
Rename assets
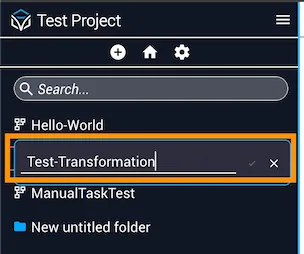
Double-click an asset name in the left sidebar to enable the name field. Type the new name and click the checkmark to save.
Asset folders
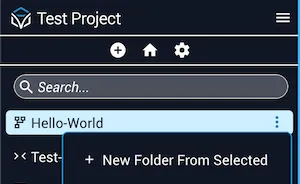
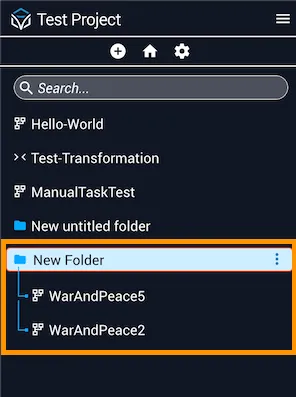
Assets in the sidebar are distinguished by icons rather than separated by type. You can organize assets into folders two ways:
- Hover over the (+) button in the Project Builder toolbar and select + Add New Folder.
- Hover over an asset in the left sidebar, click the menu button (⋮), and select + New Folder From Selected.
To rename a folder, double-click the folder name, type the new name, and click the checkmark. Additional assets and nested folders can be added under any top-level folder.
Best practices
- Keep each project focused on a single initiative or related set of assets.
- Do not attach unrelated files merely to move them between environments; this undermines search and organization.
- Use project access controls to manage permissions for a group of assets instead of setting permissions on each asset individually.
Configure project settings
Click the gear icon in the toolbar beneath a project name to open Settings. Use the Details tab to configure project information and appearance, and the Access tab to manage members.
Details tab
Six color options are available, or you can upload a custom thumbnail image (330 x 120 px is the optimal size). After entering the project details and selecting a thumbnail, click Save Settings. The chosen thumbnail appears for the project on the Projects homepage.
Access tab
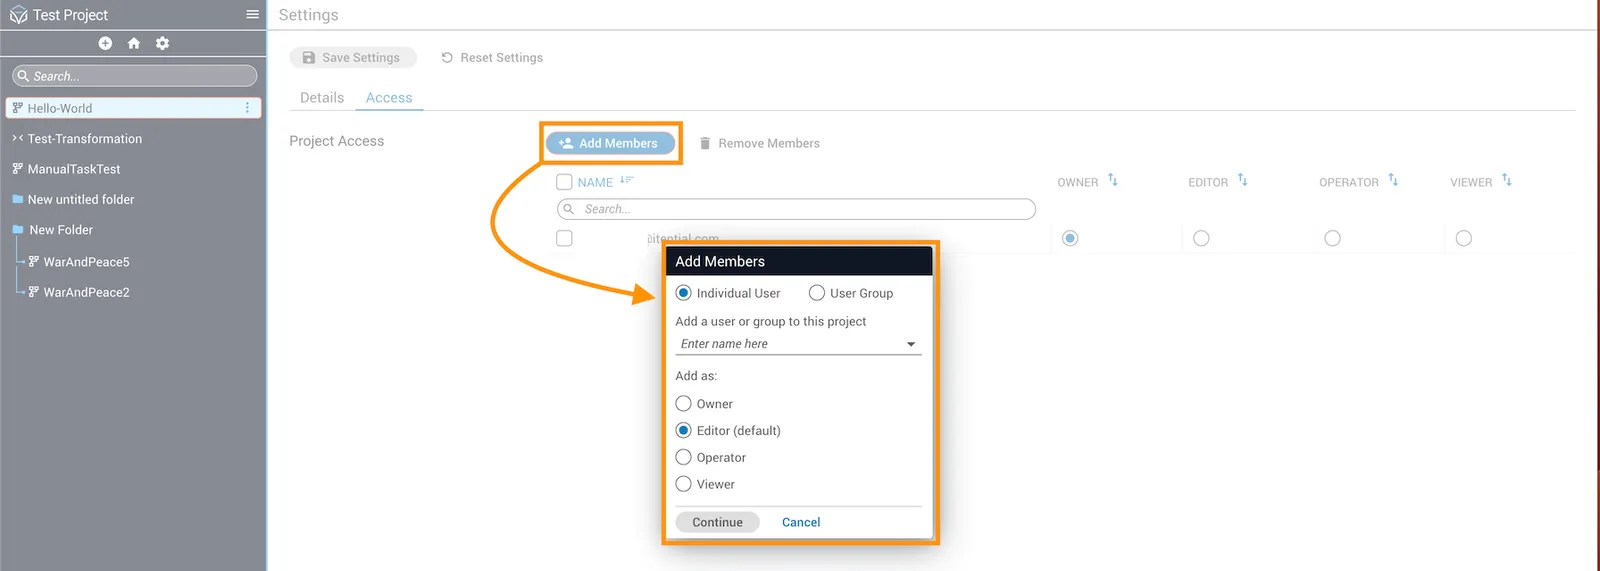
Click Add Members to open a dialog for adding an individual user or user group to the project. Select the member from the dropdown and set their role as Owner, Editor (default), Operator, or Viewer.
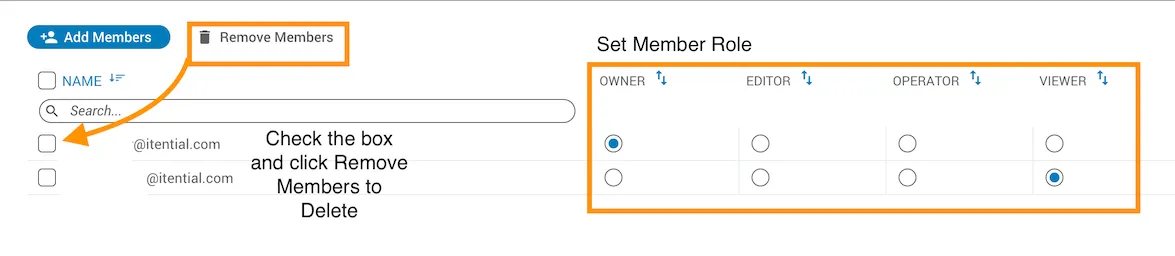
To remove a member, select the member and click Remove Members.
Member roles
Click the radio button for the appropriate role and click Save Settings to apply changes.
- Project Owner: Full privileges. All projects must have at least one owner.
- Project Editor: Same file privileges as owner, but cannot change project members.
- Project Operator: May only view and execute files in the project.
- Project Viewer: May only view the project.
Project Admin role
Platform 6.5.2+The Project Admin role is an application-level role, separate from the per-project member roles you set in the Access tab. The projectsadmin role grants it. It provides access to every Studio project system-wide, regardless of an admin’s individual project-level permissions, so admins can resolve orphaned or inaccessible projects. For example, after a project owner’s account changes or is removed. Itential records all actions taken with this role in the audit log.
An admin assigns the projectsadmin role in Admin Essentials → Authorization.
With this role, an admin can:
- Get any Studio project system-wide, regardless of their individual project-level permissions.
- Update Studio project membership to Owner, Editor, Operator, or Viewer for any user, on any Studio project.
- Delete any Studio project system-wide.
The role is exposed through its own API endpoints, separate from the standard Studio Projects API, which are available based on each caller’s project-level access:
These endpoints bypass project-level role access and are available only through the /automation-studio/admin/projects API.