RBAC in IAG
Role-based authorization and access
This article provides information on role-based access control (RBAC) for Itential Automation Gateway (IAG), which entails configuration of roles and groups for users of IAG. In the context of IAG, a role enables user access to a single route or multiple routes. They are auto-generated at the time of server initialization using information provided for each route found in the IAG API documentation. The name of a role is derived using the tag name (i.e., modules, playbooks, nornir, terraform, etc.) defined for a set of routes along with the action categories read, write, exec, and history. Note that multiple routes can fall under a given action category.
Action categories
These categories specify the actions that the role allows to be performed.
Sample role names
The following provides a sample list of role names.
modules:readplaybooks:writeterraform:execnornir:history
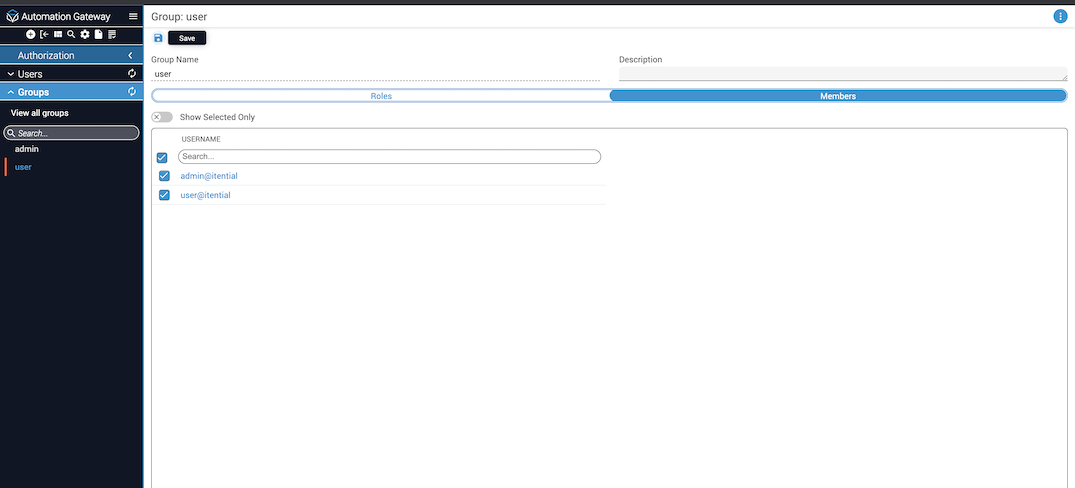
Along with roles, RBAC groups contain a set of users. Users that are members of a particular group will have access to the routes defined by the roles that have been configured for the group. Users and roles can be members of multiple groups.
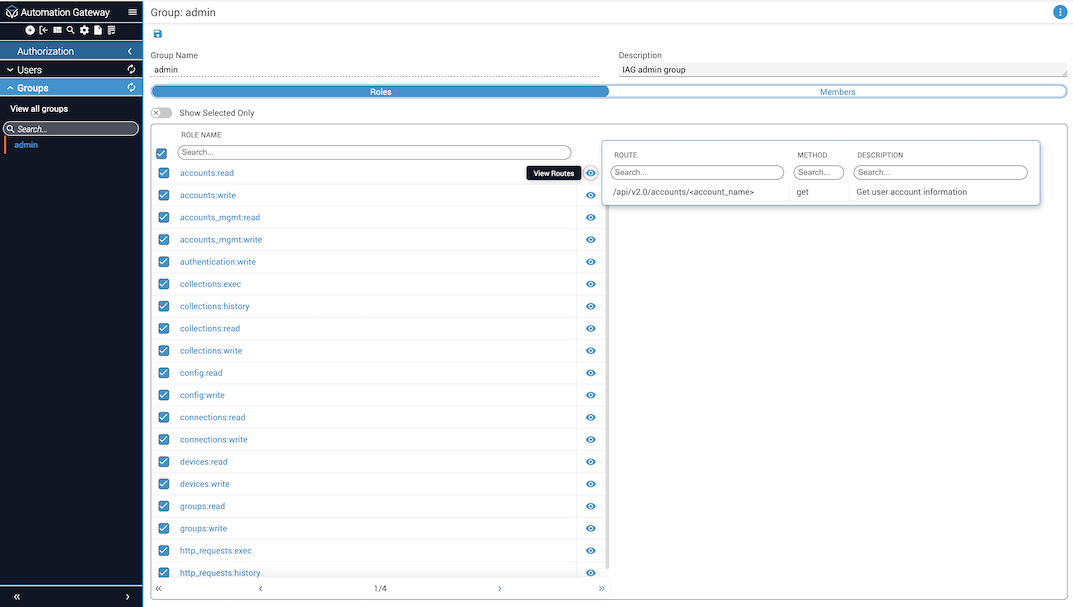
The RBAC group admin is automatically created by the IAG server upon the first boot up of a release with RBAC support. When doing an upgrade from a previous release that does not contain RBAC support, all existing users will automatically be added to the admin group upon first boot up of the server. The admin group contains all roles that are made available by the server. Users that are members of the admin group have access to all available routes.
Manage users and groups in IAG
Groups are used to manage users who need the same permissions or restrictions. A summary of how to create, edit, and delete groups is presented below, along with how to manage user roles and permission sets that control access to areas and features within IAG.
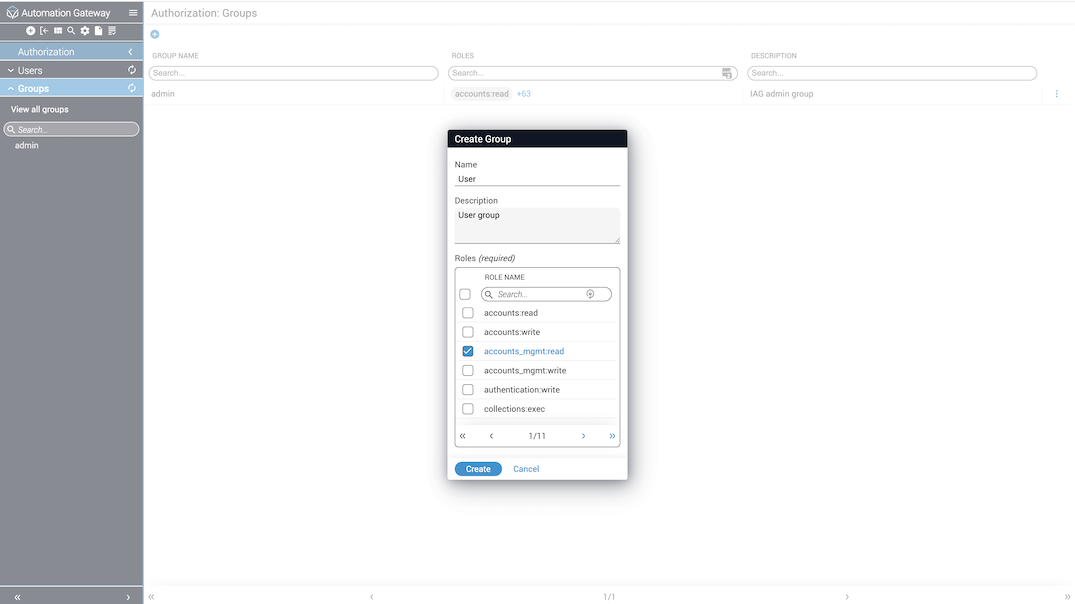
Create groups
To create groups within IAG:
Select Groups
Select Groups from the sidenav menu on the left. A list of all defined groups is displayed.
Edit groups
To edit groups within IAG:
Delete groups
Only IAG groups created by end users can be deleted. The admin group cannot be deleted or modified.
This is a hard delete. Deleting a group will remove the role from all users and groups assigned to it.
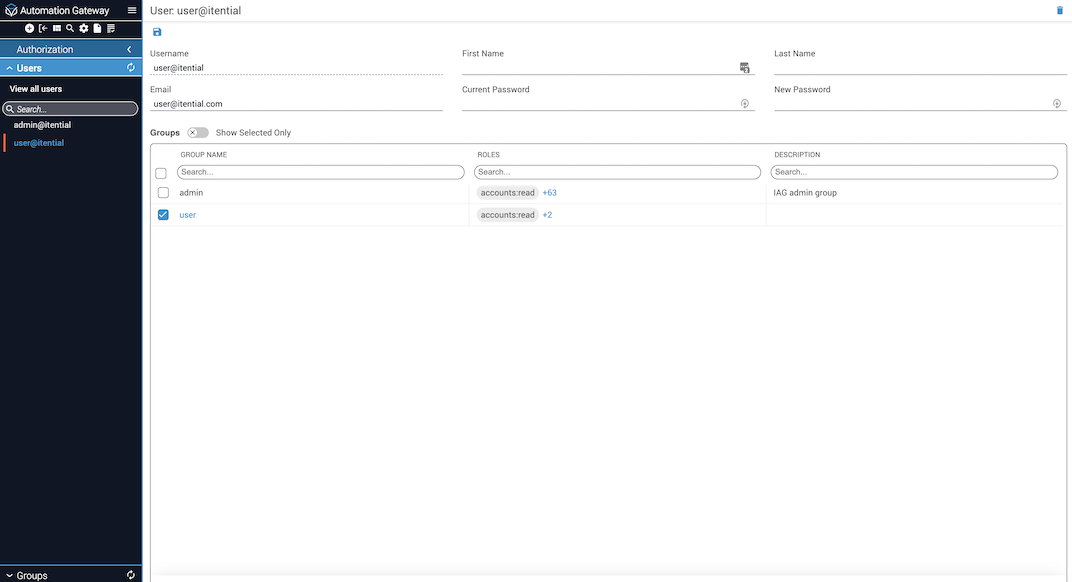
Edit users
To edit users within IAG:

Add LDAP users and groups
For LDAP users to appear in the Itential Automation Gateway Authorization Users list, you will need to:
- Manually create each LDAP user; make sure the username matches the LDAP username.
- Manually create the groups in IAG to which the LDAP users will be added.
Groups are added as members to a role, and group members are listed as user members for the role. Therefore, once you have created the LDAP users and LDAP groups manually in IAG, and assigned all necessary permissions to each group, whenever an LDAP user of the same matching username logs in, that user is automatically added to the group to which the user is a member and whatever role permissions are assigned to the group.