Configure and manage tasks
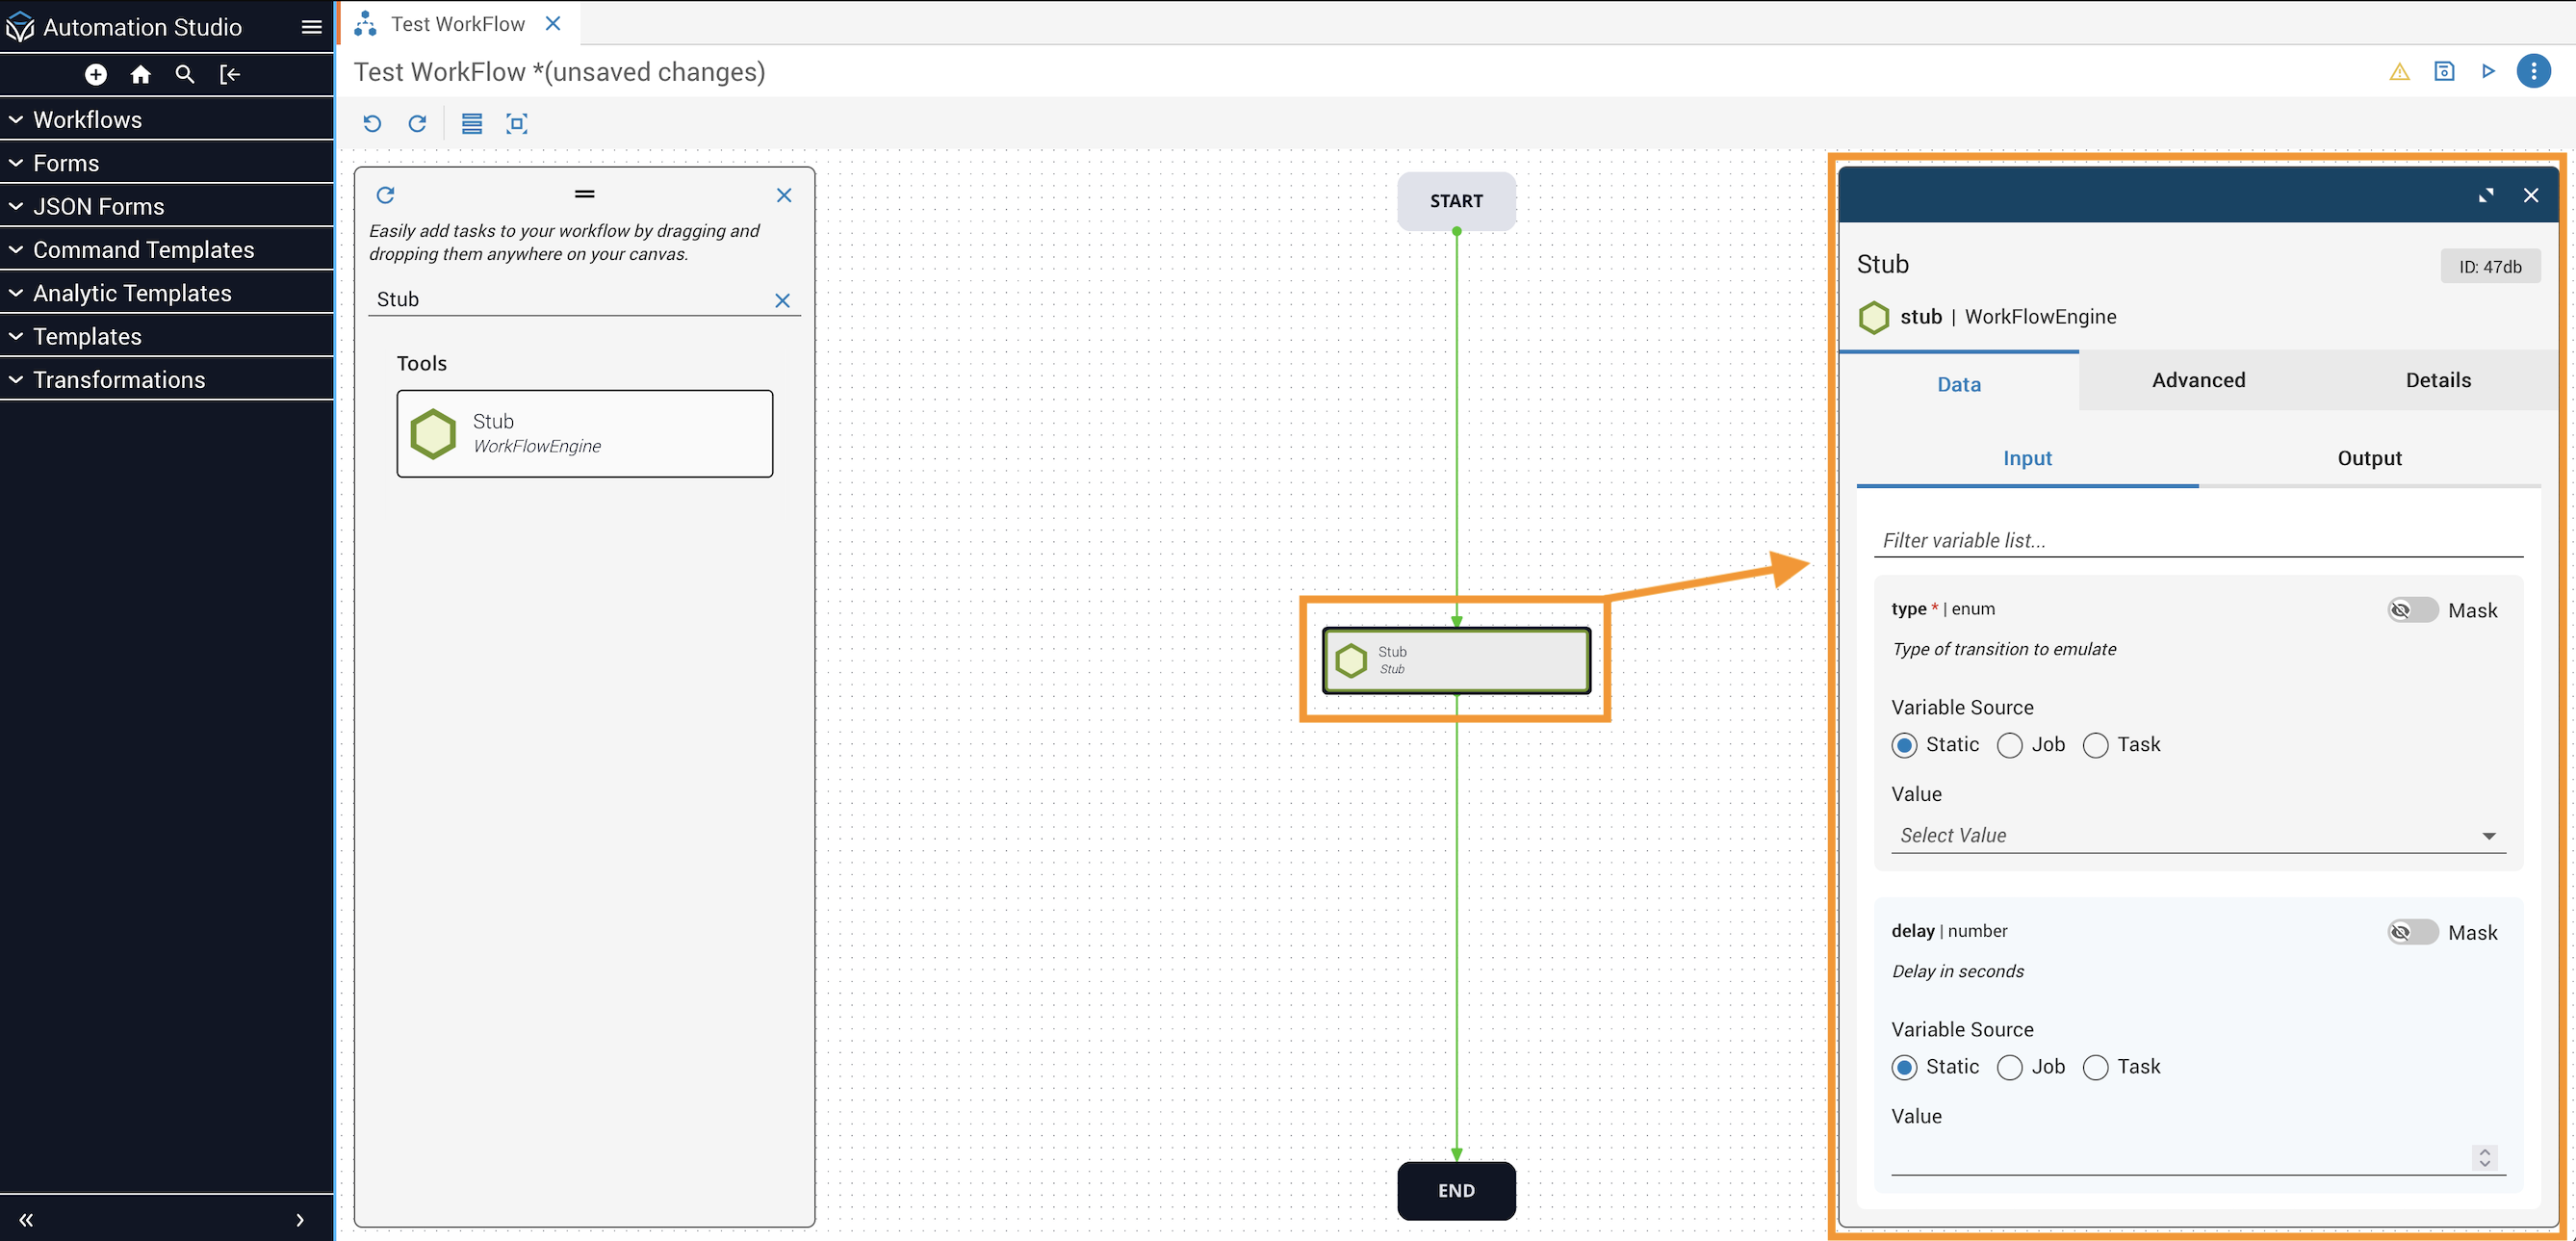
To configure a task on the canvas, double-click a task on the canvas to display information about that task in a panel on the right. Each Task panel contains a Data, Advanced, and Details tab.
- The Data tab contains input and output variables.
- The Advanced tab contains the Access Control, Run Window, and Retry Task configurations.
- The Details tab contains a description of the task that can be edited as well as a link to the API Documents page.
Tasks from the canvas make calls to actions that perform specific and discrete activities to implement business logic. They take input arguments and return output variables. The inputs and outputs for the task are visible in the Edit dialog under the Incoming and Outgoing tabs of the dialog. In the event an error occurs, the task may return an error variable, which is visible under Error.
Configure task properties
Incoming parameters
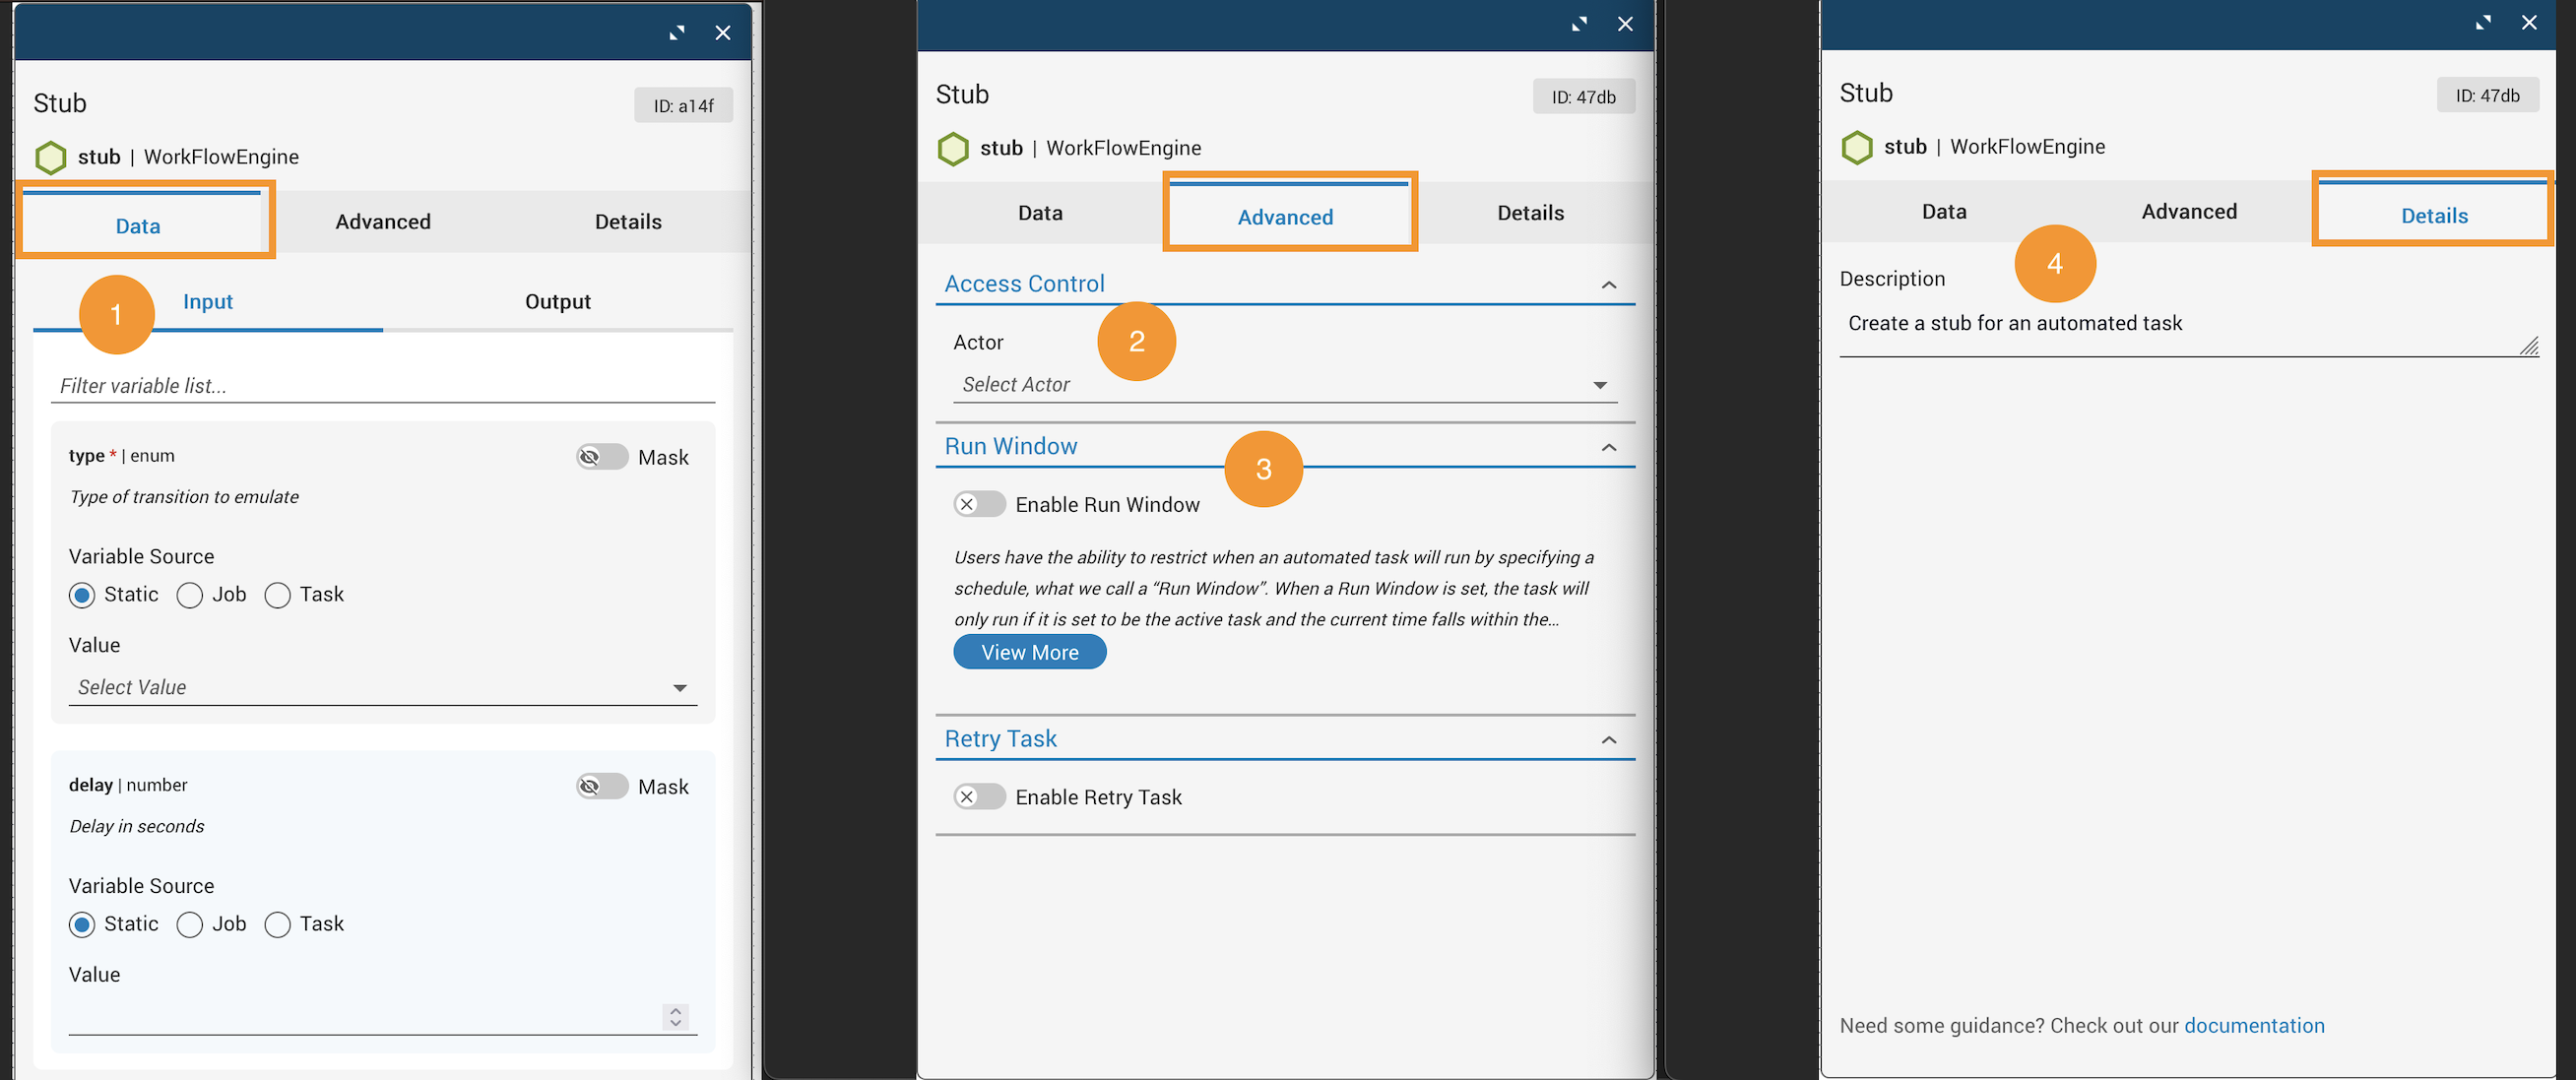
Task information is split between three tabs.
- Data: Input variables for the task.
- Advanced: Configurable options not directly related to input.
- Details: The task description.
Avoid changing to another task’s input variable, which could create variable type mismatches and other errors.
Reference task options
Reference variables
Task query
Task queries let you extract a nested property from an upstream task’s output directly on an input field using dot or bracket notation syntax. It eliminates the need to add a standalone query task to the canvas for common data retrieval operations.
Task queries support data retrieval from objects and arrays. Filtering and manipulation are not supported. Use the query task for those operations.
To configure a query on an input field:
A missing key or index at the specified query routes the task to its error transition with a descriptive error message identifying the query as the cause and which inputs had a failed query. A null value at a valid query is a valid result and does not cause a failure.
Enabling task queries is optional. Tasks without configured queries behave identically to their pre-6.4 behavior.
For information about using inline queries in Operations Manager, see View query results
Manual tasks and access control
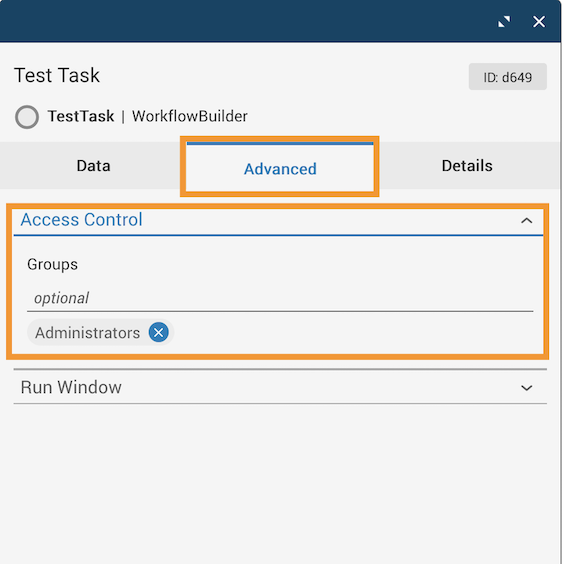
For manual tasks only, use Groups, located under the Advanced tab and in the Access Control dropdown, to restrict who is authorized to work the task by assigning one or more groups.
- Type “Administrators” in the Groups field. Matching group names will appear in a list after you begin typing.
- Click the correct group name to add that group to the task’s groups. The group will not be added unless it is selected from the list.
- Add as many groups as desired.
Outgoing parameters
Configurable options in the task output are referenced below.
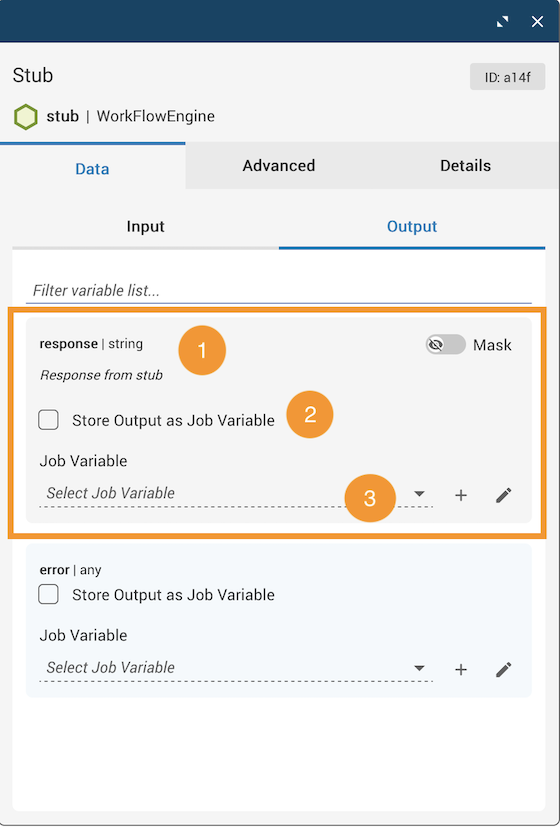
Error parameters
Task error variables are referenced below.

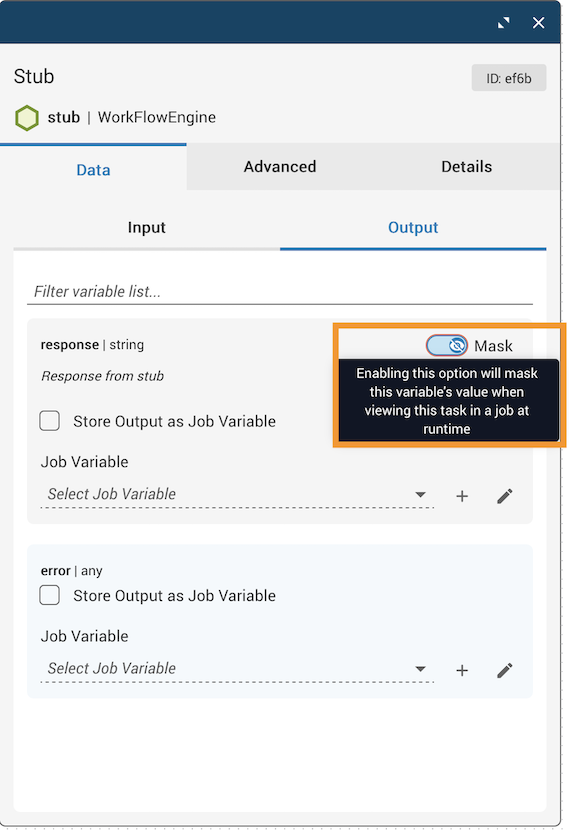
Mask variables
Variable masking hides sensitive data from operators who view workflows in Operations Manager. To enable masking, open the Task dialog and toggle Mask to On.
When you mask a variable, its value displays as asterisks (***) in operator-facing interfaces, preventing operators from viewing the actual data. The feature protects any view where operators can see workflow execution data, including Operations Manager views.
What masking doesn’t do
Masking is not a security or encryption feature. The system does not:
- Encrypt data in the database
- Delete or hash data
- Provide secure password or secrets storage
- Function as a secrets vault or password manager
- Protect data at rest on the server
For secure secrets management, use dedicated solutions like HashiCorp Vault or CyberArk Central Credential Provider. If you need encrypted storage of credentials, API keys, or other sensitive data, implement a proper secrets management solution rather than relying on variable masking.
Mask JST tasks
For JST tasks, you must mask all outgoing variables or none of them.
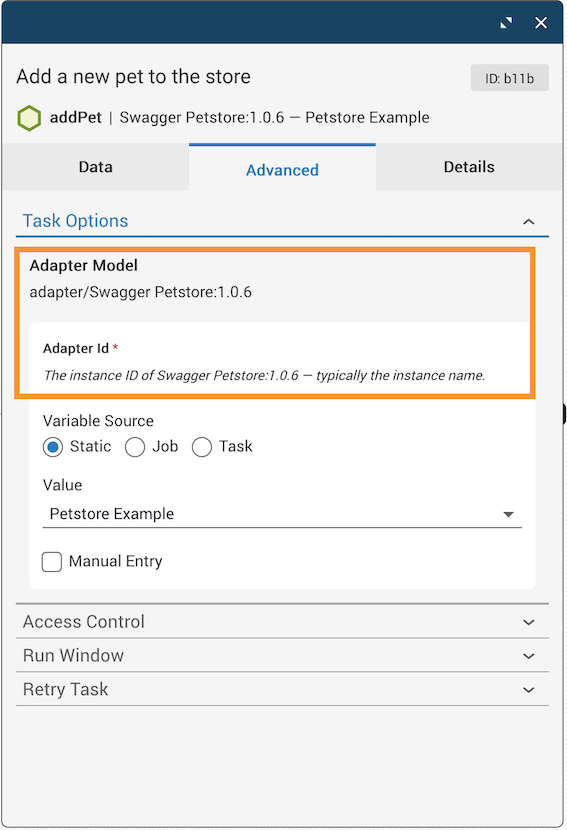
Find adapter IDs
Adapter IDs can be found under the Advanced tab in the Task Options dropdown.
Modify a task
Copy a task
Cmd + C and Cmd + V can be used to copy and paste, respectively. Holding the Option key and dragging can also be used to duplicate a task.
Delete a task
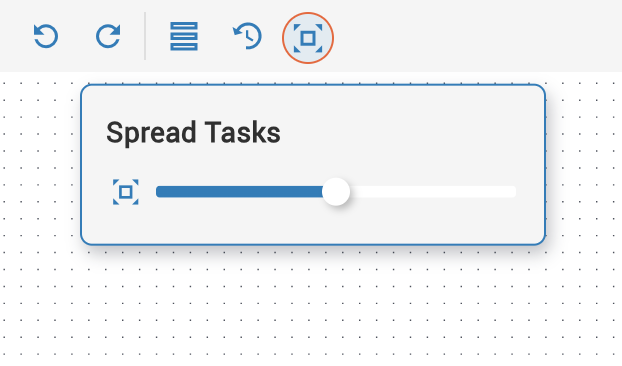
Spread tasks
To spread tasks out on the canvas for better viewing and management:
Use recent tasks
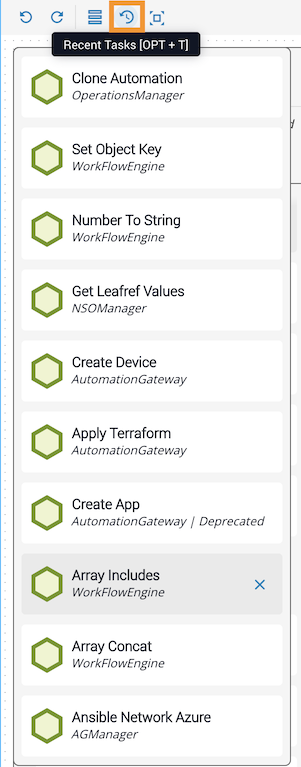
The 10 most recent tasks moved from the task palette to the canvas are stored under the Recent Tasks icon for quick access. Click the icon for Recent Tasks and a dropdown displays the 10 most recent tasks added to the canvas.
From the Recent Tasks dropdown, each task can be dragged and dropped onto the canvas to use again as needed. Copying, pasting, or duplicating tasks already on the canvas will not add them to the Recent Tasks dropdown. Any task displayed in the Recent Tasks dropdown can be removed by clicking the X to the right of the task.
Retry a task
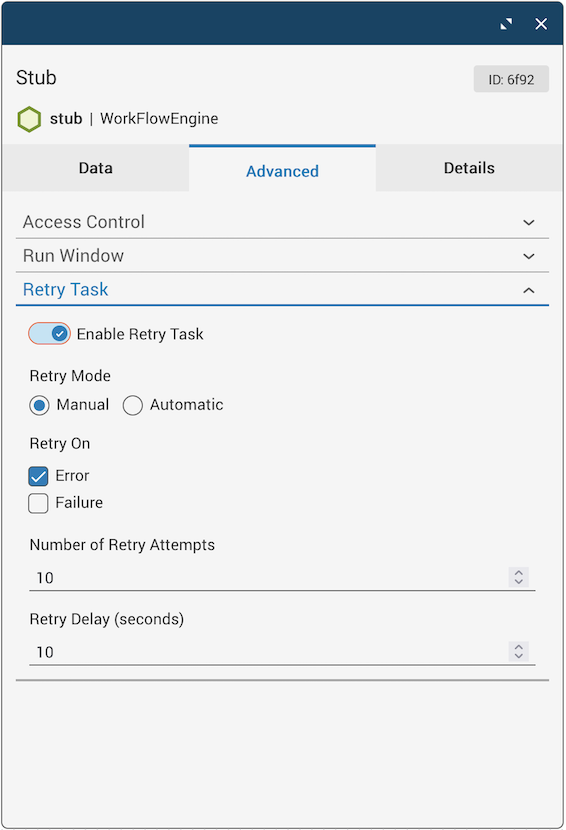
From the Studio canvas, a task can be set up to allow an operator of a job to retry it. Two types of task retry are available: Automatic and Manual.
- Automatic Retry: Configured on the canvas with options for when to retry, how often, and whether there should be a delay between retry attempts.
- Manual Retry: Available within Operations (Job) Manager; to enable this capability, the automation designer must have Retry Task set to
true.
To specify the retry settings on the canvas:
Open the Advanced tab
Open the Task Details dialog and click the Advanced tab. Expand the Retry Task dropdown.
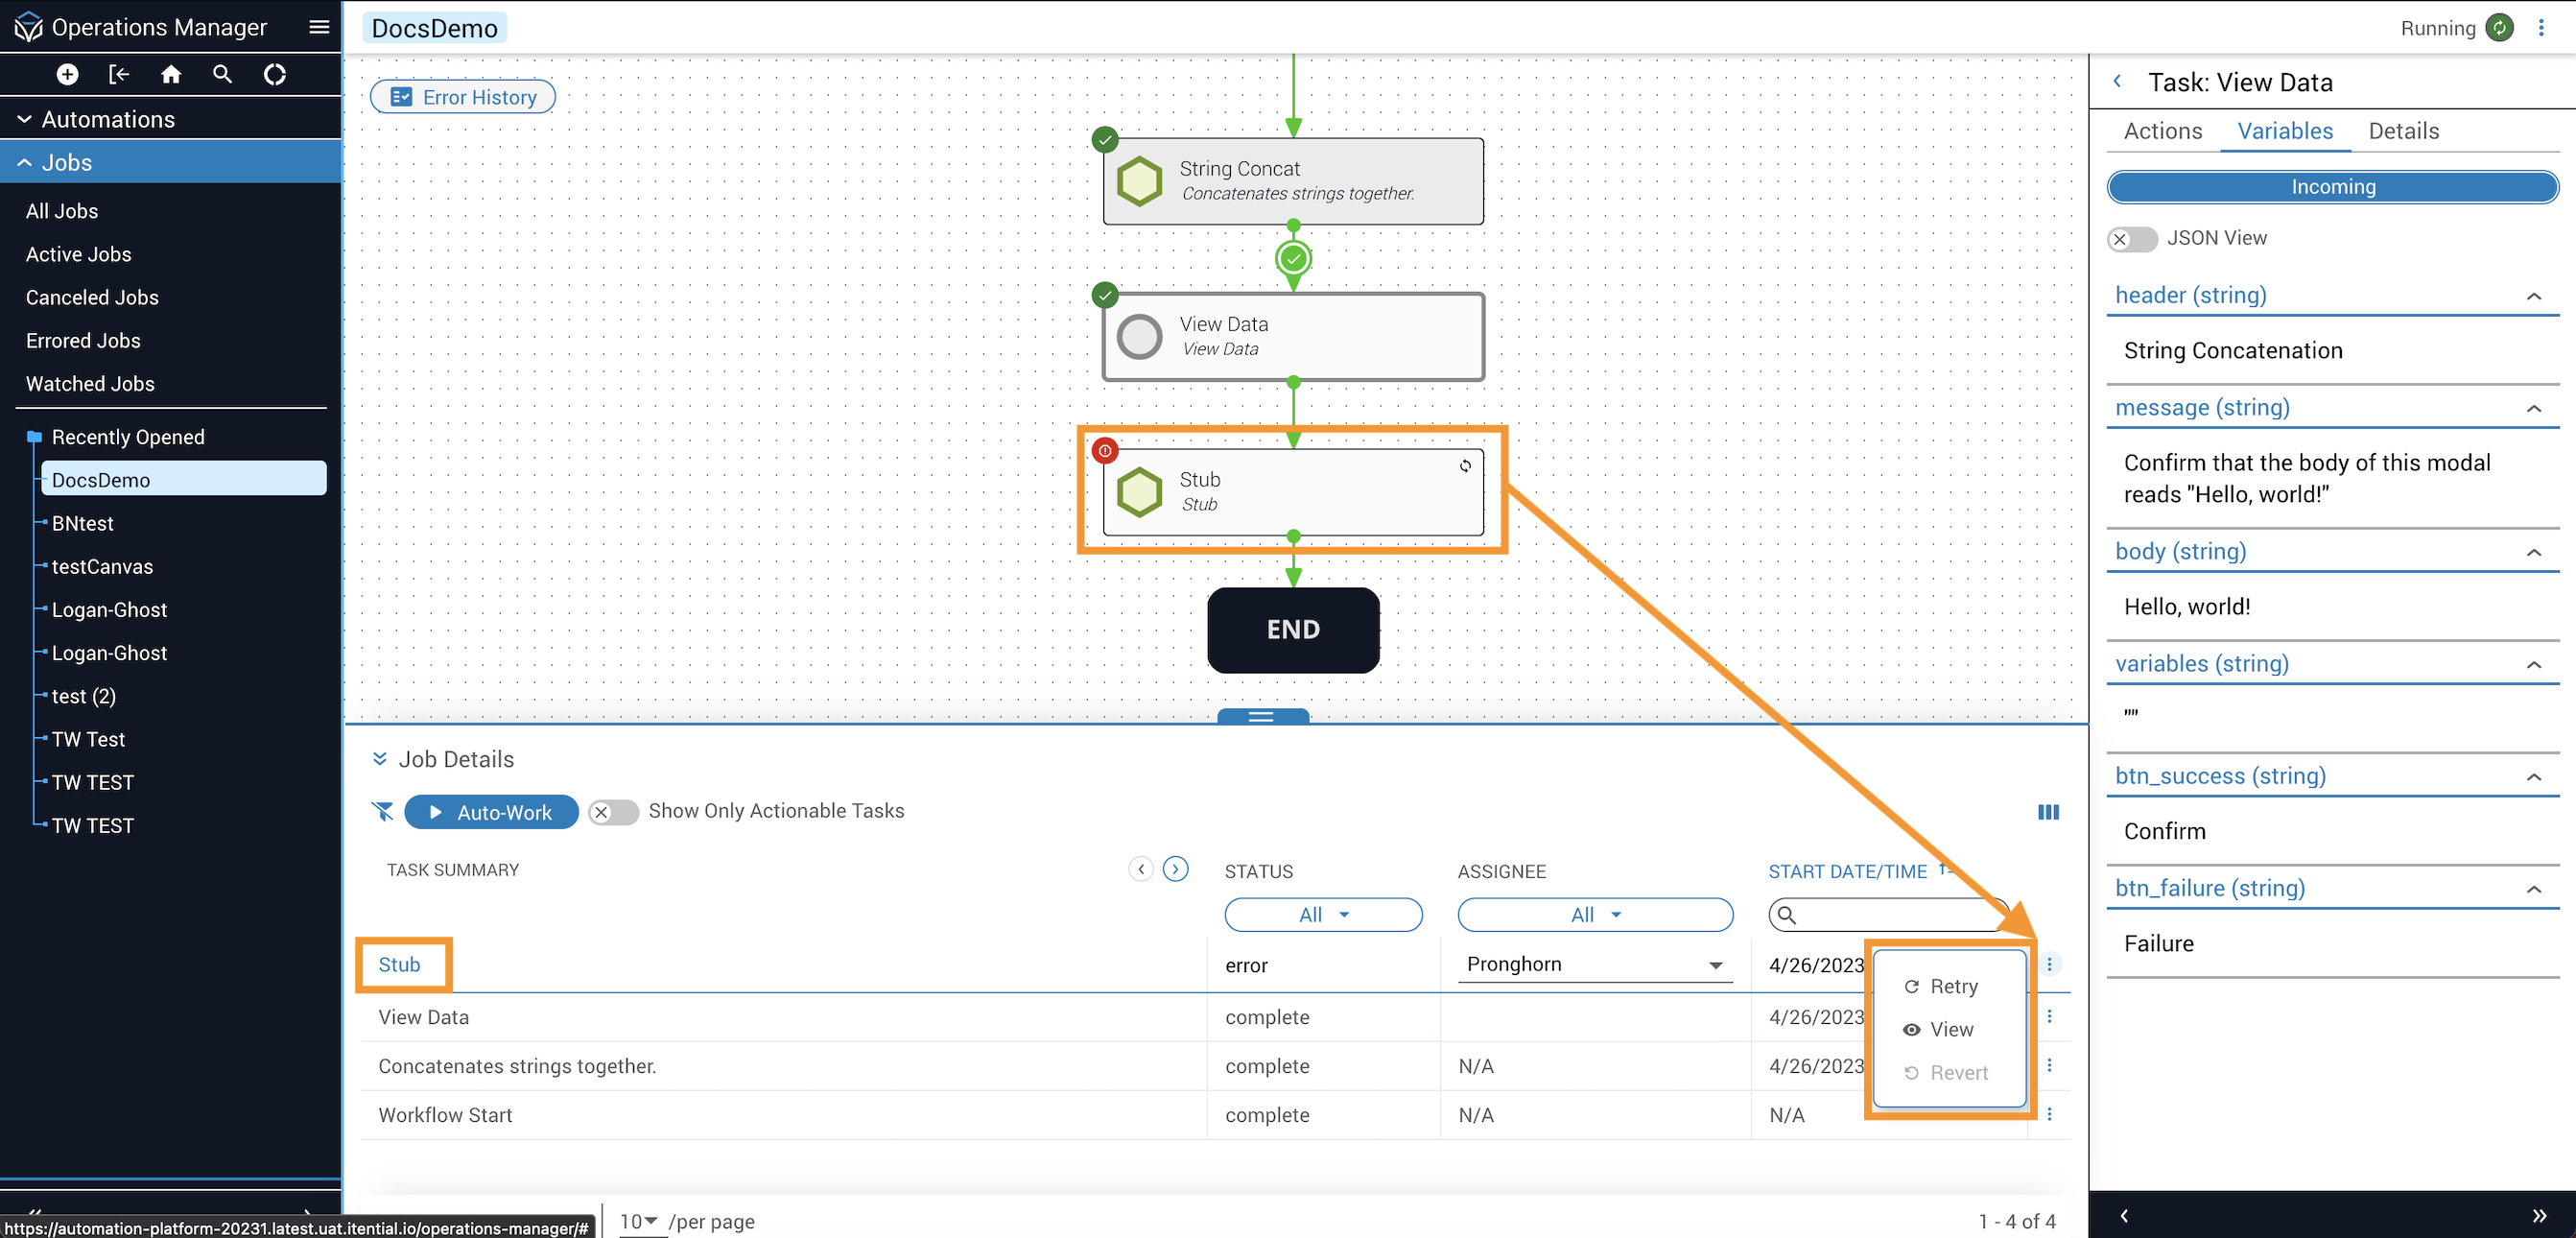
After running the workflow, you can manually retry a task by accessing the job in Operations Manager (Itential Platform > Operations Manager > Jobs) and clicking the Retry button in the Job Details panel, located in the vertical dots menu of the job. You will be presented with a Retry Task modal that contains a previous iteration of retry values. From this modal, you can provide new inputs on the retry. After entering the new inputs, click Continue Job.
Swap a task
Tasks on the canvas can be swapped without having to delete another task or the transition that connects to the task being swapped.
Open the swap task palette
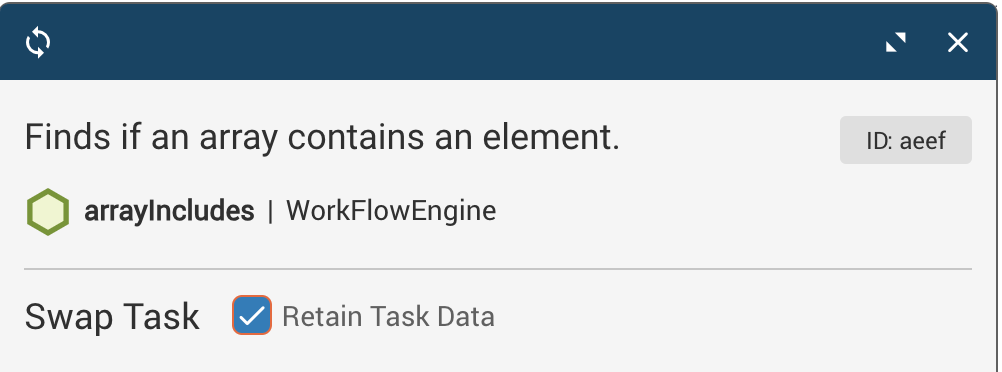
In the upper-left corner of the task panel overlay, click the Swap Task icon to open a simplified version of the task palette.

Select a replacement task
Locate the replacement task via the task filter, or scroll through the list of tasks. Click on the replacement task to put it in focus and enable the Confirm Swap button at the bottom of the panel.
Confirm or cancel the swap
Click Confirm Swap. The replacement task will appear in place of the original task on the canvas. Click Cancel Swap to revert back to the original task.
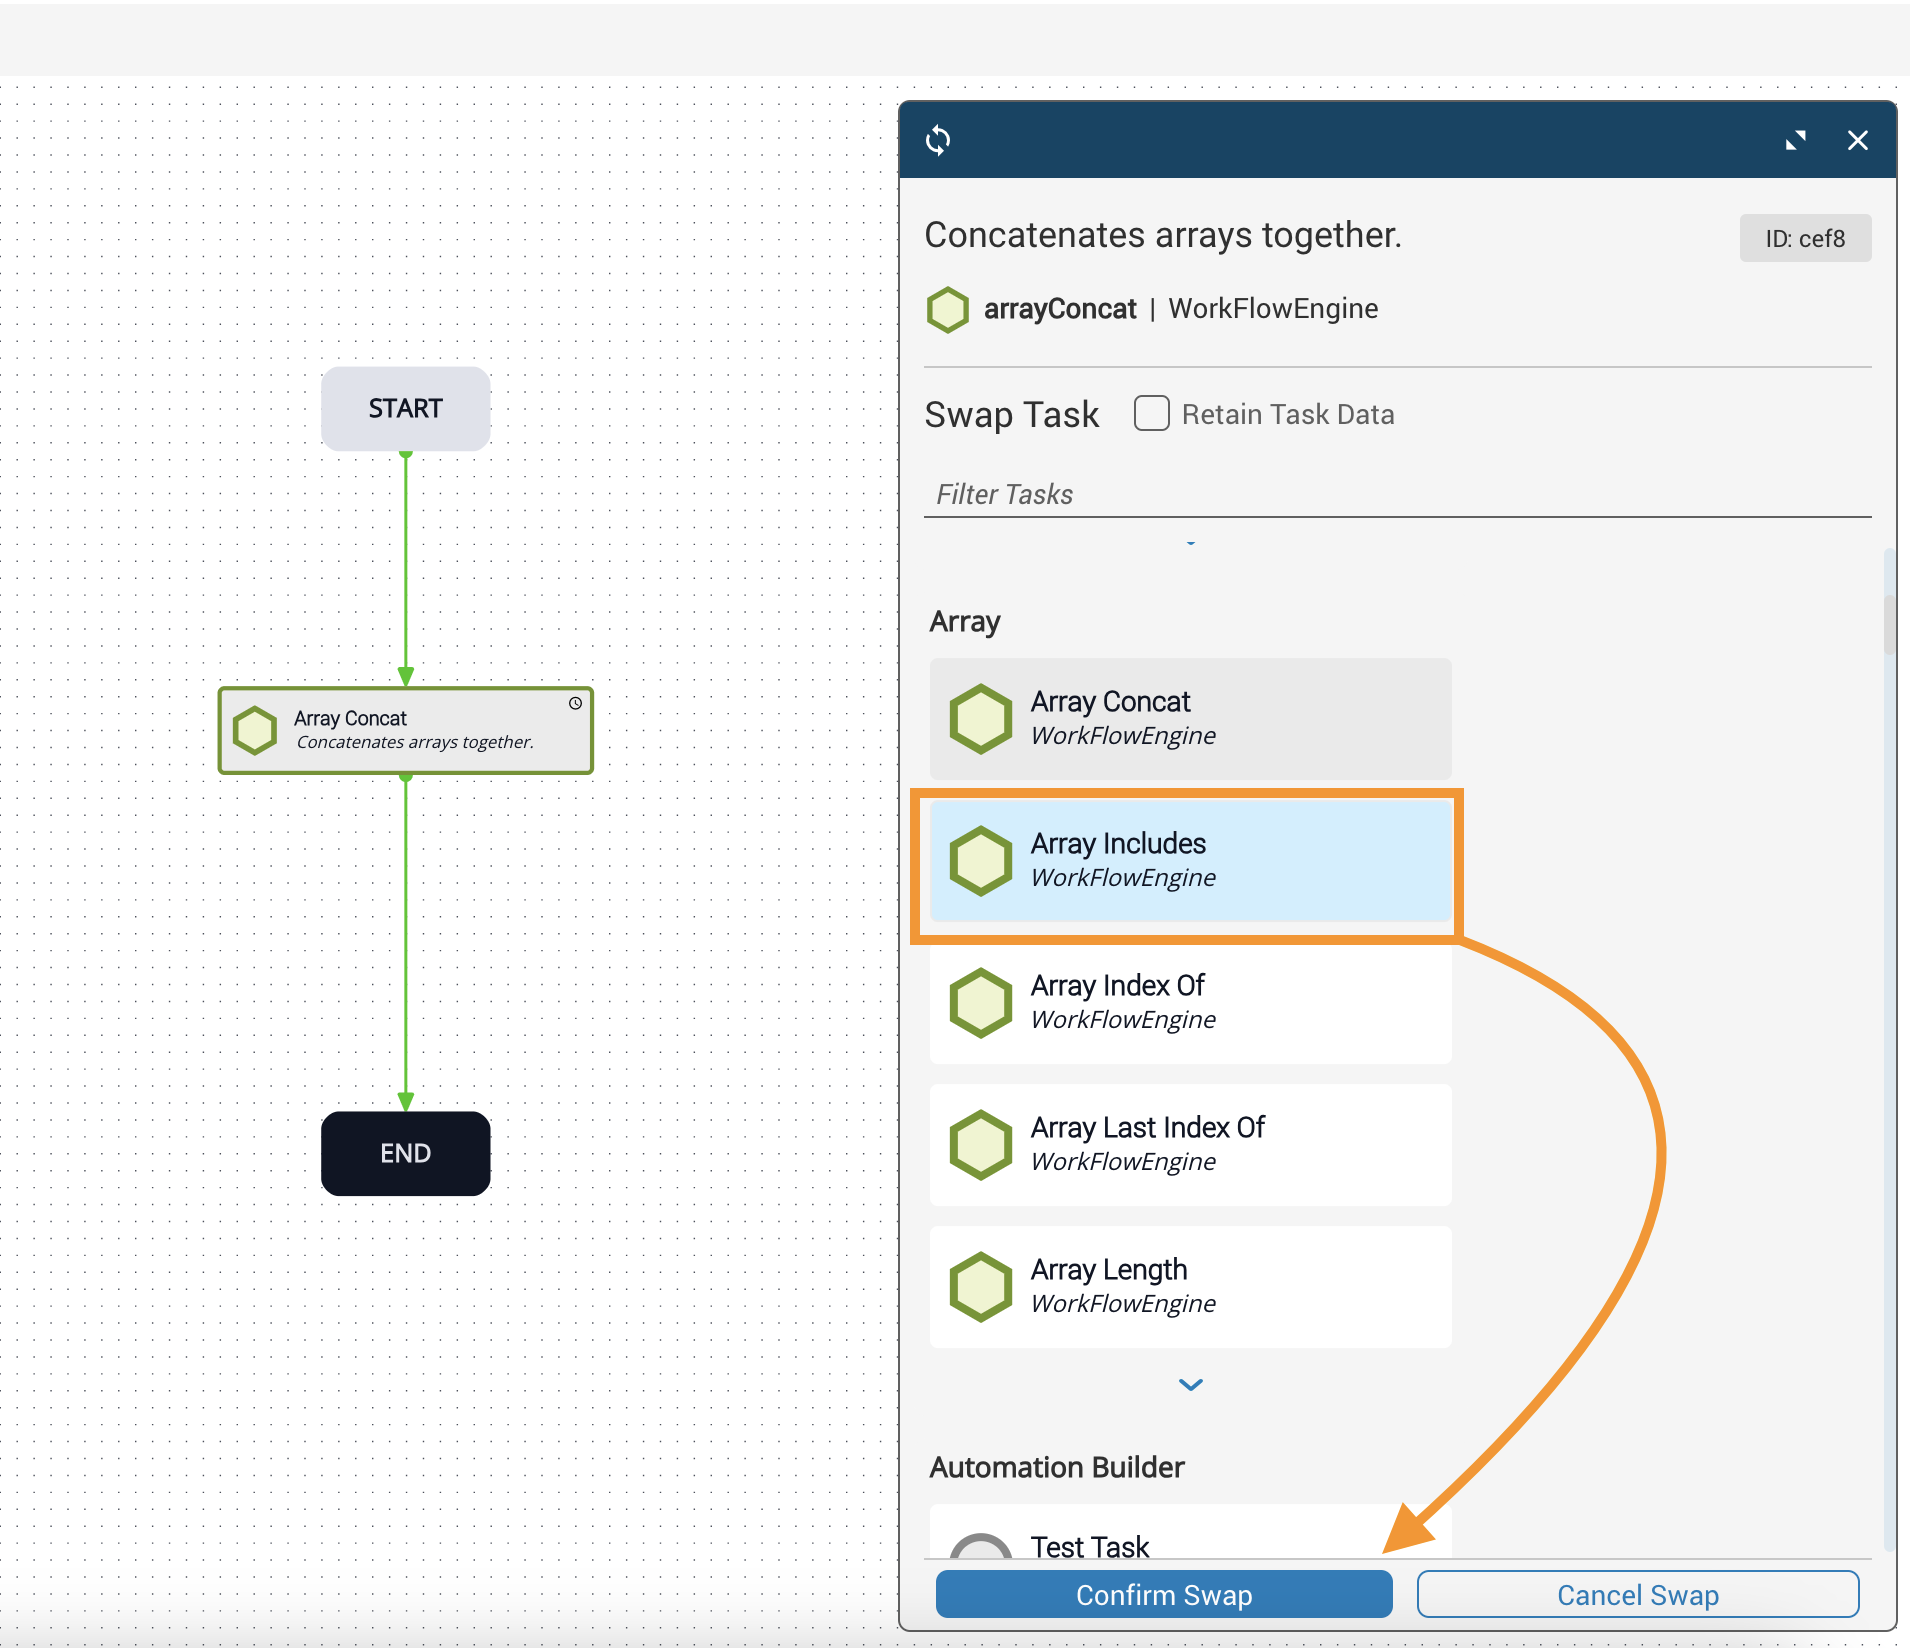
Retain task data (optional)
Any data under the Advanced tab of the original task will be retained in the swapped task.
If the swapped task contains similar variables to the original task, select the Retain Task Data checkbox to carry over any relevant data that is applicable. If the swapped task is a completely different type of task, the variables will not be carried over.
Restrict an automated task with a run window
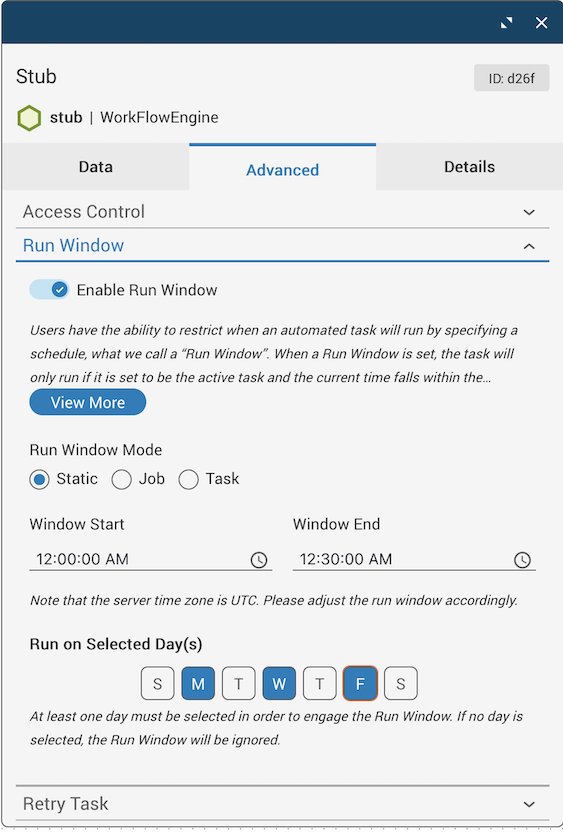
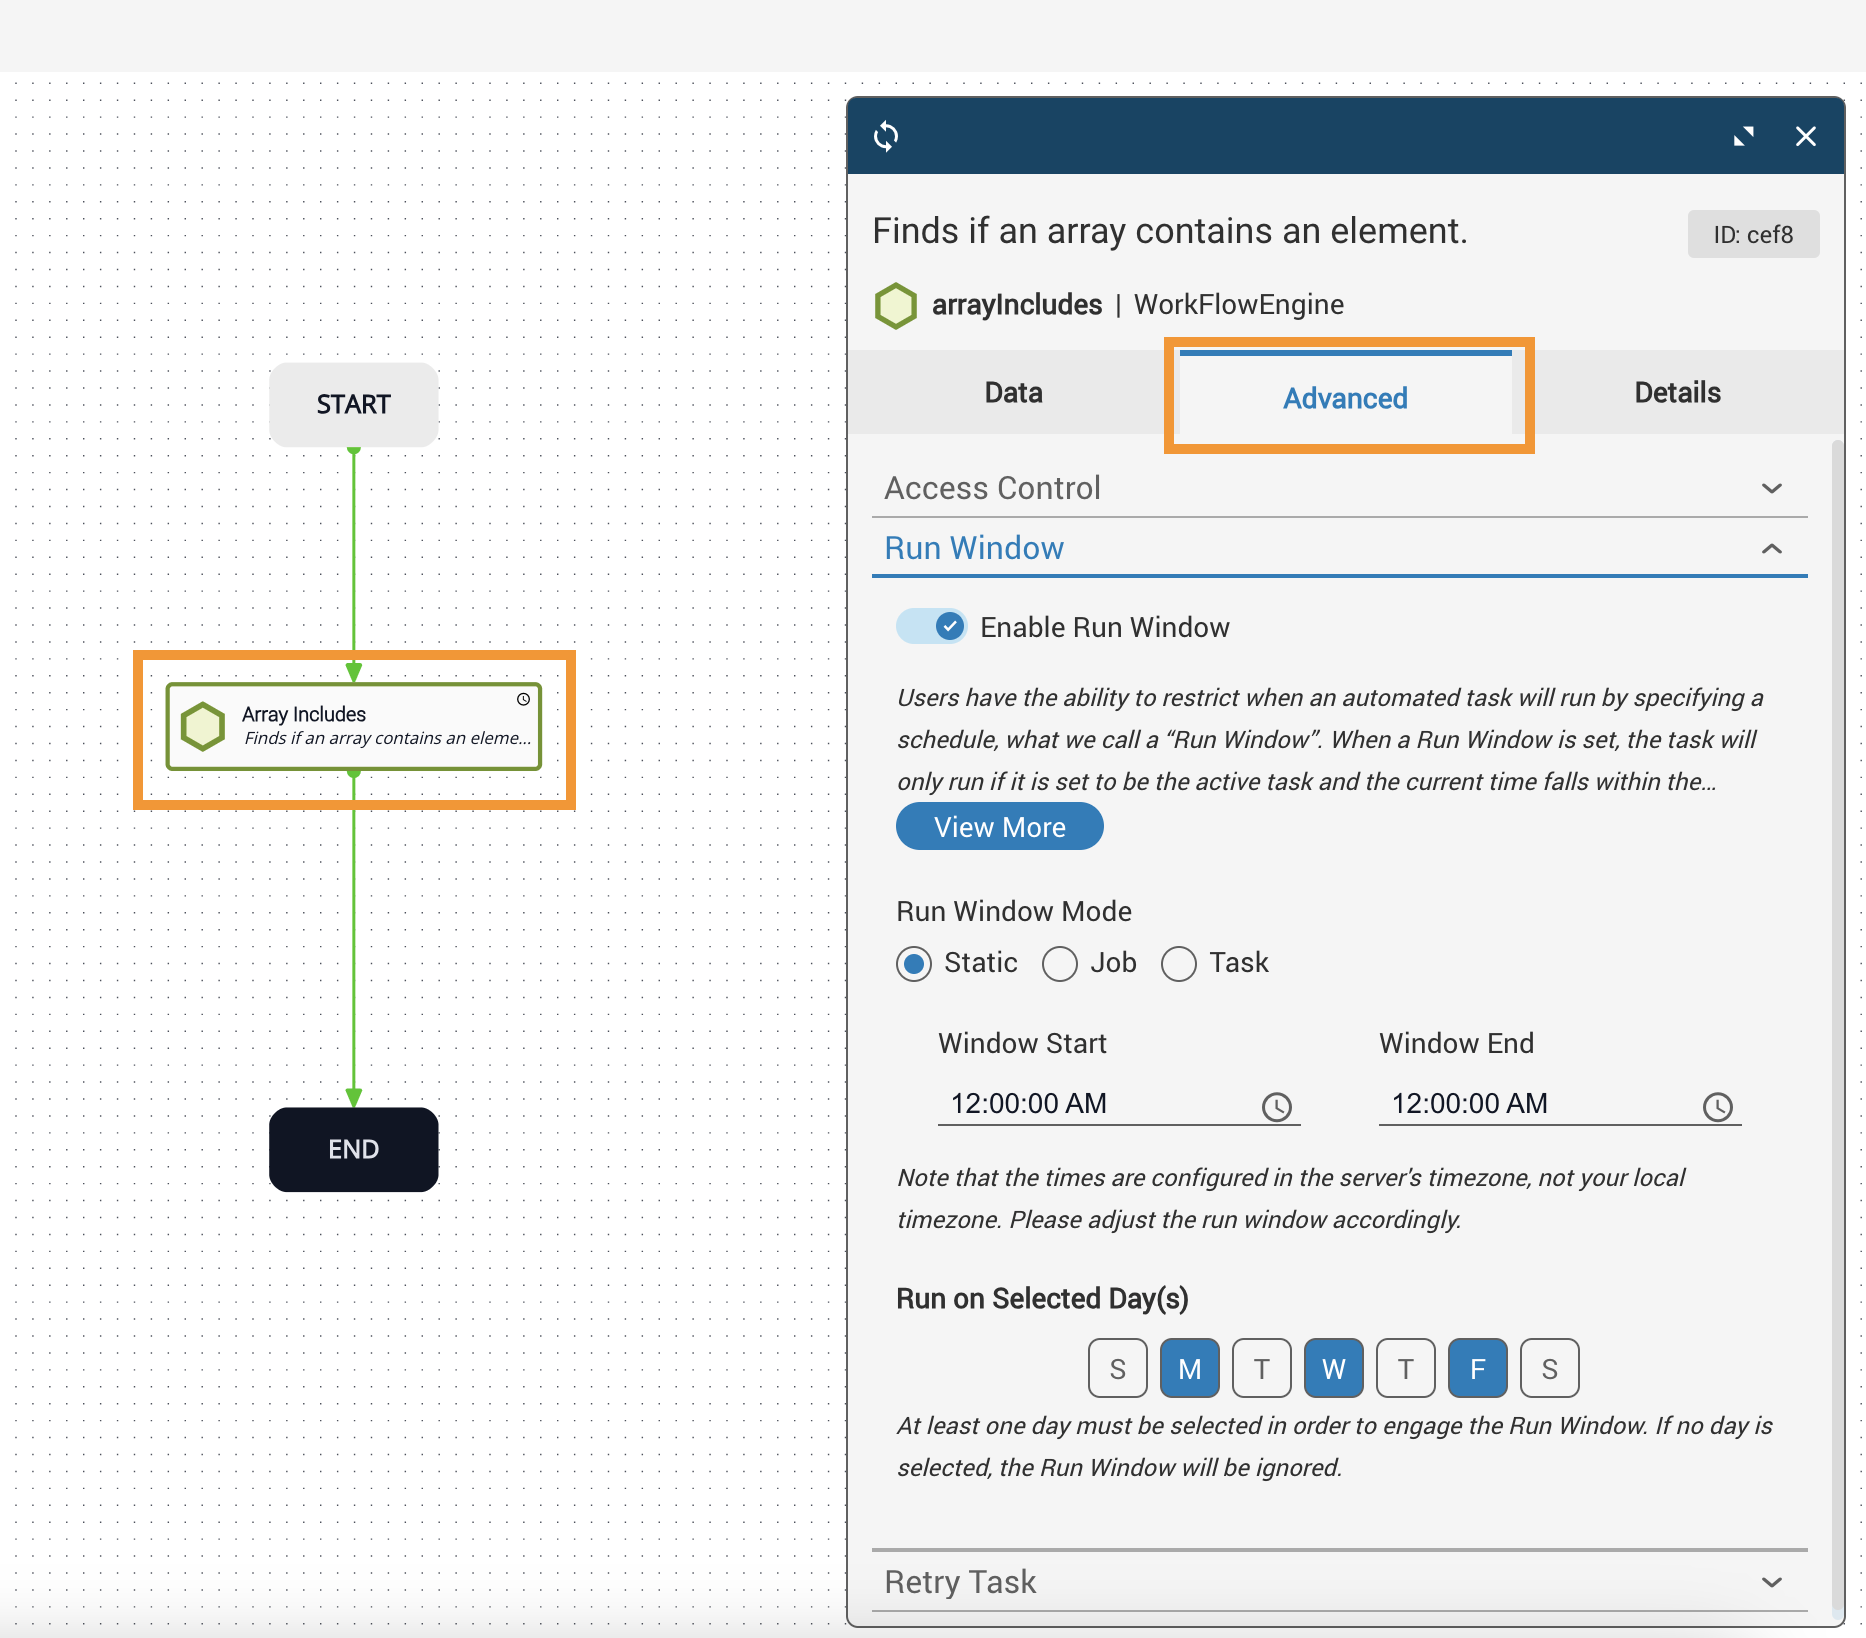
You can restrict when an automated task will run by specifying a schedule. This is also defined as setting the Run Window for a task, which means the task will not run (once it is time to run) if the current time falls outside the run window.
Open the Advanced tab
In an open automation, double-click an automated task to open the Edit task dialog. Click the Advanced tab and expand the Run Window dropdown.
Select a run window mode
Select an option from the Run Window Mode:
- Select Static to statically define the task’s run window.
- Select Job to pass the schedule at run time through a job variable, then configure the properties.
- Select Task to define the data source. Options include:
job,static, or any prior task in the current automation.