Use a JSON schema to create forms

2023.2 2023.1 2022.1

With JSON Forms it is possible to quickly create forms in a workflow using just a JSON schema. The renderJSONSchema task is available in JSON Forms via Studio in earlier versions of Itential Platform. It is a manual task that accepts a schema as input, creates a form from the schema, renders it, and then discards the form instance.

Use the renderJSONSchema task
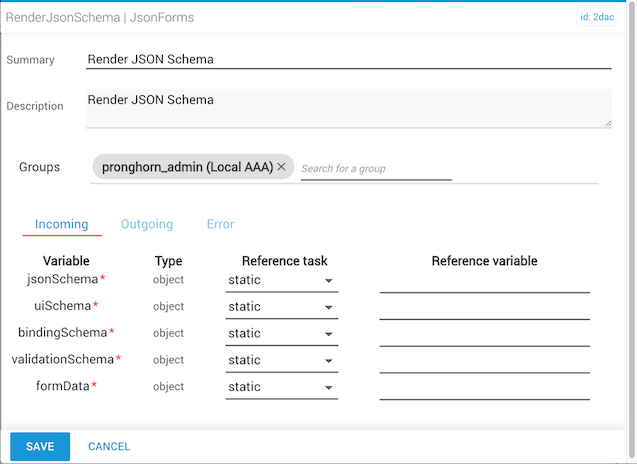
1

Create a new automation

Navigate to Studio and create a new automation.

2

Select the JsonForms task source

Under the list of tasks in the right pane, select JsonForms.

3

Add RenderJsonSchema to the canvas

Add RenderJsonSchema to the canvas. This task alone is enough to render a form.

4

Open the task editor

Double-click the task to open the task editor.

RenderJsonSchema task editor showing the five input fields

Task inputs

The task accepts five inputs that define how form elements are structured, rendered, and behave.

Input parameterDescription
jsonSchemaThe JSON schema that defines the structure of the entire form.
uiSchemaDefines the widgets to use for the form elements.
bindingSchemaDefines external data binding with a form element — typically for a dropdown populated with options. Also used to define dynamic validation. See the Itential binding schema guide for more information.
validationSchemaDefines dynamic validations for a field in the form.
formDataUses instance data to populate the form. The instance data is a JSON object with key-value format, where the key is the field name and the value is the field’s rendered value. Values inside a form rendered with instance data can be edited.

Sample input schemas

Use the sample schemas below as input to render a form using the renderJSONSchema task. Once task inputs are complete, save the automation and start the job.

jsonSchema

1{
2 "title": "inputFields",
3 "description": "",
4 "type": "object",
5 "required": [],
6 "properties": {
7 "text1": {
8 "type": "string",
9 "title": "Text 1",
10 "description": ""
11 },
12 "textArea1": {
13 "type": "string",
14 "title": "Text Area 1",
15 "description": ""
16 },
17 "number1": {
18 "type": "number",
19 "title": "Number 1",
20 "description": ""
21 },
22 "checkbox1": {
23 "type": "boolean",
24 "title": "Checkbox 1",
25 "description": "",
26 "default": false,
27 "enum": [
28 true,
29 false
30 ]
31 },
32 "dropdown1": {
33 "type": "string",
34 "title": "Dropdown 1",
35 "description": "",
36 "enum": ["item 1", "item 2"]
37 }
38 }
39}

uiSchema

1{
2 "text1": {
3 "ui:placeholder": "Enter text only"
4 },
5 "textArea1": {
6 "ui:placeholder": "Enter text",
7 "ui:widget": "textarea"
8 },
9 "number1": {
10 "ui:placeholder": "Enter a number",
11 "ui:widget": "updown"
12 },
13 "dropdown1": {
14 "ui:placeholder": "Select an item"
15 }
16}

Render the JSON schema form

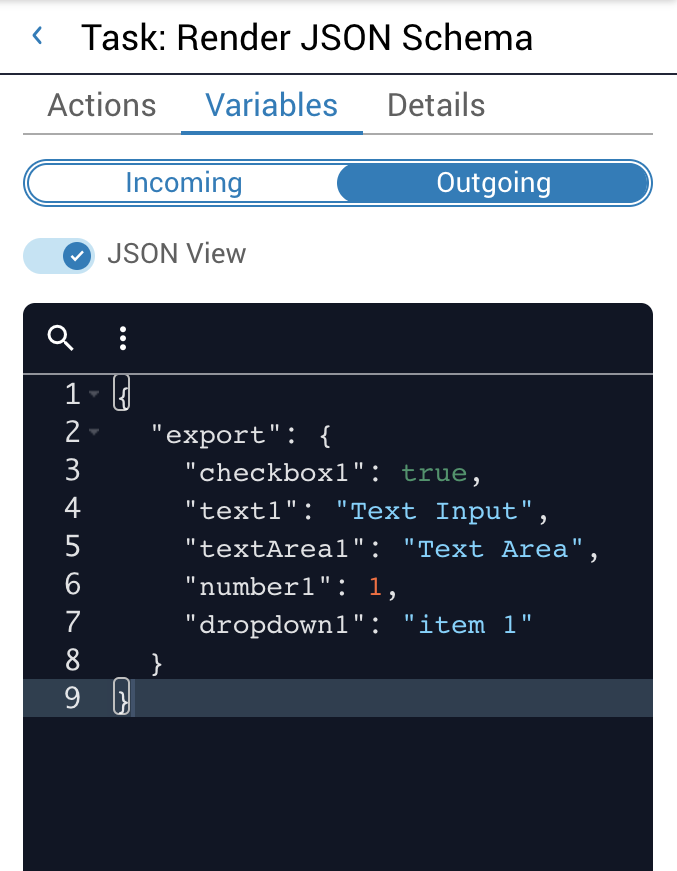
After the job runs, work the task from Jobs in Operations Manager, where you can also view task details and incoming variables.

1

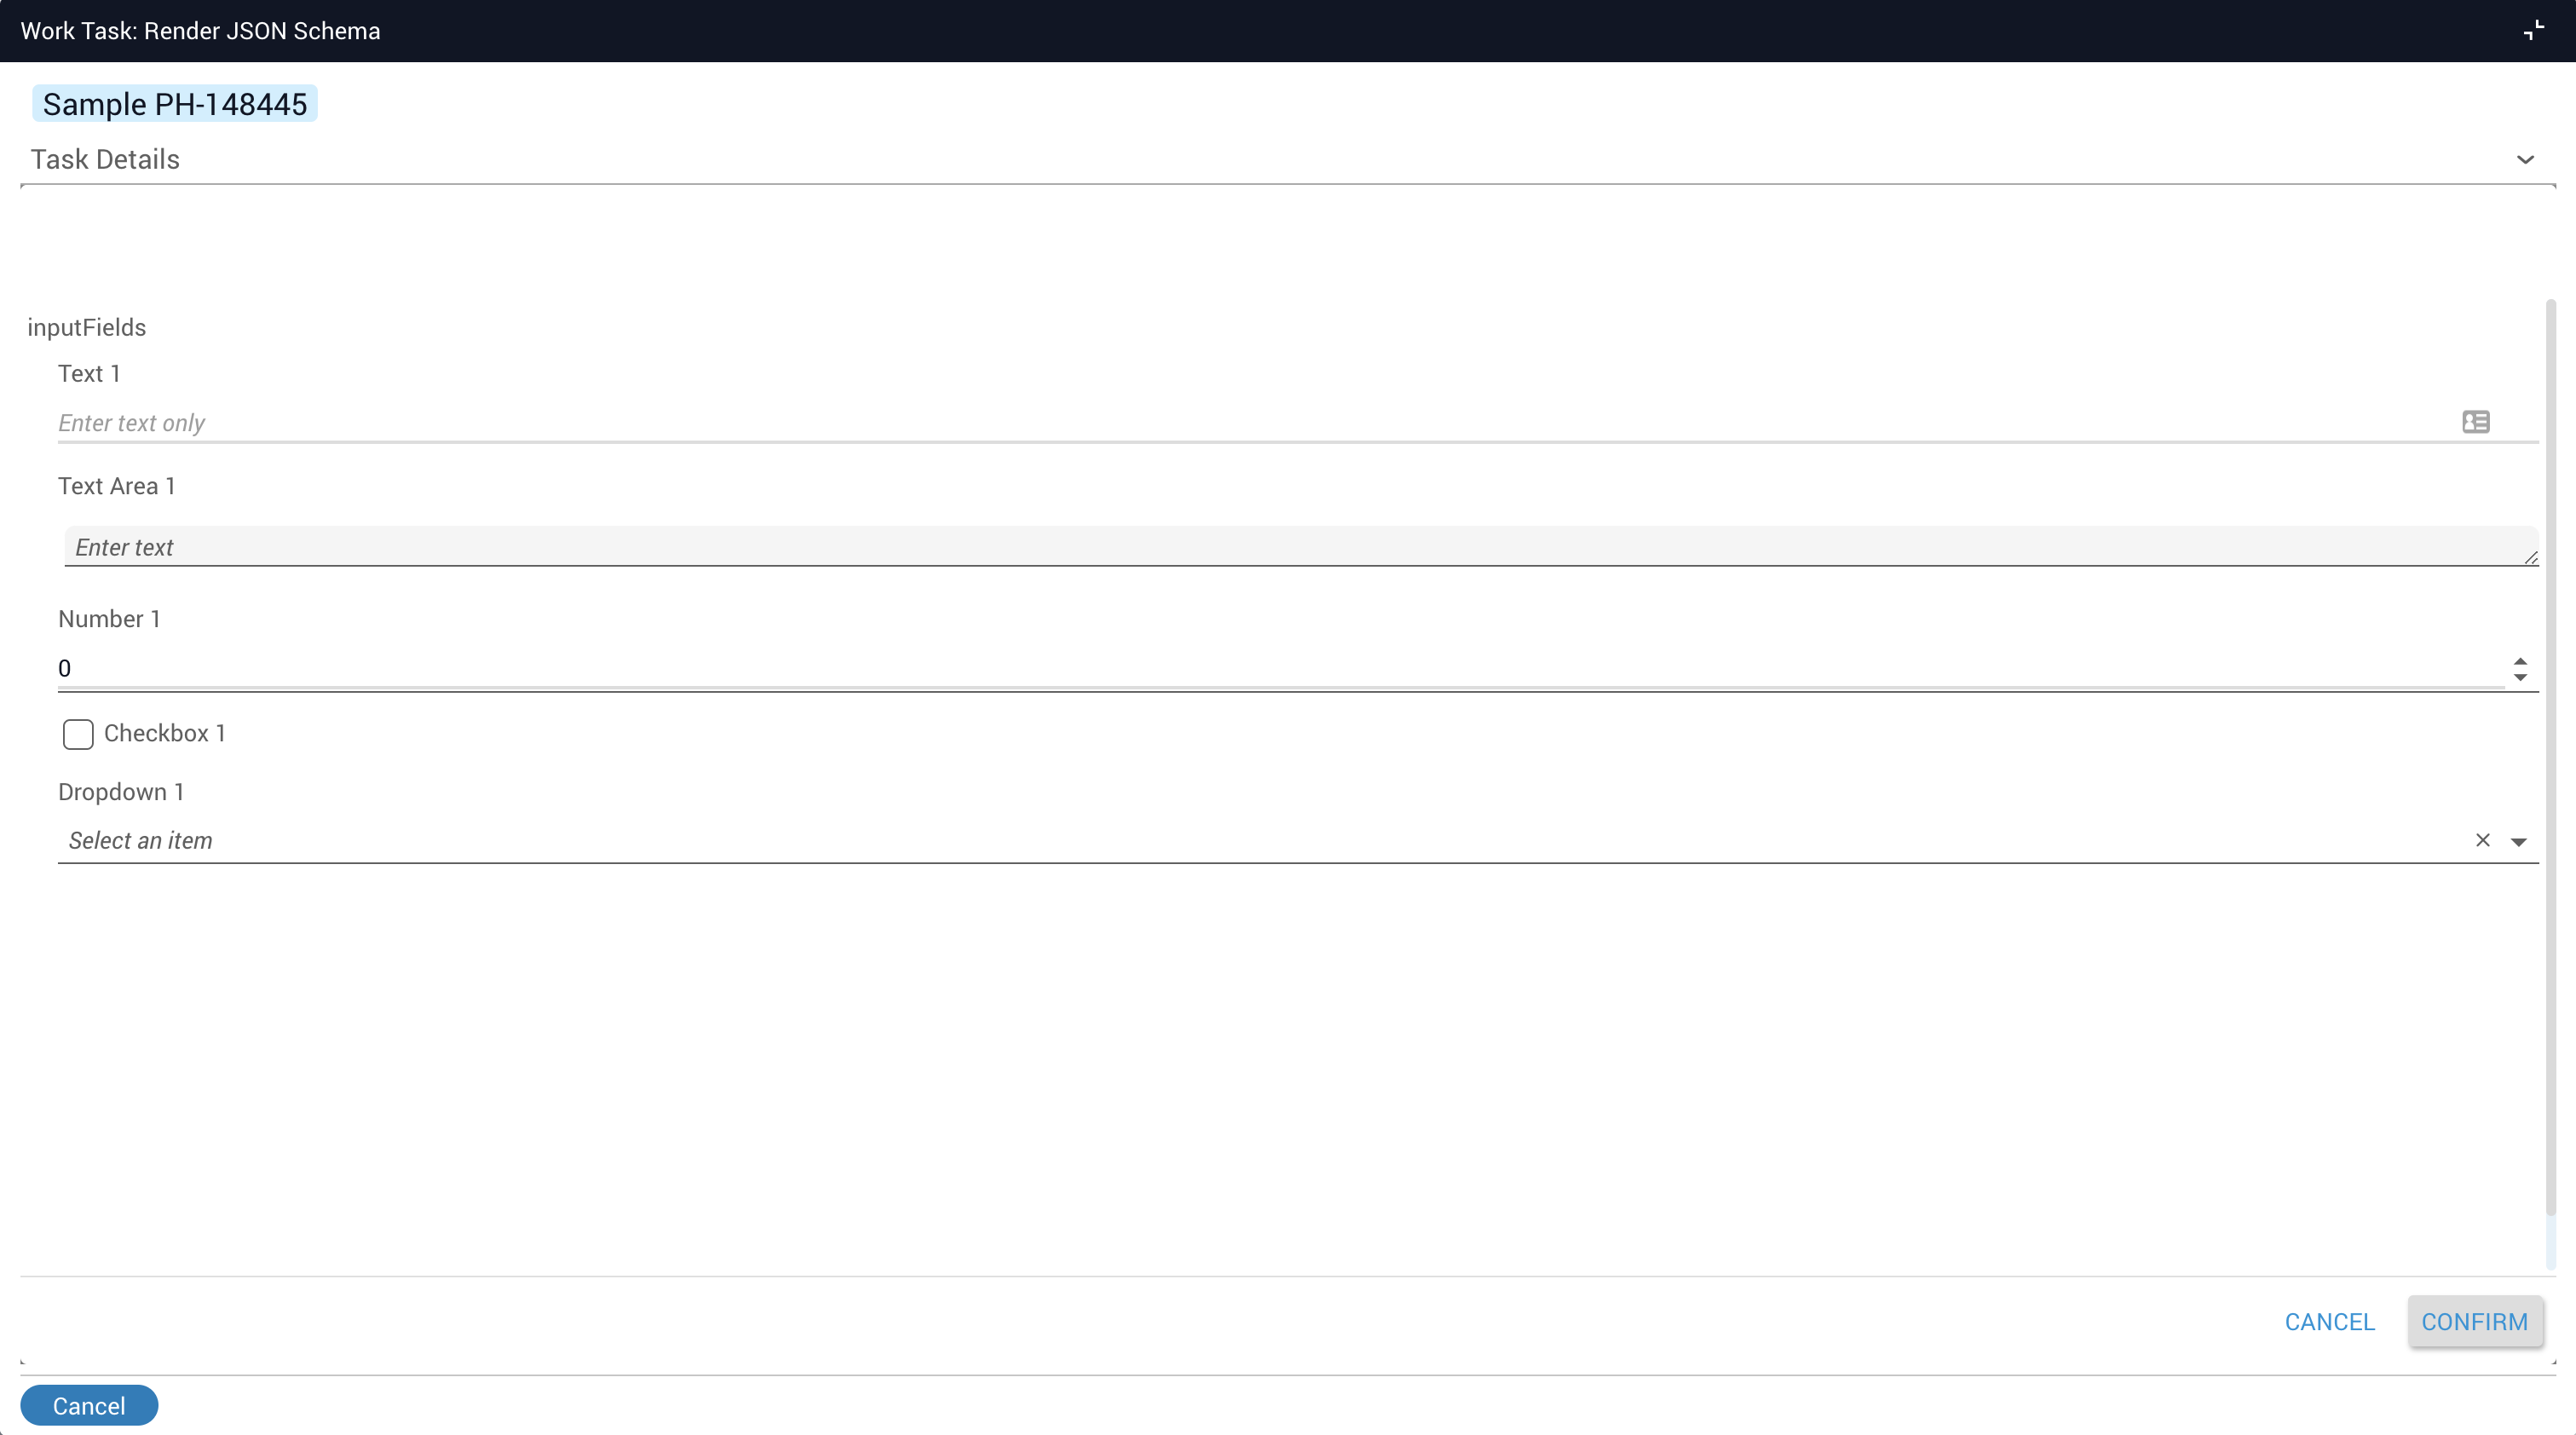
Open the rendered form

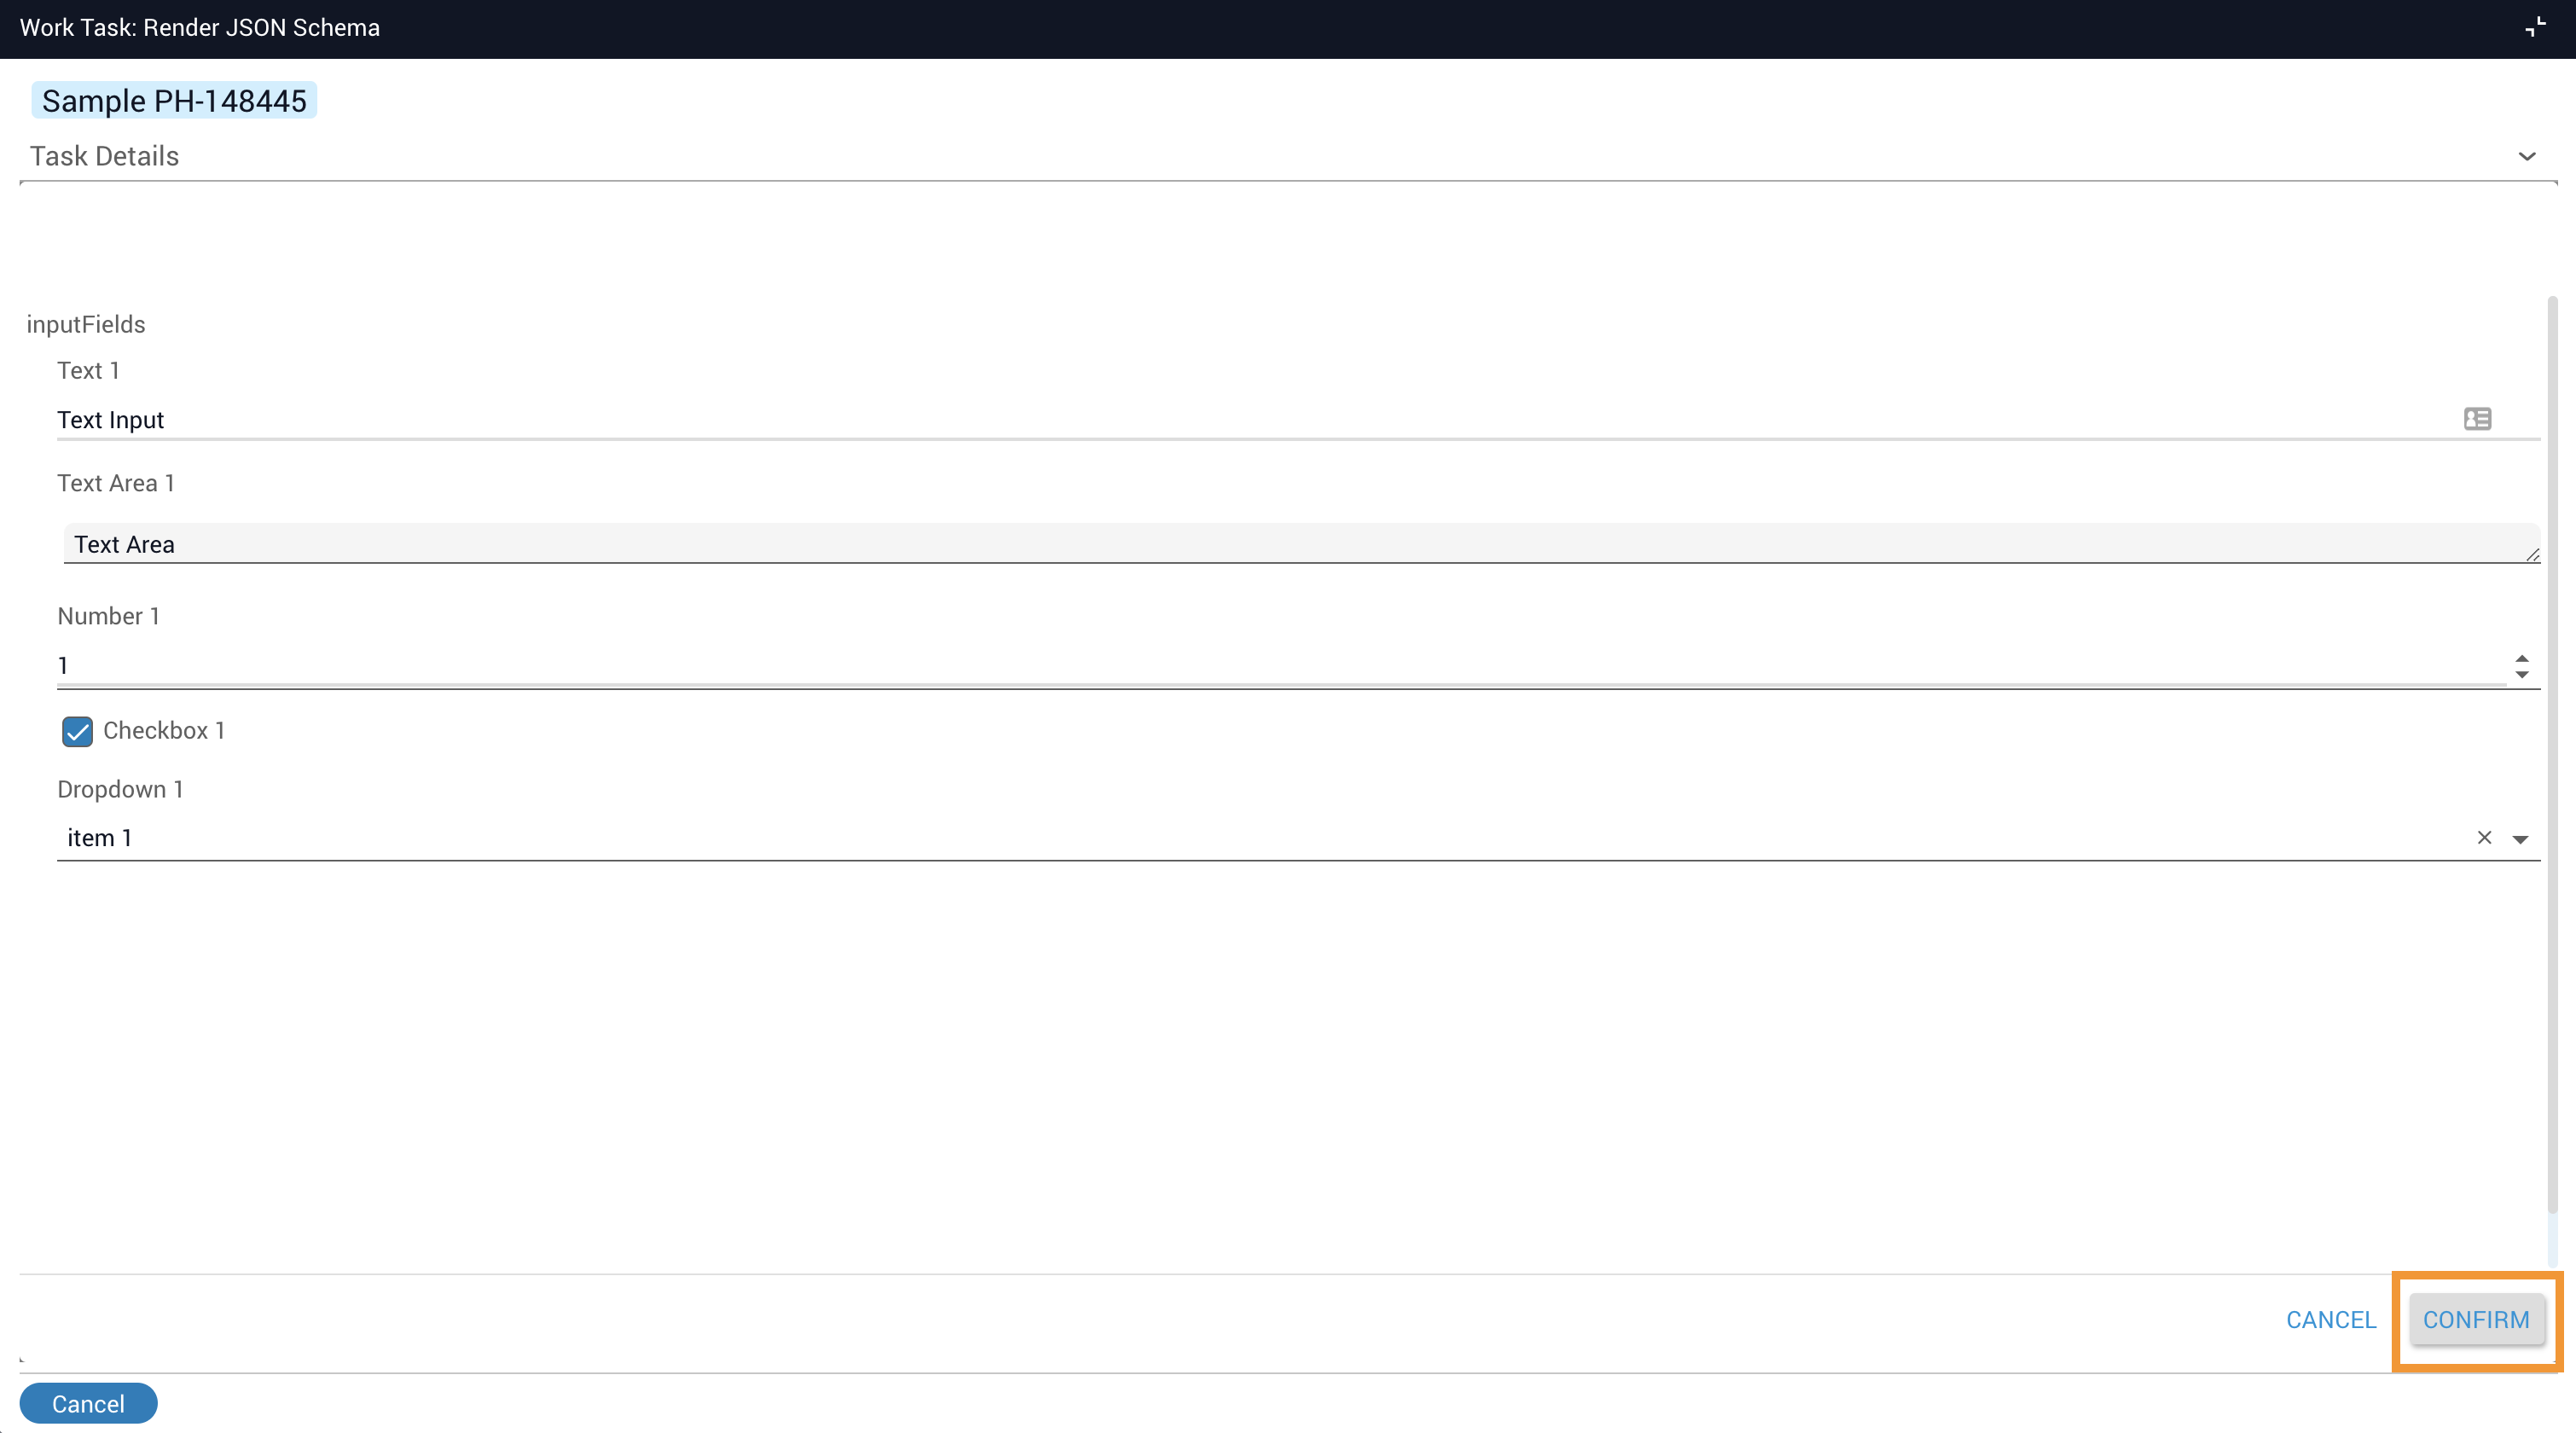
Click the work task. The rendered form displays with the inputFields reflecting the fields defined in the JSON schema.

Rendered form showing the input fields defined in the JSON schema
2

Complete the form

Complete the inputFields in the form and click Confirm to complete the task.

Input fields filled in before clicking Confirm
3

Review the outgoing data

Once the task is complete, the Outgoing tab in Task History shows that the form data has been exported.

Outgoing tab showing exported form data after task completion

This task does not create a form instance in the json-form application. The form will not appear when you open the JSON Forms app.