NSO Service Model form field reference
Guidelines
- To view device elements from a service model in Form Builder, specify where to find the YANG files. In NSO adapter version 4 and higher, configure the
yangdirsproperty in the adapter. - In older NSO adapter versions (pre-version 4), include your YANG schemas in the
load-pathofncs.conf. - For more information, see the NSO NETCONF adapter documentation.
Create a form using an NSO YANG service model
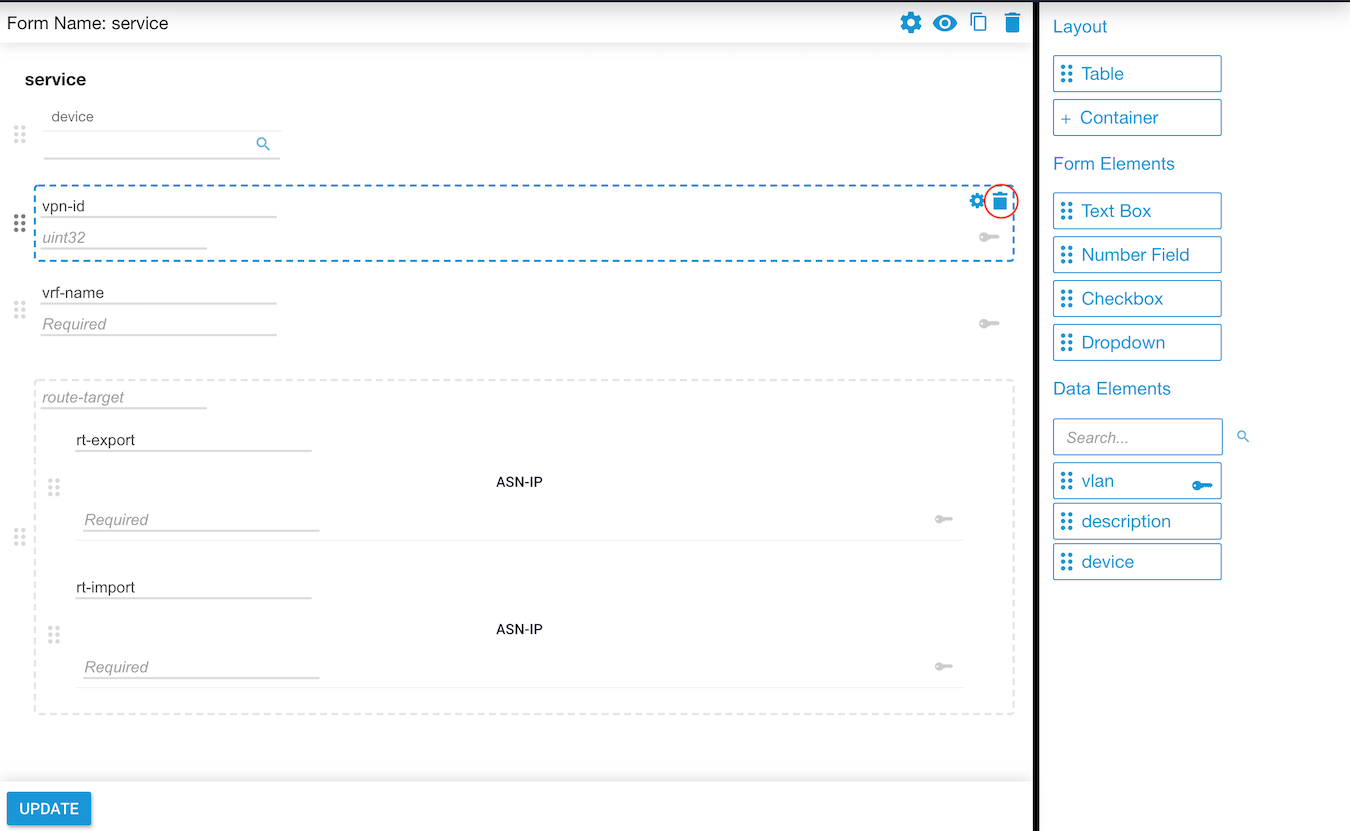
Select a service
Select the appropriate service from the Data Elements dropdown list. The leafs defined in the model display automatically below the dropdown.
Assign fields
Drag and drop the fields onto the form. By default, each field label matches the leaf name from the service model. Click a field and type a new label to change it.
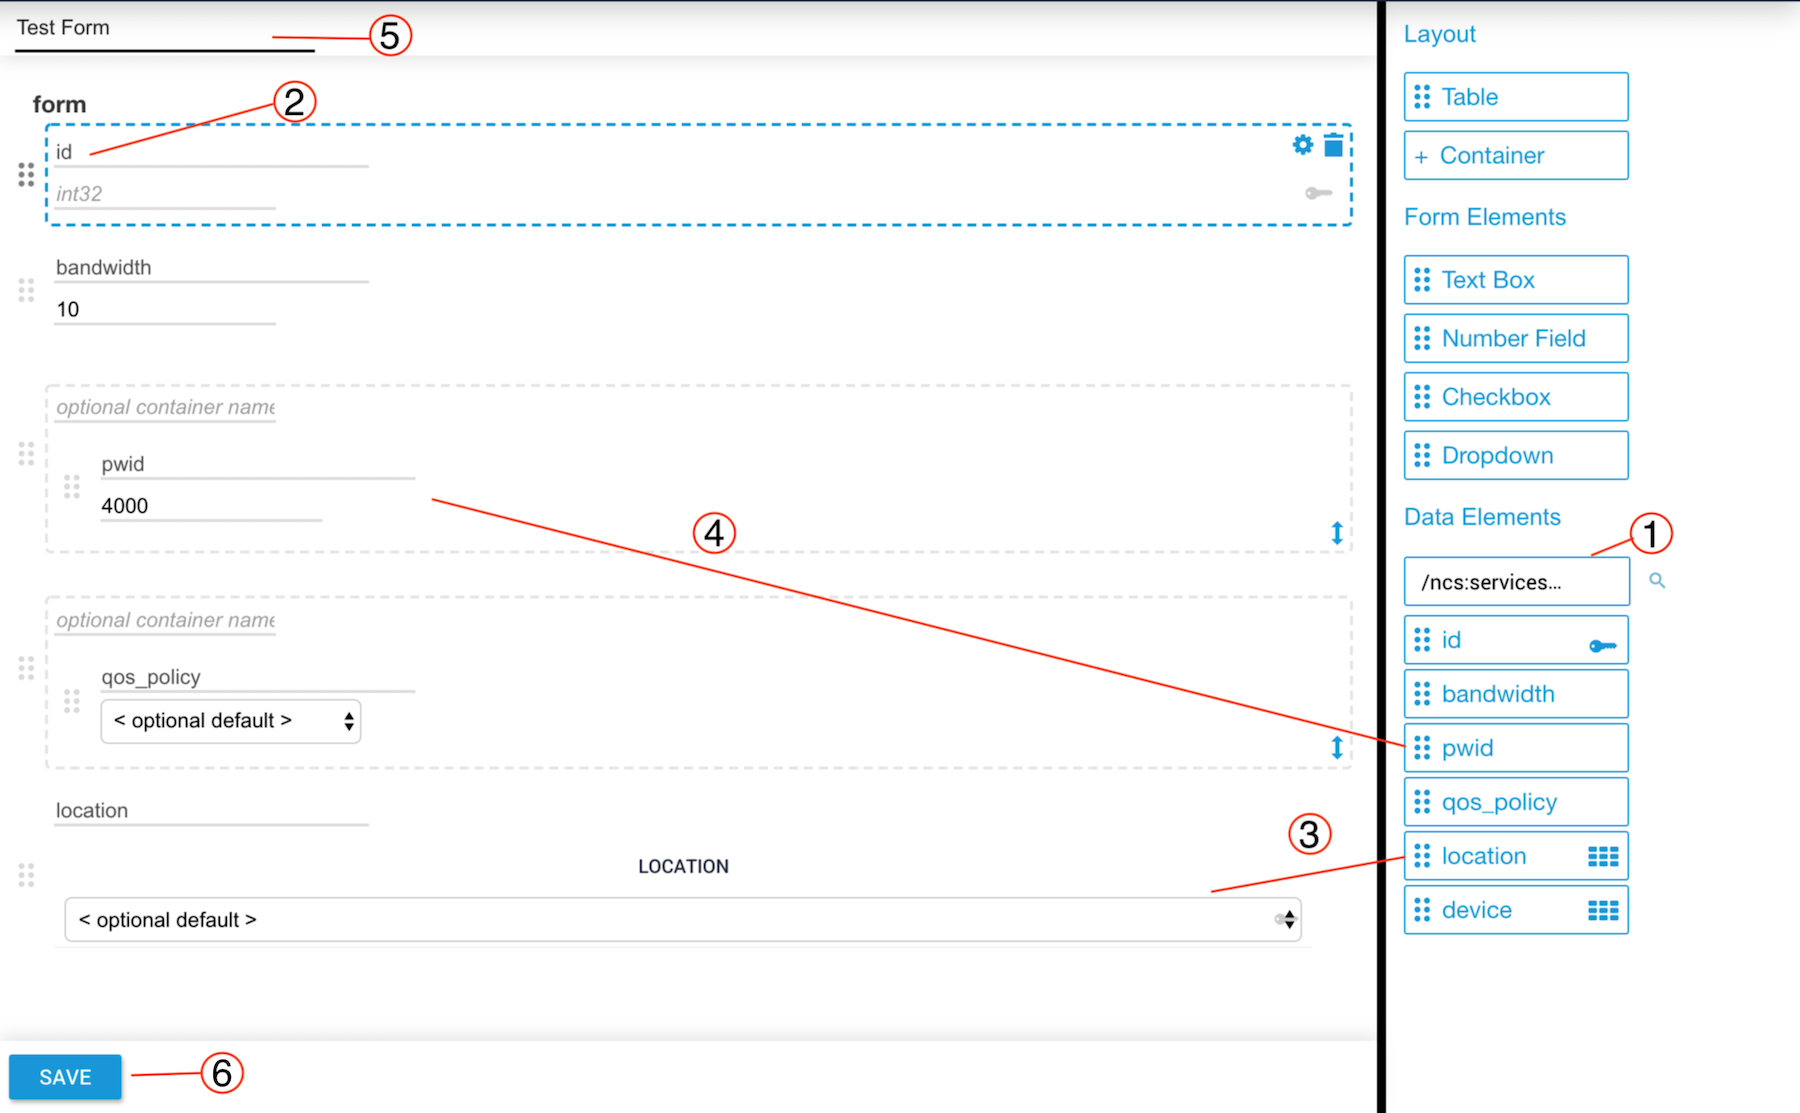
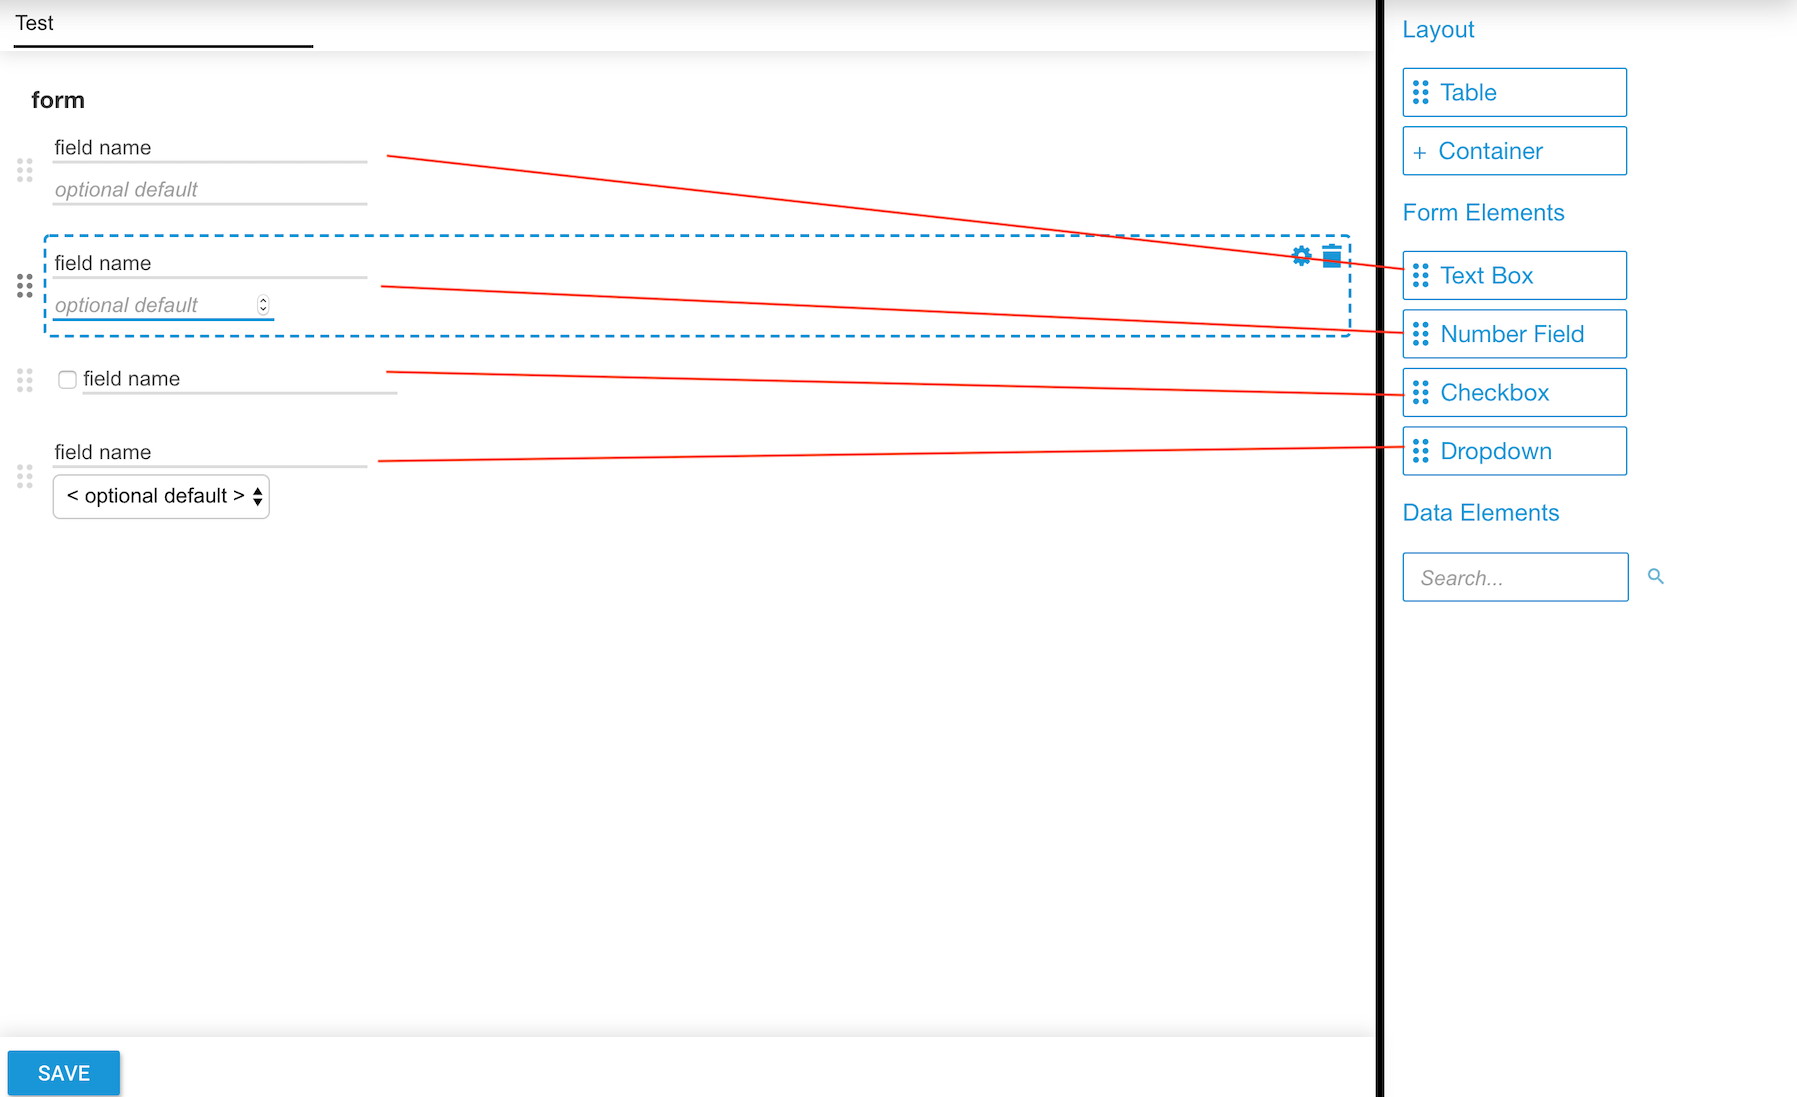
Meta Data fields
In addition to leafs from an NSO YANG service model, you can assign Meta Data Fields to a form. The following field types are available:
- Text Box — Allows any characters.
- Number Field — Accepts only numerical values.
- Checkbox — A boolean field that can be checked or unchecked.
- Dropdown — Accepts one selected option from a dropdown list.
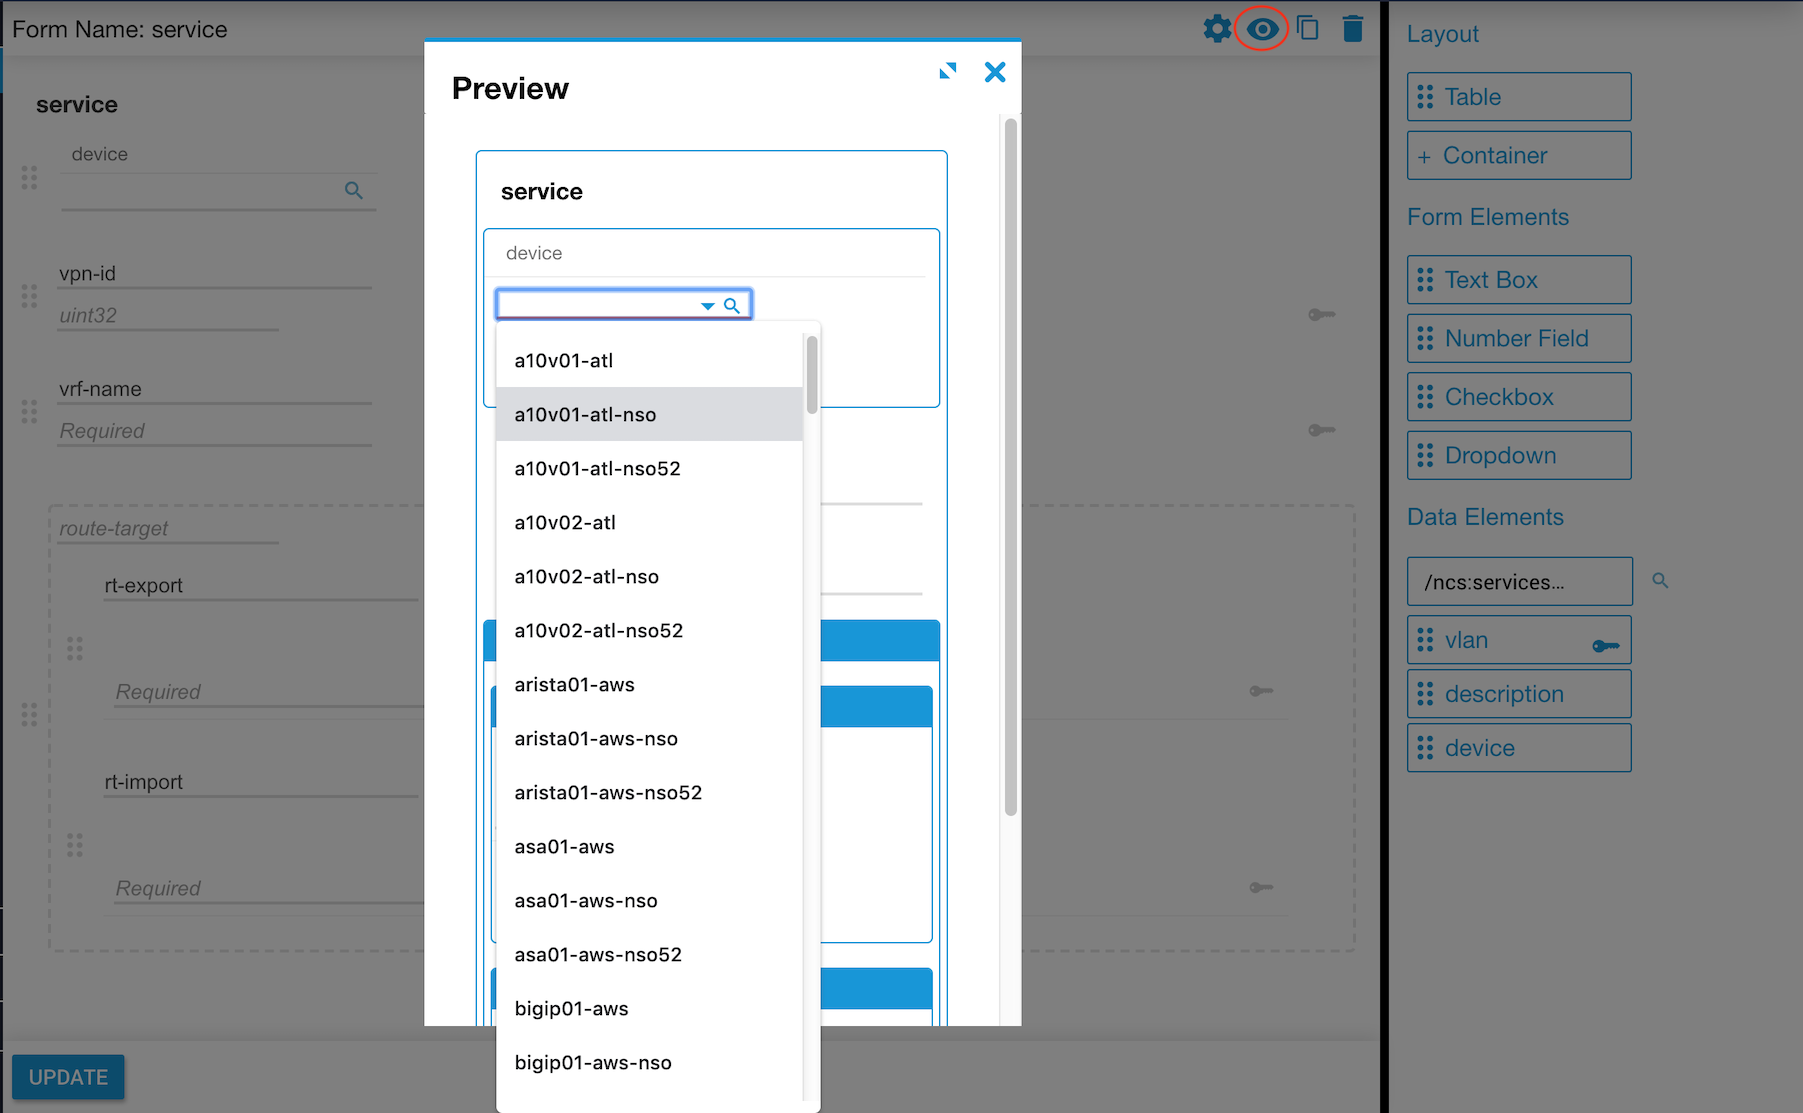
Preview a form
Once a form is saved, click the Form Preview button (eye icon) in the title bar to preview the form.
.png)
All form fields are editable in Preview mode, including those configured as a leaf reference or enumeration in the YANG service model, just as they are when the form is used in a workflow.
Enable or disable constraints
The Validate Constraints checkbox allows you to bypass the must statement validations defined in the YANG service models. The checkbox works at the form level — disabling it disables validations for the entire form. It does not disable other form validations.
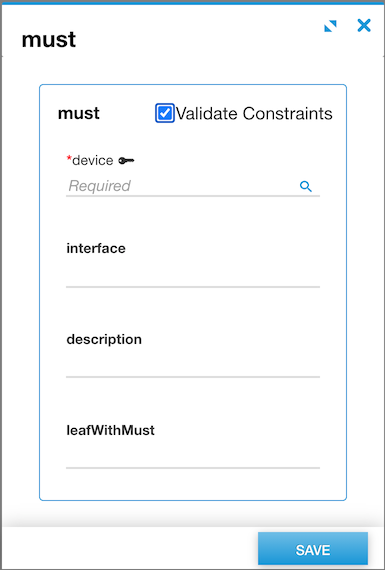
Examples
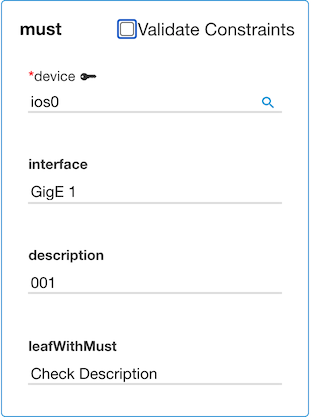
The example below shows a form with a leaf description that has a length constraint (3 to 8 characters) and a must statement (leafWithMust) that requires description to be exactly 5 characters.
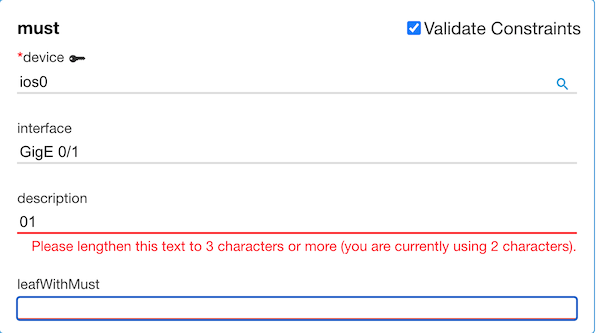
When description has only two characters, an error message displays for the leaf:
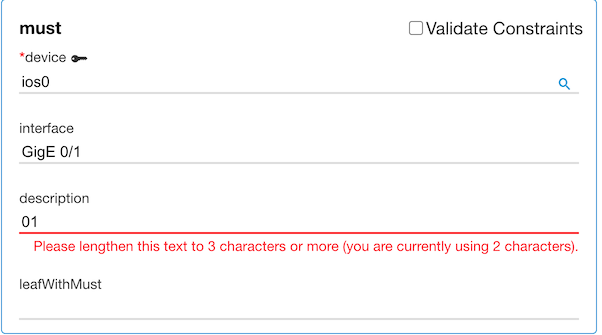
Disabling Validate Constraints does not remove the length error for the field:
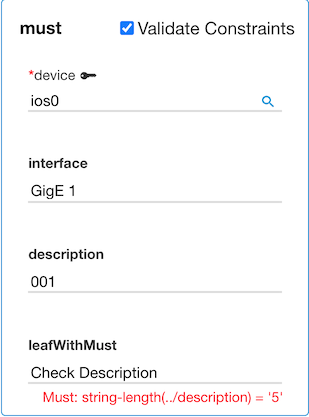
When description has three characters, the length validation passes — but leafWithMust now fails because it requires exactly 5 characters:
When Validate Constraints is unchecked, the must statement validation is disabled and the form reports no errors:
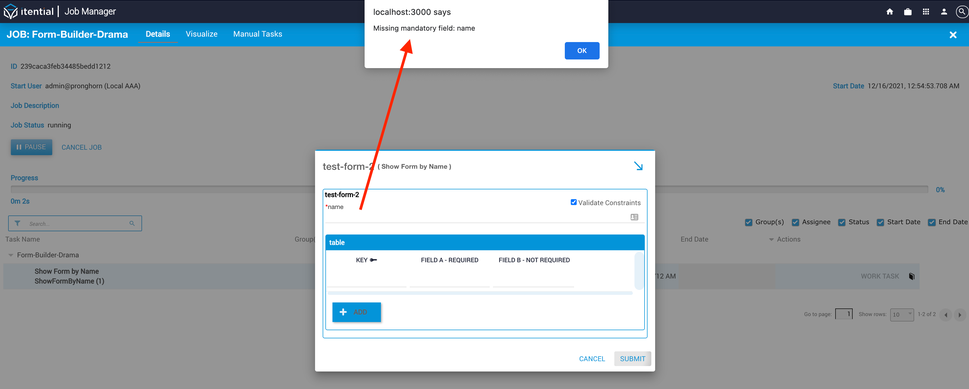
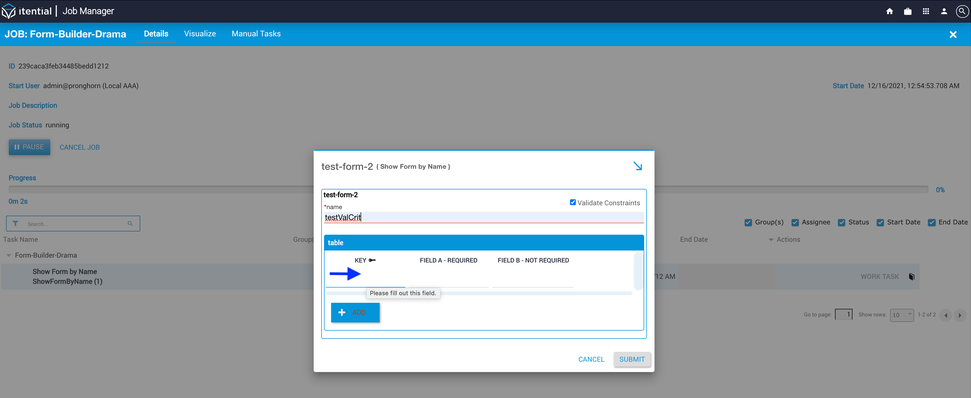
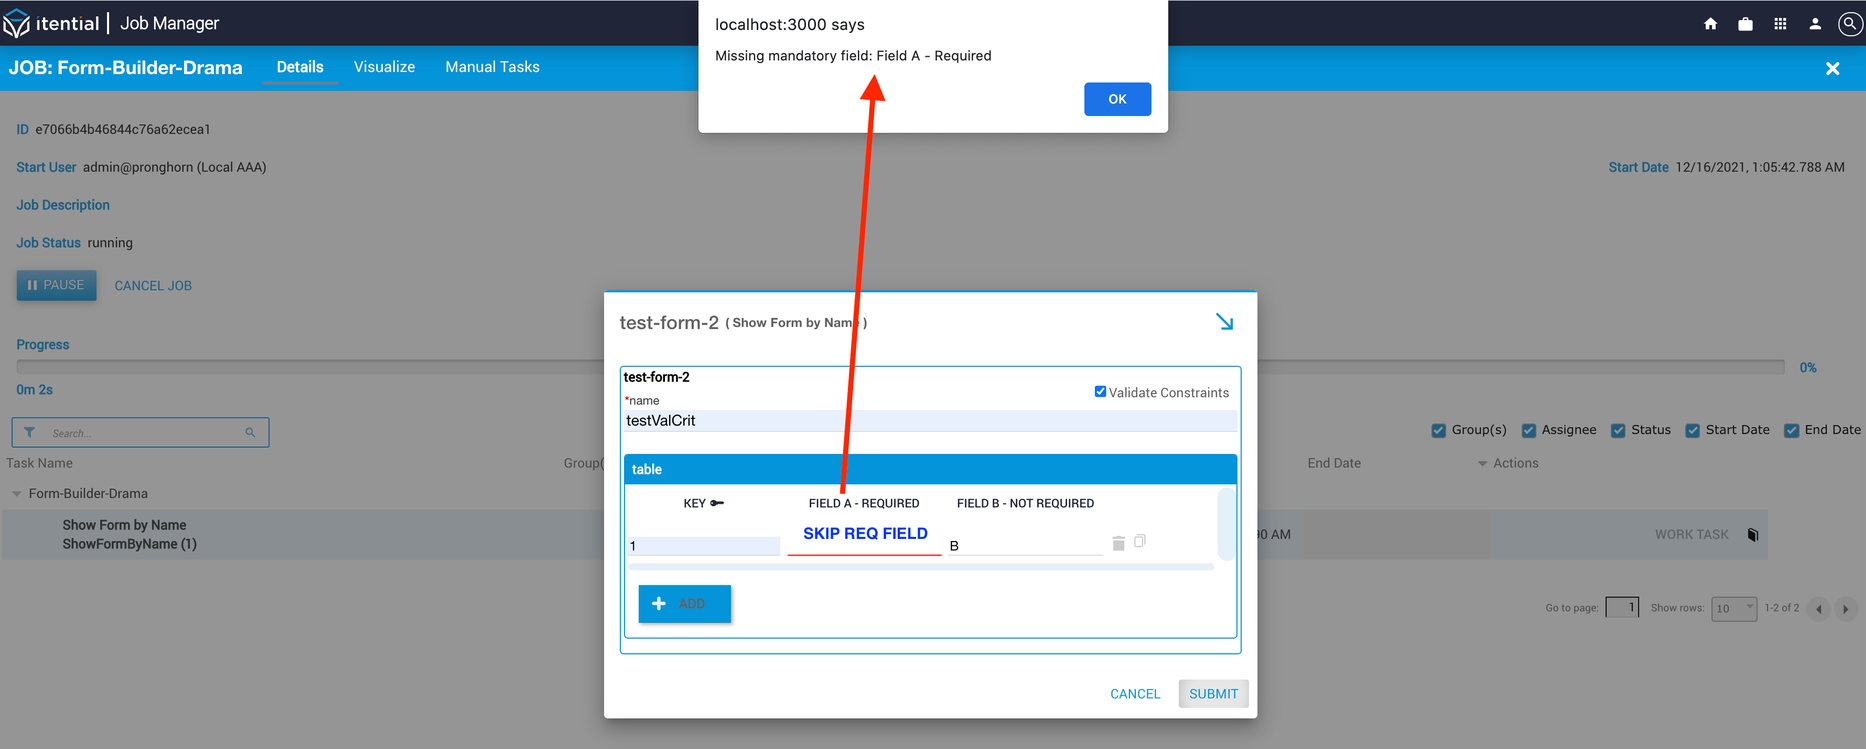
Mandatory vs. required field constraint validation
Some fields are mandatory — they must contain a value and this cannot be overridden. Mandatory fields always display a red asterisk (*) or the text “Required” next to the field label. Constraints can also restrict values based on the value of another field. If expected data is missing or incorrectly formatted, an error message displays.
Examples
Mandatory constraint validation:
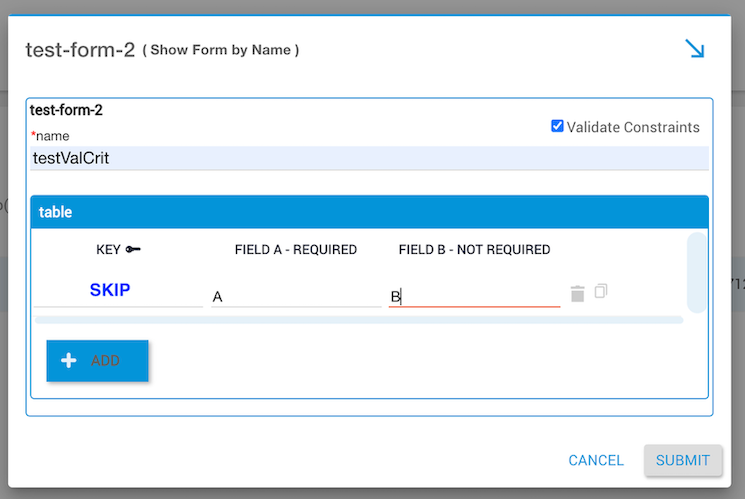
For required field constraint validation, there is a dependency between the key and the required field element. When a nested table key is not entered, the form skips the table row:
When the table key is missing, the form submits but the table row is ignored regardless of whether Field A or Field B was filled in:
Output (missing key):
When the table key is present but required fields are empty, the form cannot be submitted:
A successful submission includes a valid table key and all required fields:

Output (successful):
Resources
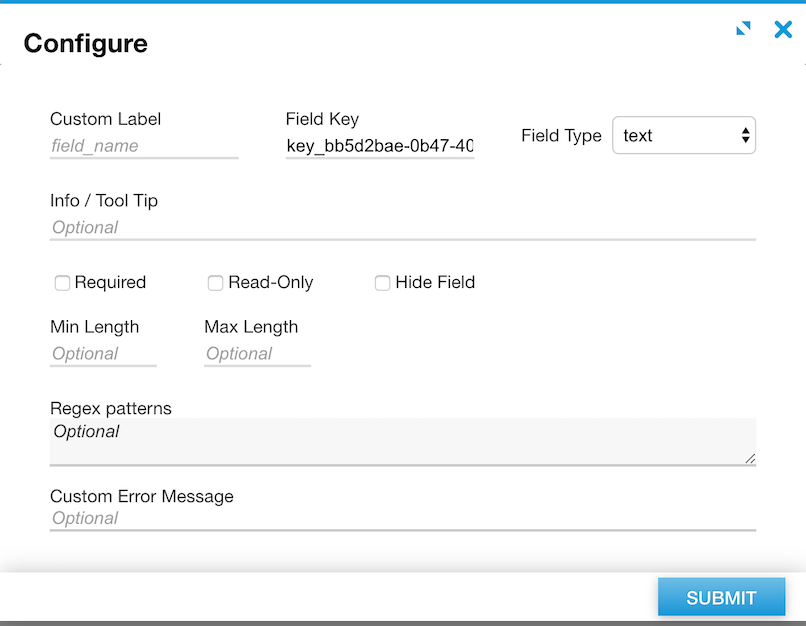
Edit form field properties

Delete a form field
Click the trashcan icon on the field to remove it.