Use the dropdown element
A dropdown element presents a list of options for the form operator to choose from. The options can be static (values you define at design time) or dynamic (values fetched from an API at runtime).
Use a static dropdown when the list of valid options is fixed and known in advance — for example, a list of environments like dev, staging, and production. Use a dynamic dropdown when the options depend on live system state, such as a list of devices currently managed by Configuration Manager or a list of users in an external directory. Because a dynamic dropdown fetches its options when the form loads, it always reflects current data without requiring manual updates to the form.
Dynamic dropdowns support two approaches to mapping the API response to dropdown options: Source-to-Target (extract a property directly from the response) and JSON Transformation (apply a JST to reshape the response before mapping). Use Source-to-Target when the response already contains a flat list of values. Use a JST when the data requires filtering, restructuring, or computation first.
When a single API endpoint is not sufficient, additional bindings let you combine results from multiple API calls into one dropdown.
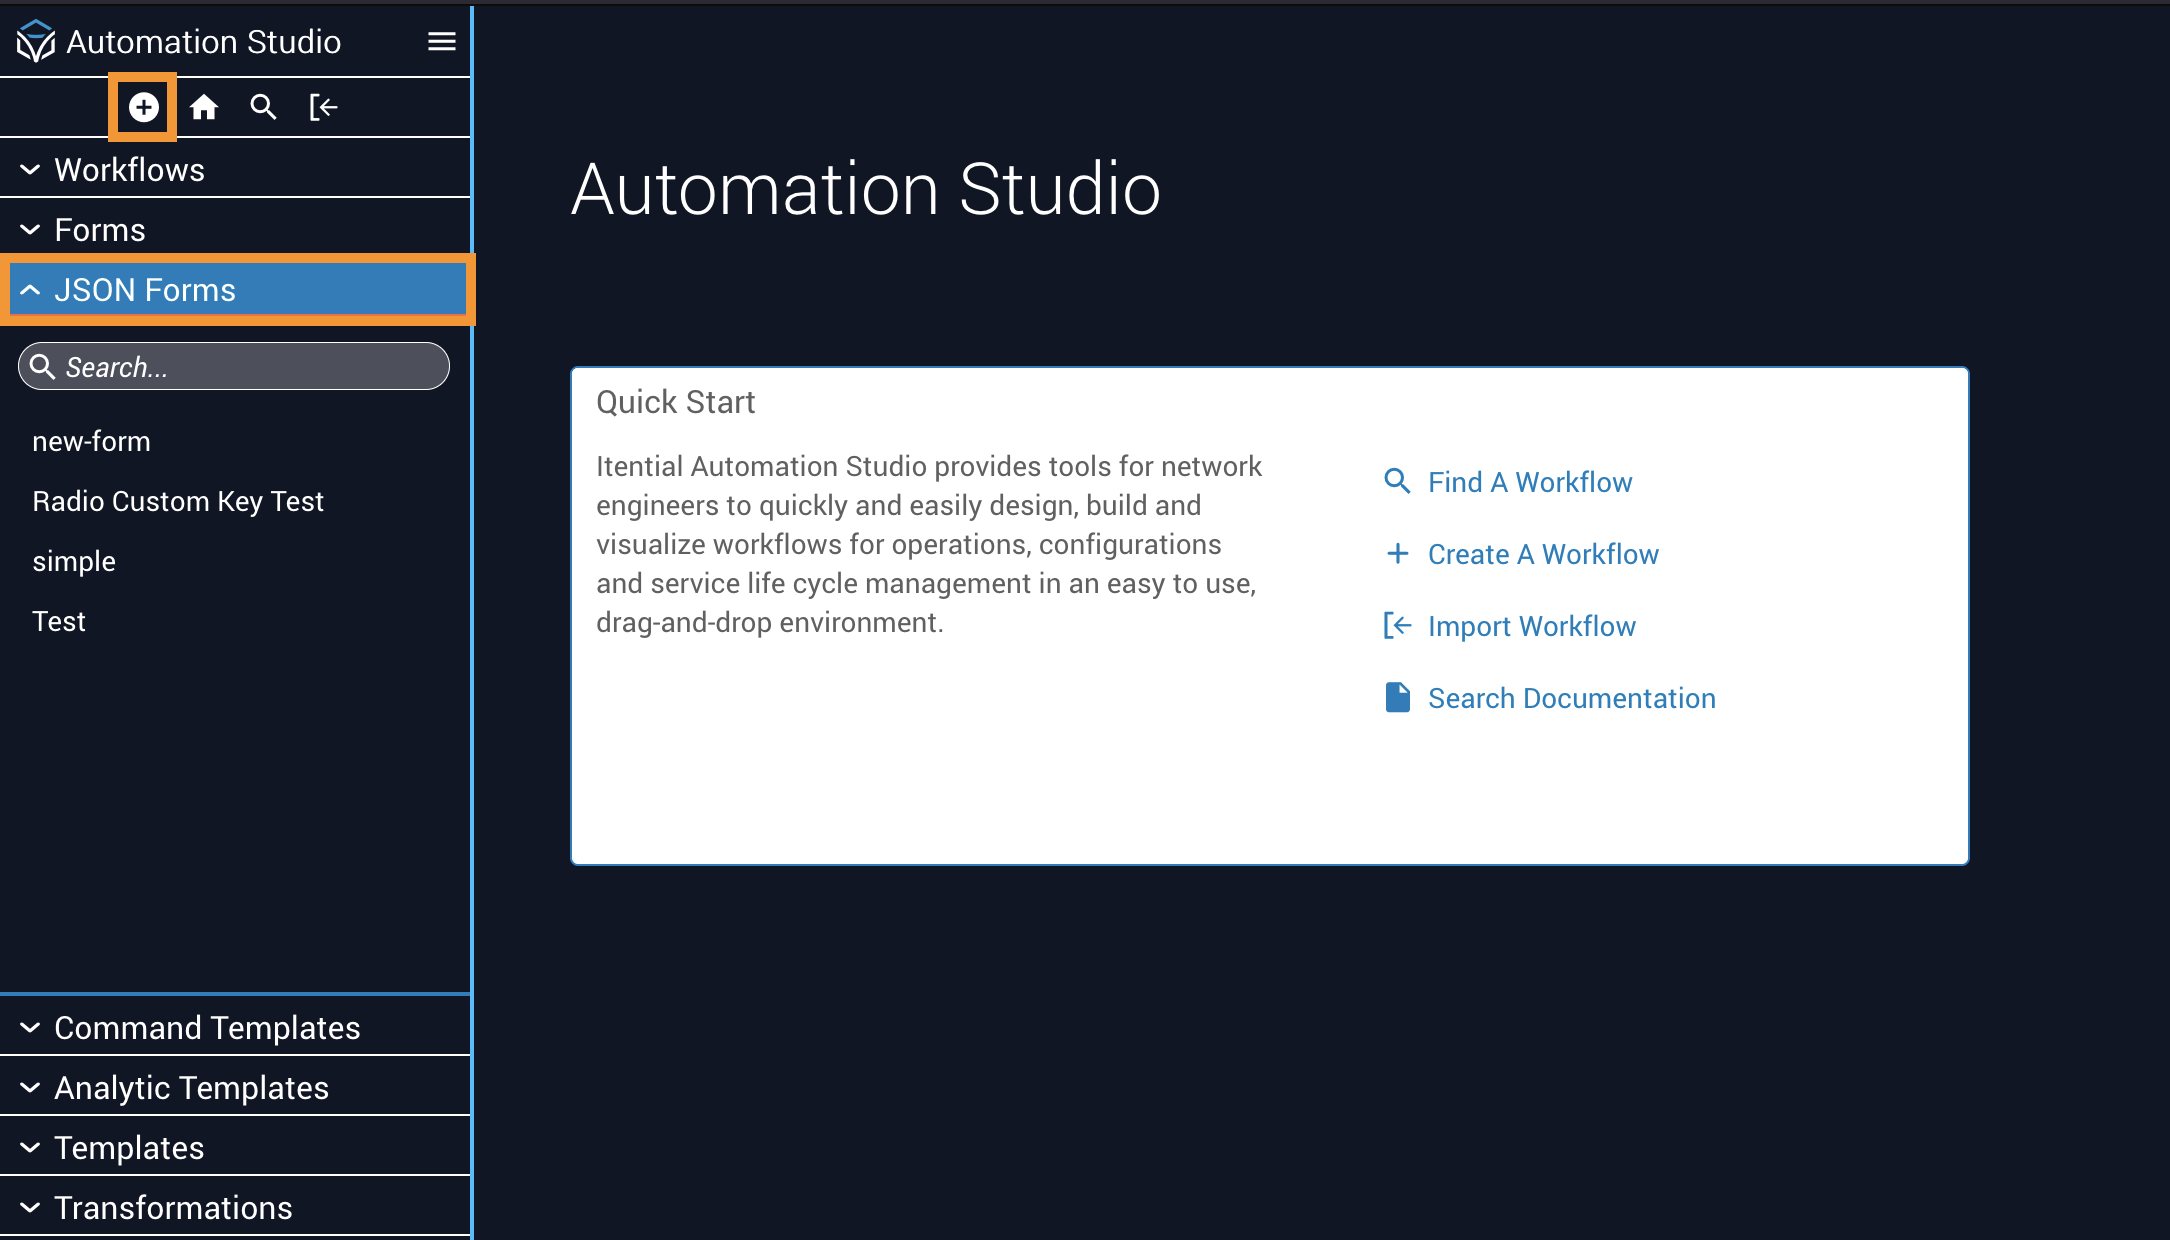
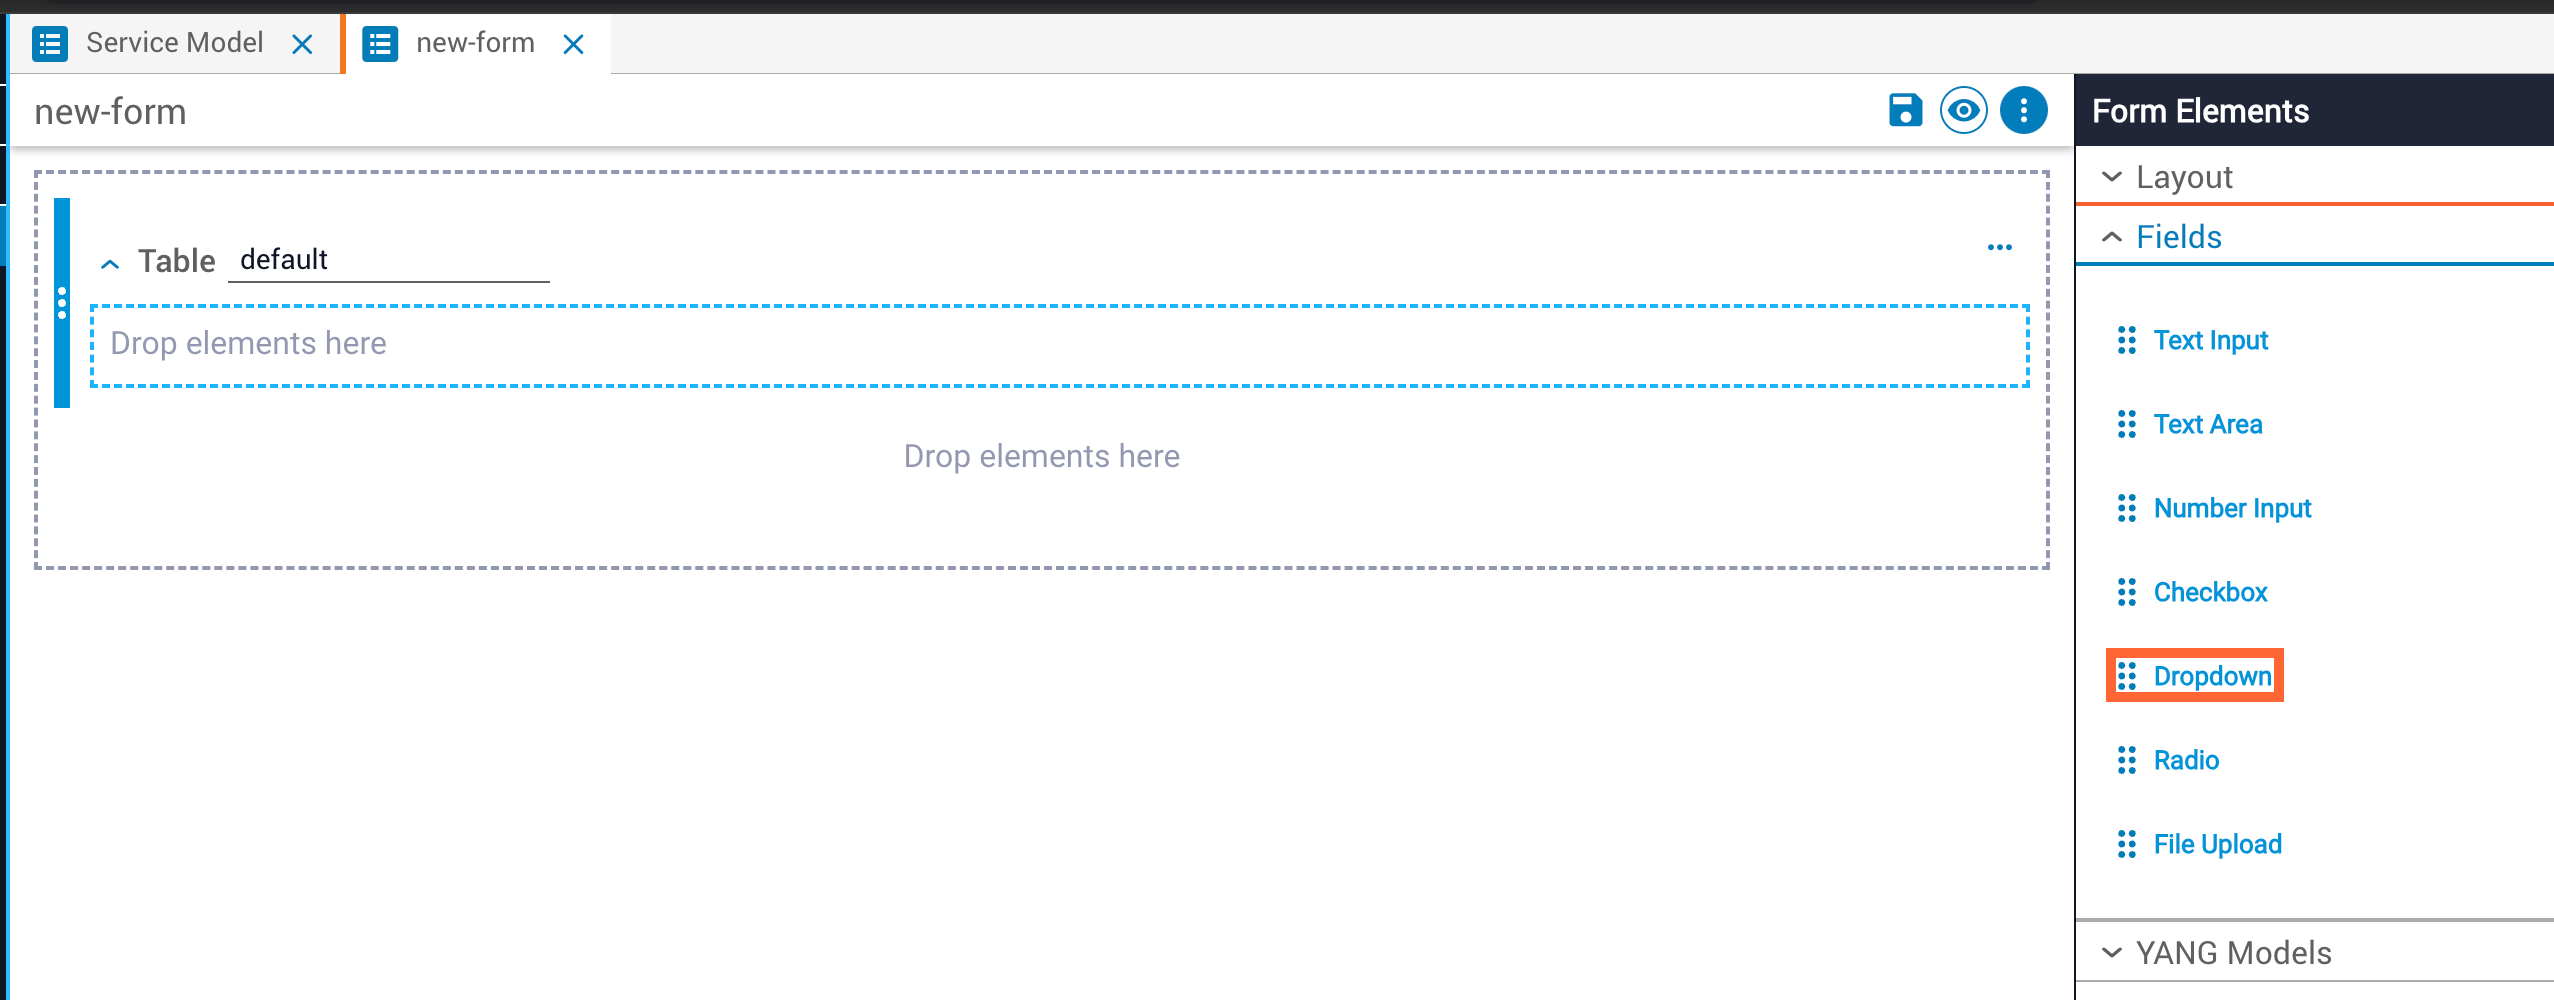
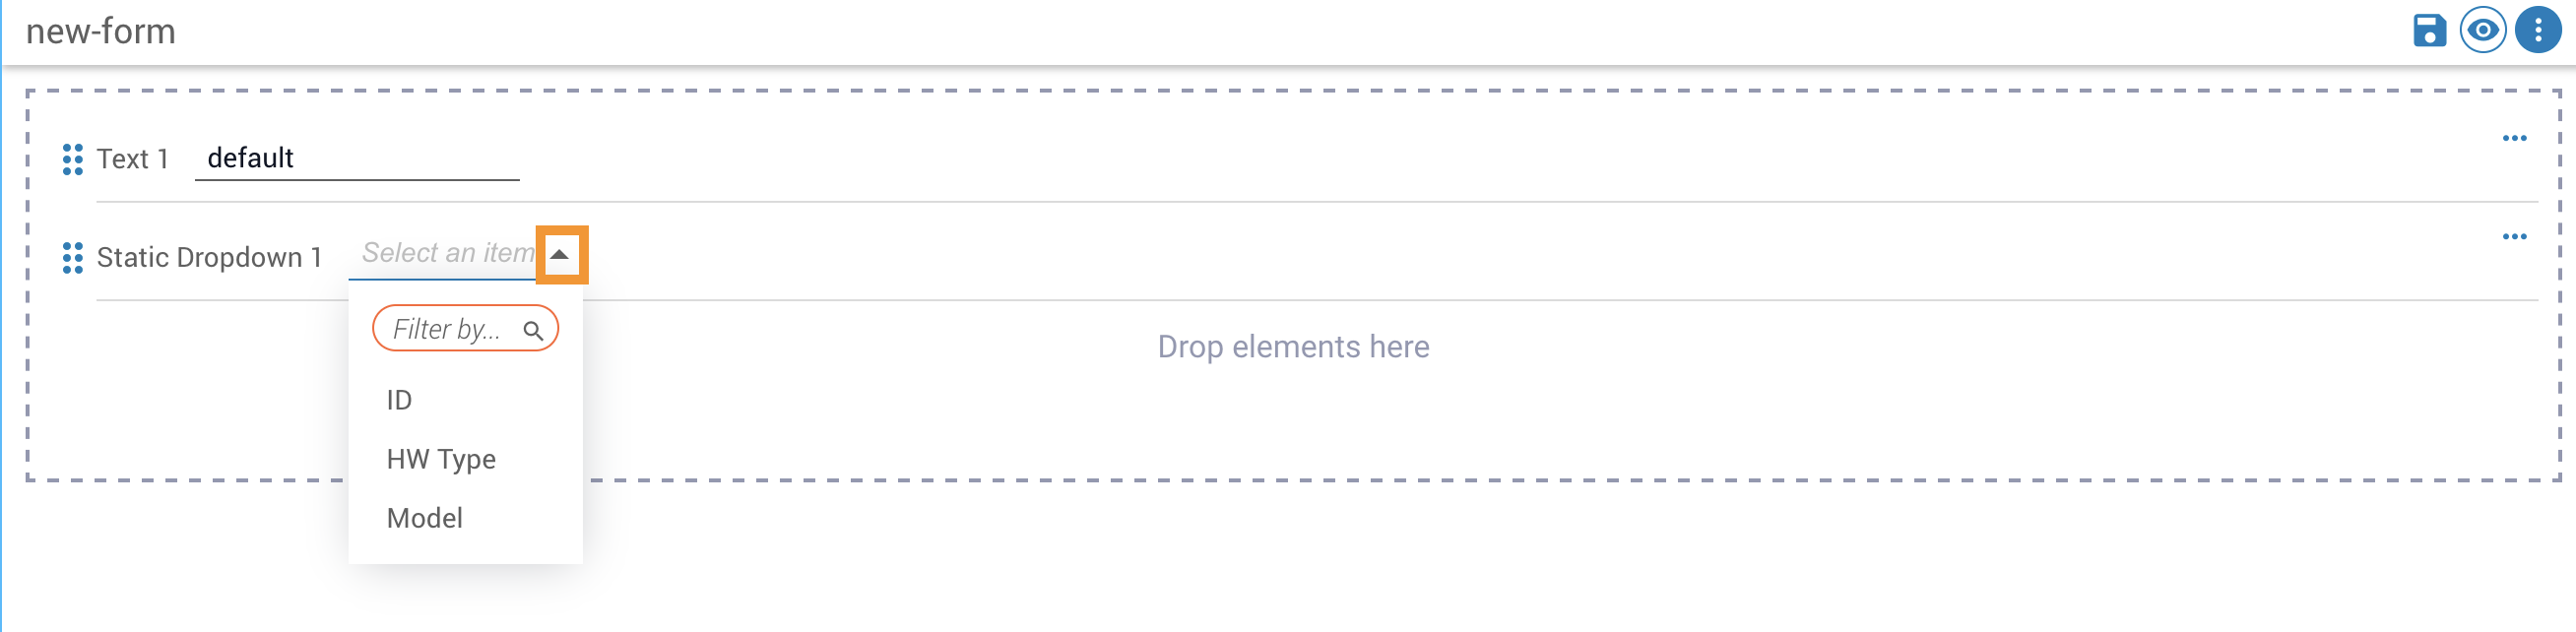
Add a dropdown to a form

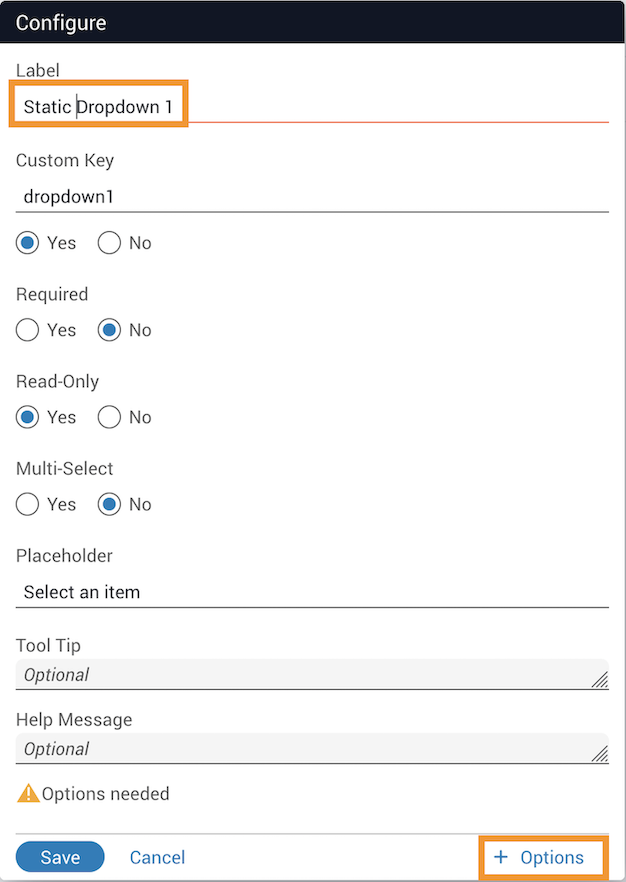
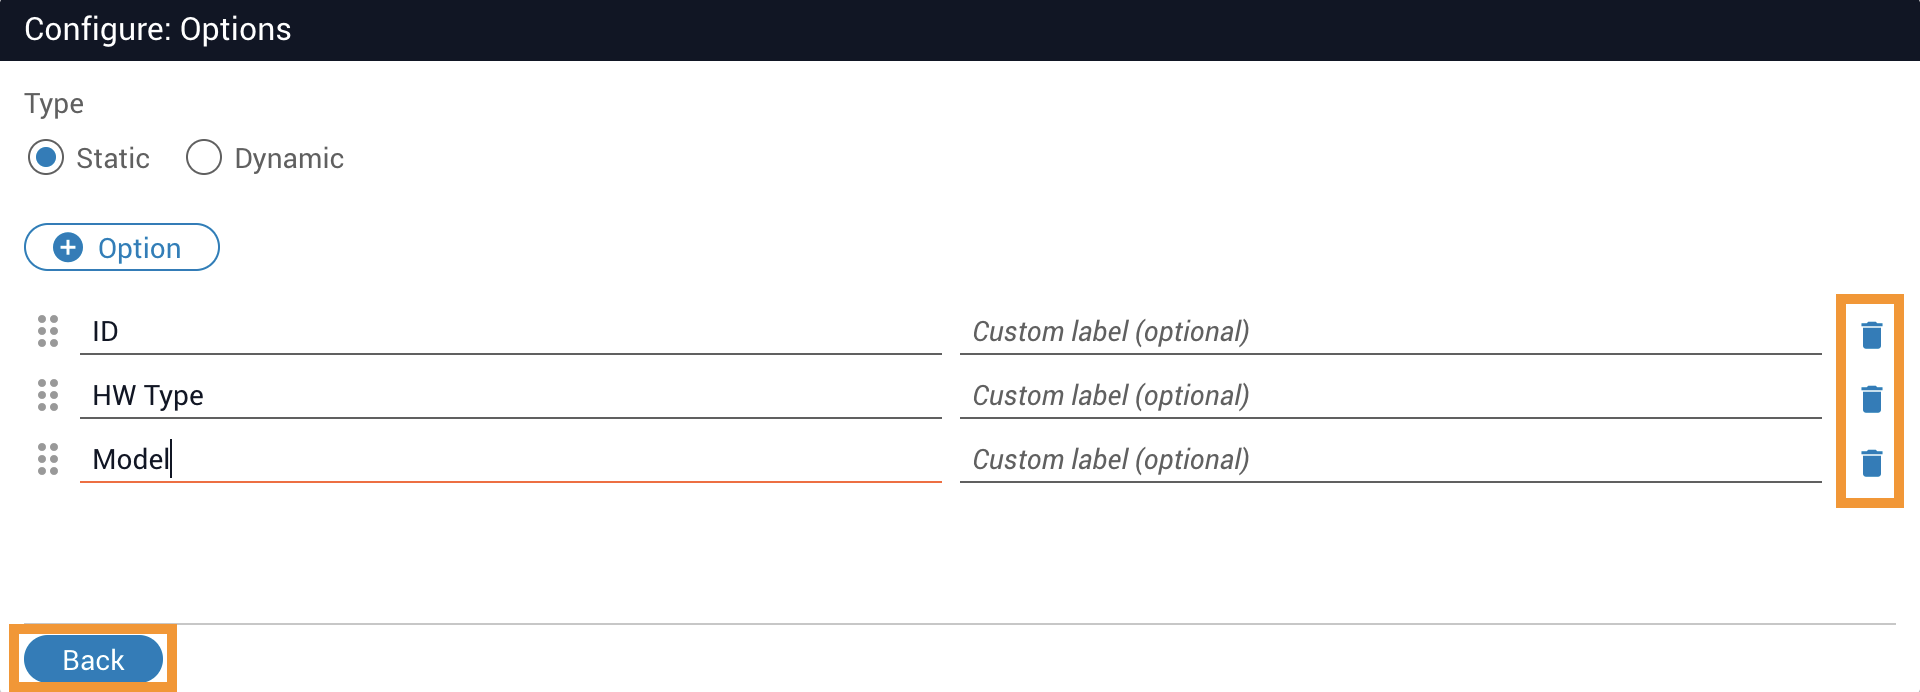
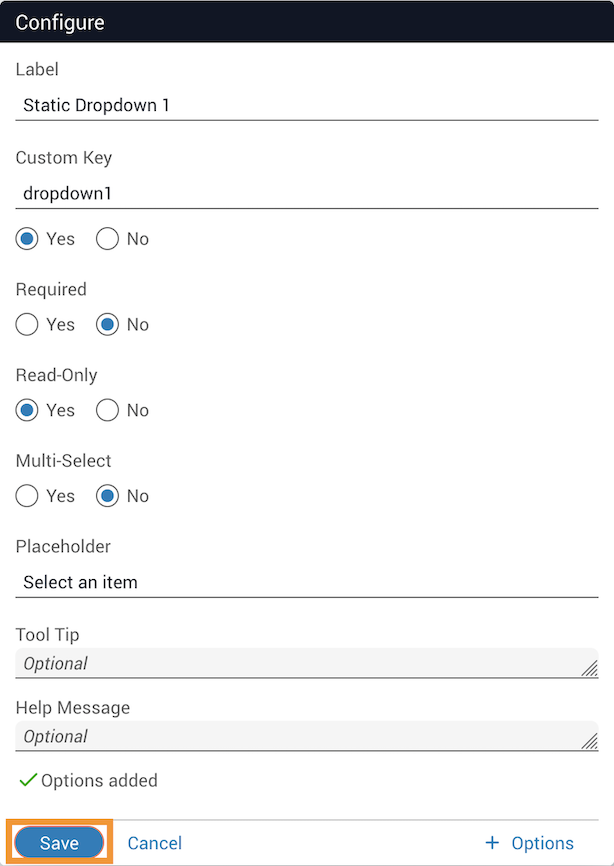
Configure a static dropdown
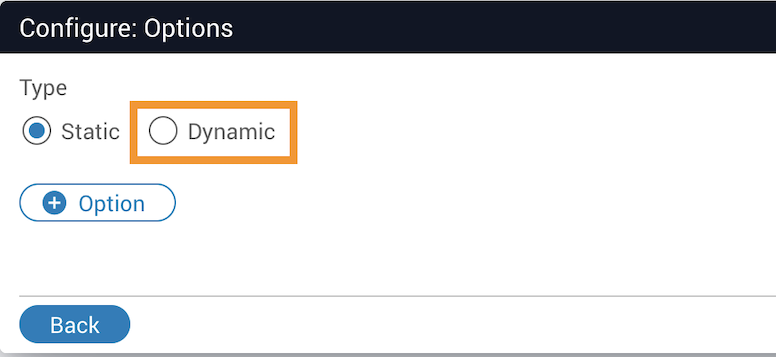
Configure a dynamic dropdown
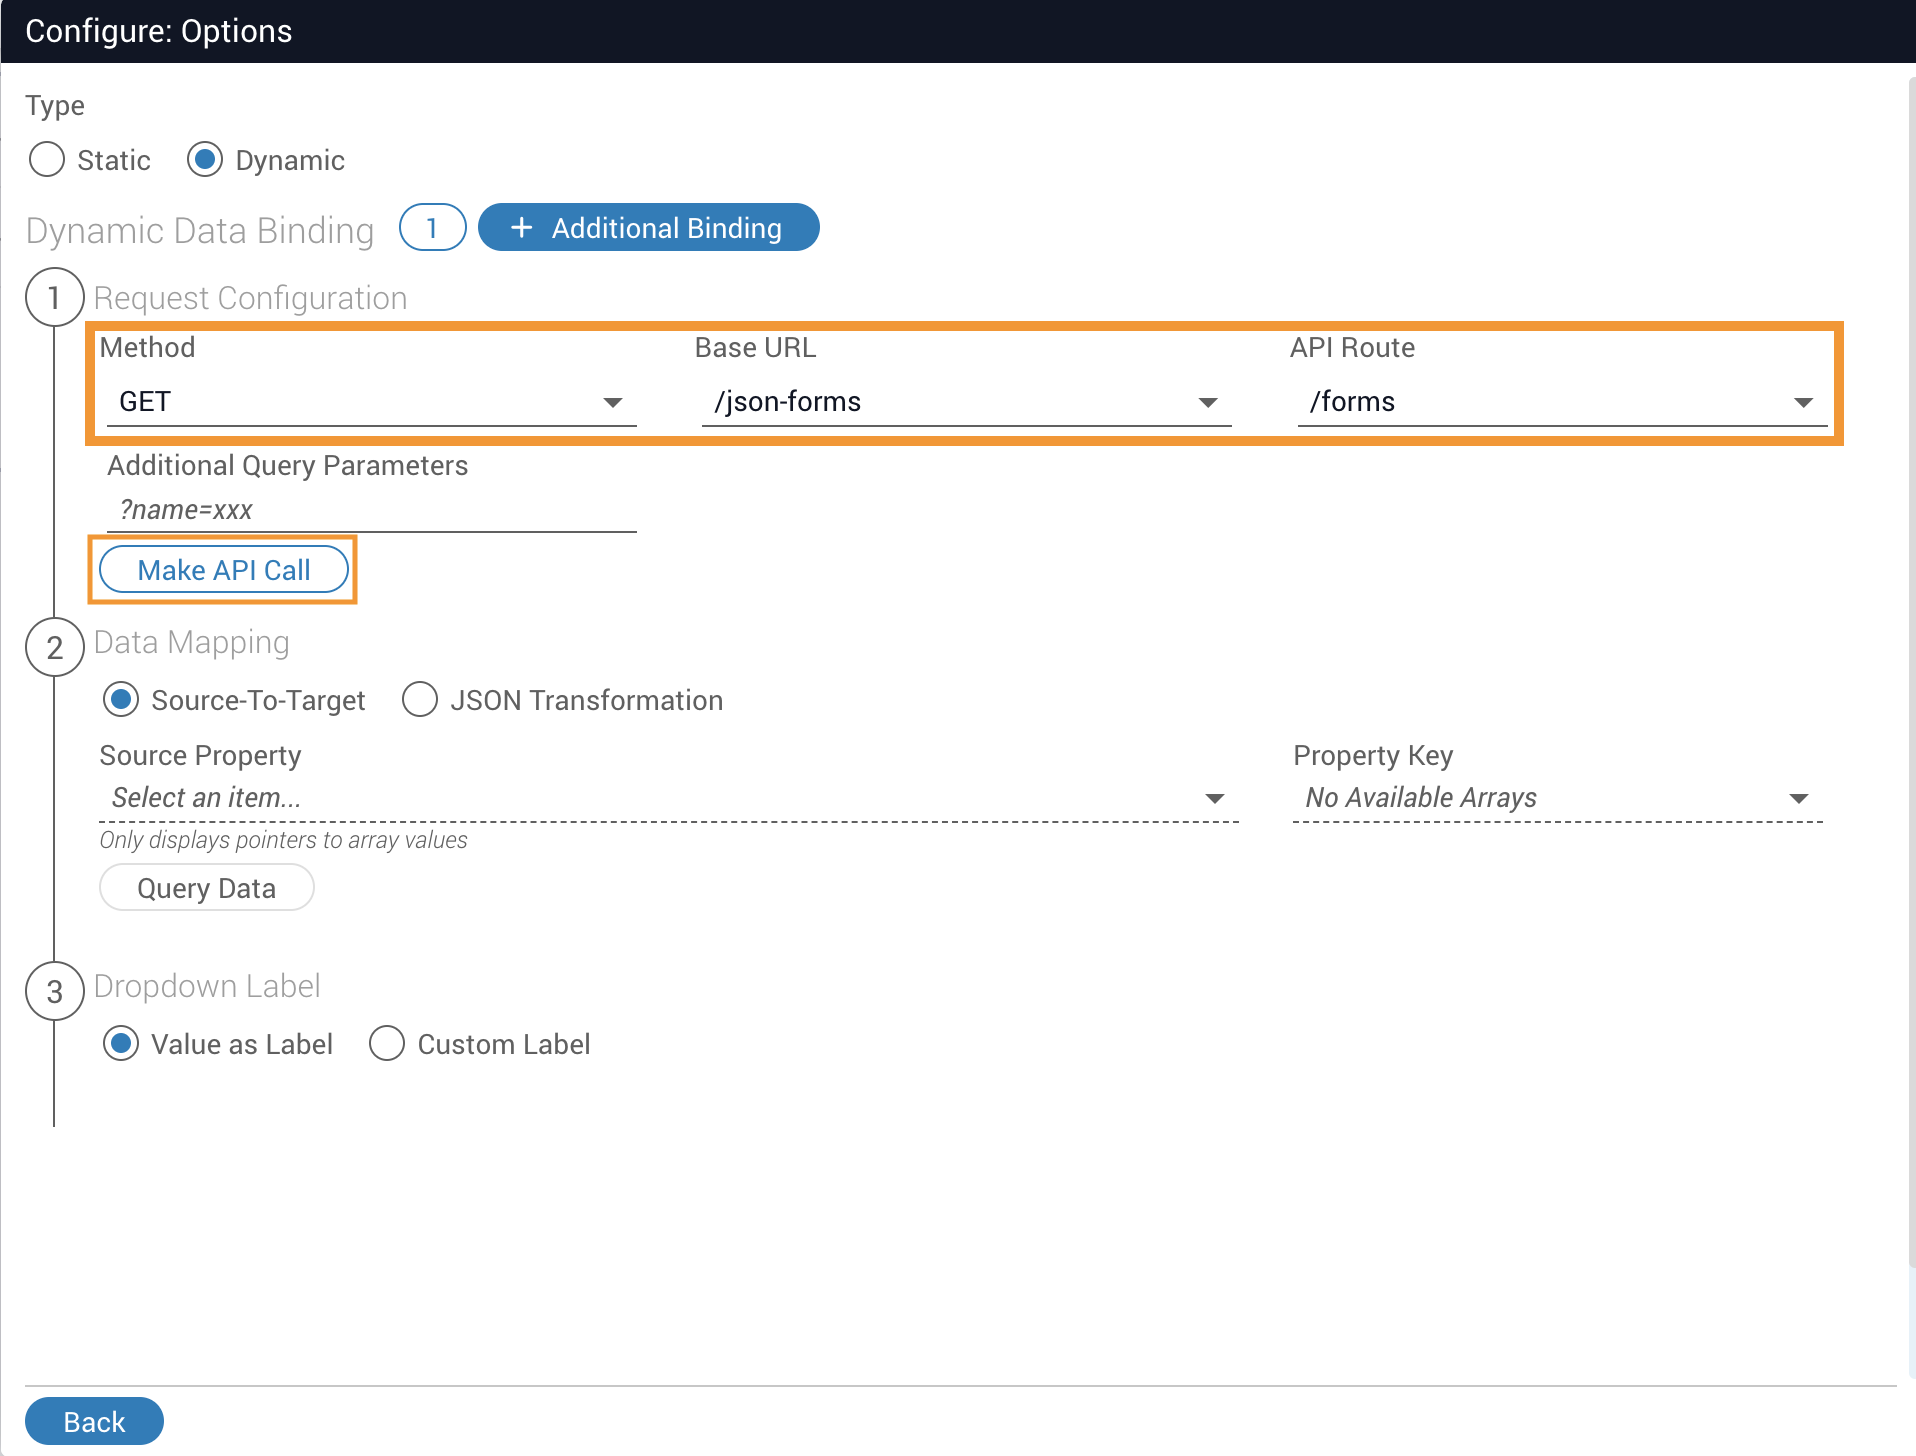
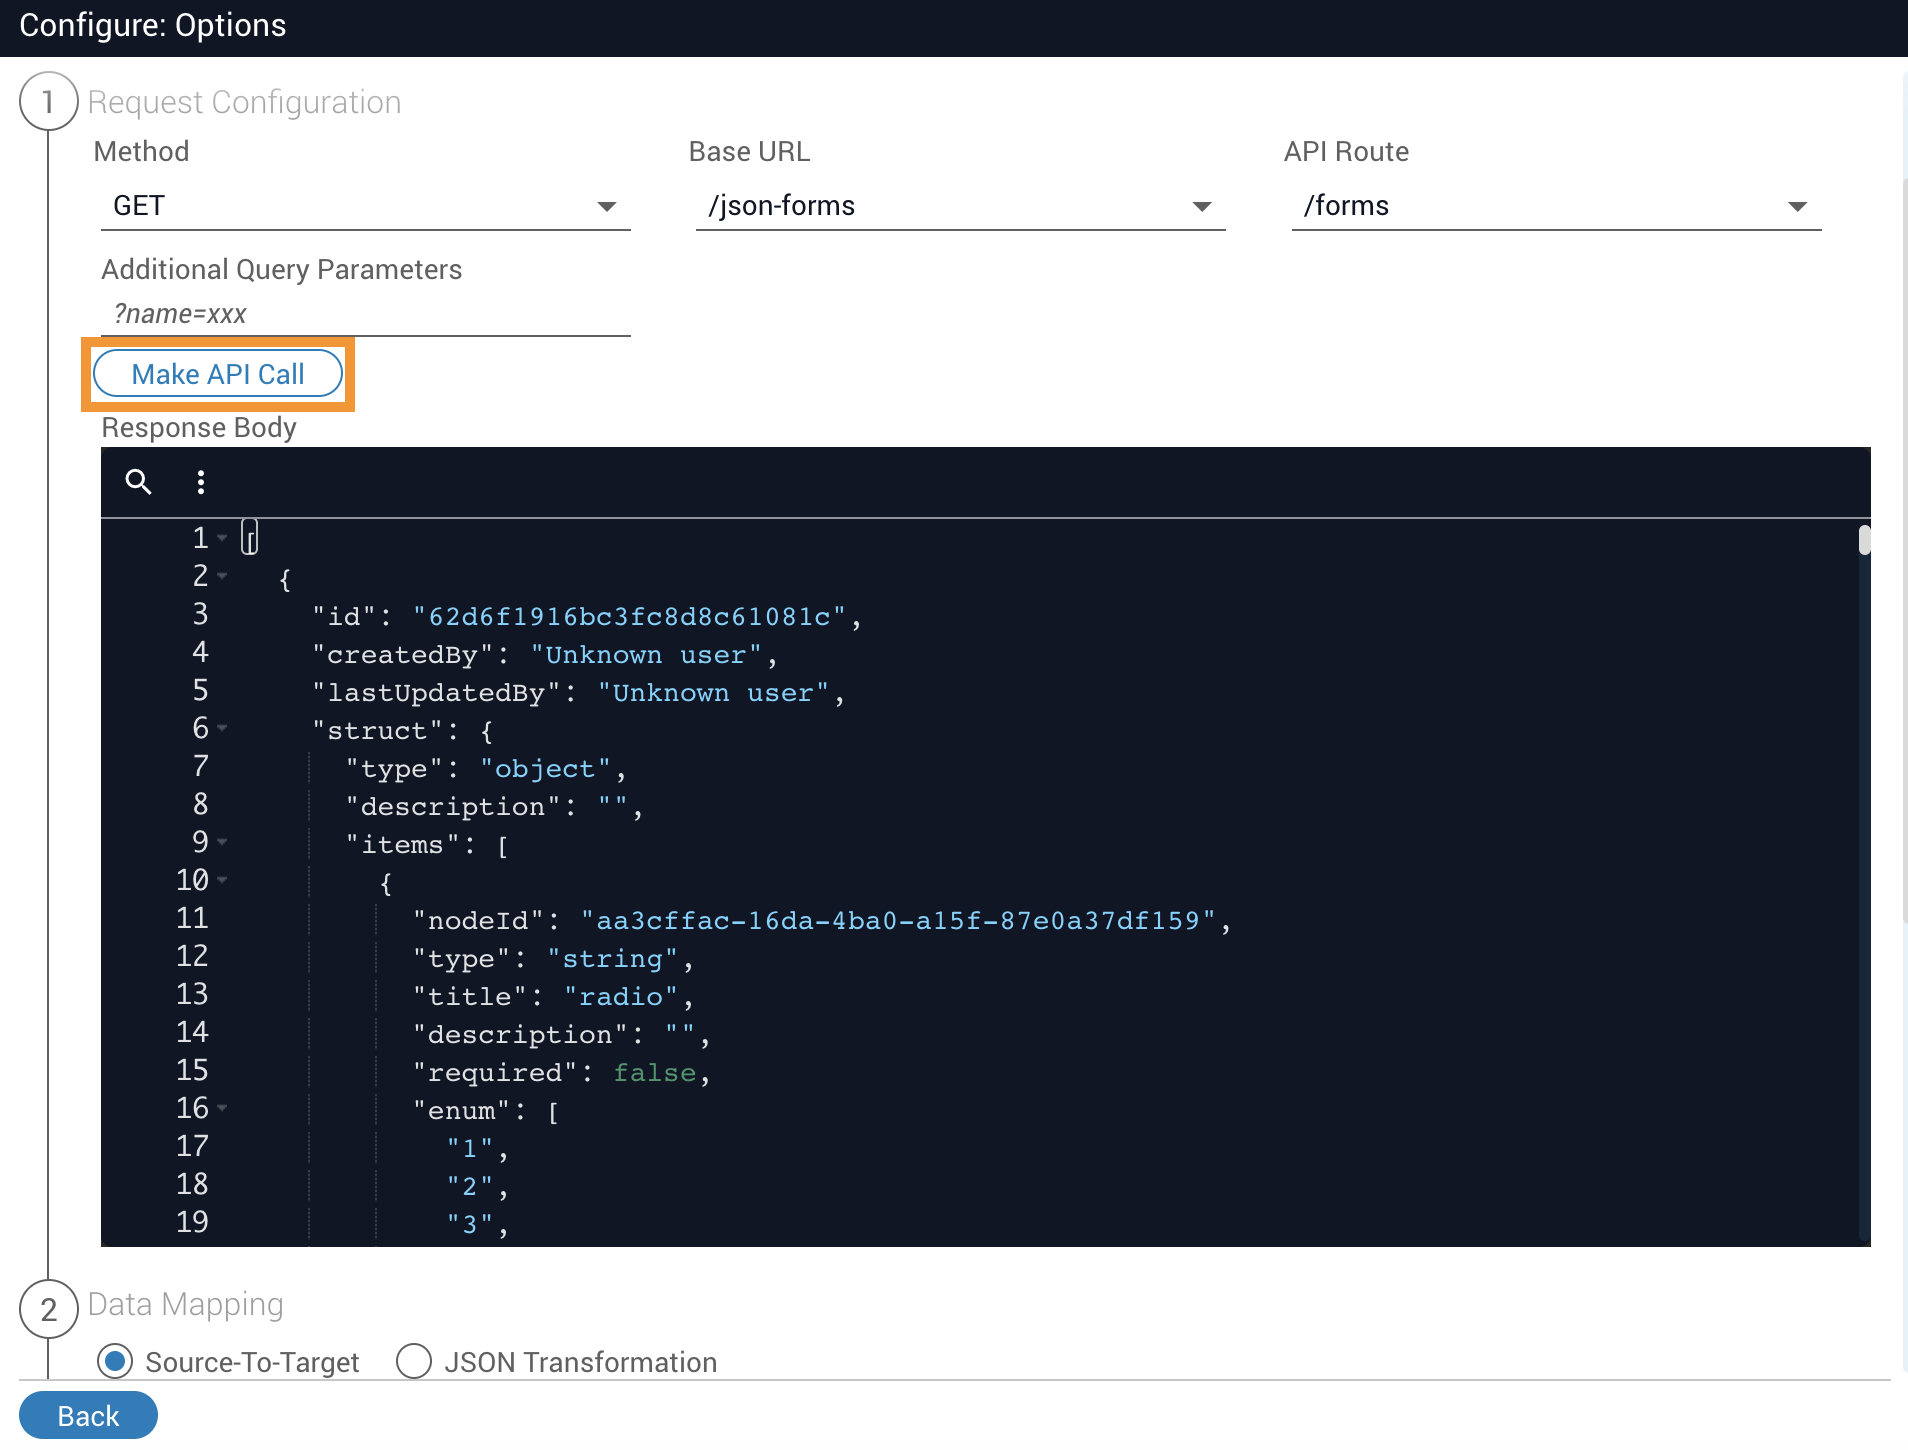
Configure the API request
Set the Method, Base URL, and API Route under Request Configuration, then click Make API Call.
The response appears in the Response Body.
Map the data
Choose a data mapping method under Data Mapping.
Source-to-Target: Select Source-To-Target, enter the Source Property and Property Key (in the example below, /results and /id), then click Query Data.


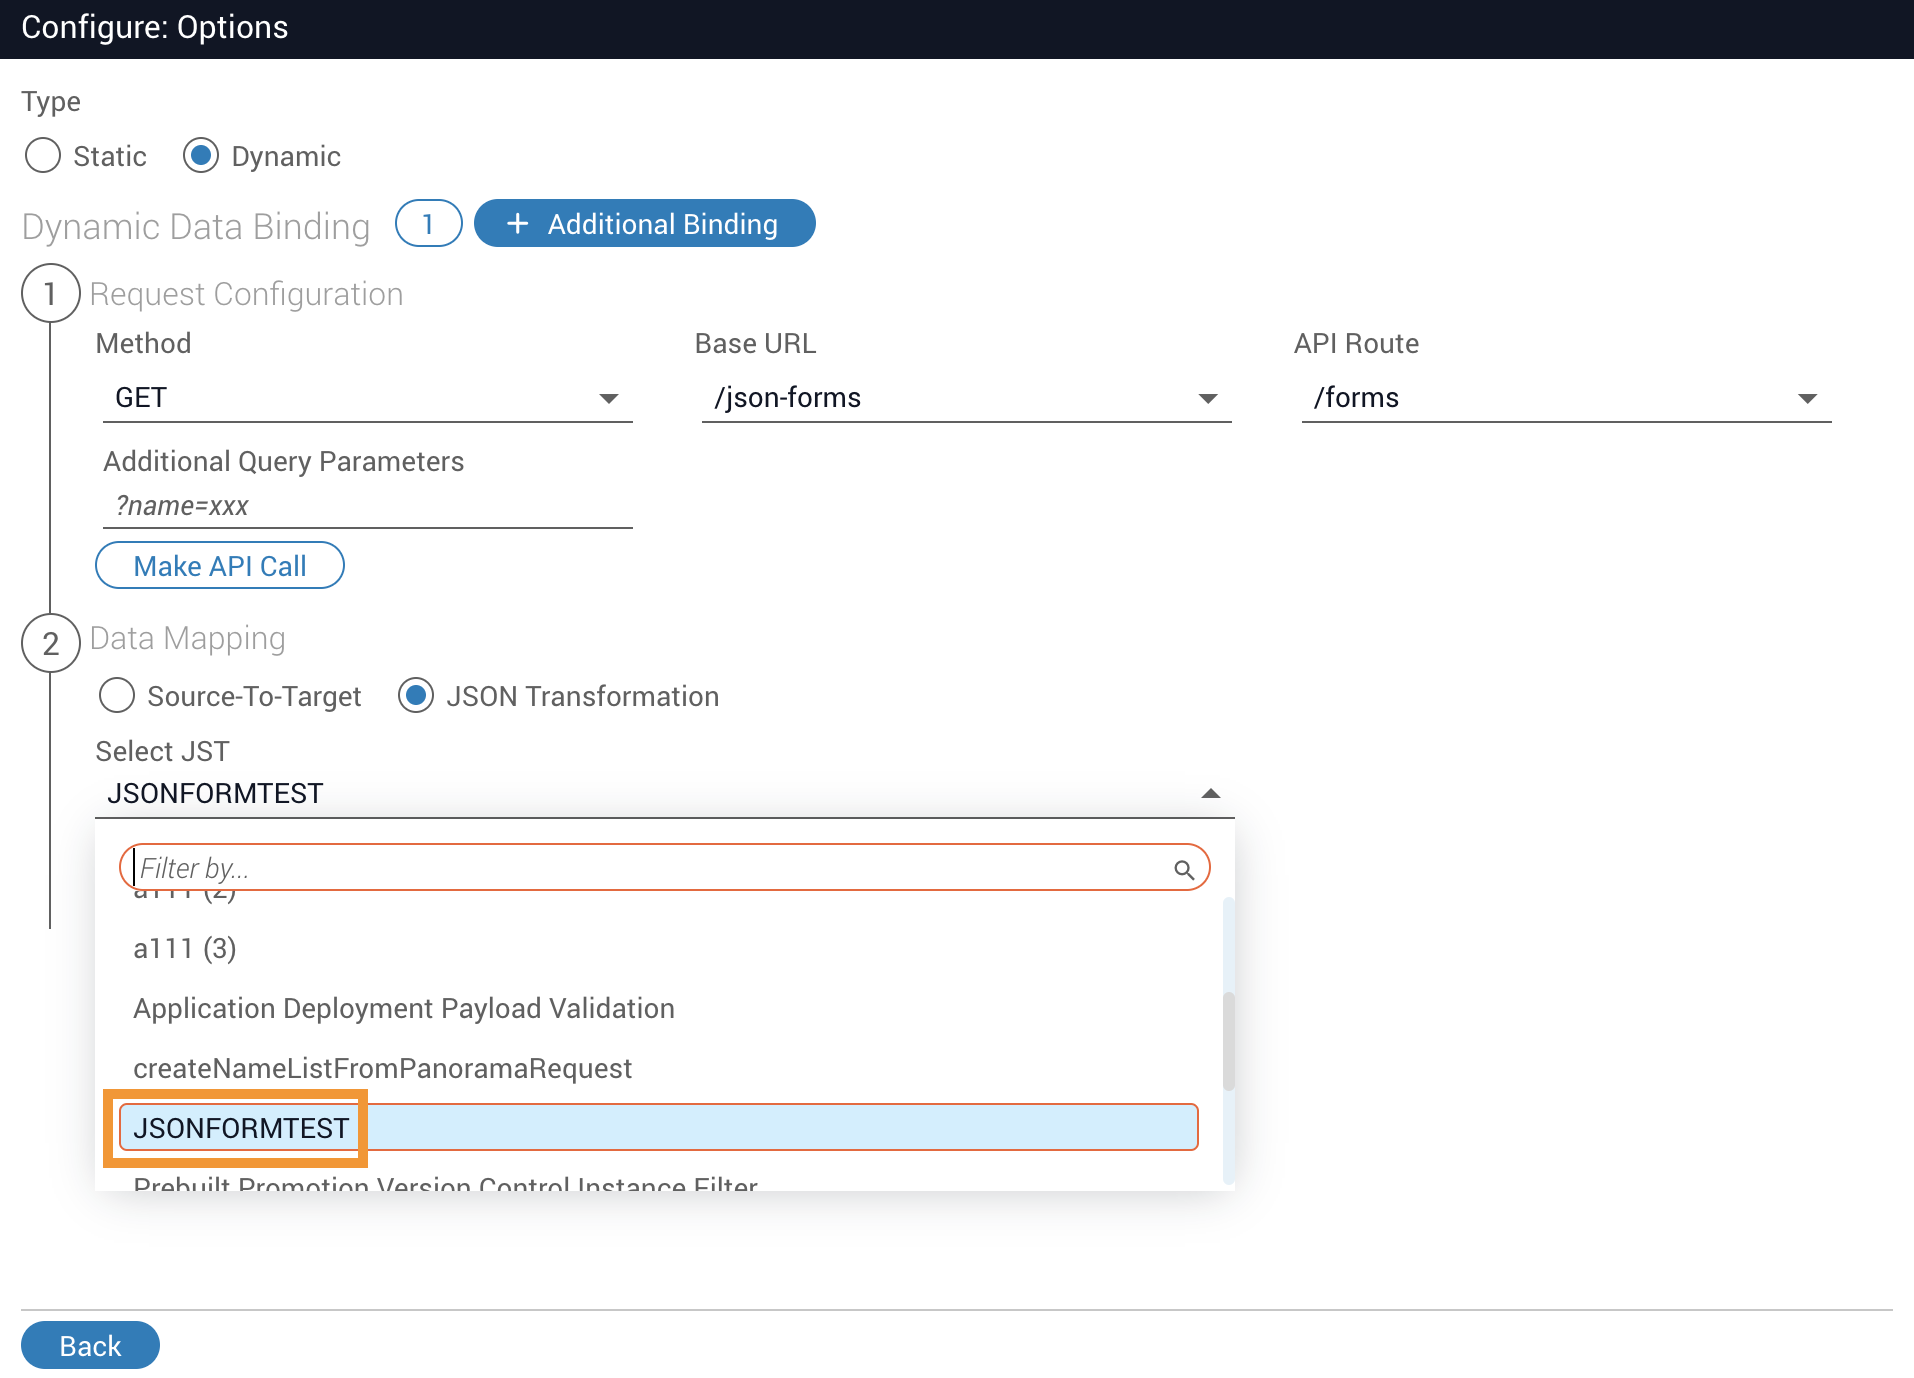
JSON Transformation: Select JSON Transformation, choose a JST from the dropdown, then click Run Transformation. The data is parsed and the result is displayed — in the example below, the id field.
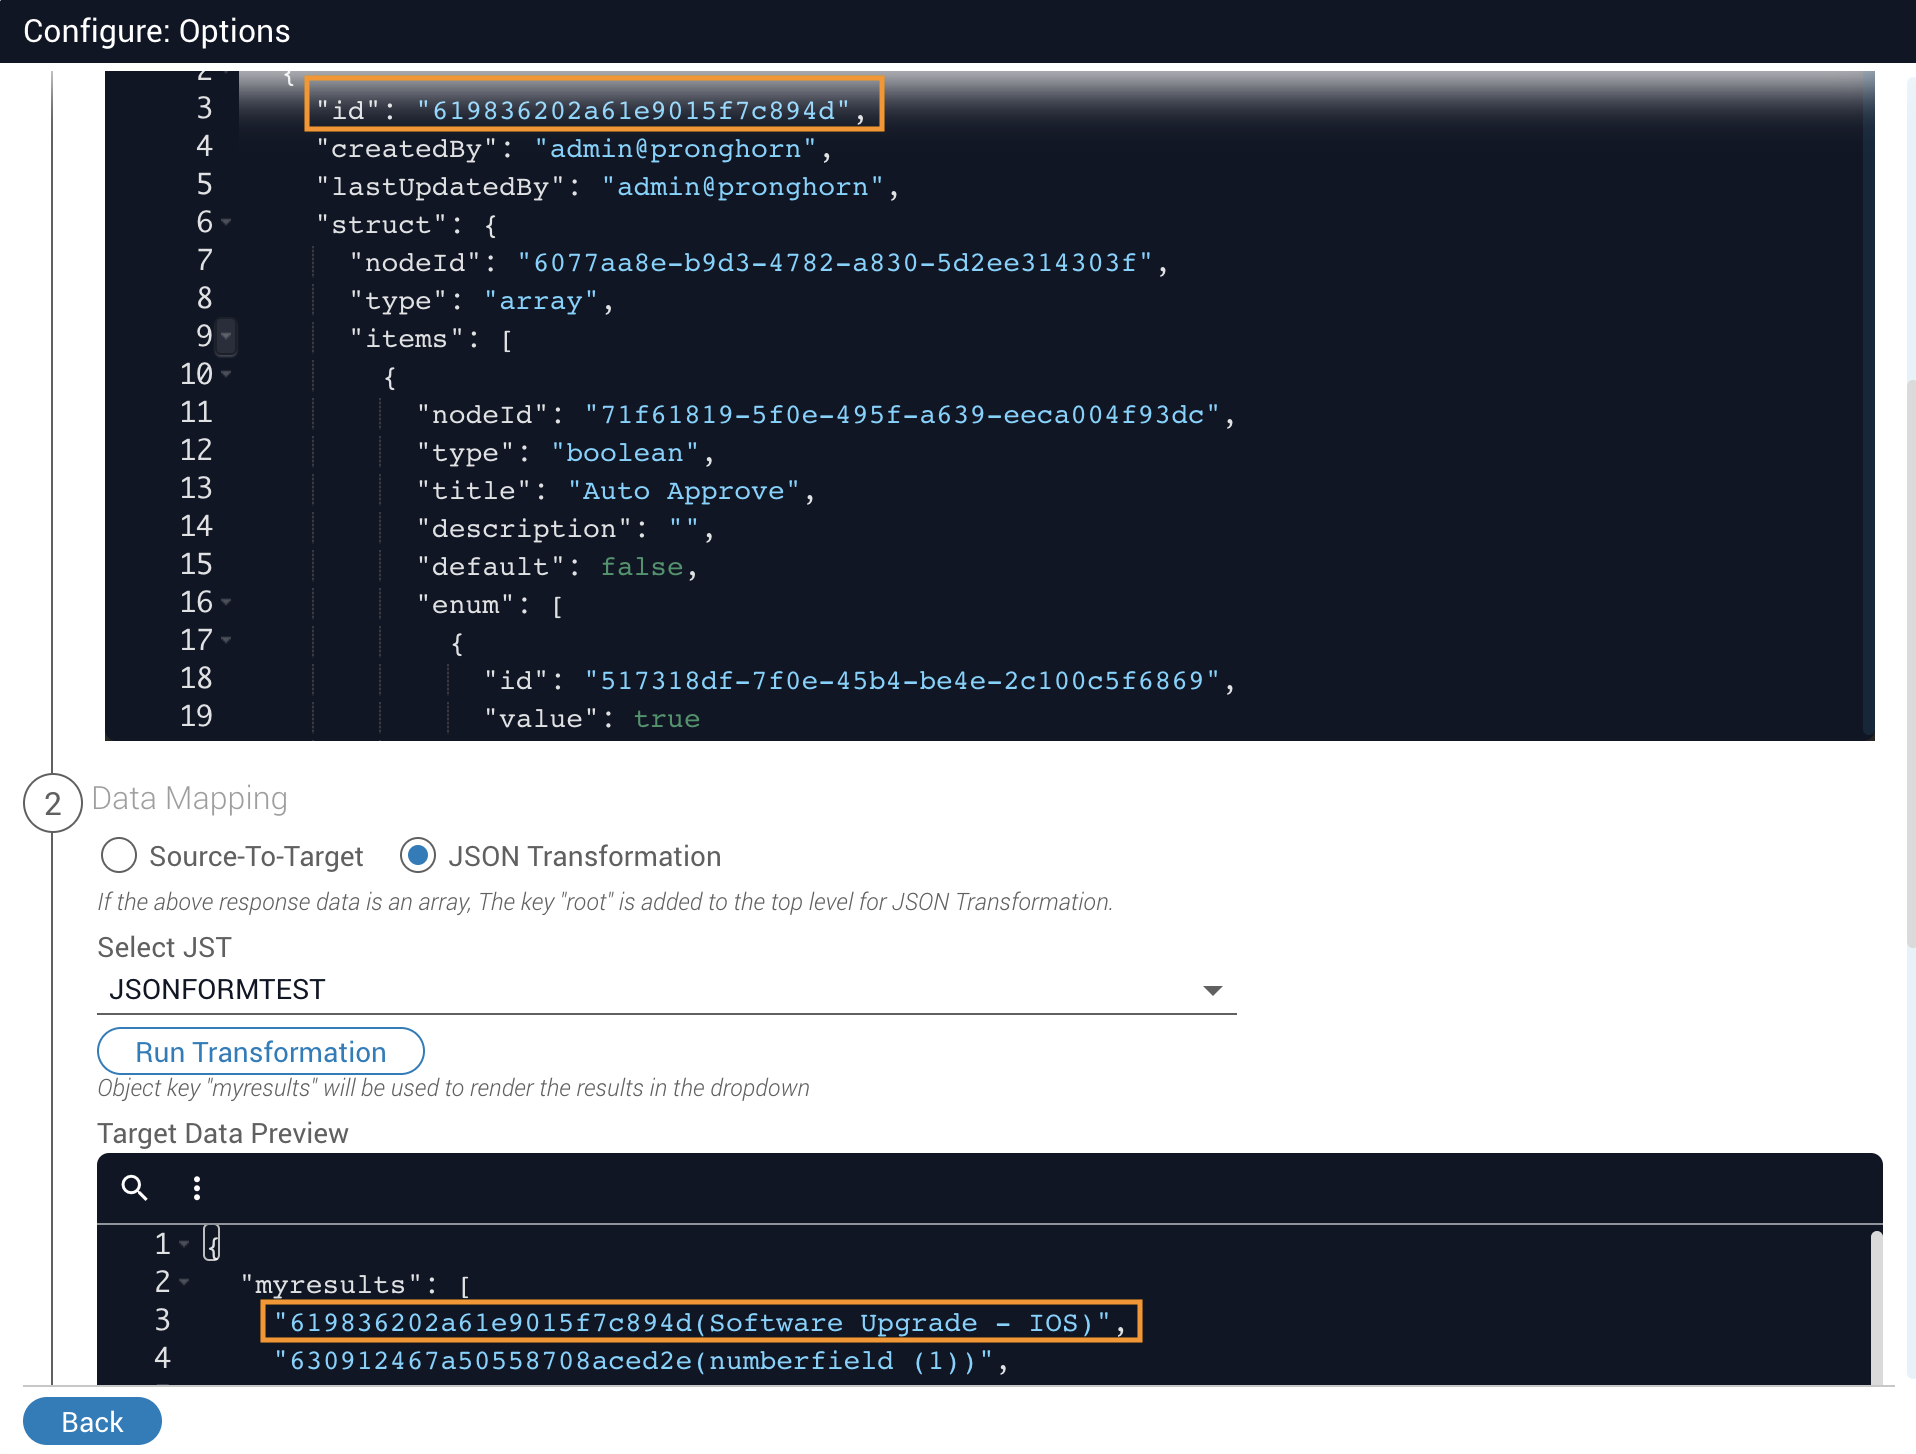
If Run Transformation is unavailable, run the JST at least once before using it in a JSON Form.
Add additional bindings
Additional bindings let you combine results from multiple API calls into a single dropdown. If one binding returns [a,b,c] and another returns [d,e,f], the dropdown displays [a,b,c,d,e,f].

Click + Additional Binding to add another API configuration. To configure it, follow the dynamic dropdown steps above. To remove a binding, select it and click Remove Data Binding.