Authorization
Authorization is the main interface in Admin Essentials for administering and viewing users, groups, and roles. Available views, features, and interactions in the UI are limited based on user permissions.
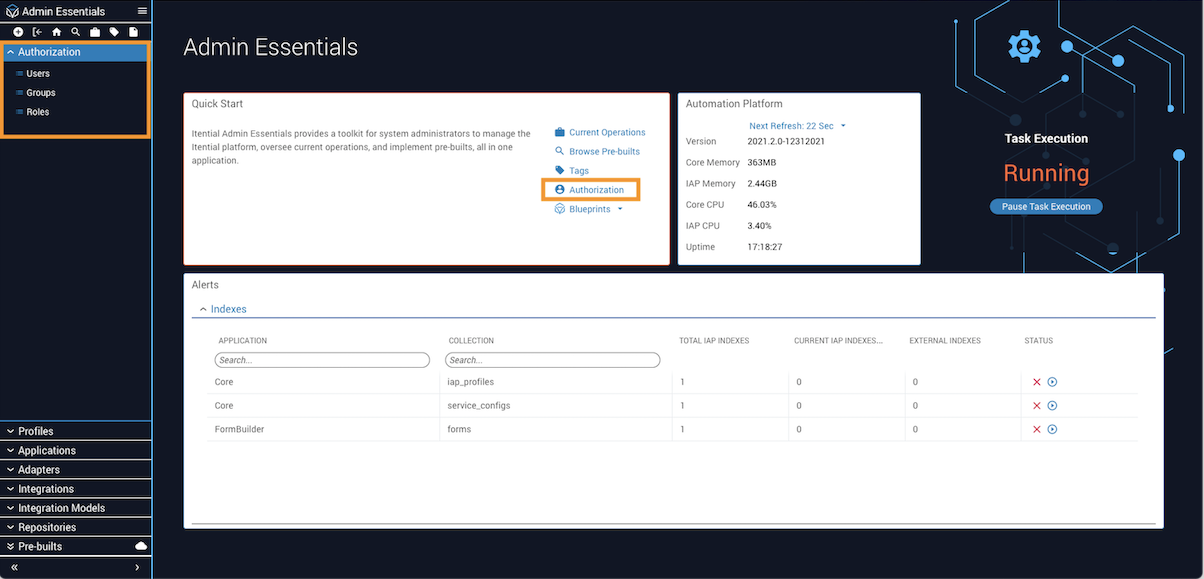
There are two ways to access Authorization: from the Itential Platform home page, navigate to Admin Essentials → Quick Start → Authorization; or click Authorization in the left sidebar to open the accordion menu.
If you have Cisco NSO and want to use the NSO External Authentication script, network connectivity is required between the two (typically port 3000). For more information, see the NSO Network Adapter Integration guide.
Terminology
Users
A user is an entity that comes from an external AAA system such as LDAP. All operations within Itential Platform are associated with a user. Itential Platform provides the ability to assign roles directly to users, and administrators can manage user membership through groups. Users may be members of any number of groups and, through group membership, may be assigned any number of roles.
User roles — whether directly assigned or inherited from a group — determine what the user can see and do within Itential Platform. The final permission set of a user is a combination of permissions granted to all roles assigned to the user and to any groups of which the user is a member.
Viewing and filtering users
Because users are accounts from an external system, Itential Platform creates a user record when someone has successfully logged in using their AAA system credentials.
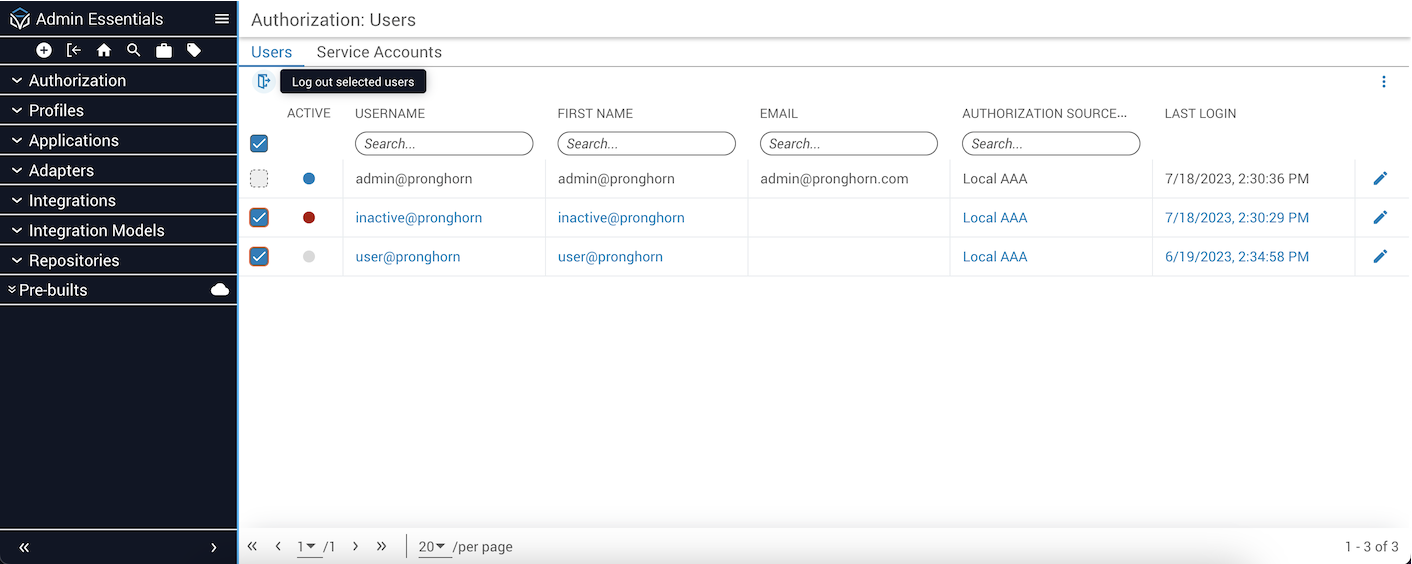
To view the Authorization → Users table, you must have permission for the authorization.getAccounts method. This allows you to access the page, view the list of users, and see their login status.
The indicator circles under the Active column header denote the login status of each user:
- Blue: User is currently logged in.
- Red: User who is deactivated.
- Grey: User who is not logged in.
Active Login Session Management was made available in release versions 2023.2 and higher. The ability to view active login sessions is not available in earlier release versions of Itential Platform.
The Users table can be filtered by login status using the popover menu in the top-right. Click the vertical ellipsis (⋮) to display two filter toggles: Show Active Users Only and Show Deactivated Users.

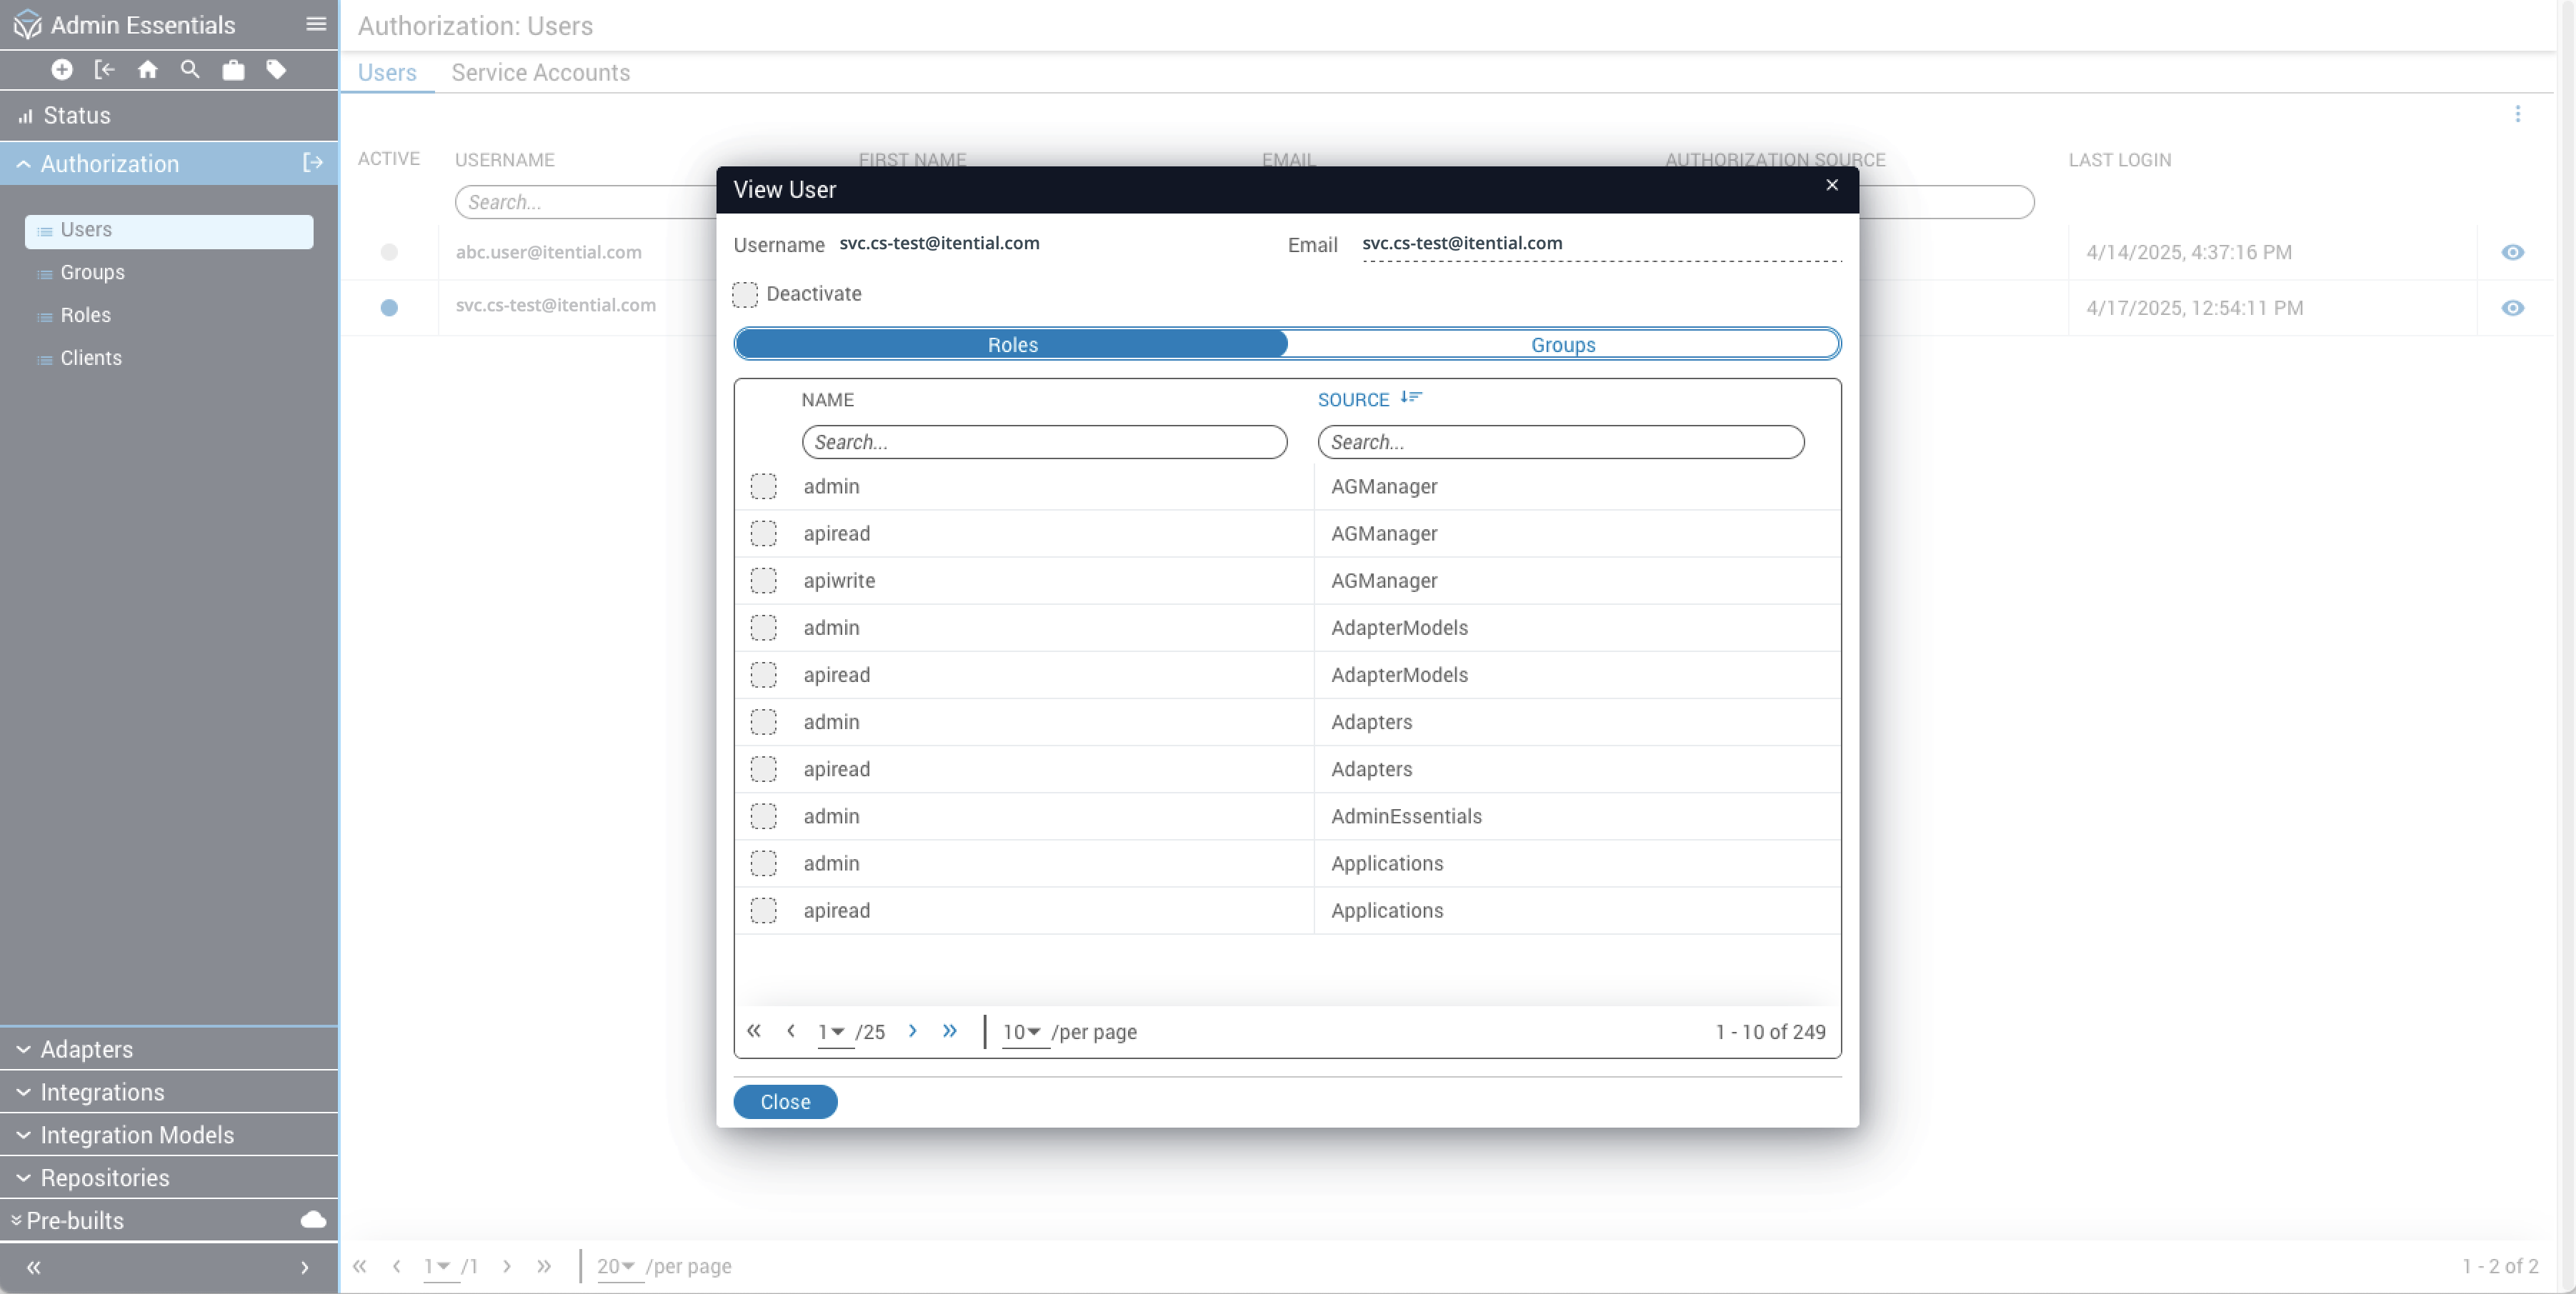
Configuring role assignments for users
There are two ways to assign users to Roles: directly, or by group membership.
To assign Roles directly to a user:
Locate the user
Locate the user you wish to assign. You can filter the user list by typing in the username column header search box.
Roles assigned by groups are grayed out (disabled), indicating the assignment is inherited.
Configuring group membership for users
External group memberships for users are managed by the external AAA system and cannot be edited in Itential Platform. A user may only be added to or removed from Itential Platform groups within Authorization.
To change the Groups to which a user belongs:
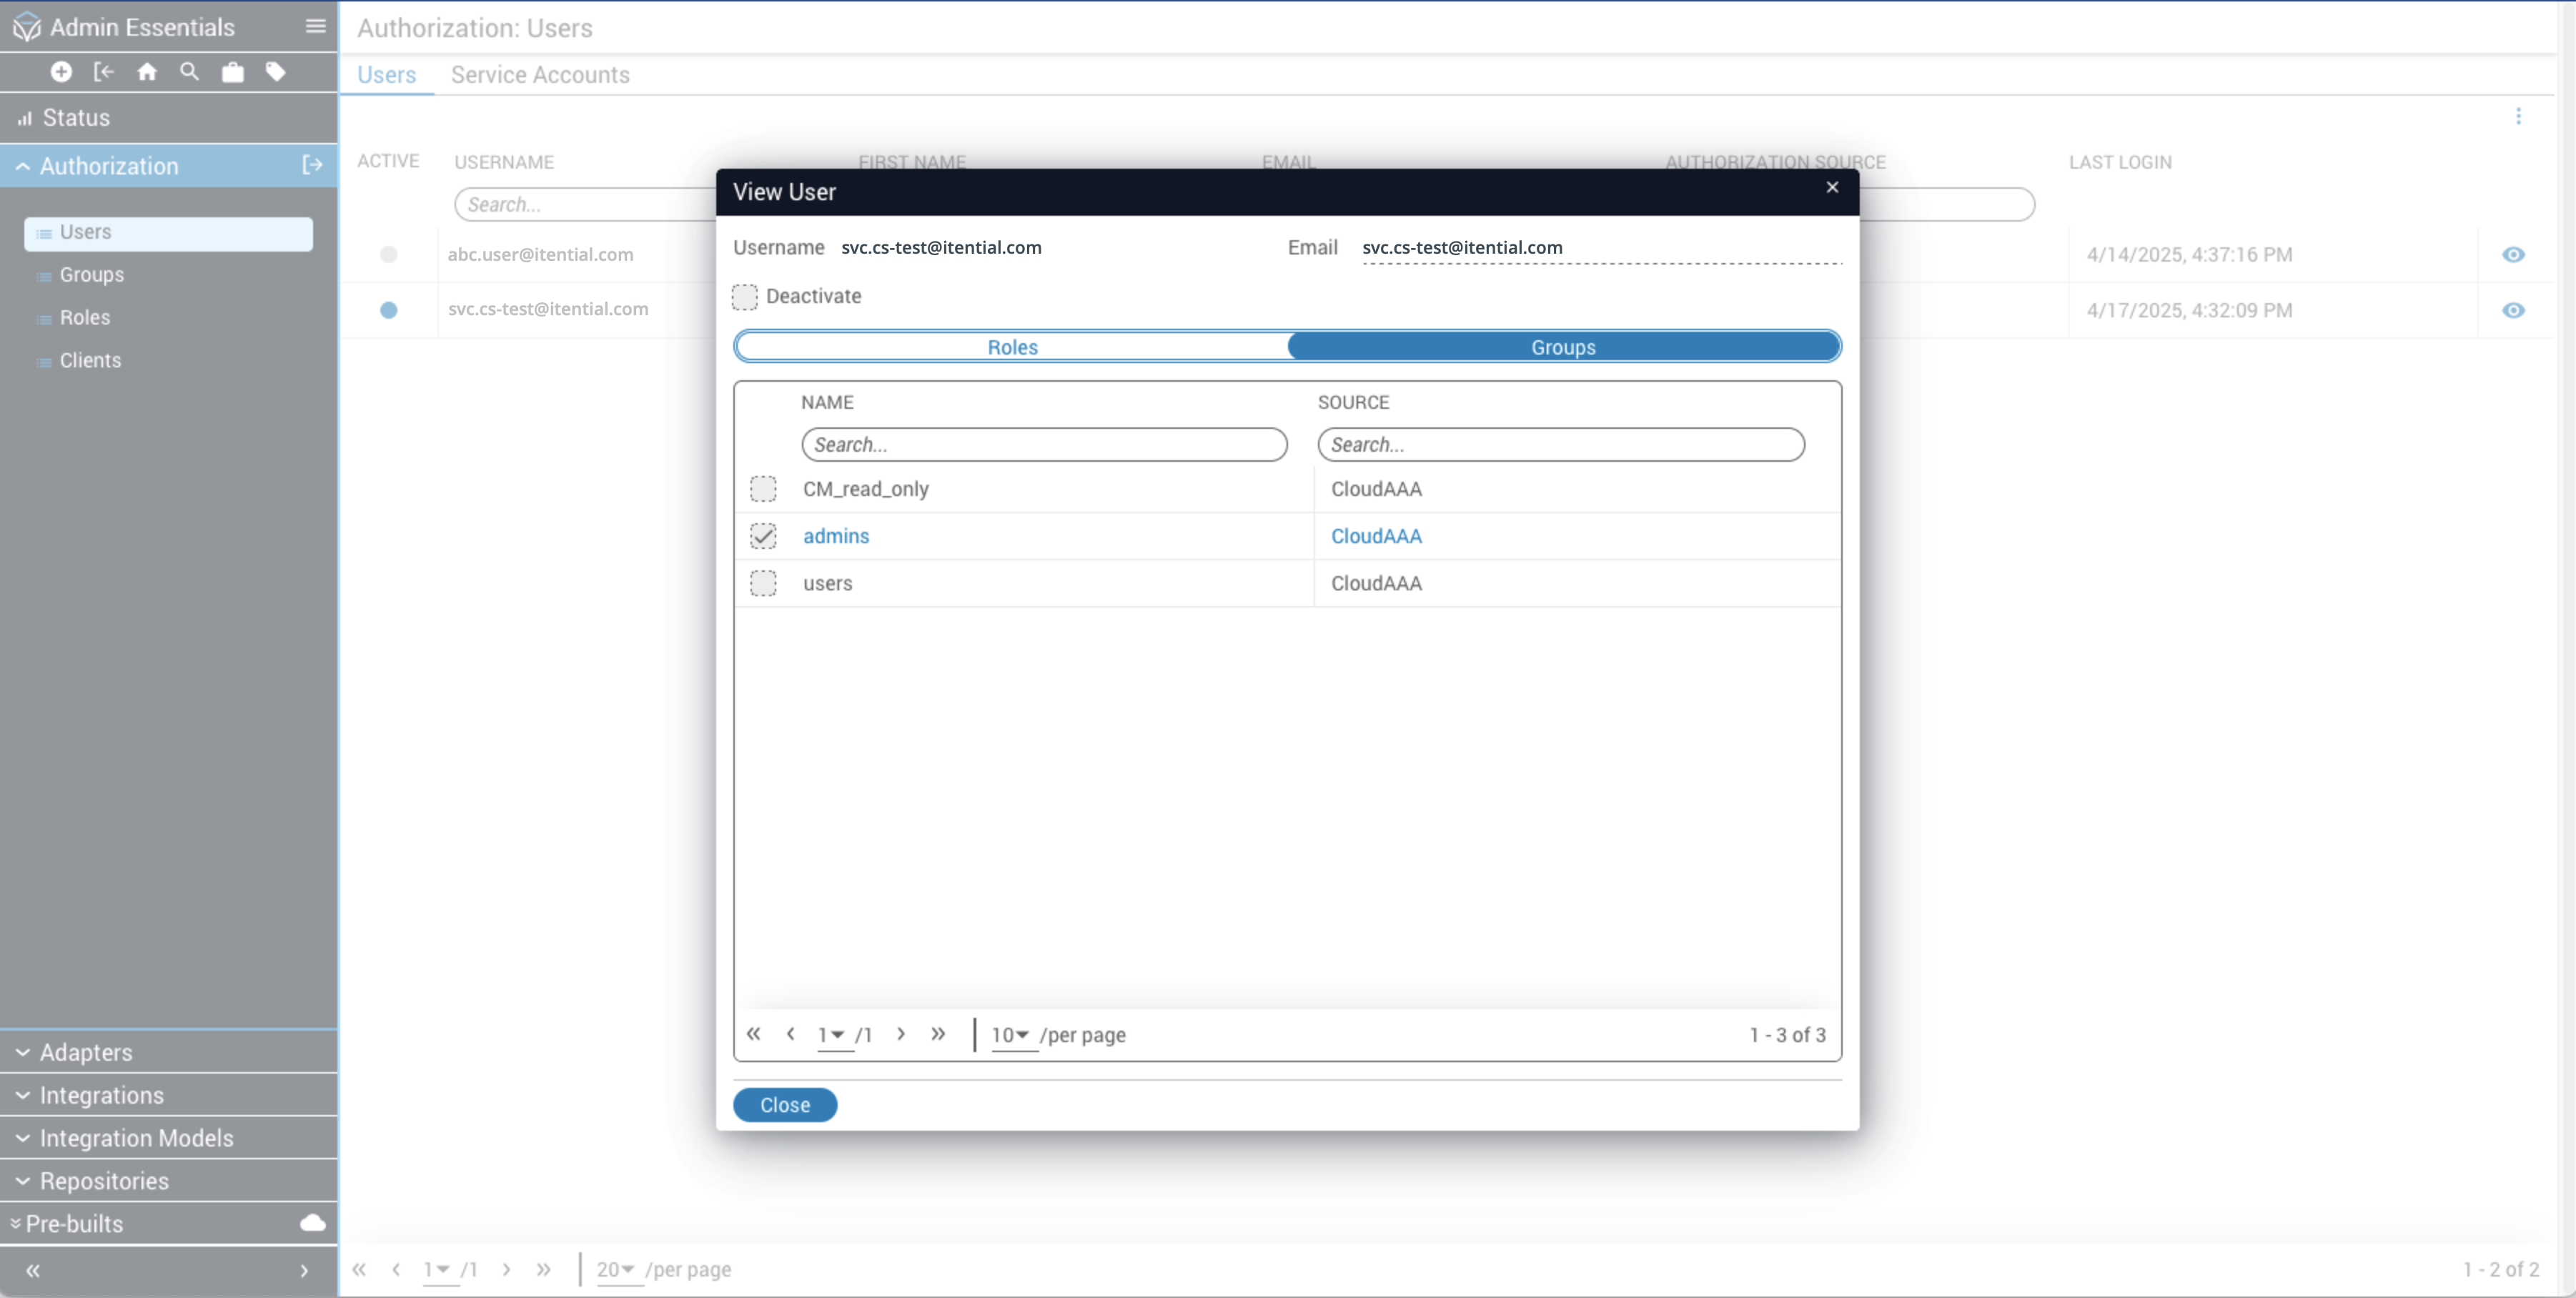
AAA-managed group memberships will be grayed out (disabled), indicating the membership is not editable in Itential Platform.
Forced Logout
Itential allows administrators to forcefully log out all or selected users from the Authorization interface. Admins must have permission for the Authorization.forceLogout method.
Click the checkboxes to select users and then click the Log Out button icon at the top to forcefully log out all selected users.
Groups
An Itential Platform Group is an account created within the Itential Platform system. Users are assigned to Itential Platform groups through Authorization. In contrast, users are assigned to external groups within the external AAA system. An external group is an account that comes from an external AAA system such as LDAP; it cannot be created within Itential Platform.
If User1 is a member of Group1 and starts a job, and User2 is not a member of Group1, then User2 will not be able to see the job.
Assigning groups to roles
External groups cannot be created within Itential Platform. Instead, Itential Platform creates the external group record once it has been learned from the AAA system.
Groups are assigned to roles in two ways: directly, or by membership in another group.
To assign roles directly to a group in Itential Platform:
Locate the group
Locate the group you wish to assign to a role. You can filter the list by typing in the Name column header search box.
Open the View Group dialog
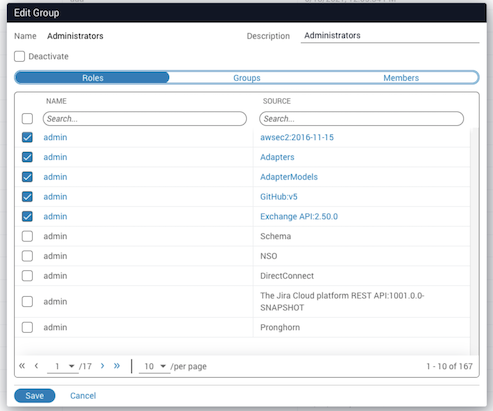
Click the eye icon at the end of the table row to open the View Group dialog. The Roles tab displays by default.
Roles assigned by other groups are grayed out (disabled), indicating the assignment is inherited.
Assigning group membership
Itential Platform groups and external groups can be given membership to an Itential Platform group; however, neither can be given membership to an external group.
Identifying group members
Open the Members tab
Select the Members tab on the Edit Group modal to display the members list of users that are direct members of a group. There is no indicator for inherited memberships.
Roles
A role is a bundle of permissions assigned to users and groups, granting permission to access one or more endpoints. Roles are pre-defined in the pronghorn.json file for each application and assigned to methods and views with the roles property.
Built-in roles
The following built-in roles come with Itential Platform, offering a set of ready-to-use permissions and access levels that pre-define what actions users can perform within the Platform.
These built-in roles can serve as a guided framework for users who desire to create custom roles for more precise control. Itential Platform offers the flexibility of custom role access based on your organization’s security and business needs.
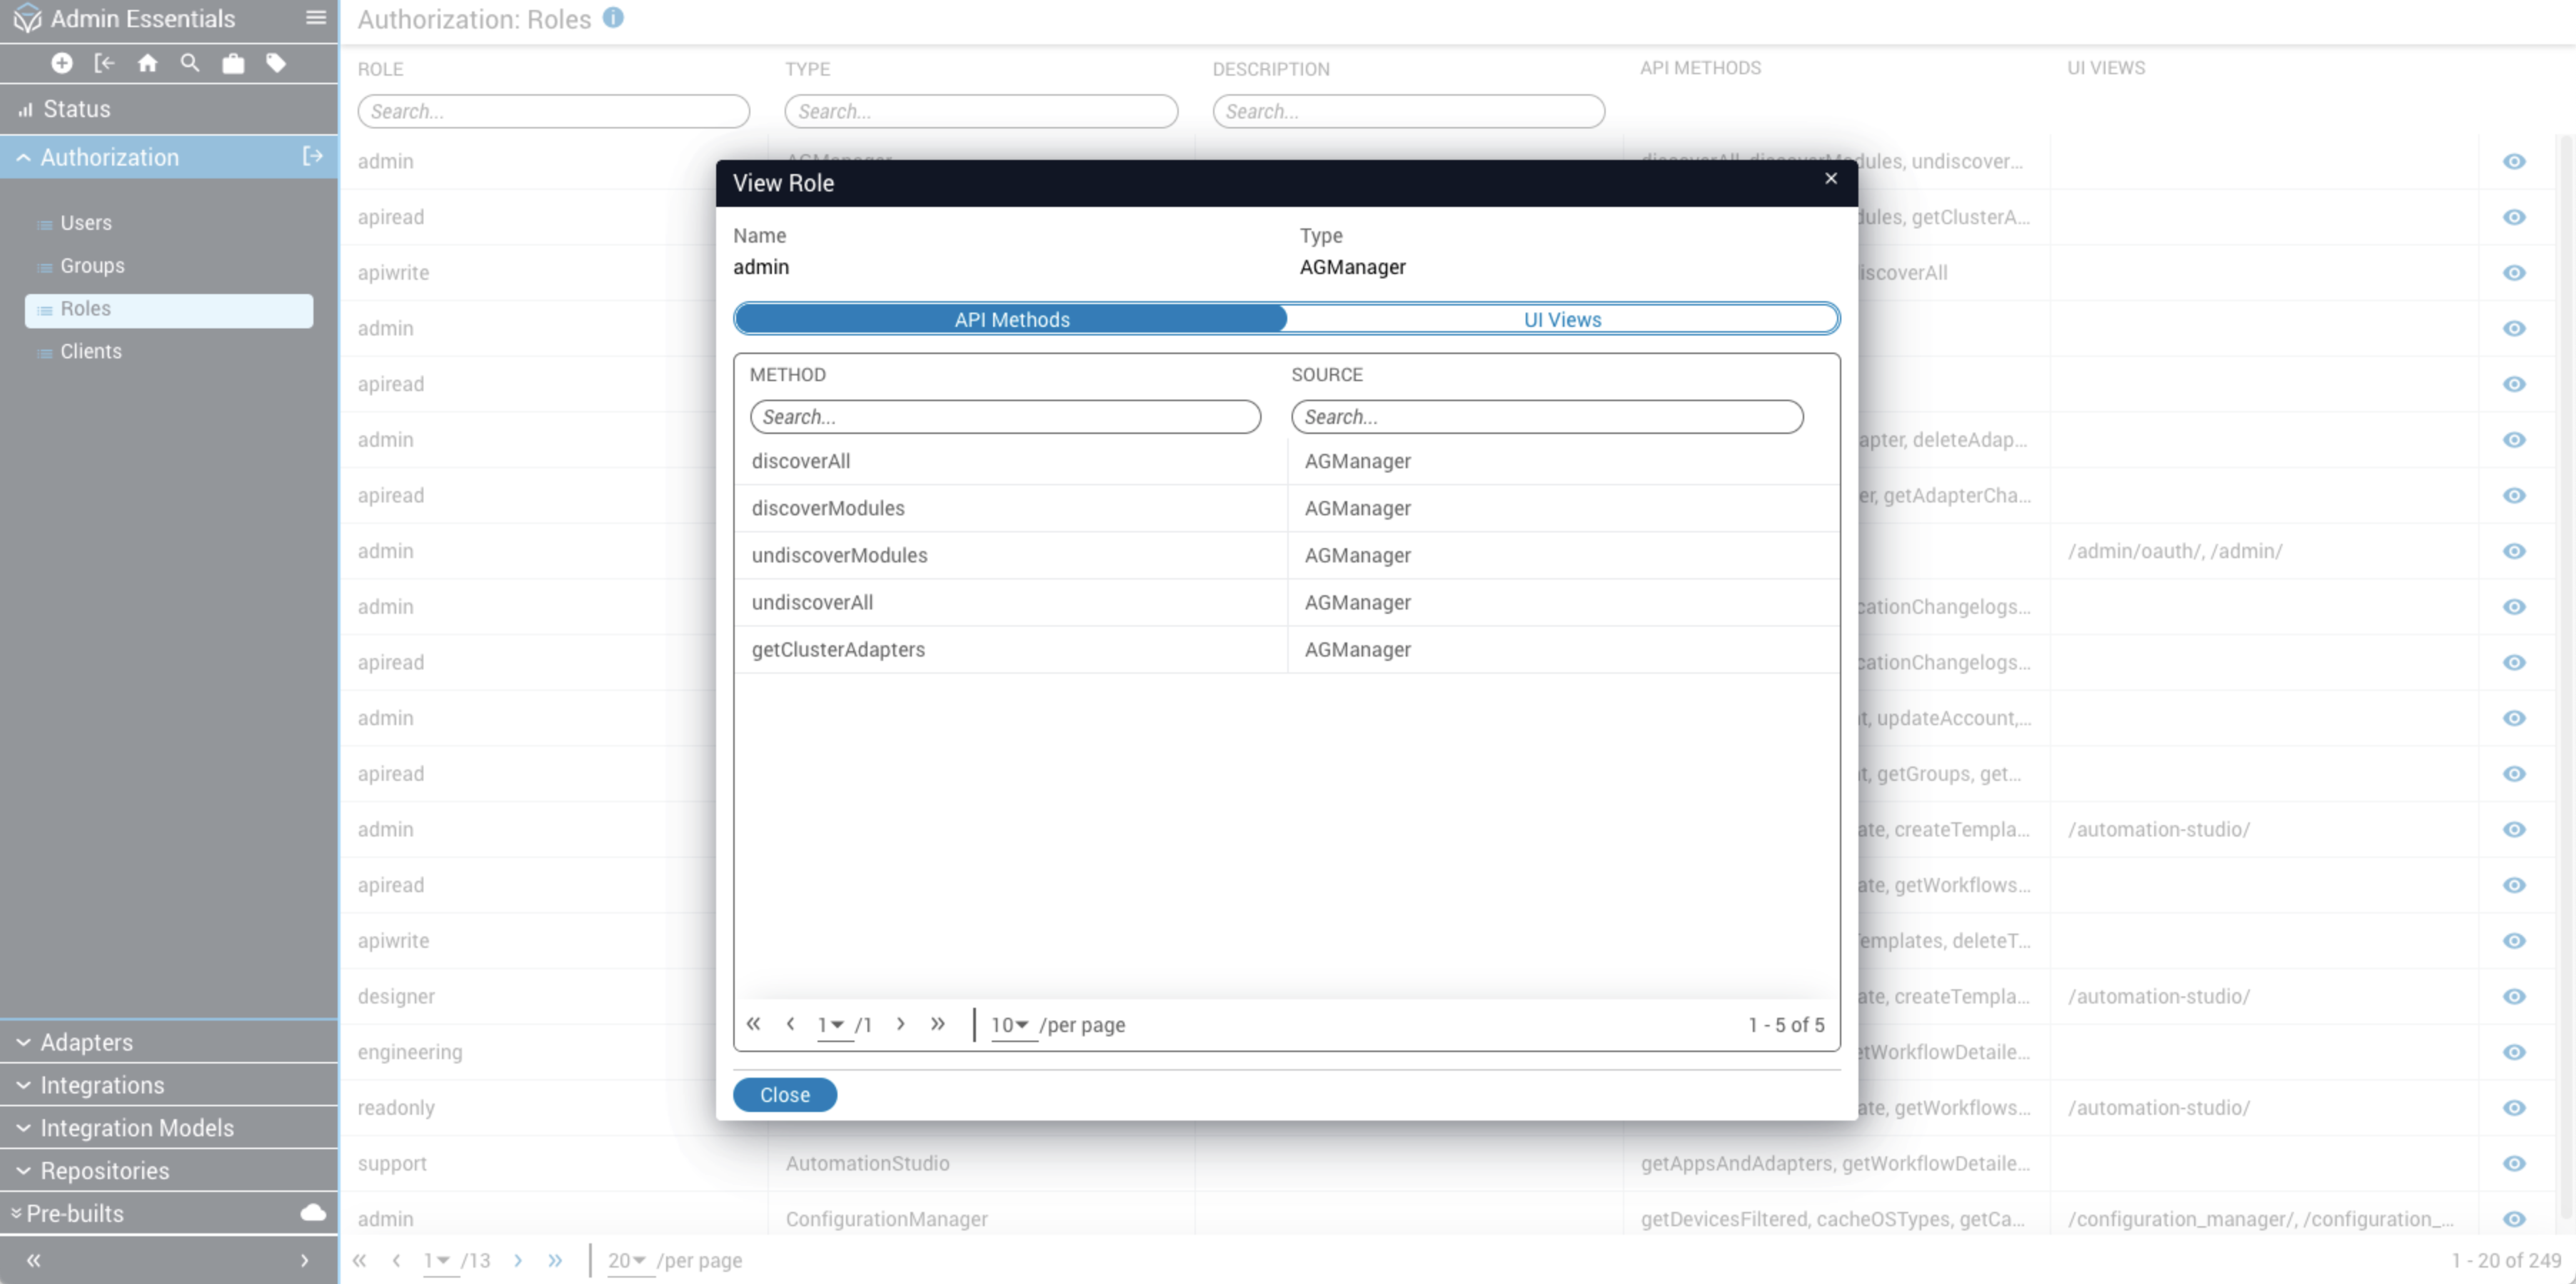
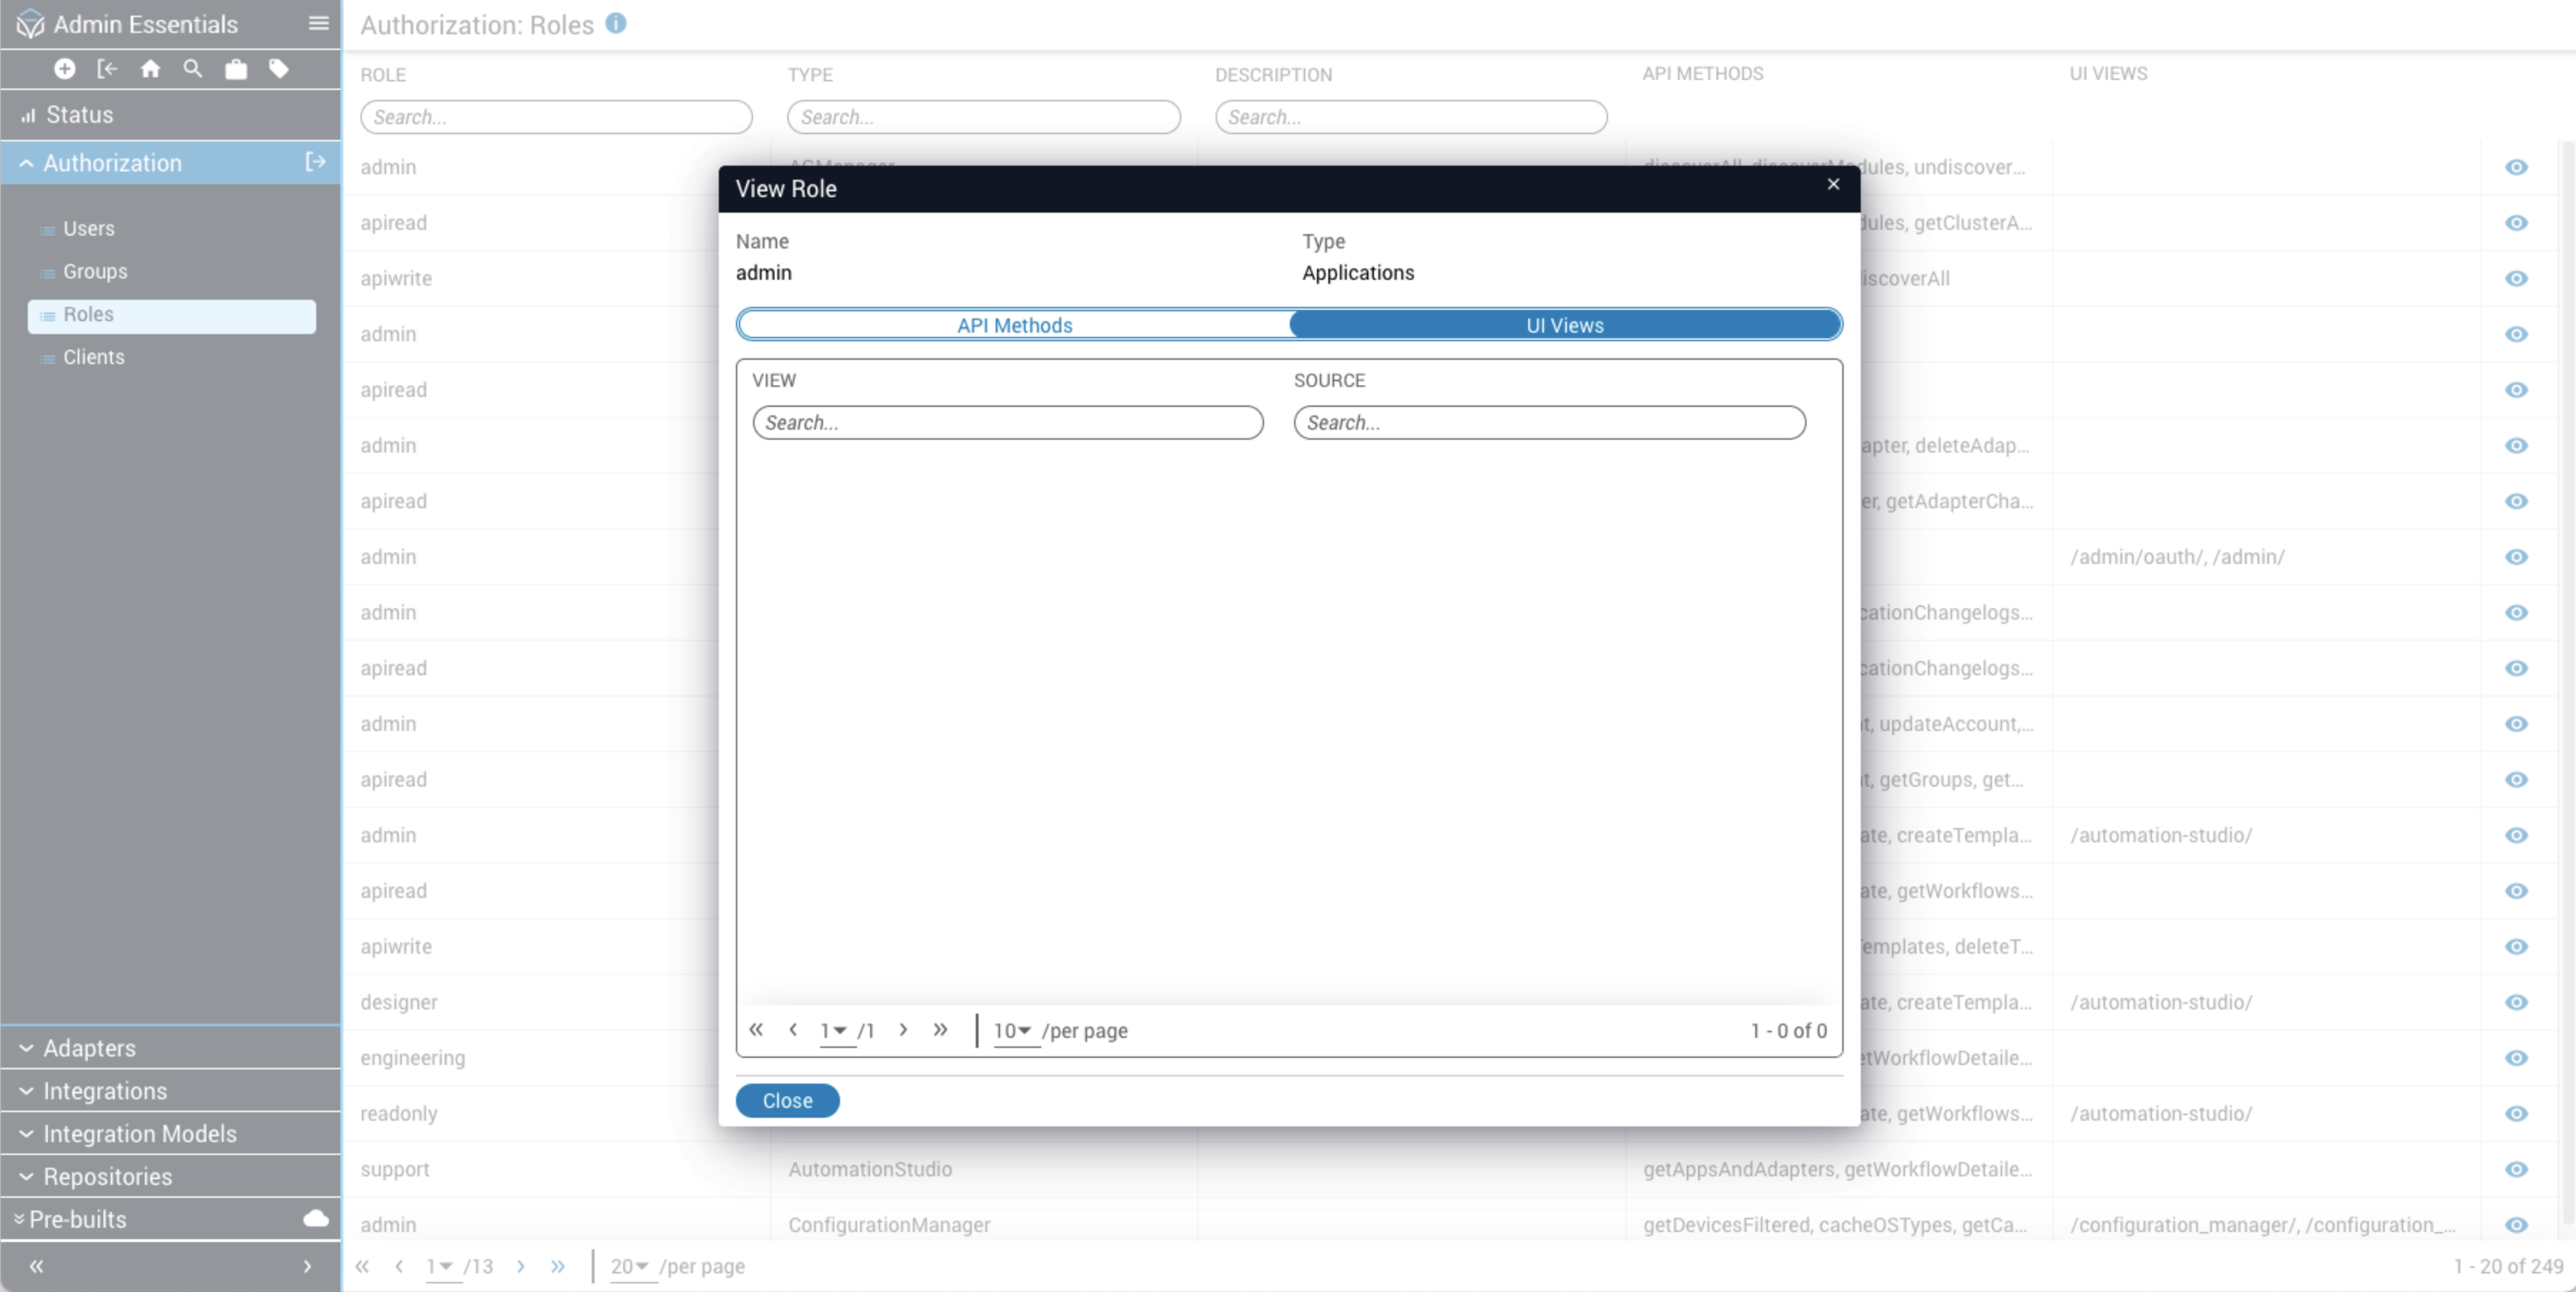
Endpoints
Endpoints are defined by each application in the Platform. There are two types:
To view endpoints granted to a role:
Custom roles
In addition to built-in roles defined by applications, Itential Platform allows administrators to define custom roles for different authorization strategies. Built-in roles are hard-coded in the services and are not user-editable. Users can only utilize services from their active server profile and cannot add roles for services that are not currently running.
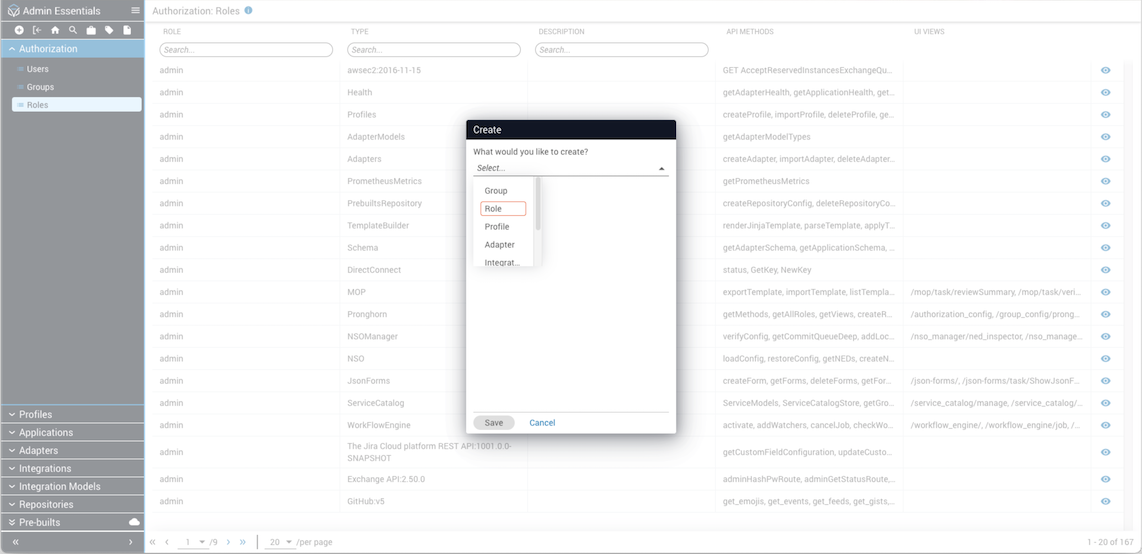
Creating custom roles
Open the Create dialog
Click the plus (+) sign from the top toolbar in Admin Essentials to open the Create dialog.

Editing custom role permissions
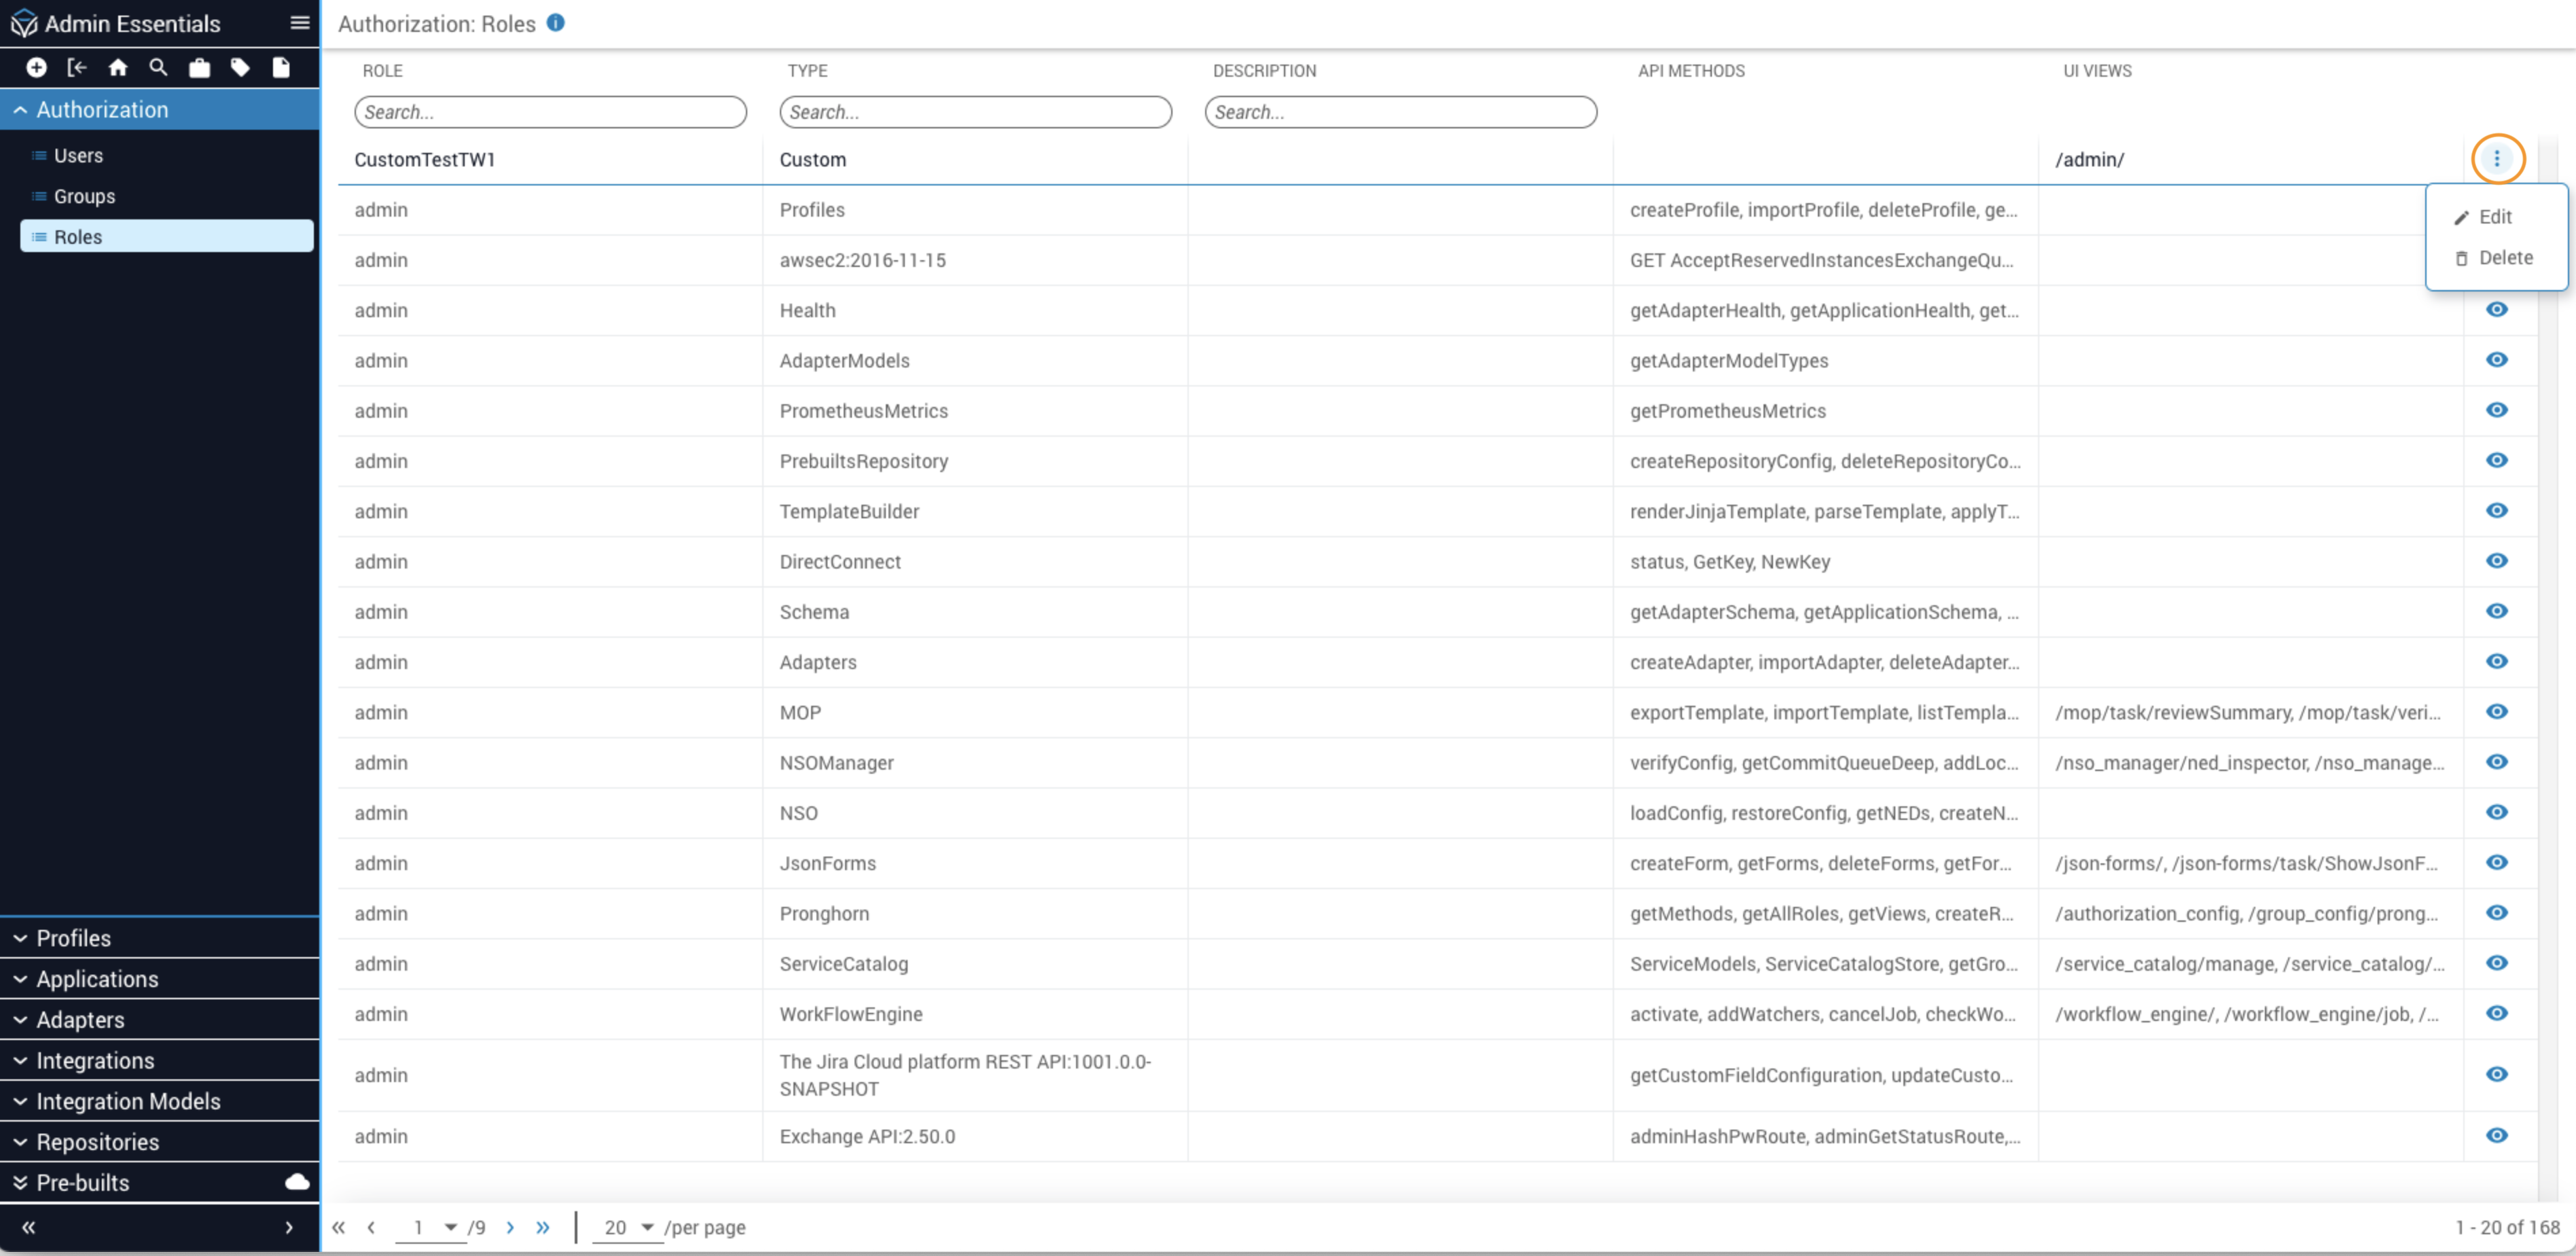
Find the custom role
Type the name of the Custom role in the search bar under the Role column header and select it from the results.
Open Edit
Click the stacked dots menu icon and select Edit. The endpoints for the selected custom role display in the Edit Role modal, with tabs for API Methods and UI Views.
Deleting a custom role
This is a hard delete. Deleting a custom role will remove references to the role from all users and groups assigned to it.
Only custom roles may be deleted.
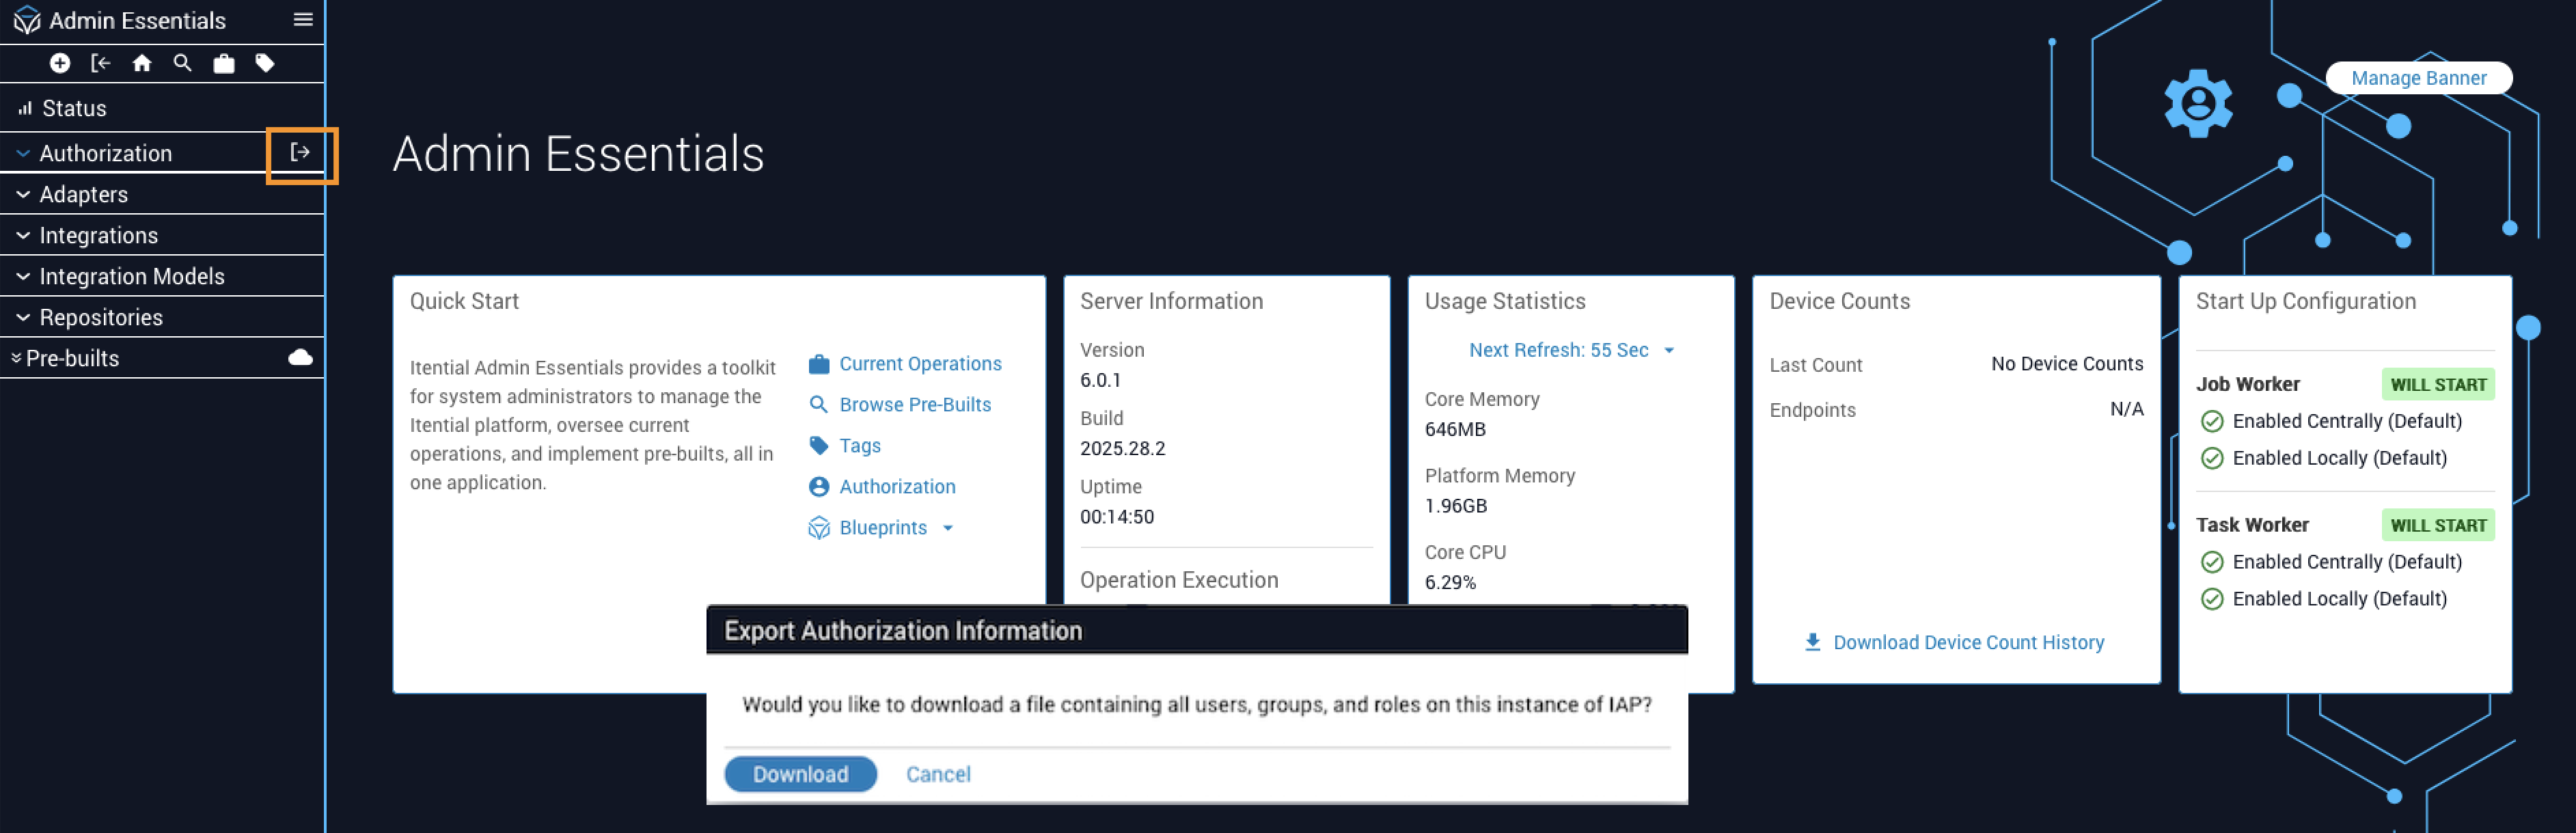
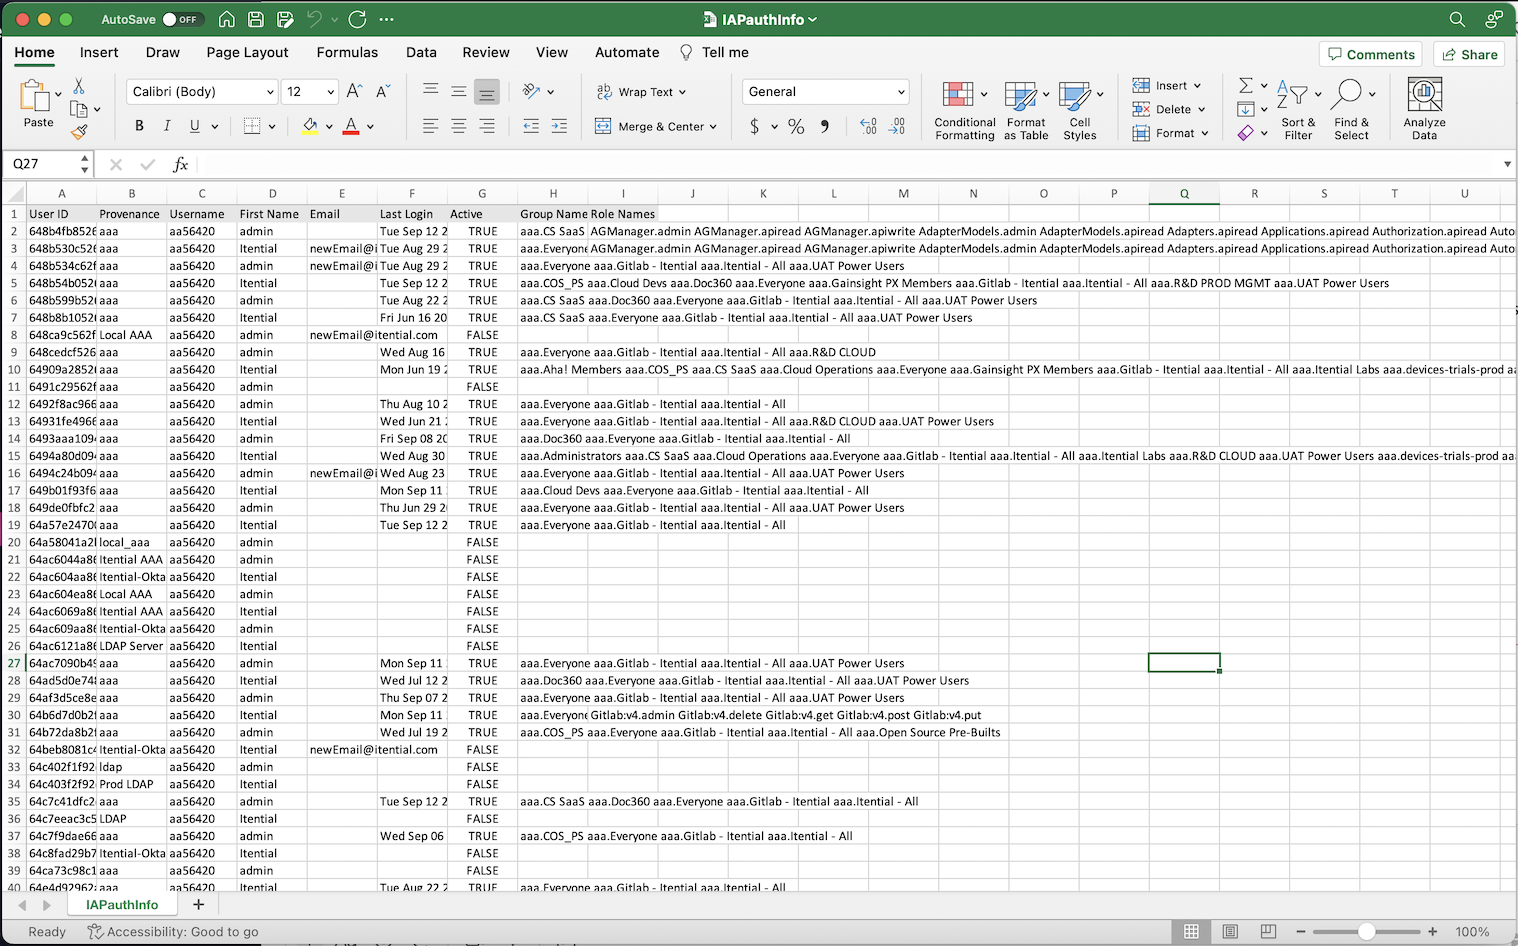
Exporting authorization data
You can export a list of Users, Groups, and Roles from the Authorization interface into a CSV-formatted file. The CSV data can be used as a reference list to help track what role a user belongs to and see the groups to which each user belongs.
To utilize this export feature, you must have assigned permissions to read/write roles on user and group entities, and must have assigned permissions to perform the export.
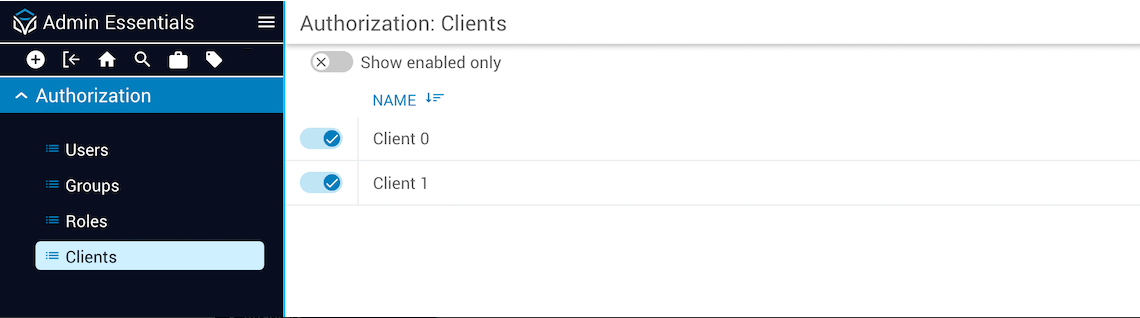
Authorization Clients
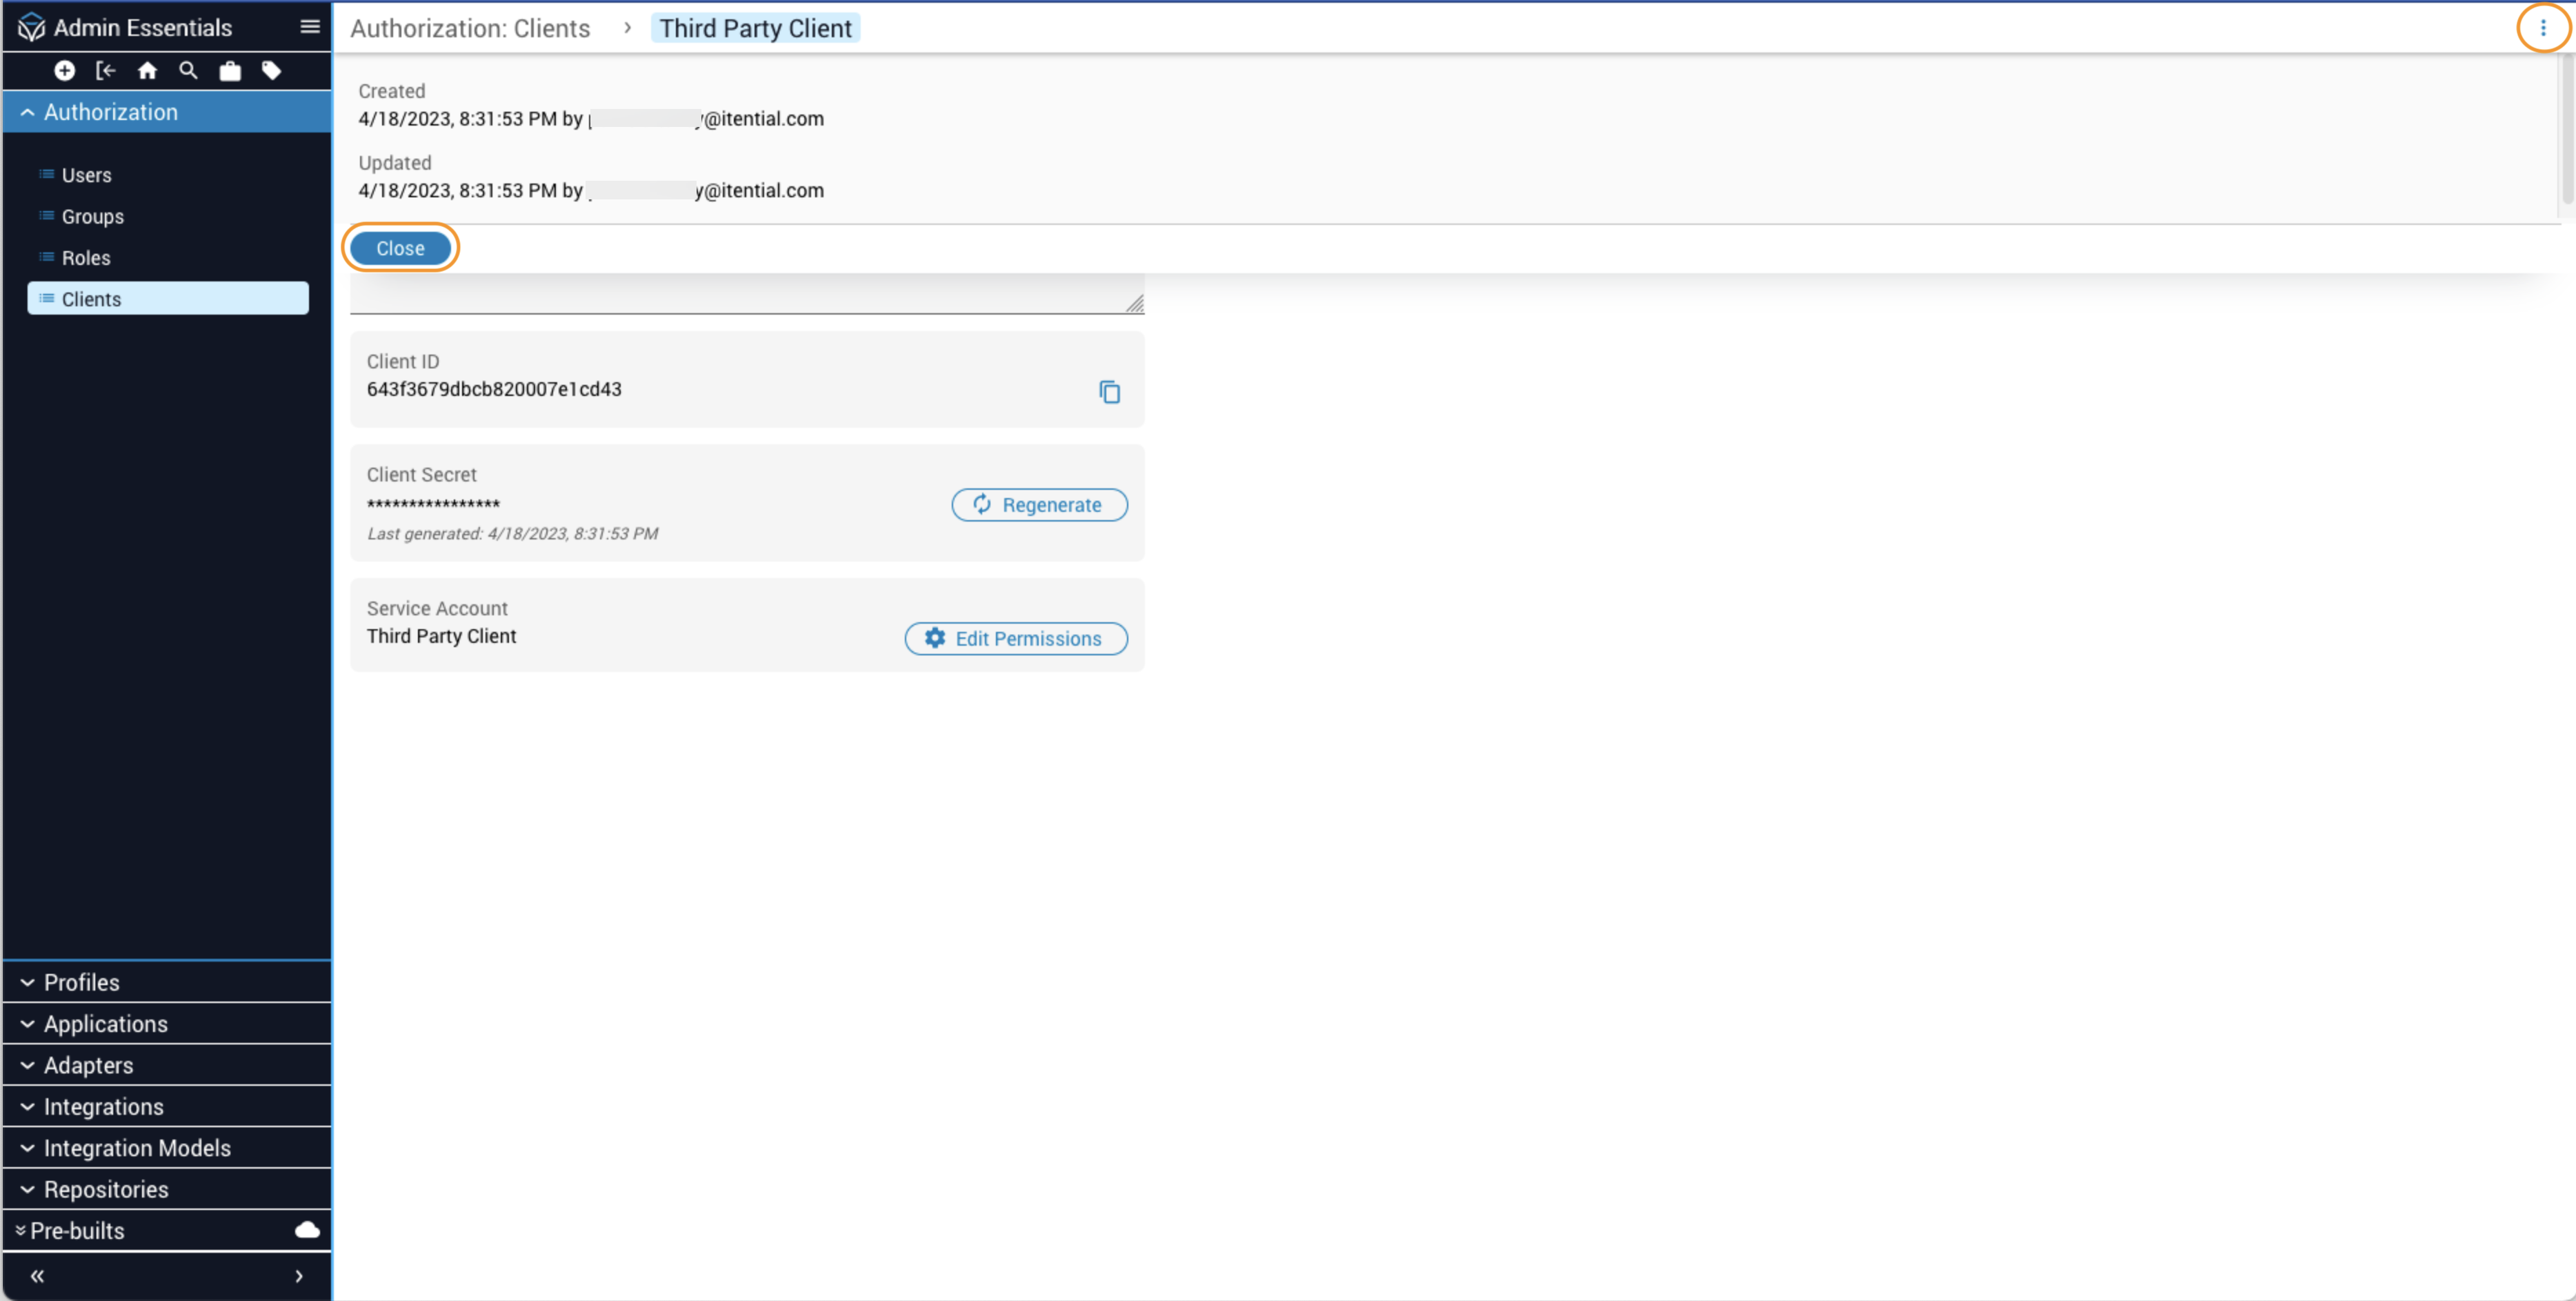
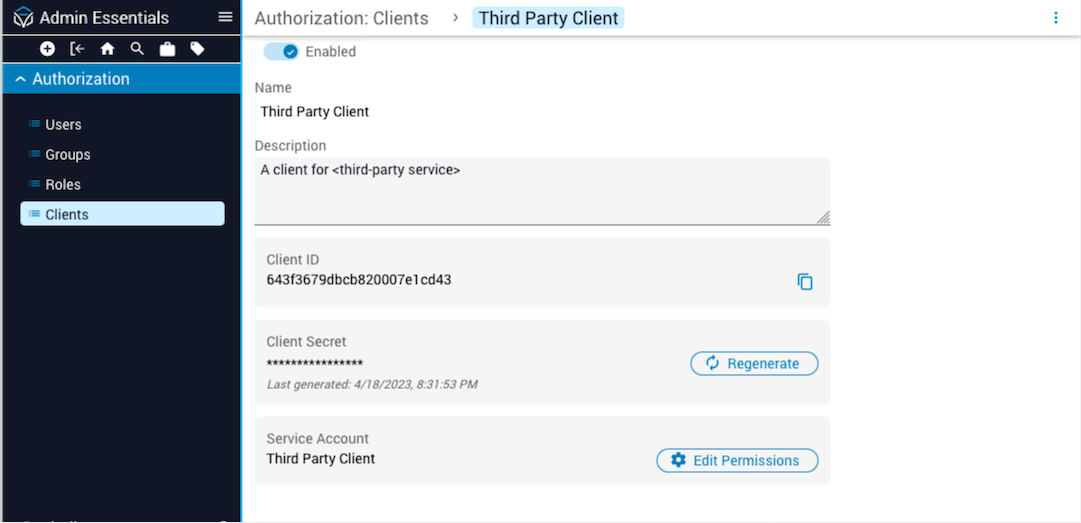
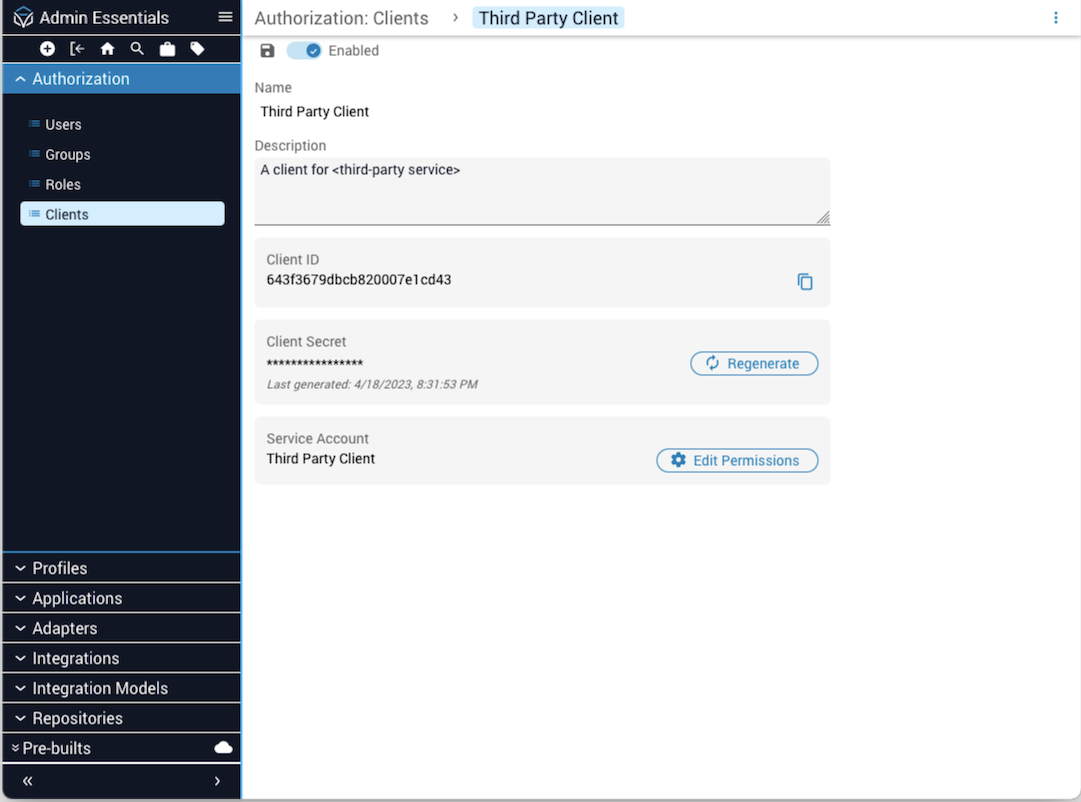
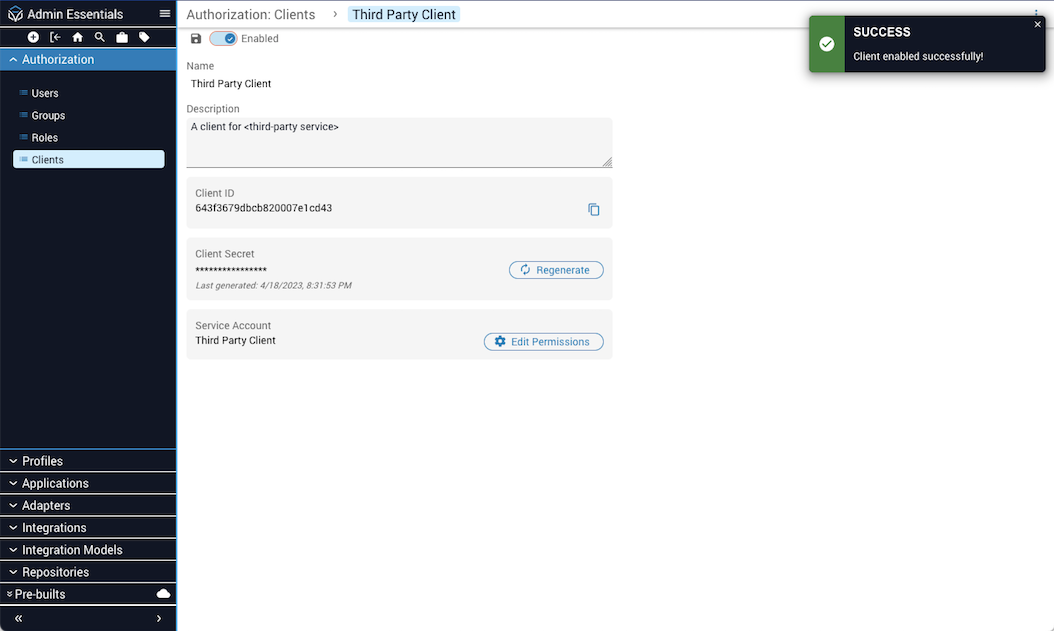
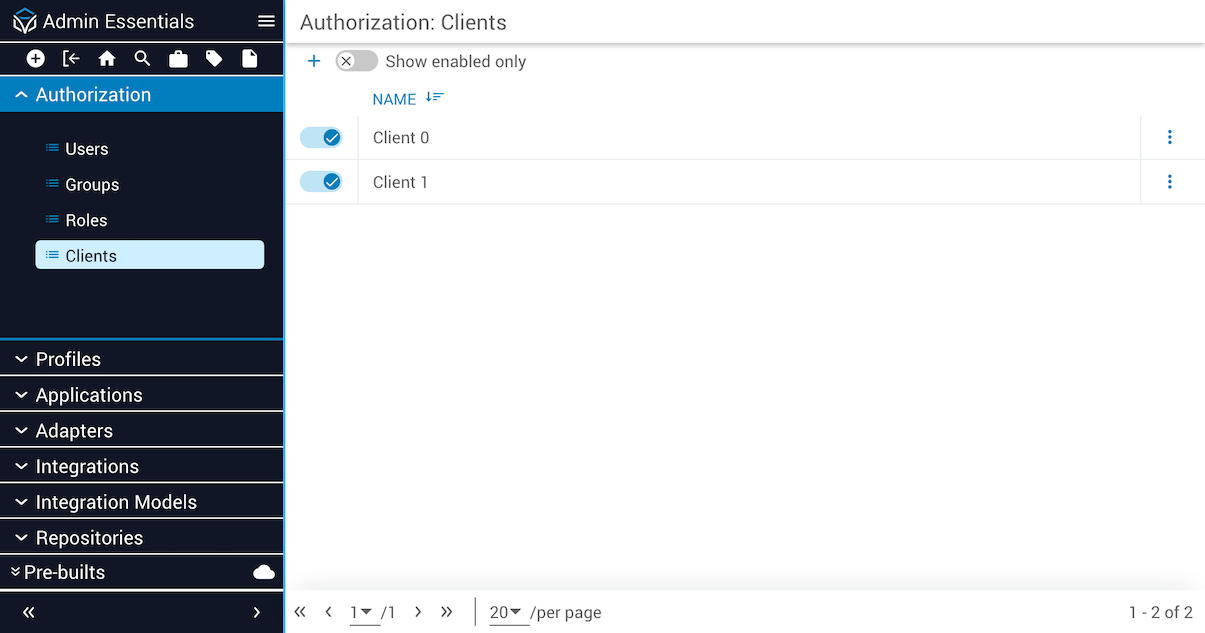
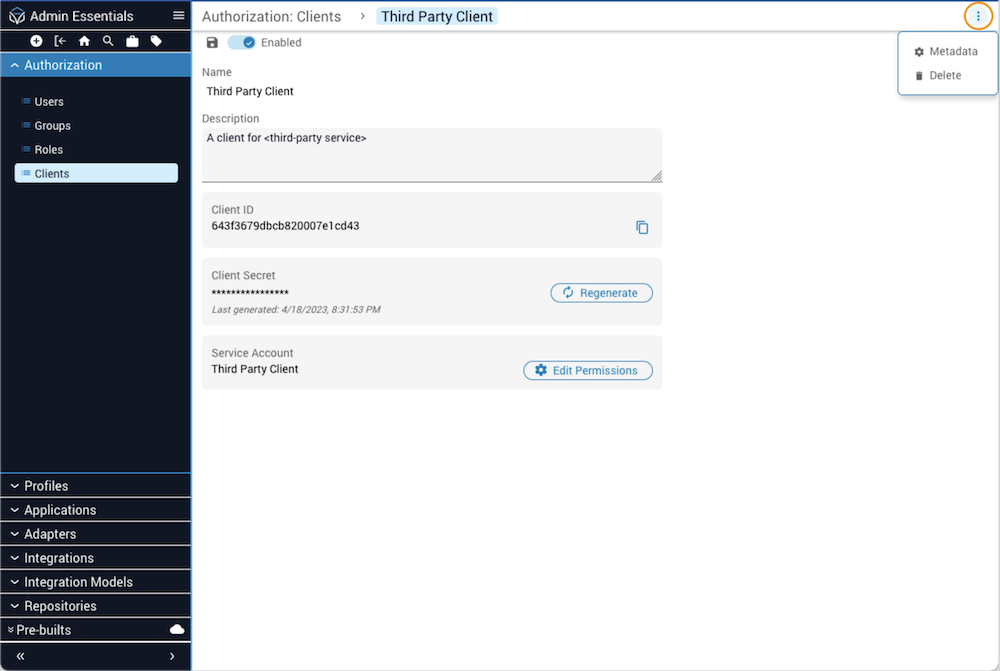
The Authorization Clients view displays a list of clients for Service Accounts. Click on the Clients name in the list to open the Client Details page, which displays the Client ID and a timestamp identifying the date and time a Client Secret was generated. Use the toggle switch at the top to enable or disable the Service Account. Authentication is not permitted against disabled Service Accounts.
For security reasons, the ability to edit a Service Account client is protected by the service-accounts:read and service-accounts:write Cloud application roles. To grant a user the right to edit client permissions for a Service Account, you must enable these roles in the groups whose users need to create or modify Service Accounts.
Service Accounts
Applications that need a point of entry to interact with Itential Platform APIs are created as Service Accounts in Itential Platform. Using OAuth2 protocols over HTTPS, authorization policies and controls are applied to limit what the requesting application is permitted to do and for how long. The client ID identifies the Service Account and the secret key provides proof of right-to-access. The client ID and secret key may be distributed to one or more Service Applications.
Benefits of encapsulating applications as Service Accounts include providing a more secure way to connect Itential Platform to external systems, using tokenization to give limited access to user data, protecting user data by providing access via client token ID without revealing user credentials, and allowing third-party services to make requests on behalf of a user without accessing passwords or other sensitive information.
Service Account properties
Example Service Account configuration:
Service Account APIs
Error responses
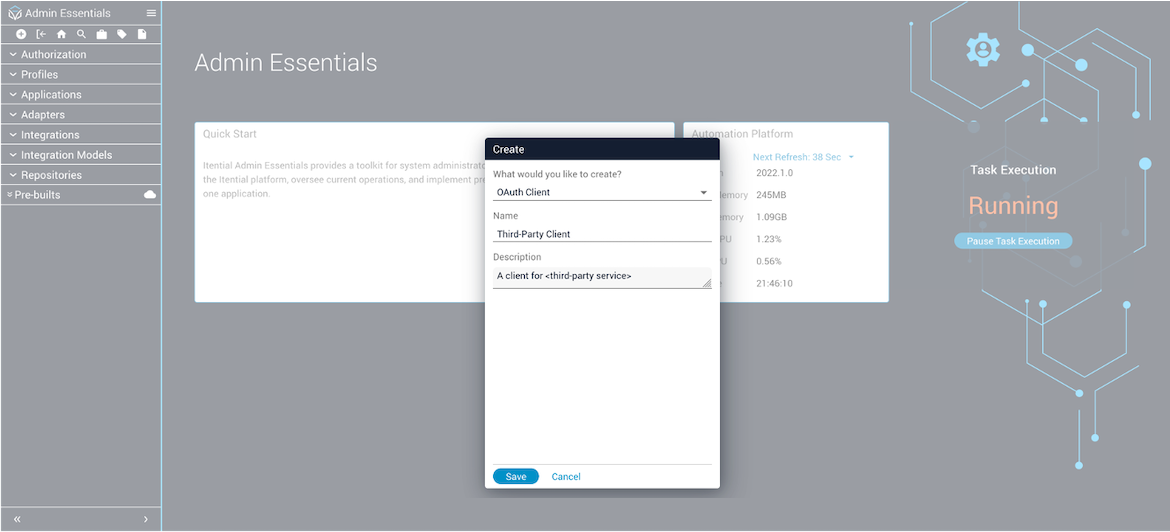
Creating a new client for a Service Account
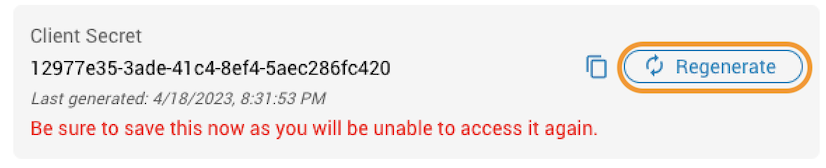
If you leave the Authorization Client Details page and later return via the Clients Collection view (Admin Essentials → Authorization → Clients), you will not be able to see the client secret — only the client secret timestamp.
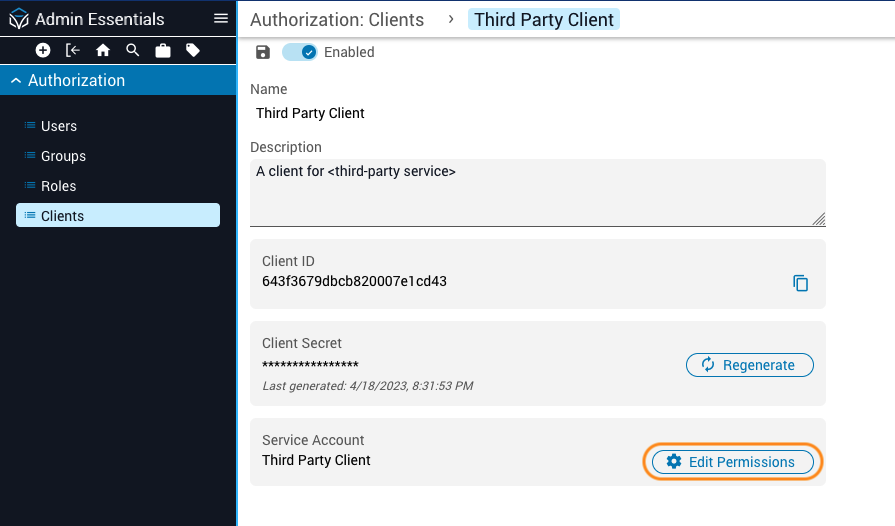
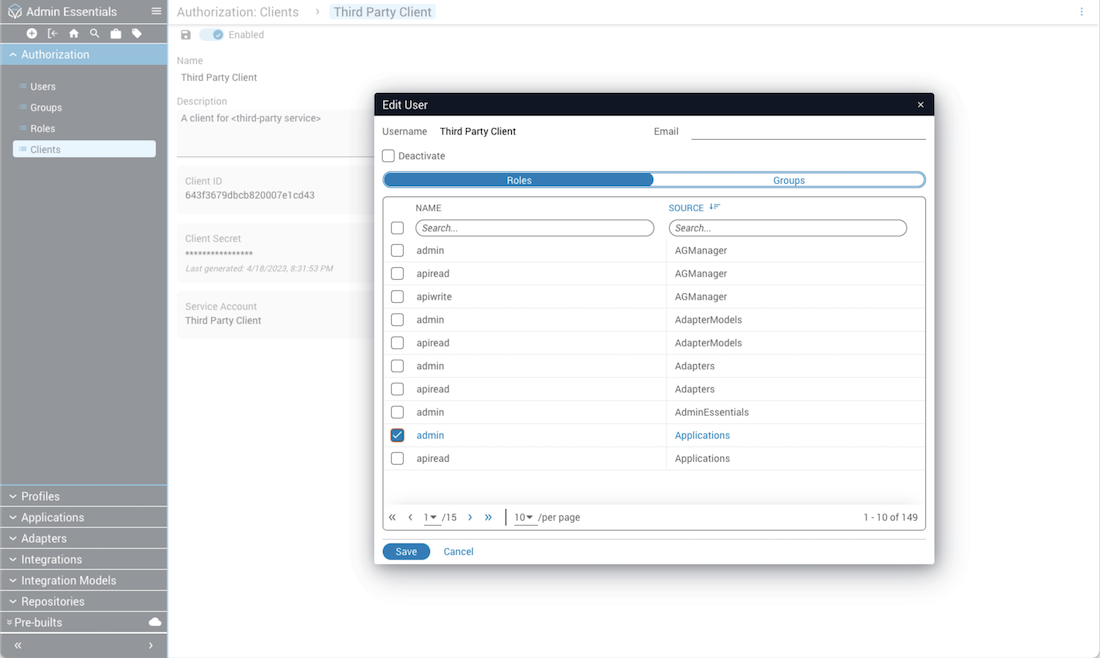
Editing client permissions for Service Accounts
Enable/disable clients for Service Accounts
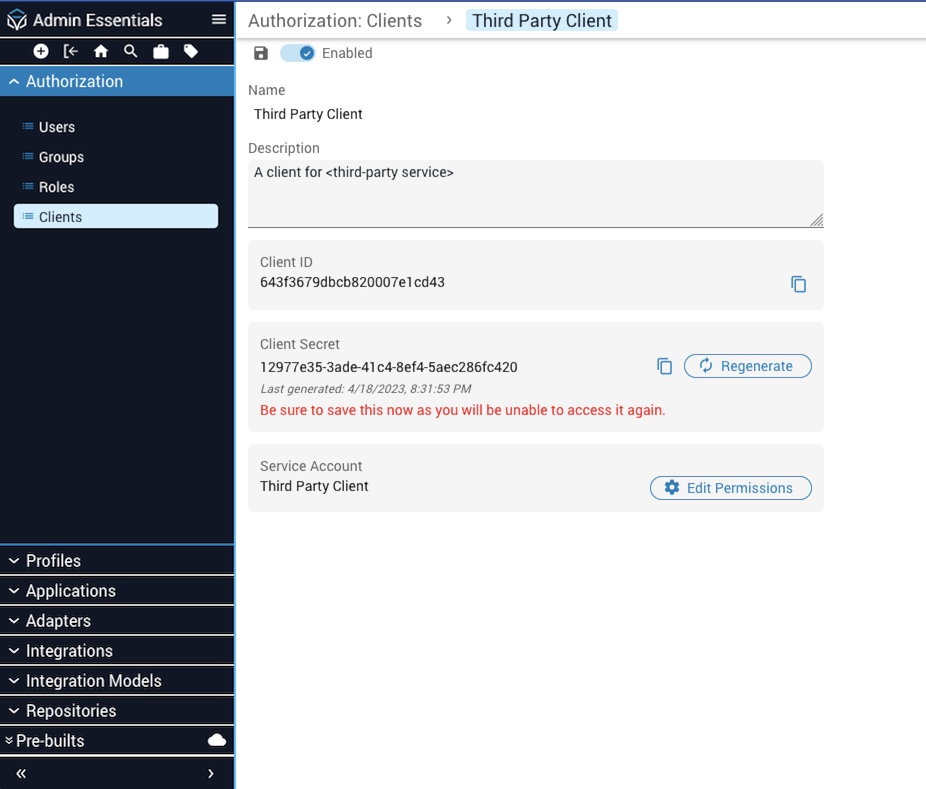
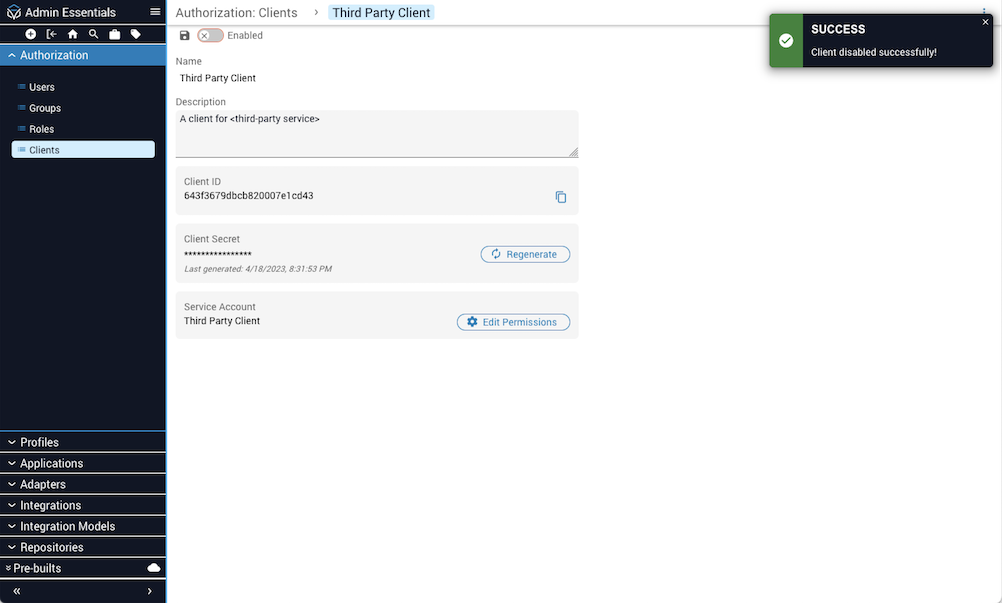
Use the toggle switch at the top of the Client Details page to enable or disable the Service Account. Click the Save button to retain your changes. A message banner informs users when the enable/disable state is activated for the Service Account. Authentication is not permitted against disabled Service Accounts.
Viewing, editing, and deleting Service Accounts
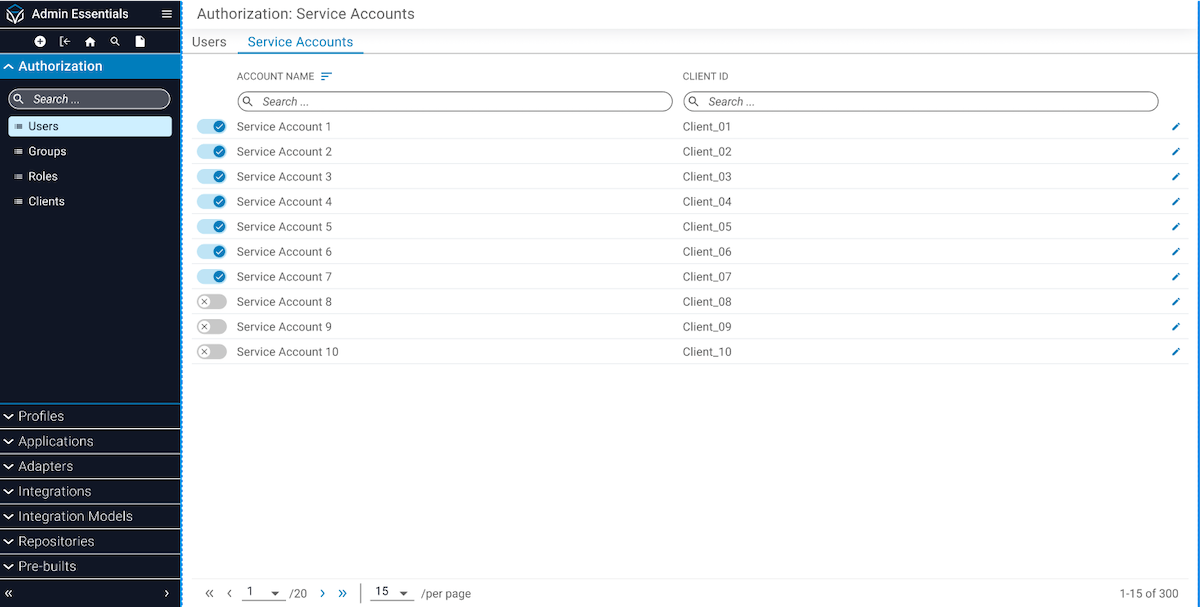
To view all Service Accounts on the system, select Users from the left navigation menu in Admin Essentials and then click the Service Accounts tab. From this table view, you can also click the pencil icon to edit the permissions associated with a Service Account.
To delete a client associated with a Service Account, click the Clients name in the list to open the Client Details page. Then click the menu button (⋮) in the upper-right corner to open the menu dialog and select Delete to remove the client.
Viewing and modifying client metadata for Service Accounts
From the menu button (⋮) in the upper-right corner of the Client Details view, select the Metadata option. In the metadata drawer that opens, you will see a Created field with a date timestamp and the user that created or updated the client. Click Close to dismiss the drawer.