Create and run workflows
Itential Platform includes Studio for defining and building automations that can be used by applications in the system. Studio provides a clean, modern interface for arranging and connecting tasks and transitions on a canvas to create flow-based workflows.
Terminology
The following terms apply to Studio and workflow design in Itential Platform.
Workflows in Studio
To start building an automation, select Studio (formerly Studio) from the Itential Platform homepage. From the Studio landing page, you can search for an existing automation or create a new one.
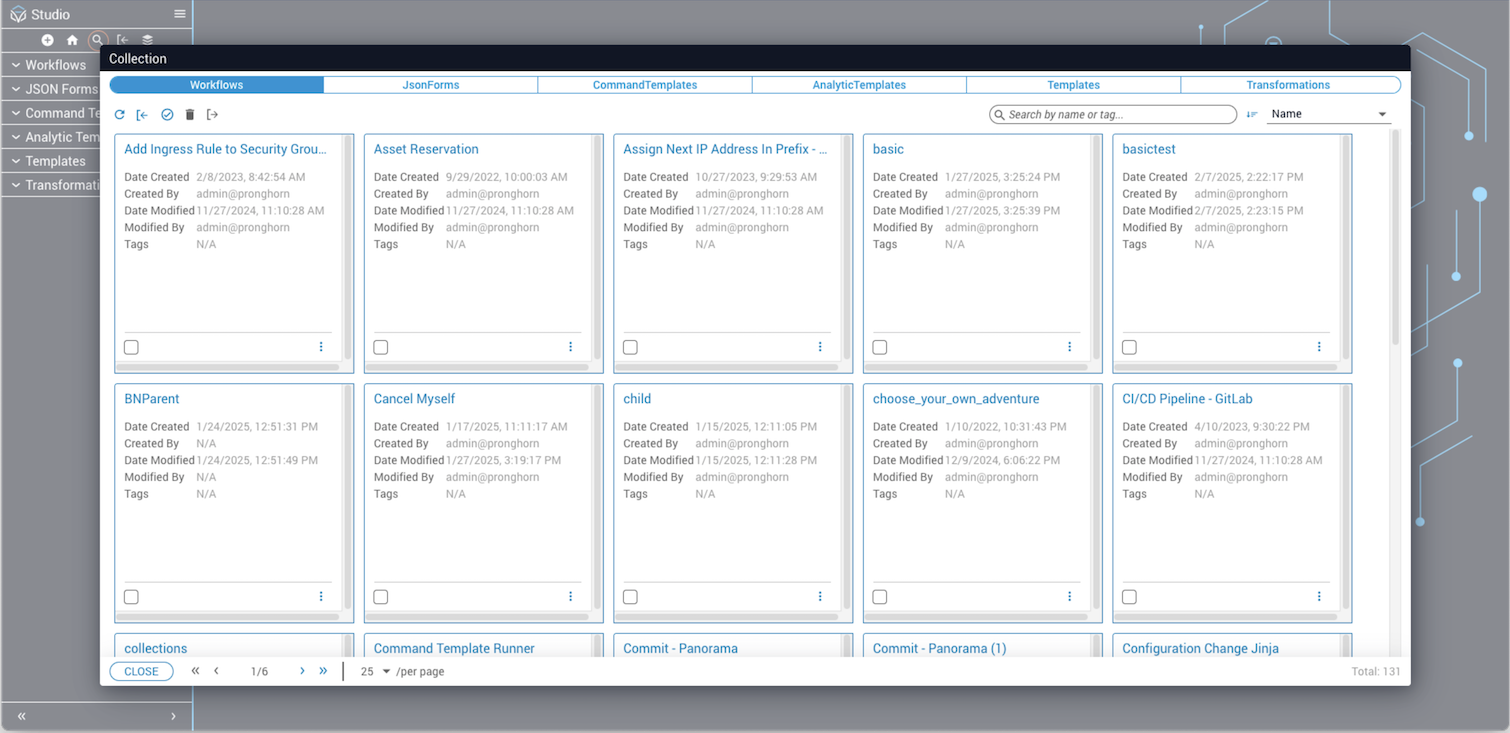
Searching for workflows
To find an existing workflow, click the search icon (magnifying glass) in the Studio top toolbar. From the Workflows tab of the Collection dialog, browse or search for an existing workflow and click it to open its canvas.
Creating workflows
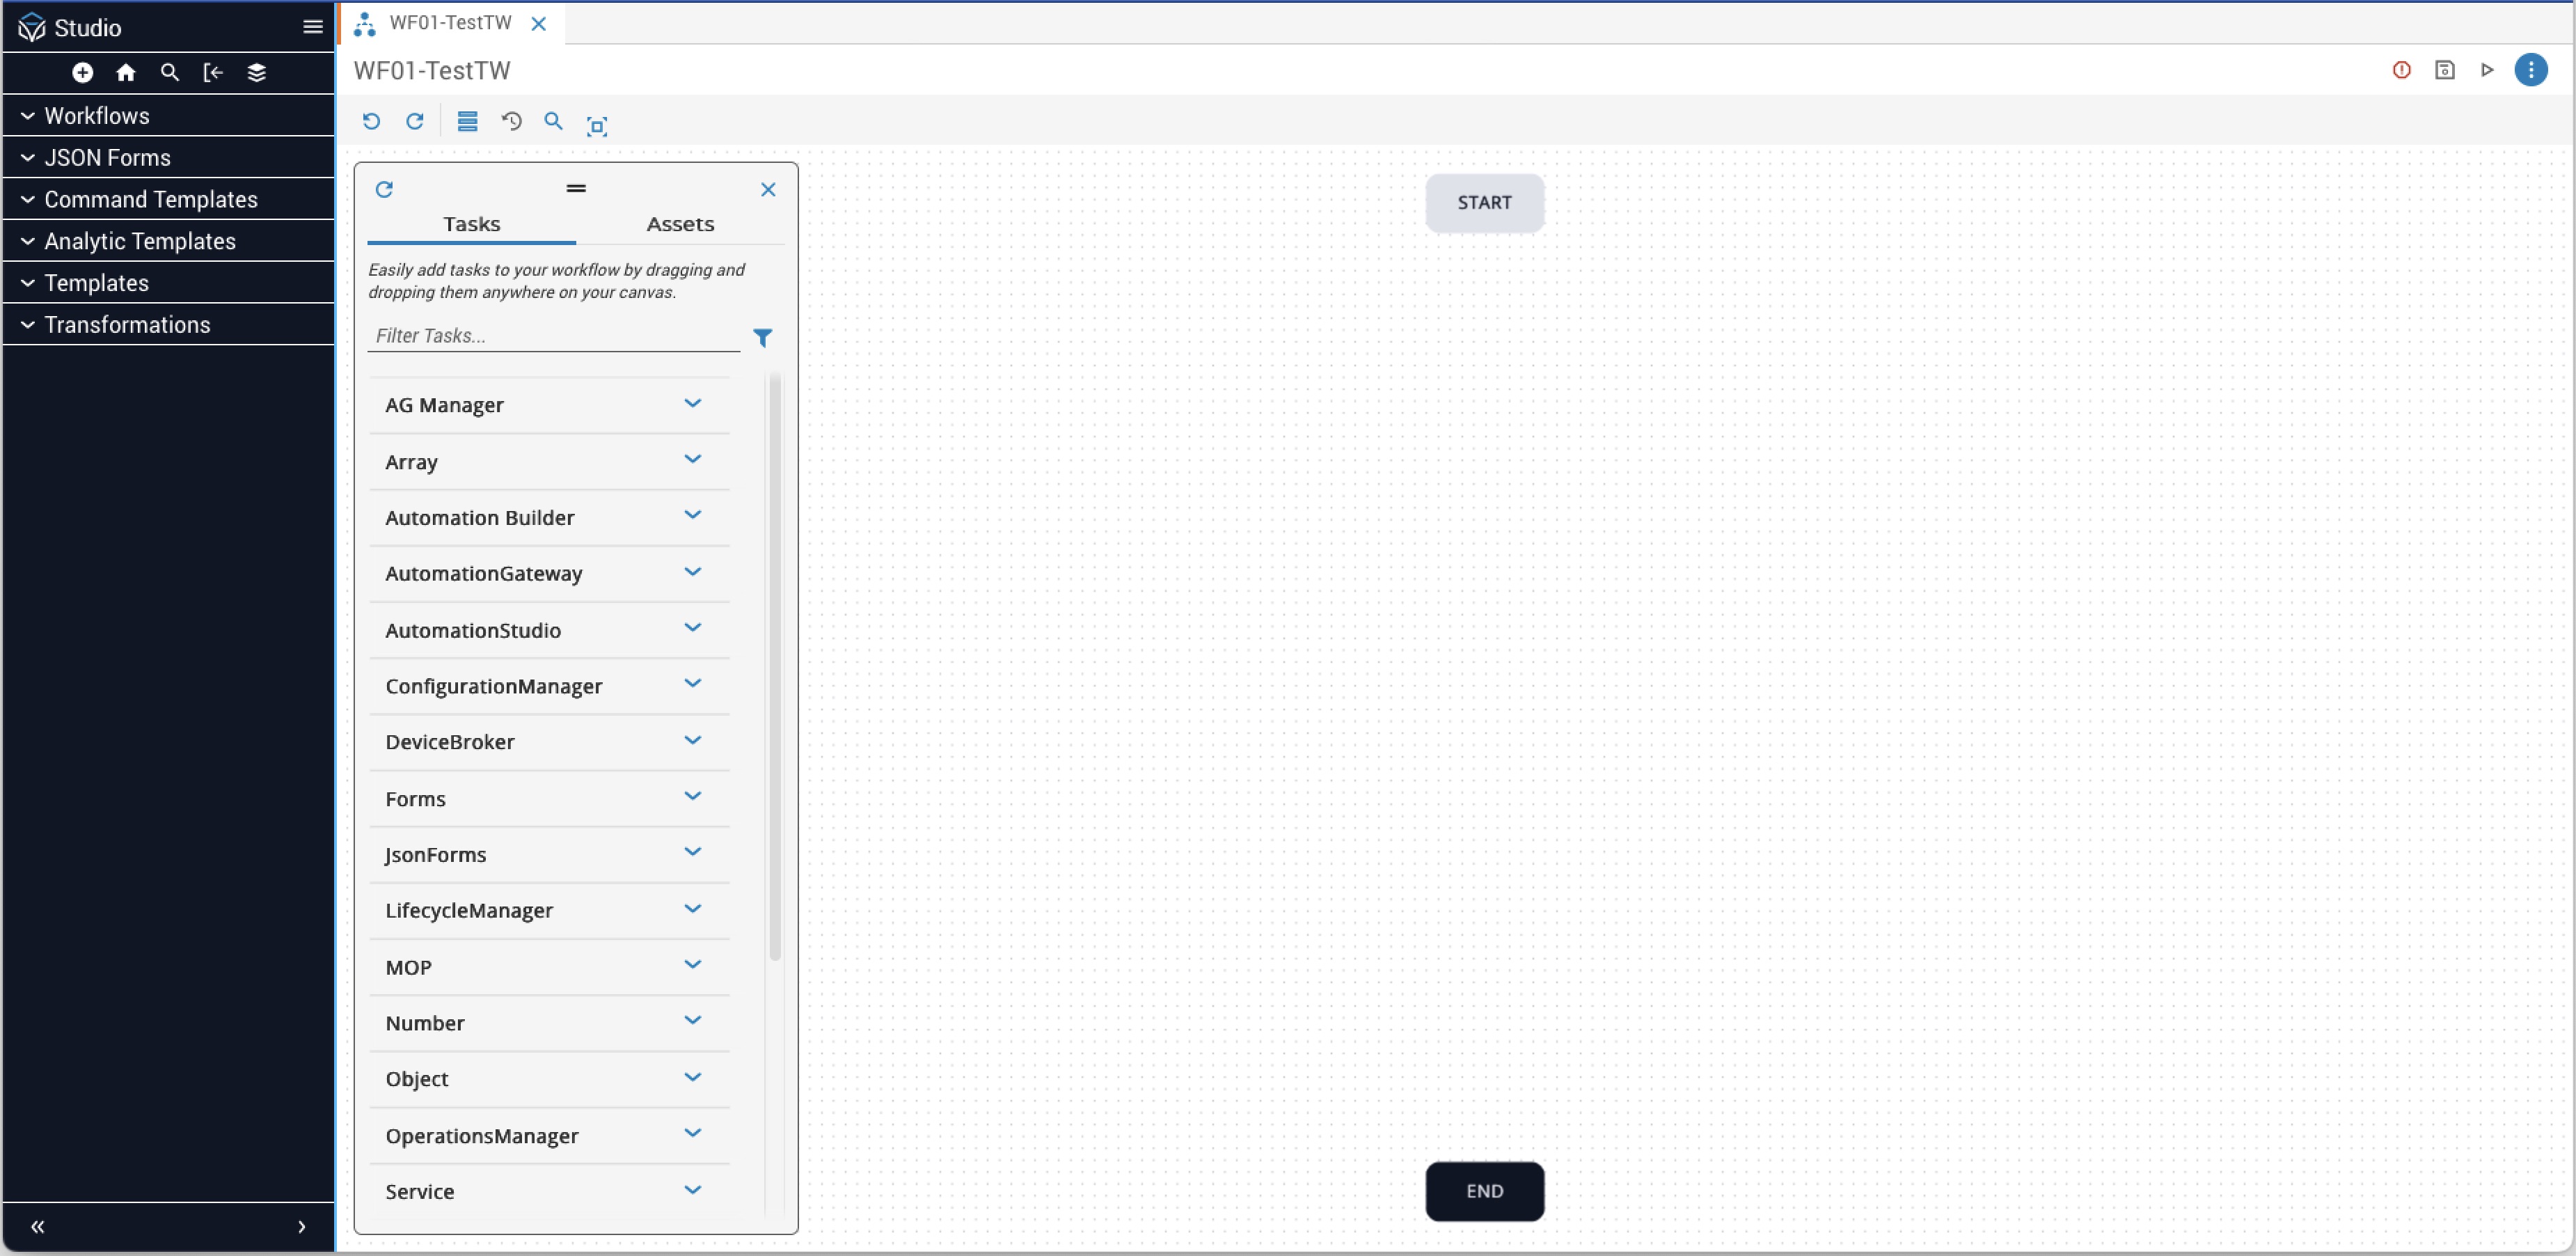
Build the workflow
The new canvas opens with Start and End tasks displayed. Add more tasks from the Task Palette by drag and drop:
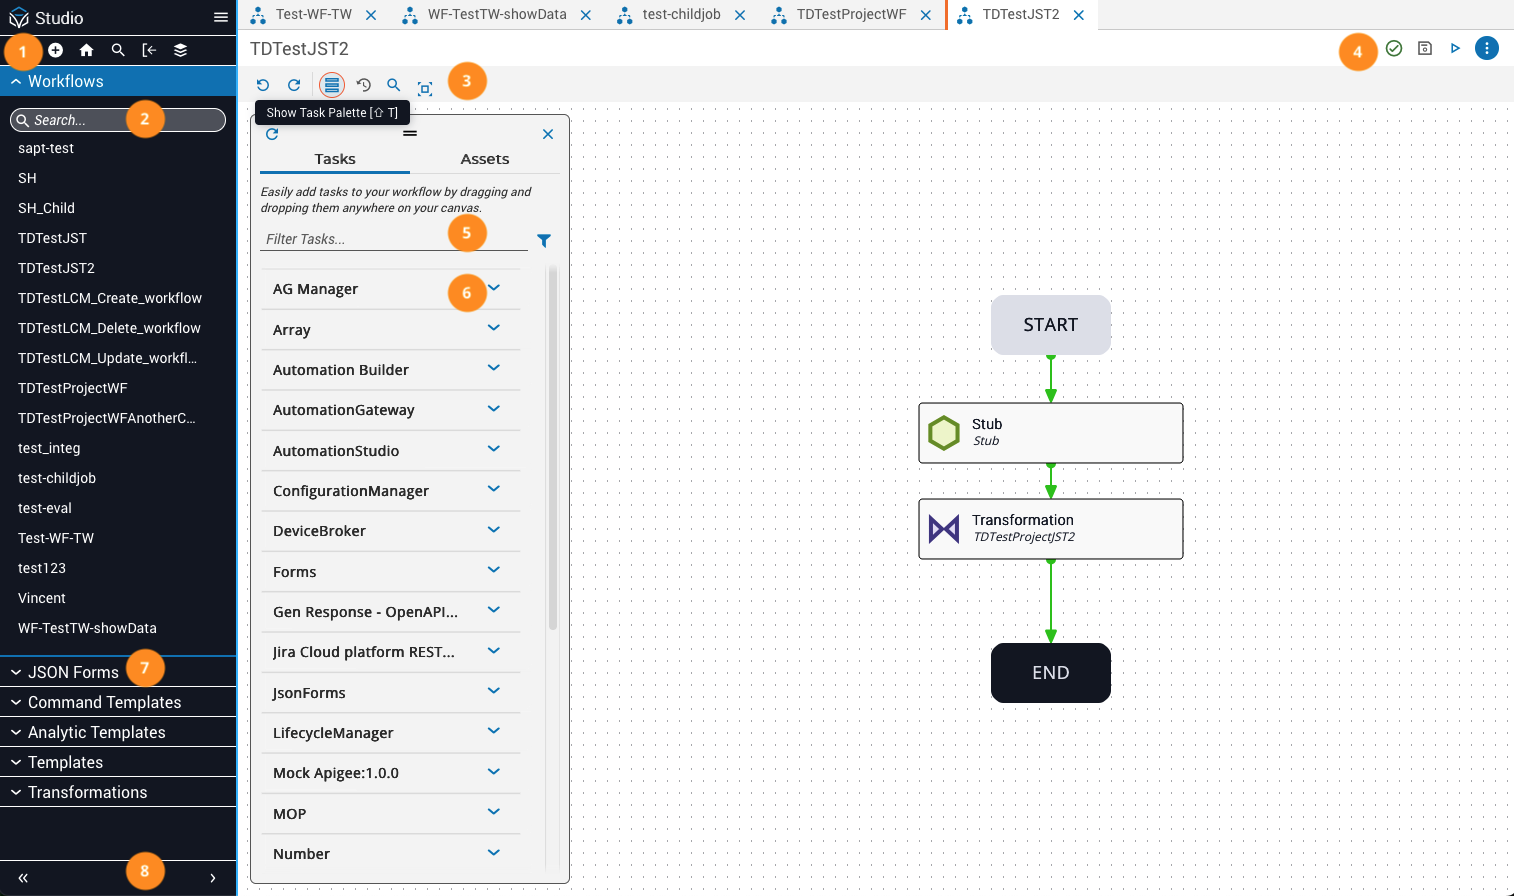
- The Task Palette appears on the left side of the canvas. It can be moved or closed to free up canvas space. Click Show Task Palette in the task toolbar to reopen it.
- Search for a task by typing in the Filter Tasks field.
- Drag the desired task from the search results onto the canvas.
- To add a transition, hover over the border of a task until the border highlights, then press and hold the mouse button and drag toward the destination task. Release the mouse when the transition snaps to the destination task.
Canvas task types
An automation in the canvas consists of four task types: automatic tasks (green), manual tasks (grey), start/end terminators (grey and black), and operational tasks (purple).
Arrows represent transitions and show the direction of the workflow. Studio also supports optional role-based access control (RBAC) by restricting task ownership to authorized groups. Only group members are authorized to work tasks.

Transitions are identified by two properties: the exit status of the leading task, and the direction of the transition (standard or revert). Different transitions allow automations to correct anomalies, repeat parts of an automation, skip tasks, manually intervene, or follow the planned execution path.

Automation lifecycle
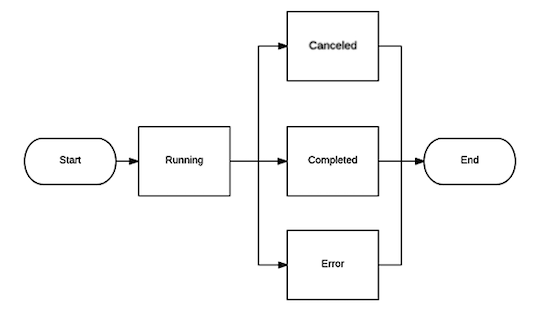
Job status
Upon start, a job is set to running status. Running jobs can move into cancelled, completed, or error states.
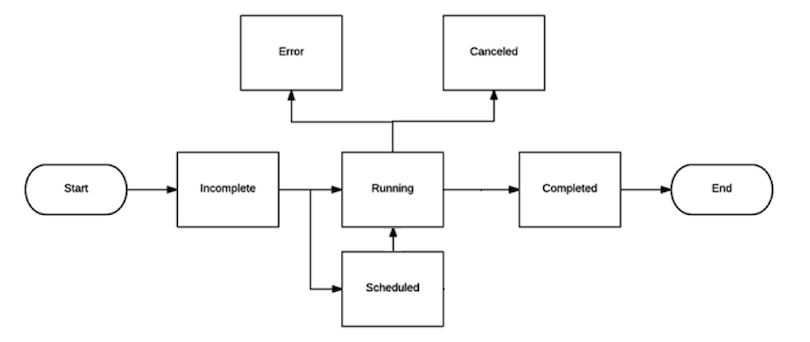
Task status
When a job starts, its tasks are set to an incomplete status. From incomplete, tasks move into running or scheduled states. A running task can move to completed, cancelled, or error states.
Variable types
In Studio, variables hold values that can be referenced by devices and applications. Three variable types can be used in a reference task on the canvas.
Static variables are hard-coded and maintain the same value for the entire automation run. They cannot be changed programmatically and are used for settings that should not change once a workflow has started.
Job variables allow you to use changeable values in the configuration and execution of a job. You create a variable, give it a name and a value, and reference it by name throughout the workflow. Job variables can be passed as inputs each time a workflow is executed, and any task can update their value mid-run. Use task variables instead of job variables whenever possible.
Task variables are values produced by a previously executed task in the workflow. They provide reference information for a subsequent task — you choose a prior task, take its output, and use that as the input for the selected task.
Actors in workflow management
In the context of workflow management, actors execute tasks within a workflow. Setting up an authorization layer ensures tasks are carried out with the appropriate user context and are not executed by unauthorized individuals.
Assigning actors
When editing an automatic task, you can select the actor — the user that executes the task in a job. By default, the actor is the Itential user, but any platform user can serve as an actor. Available options are Itential (default), Job Initiator (the user that started the job), or any prior manual task user in the workflow.
When an automatic task runs, it calls the method, writes to an audit trail, and is authorized as if that user had called the method via the Northbound API. If the task calls an external system API, Itential Platform uses the actor’s credentials in that API call.
Users from manual tasks inside a prior child job are not available as actors. If an actor is selected from a manual task branch that does not run, the automation engine falls back to the Itential user.
Transitions and task states
Transitions connect tasks to each other and control the order of task execution. A transition has two properties: a binding value corresponding to a possible finish state of its leading task, and a direction determining whether execution moves forward or backward.
Task finish states
The table above assumes automatic tasks. When using actionable tasks, finish states are determined and set manually by the end user.
Transition binding values
The binding value of a transition corresponds to one of the finish states. Success transitions are green, error transitions are red, and failure transitions are purple. After a task is assigned a finish state, the workflow follows any transitions with a matching binding value.
Example: A workflow uses stringConcat to combine two strings. If no errors occur, the workflow advances to the evaluation task. If the combined strings match the evaluation expression, the workflow ends via the success transition. Otherwise, the workflow moves to runShellCommand via the failure transition.
Transition direction
Example: A workflow uses getTime to get the current time. On success, a standard transition advances to ViewData. If the user wants to re-run the workflow, the revert failure transition on ViewData returns execution to getTime.
Adding transitions
Select the source task
Click the task you want to transition from. The task highlights with a dashed border.
Drag the transition
Click within the dashed border and drag toward the destination task. Transition direction is automatic — it is standard unless you are dragging to an earlier point in the workflow.
Changing a binding value
To change the binding value of an existing transition, click the transition to select it (it becomes bold), then press S, E, or F to assign a new binding value. Alternatively, right-click the transition and select a binding value from the context menu.
Task status symbols (Ops Manager)
Task status symbols on the canvas are used by Operations Manager to track task status in a job instance.
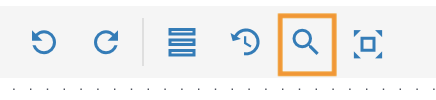
Using canvas search
Studio supports searching automation content through the Canvas Search function. The search icon is located at the top left of the main canvas.
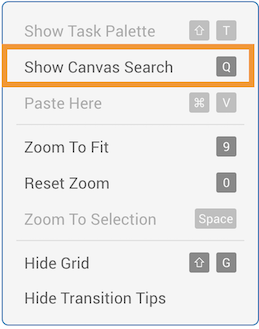
Canvas Search can also be accessed by right-clicking the canvas and selecting Show Canvas Search, or by pressing the keyboard shortcut Q.
Clicking the search icon reveals the Search Palette, which lists all tasks currently on the canvas.
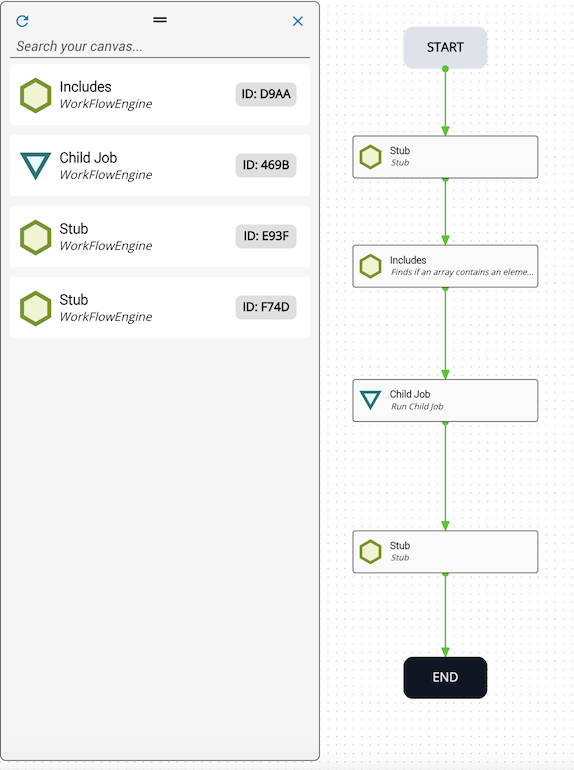
Enter a search term in the Search your canvas field. The function queries task summary and description, looking for three words before and three words after the search term. Search options include app, description, id, job variable, name, and summary. Matching terms are highlighted at the bottom of each relevant task. To clear a search, delete the search term.
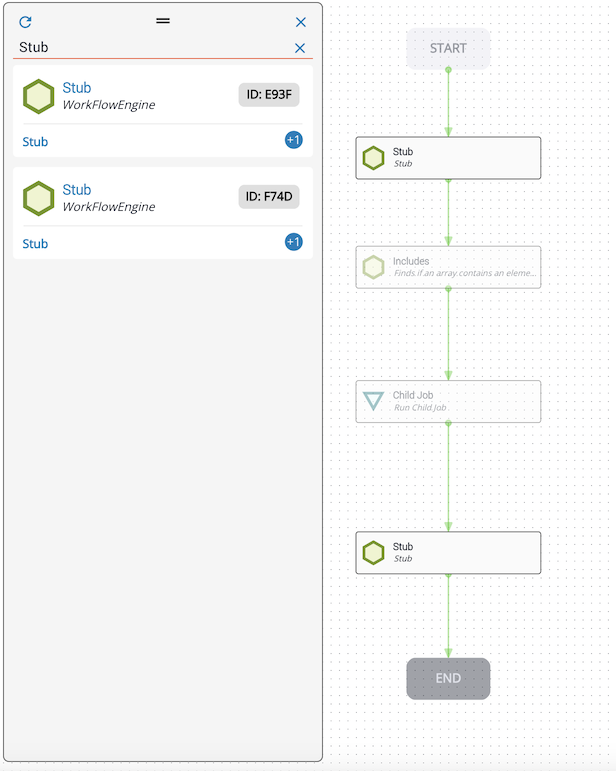
When a search matches a task that appears in multiple places, all instances are listed and each is brought into focus on the canvas, making them easier to find in complex workflows.
Clicking a task in the search list selects and centers it on the canvas.
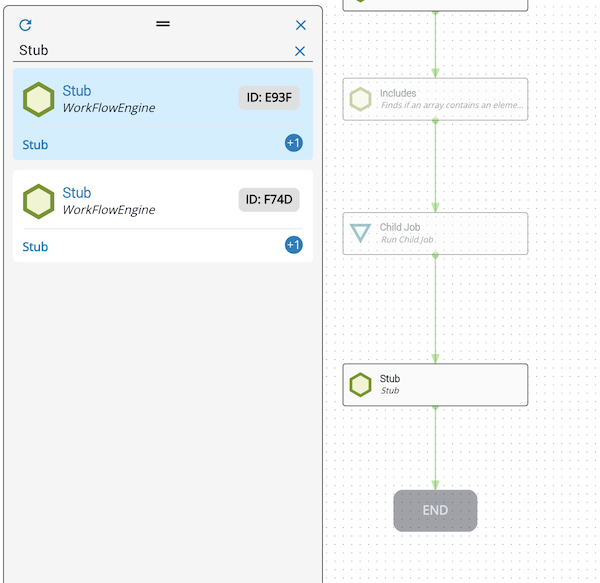
Double-clicking a task in the search list selects, centers, and opens it.
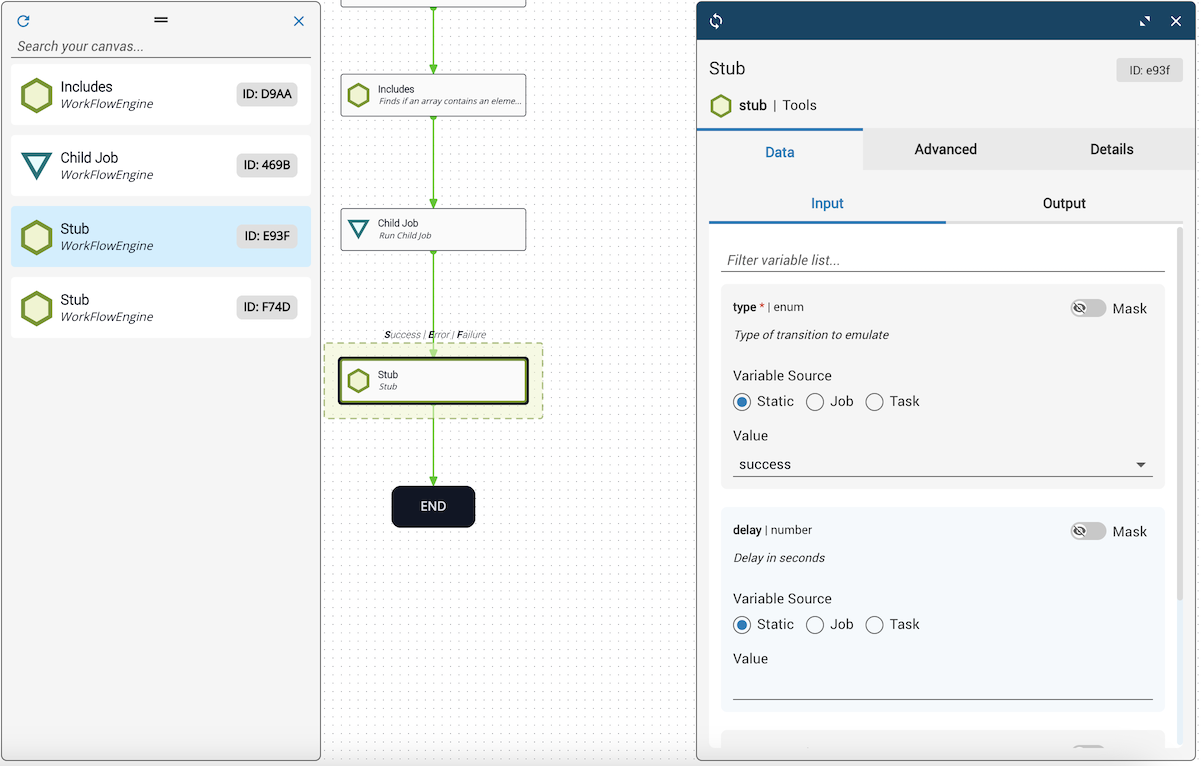
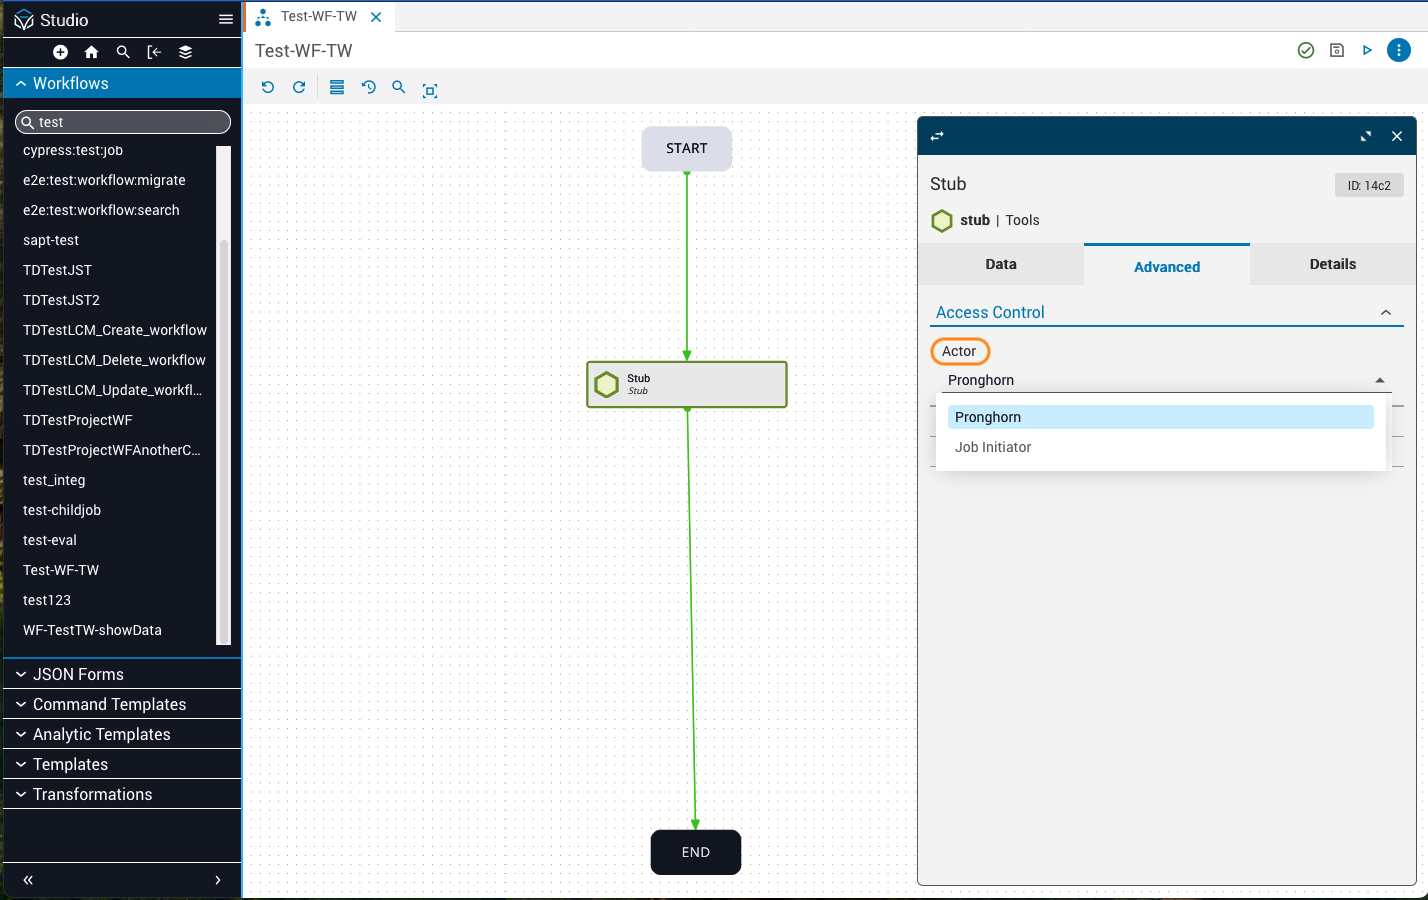
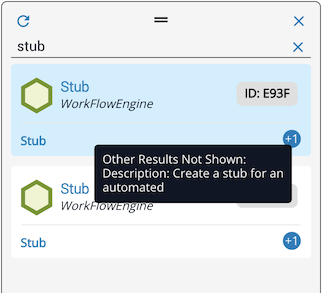
If multiple results match within the same task, an icon showing the count of Other Results Not Shown appears (up to +4). In the example below, a search on “stub” matched the Task Summary first, with additional matches hidden behind a +1 icon. Hover over the icon to see the additional details.
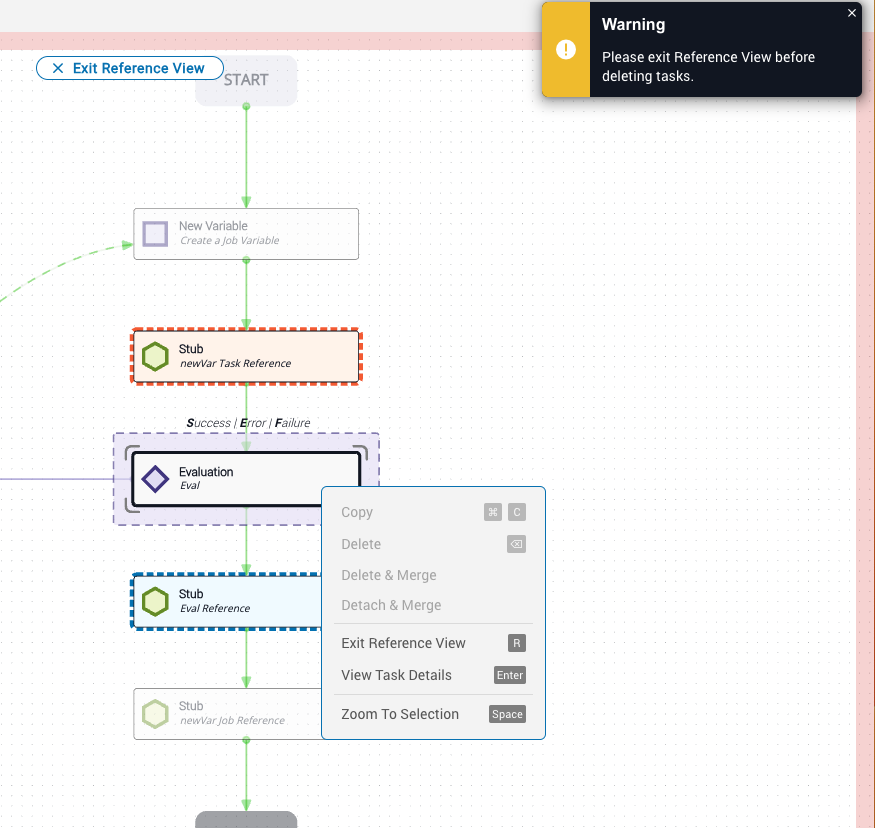
Using reference view
Reference View is an interface tool that allows you to see the flow of data through a workflow before making changes. Use it to understand what a task is connected to and how any changes will affect other tasks.
Enable reference view
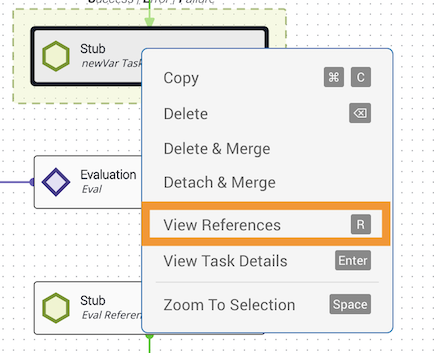
Click a task and press R, or right-click the task and select View References from the context menu.
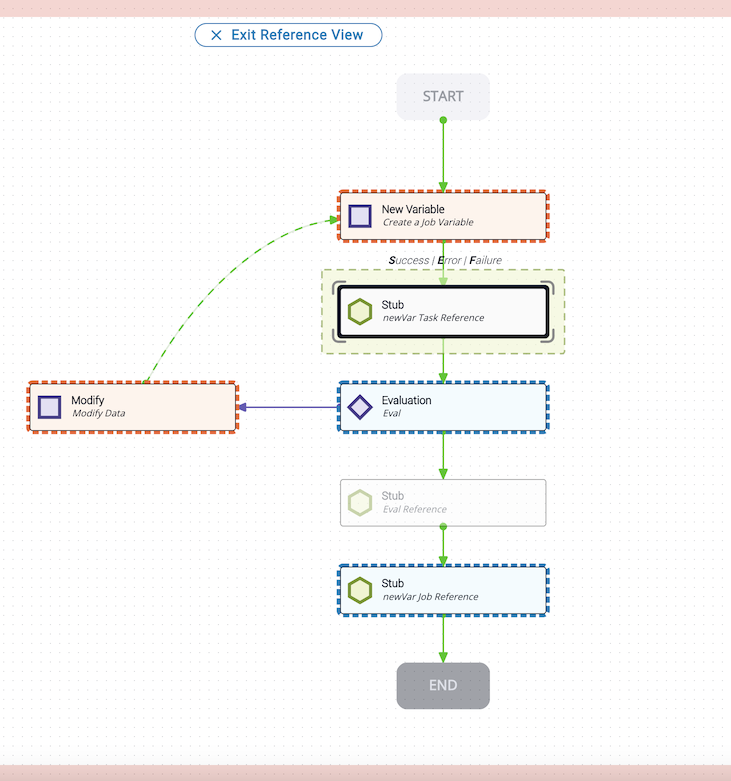
When Reference View is enabled, all prior tasks (those providing variable inputs to the selected task) and subsequent tasks (those using its output) are shown in a custom node template. All other tasks and transitions are reduced in opacity.
While in Reference View, you can interact with the canvas normally, except for actions that would change a task’s references — these trigger a notification suggesting you exit Reference View first.
Reference view visualizations
The origin task (the one you selected) is outlined with four gray floating corner accents. Prior tasks are highlighted in orange, indicating data flowing into the origin task. Subsequent tasks are highlighted in blue, indicating where data is going.
Example: Below, the Stub task is the origin task. It is pulling data from the New Variable and Modify tasks (orange). It is passing data to the Evaluation task and another Stub task (blue).
When you attempt an action that would change references — such as deleting the origin task — delete options in the context menu are disabled and a warning notification appears in the upper-right corner of the canvas.