Create and use templates
Templates in Studio are Jinja2 or TextFSM files that filter and reshape data for use in workflow tasks. You build and test them under Studio > Templates.
When an Apply Template task runs in a workflow, it combines data from a preceding task or job variable with a named template and passes the result to subsequent tasks.
Prerequisites
Template Builder uses Jinja2 or TextFSM syntax. Knowledge of the relevant language is required before proceeding.
Create a template
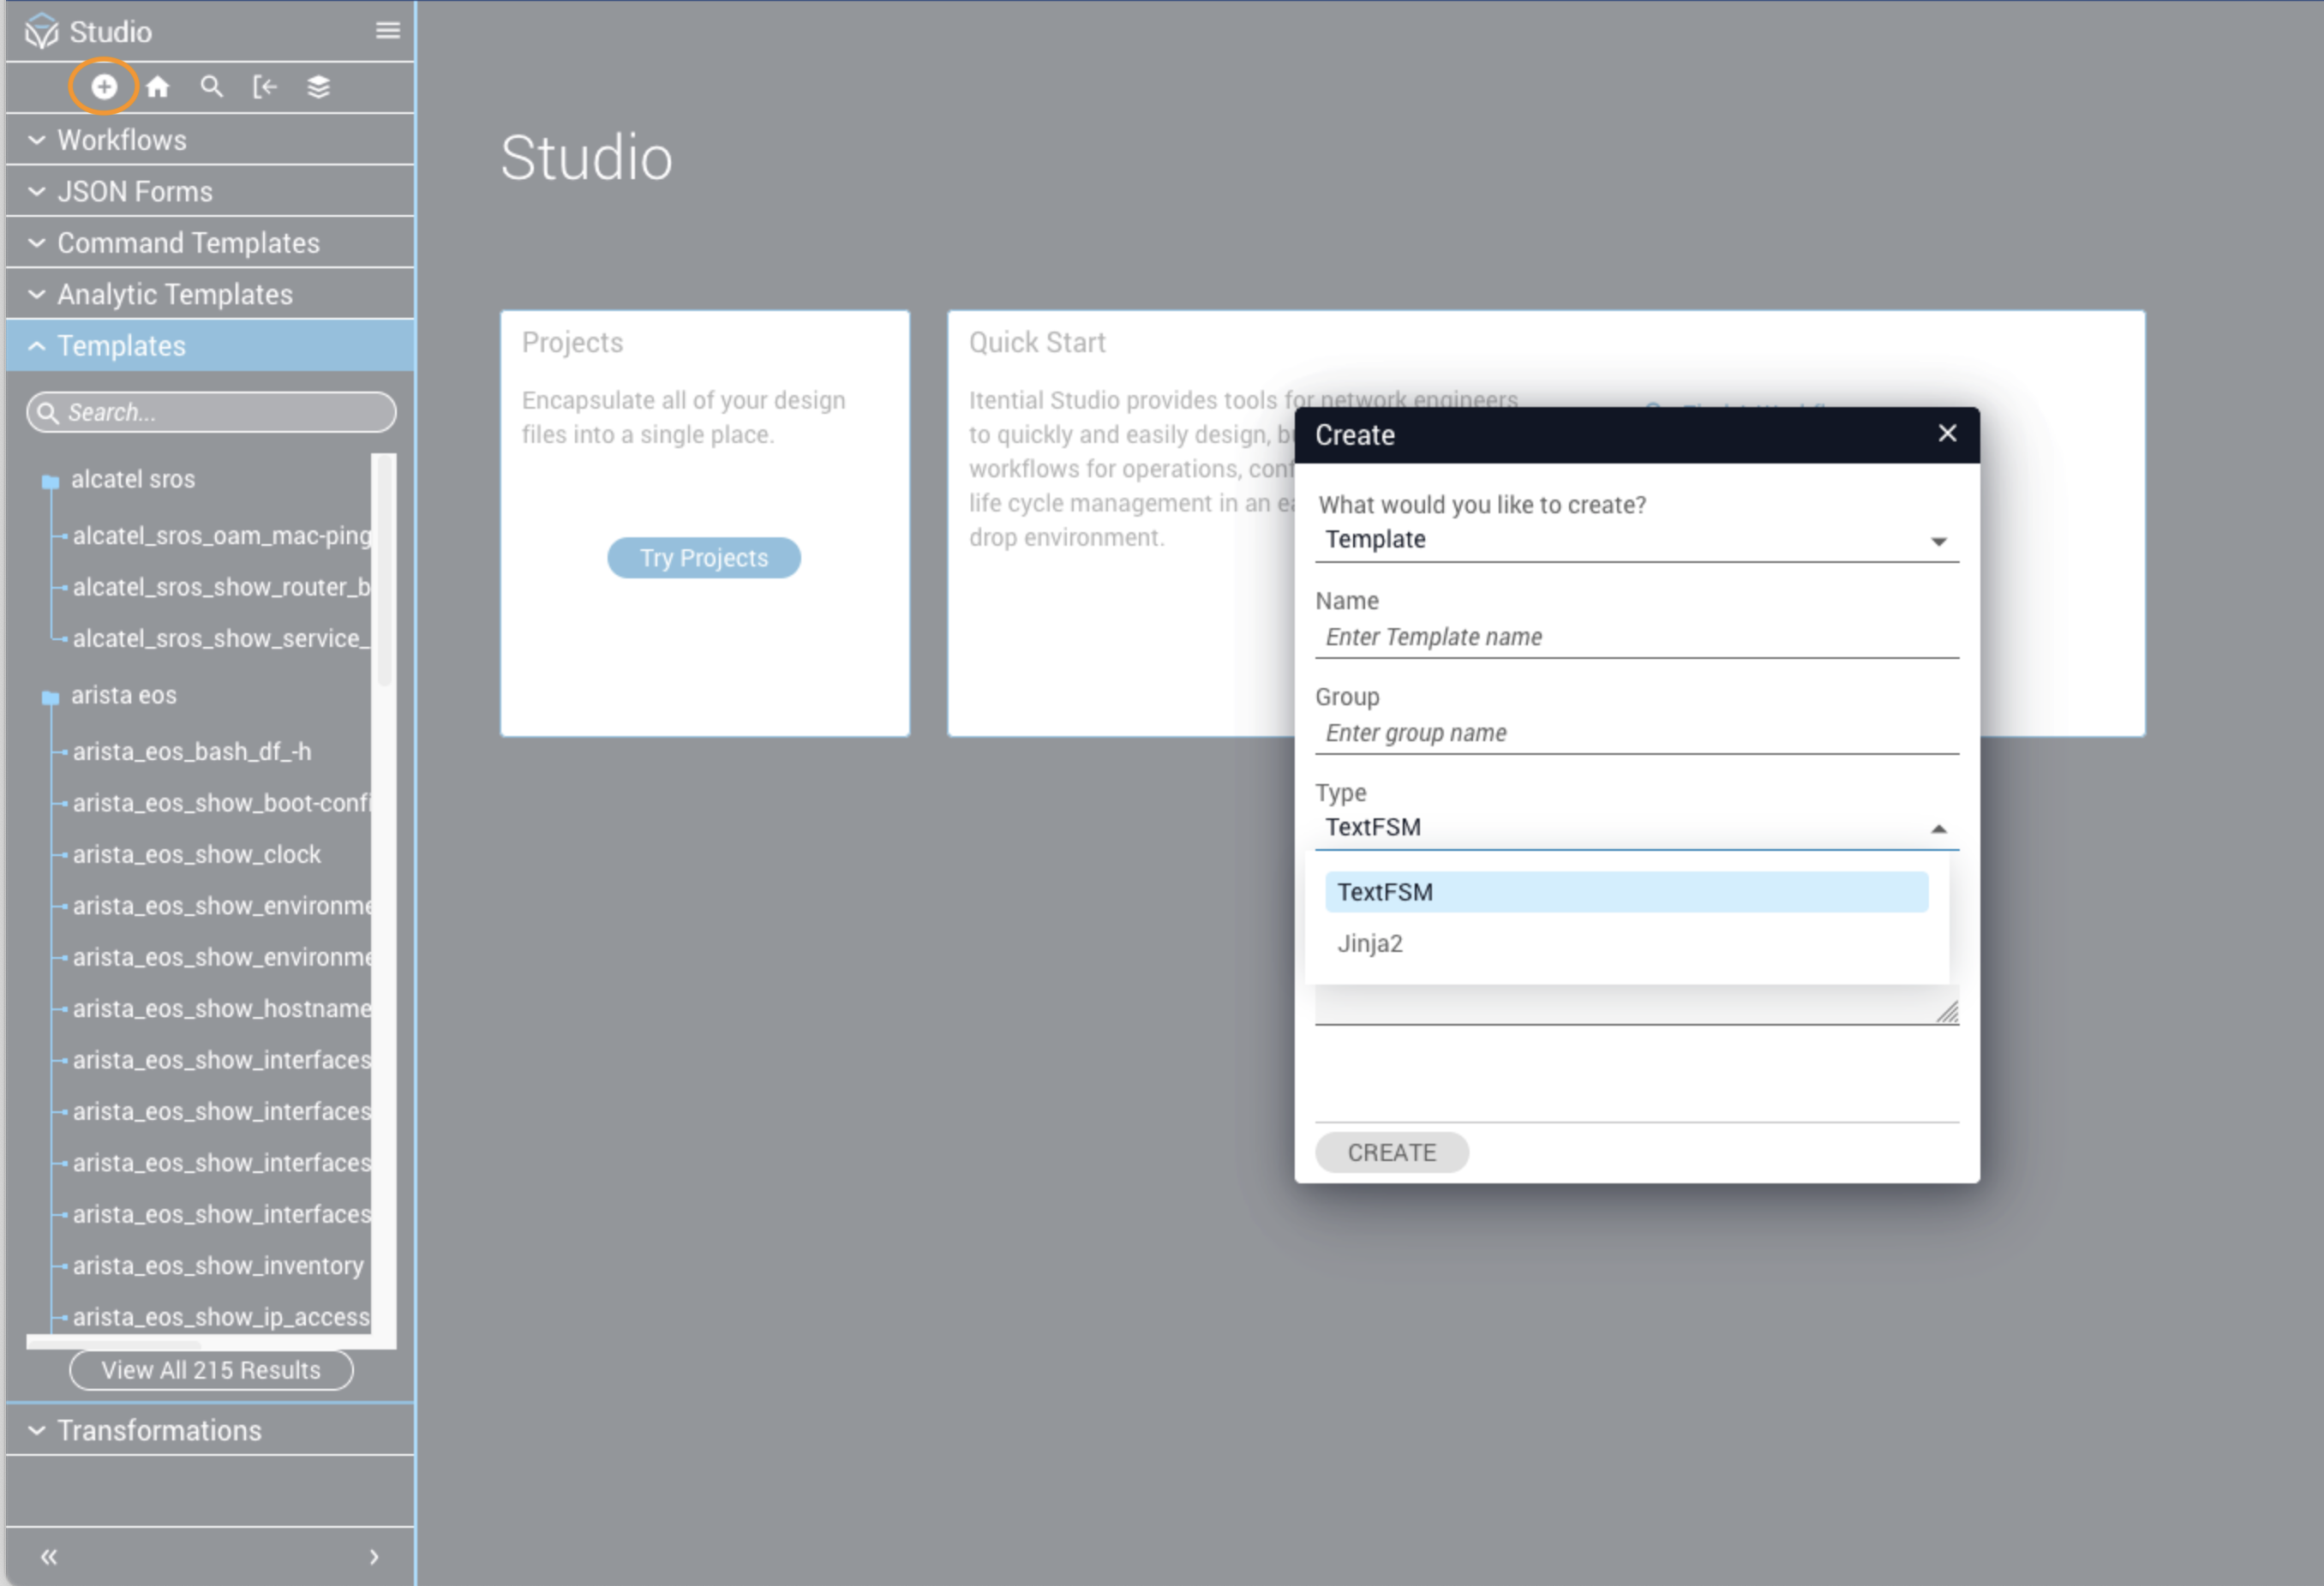
To open an existing template, select it from the Templates section of the side nav, or browse via the collection view by clicking Search.
Template Builder UI
Template Builder has three components:
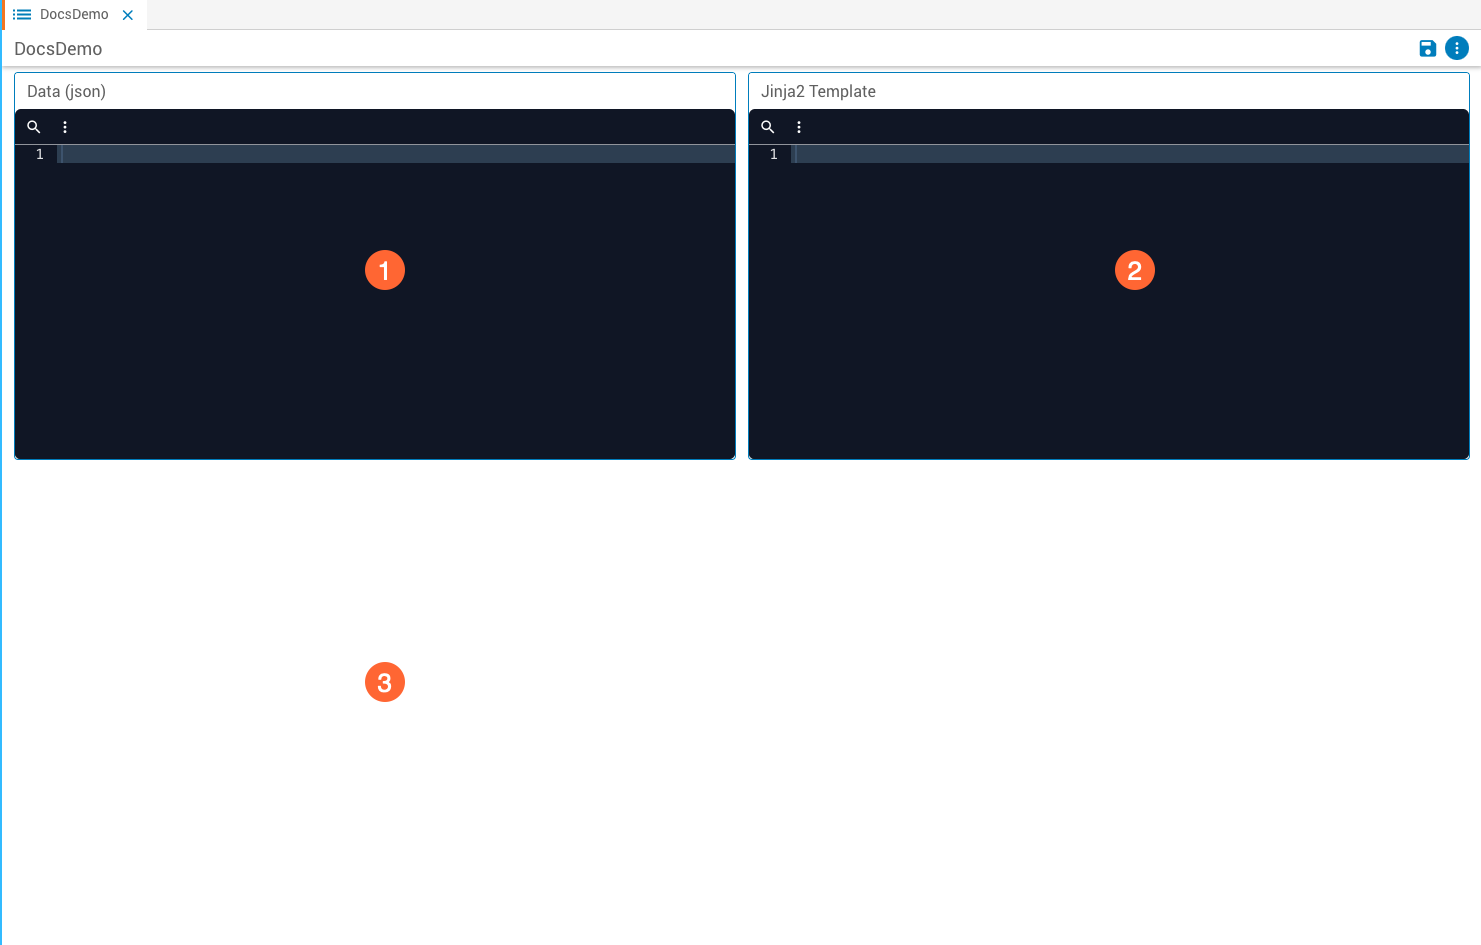
Define a template
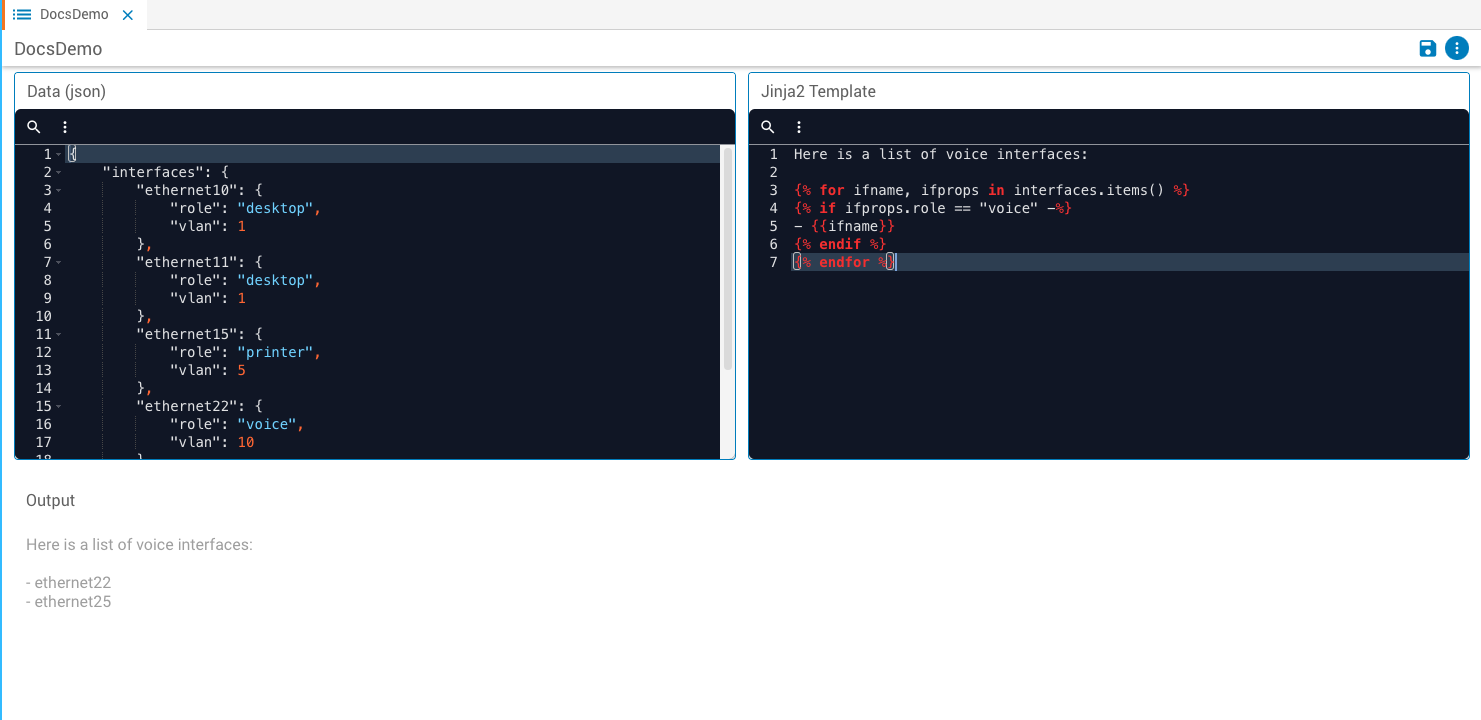
Enter template logic in the Template field. The syntax depends on the language selected during creation.
Enter example data in the Data field. This should match the structure your template will receive at runtime — a JSON object for Jinja2, semi-formatted text for TextFSM.
The Output field shows the combined result in real time. Use this to draft and troubleshoot your template before using it in a workflow.
Use a template in a workflow
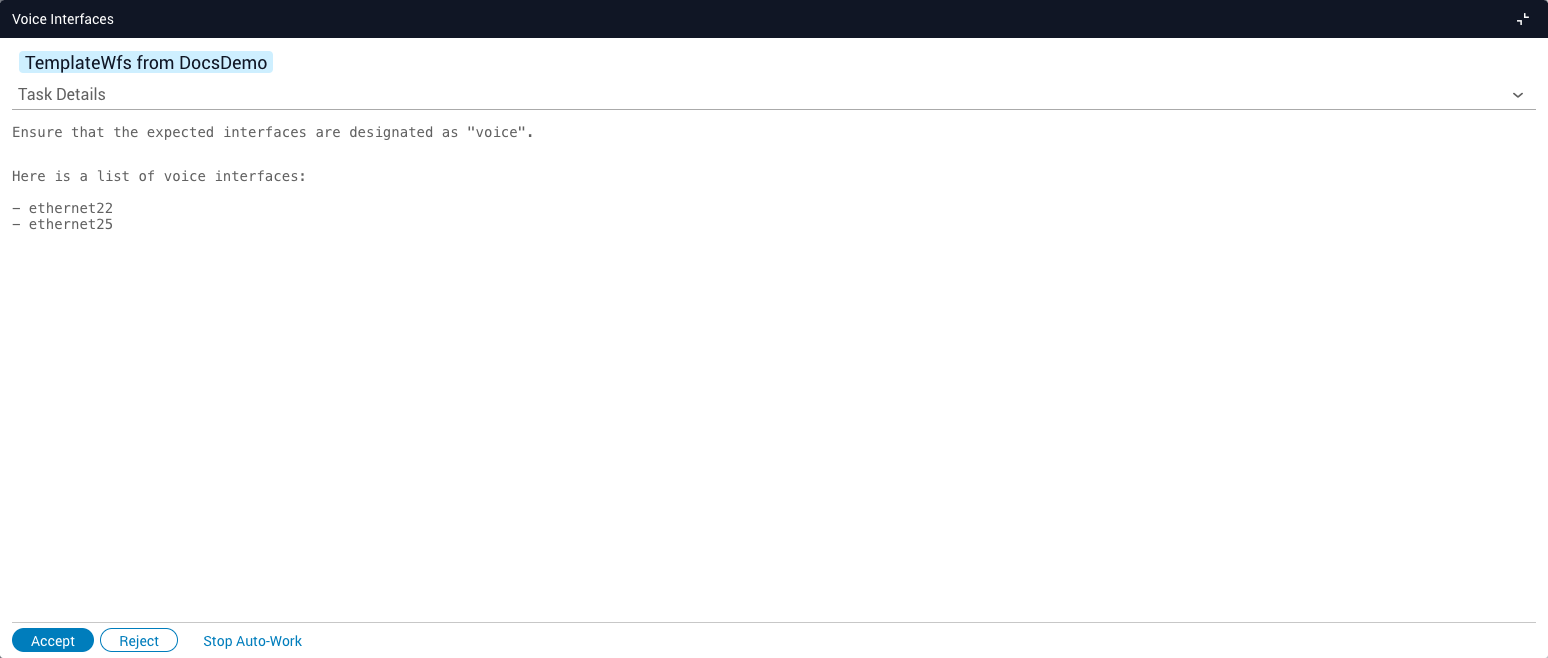
In this example, a workflow retrieves interface data from a network switch via API. The response contains dozens of entries, but only interfaces with a role of voice are needed. A Jinja2 template filters the response, and the result is passed to a View Data task for manual confirmation.
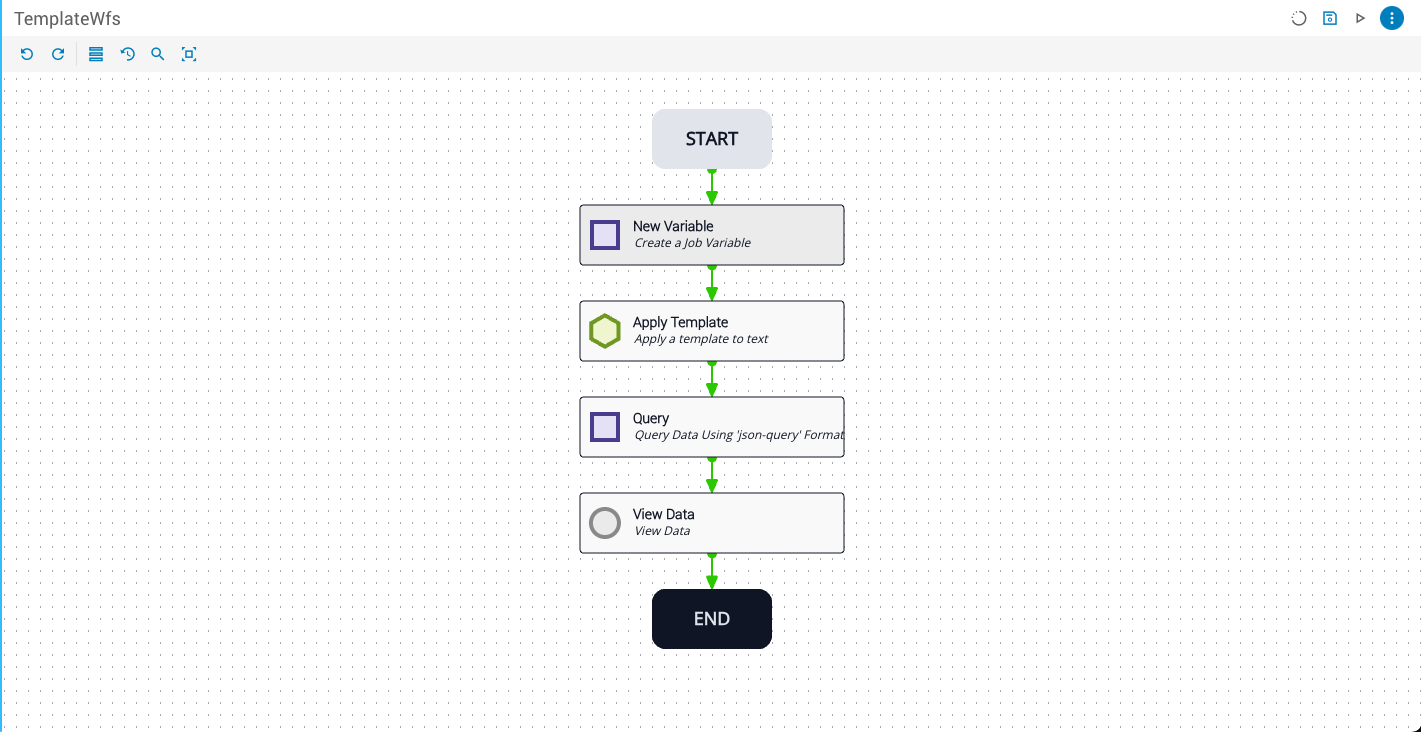
In this example, the API response is simulated by a New Variable task that creates a deviceResponse job variable:
Add the Apply Template task
Add Apply Template to the workflow and set:
text— thedeviceResponsejob variabletemplate—DocsDemo
Add the Query task
Add a Query task and draw a success transition from Apply Template. Set:
object— theparsedoutput variable from Apply Templatequery—results
Apply Templates (plural) works the same way but accepts arrays. The text and templates fields each take an array, and items are paired by index: text[0] with templates[0], text[1] with templates[1], and so on.